Use regular expression match to extract values from text
In this article we will be talking about using Regular Expression Match action Plumsail Actions connector for Microsoft power automate and Azure Logic Apps.
Let’s suppose you are getting a new email after someone made a purchase and you need to extract information from this email and create a new item in your orders SharePoint list.
Your email might look like this:
*** Order information ***
Time zone: GMT+00:00
Reference: 4563452
Order number: 1400
Payment method: Visa/MasterCard
Order status: Credit card payment authorized

*** Ordered products ***
Product code: D3F13B23B0
Title: Tires
Price: 150
Quantity: 4

Product code: FD3423DE
Title: Cookies
Price: 30
Quantity: 20

Product code: KFG45GK445
Title: Tools
Price: 50
Quantity: 10

*** Delivery information ***
First name: John
Last name: Doe
Company: Happy Company Ltd
Country: Australia
Phone: 01 2345 6780
To achieve this we will be using Regular Expression Match action.
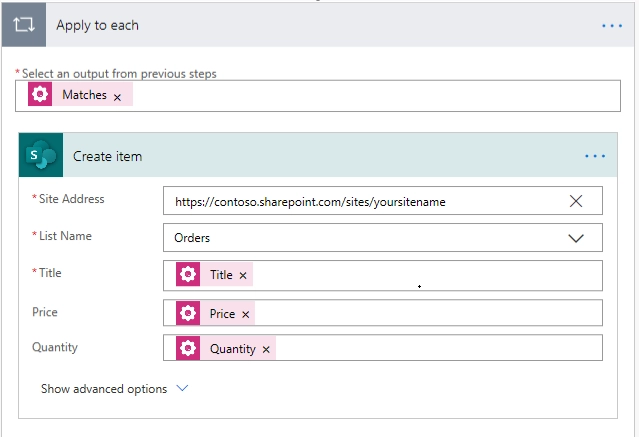
So your flow might look like this:
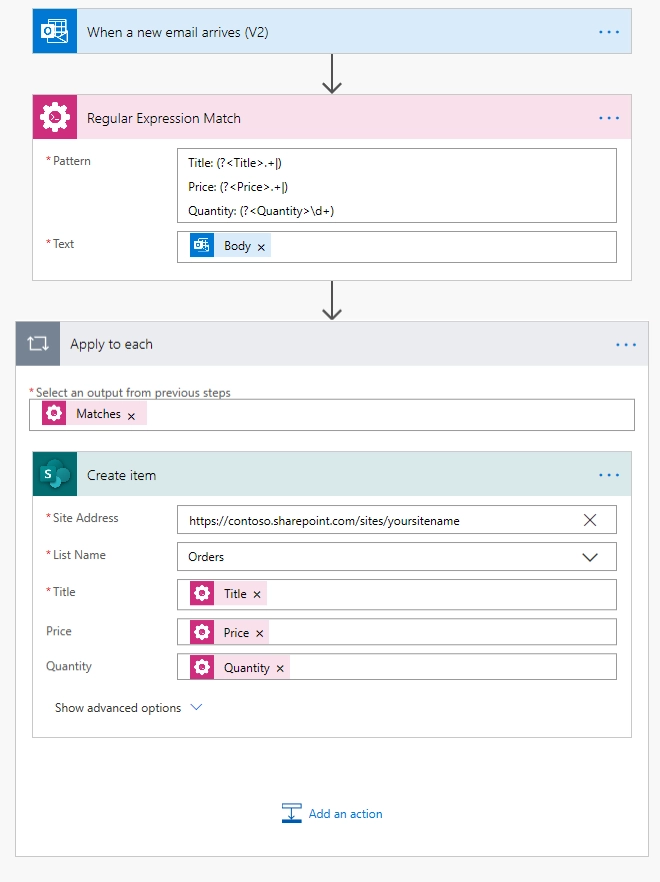
For this case, I’m using the trigger to manual start of the flow. You can use any other trigger available in Power Automate (Microsoft Flow).
Receive email
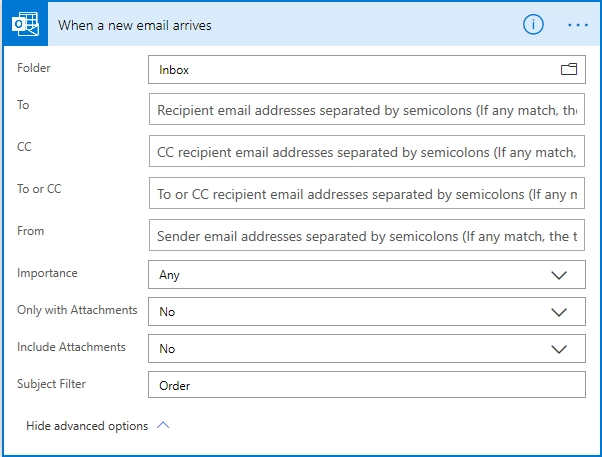
First, we receive an email in Outlook, you can specify Subject Filter field so this trigger will be working only the ones that have ‘Order’ in their subject.
Regular Expression Match
Then we are using Regular Expression Match action.
Adding the Plumsail action for the first time, you’ll be asked for a Connection name, API Key, and Data center location.
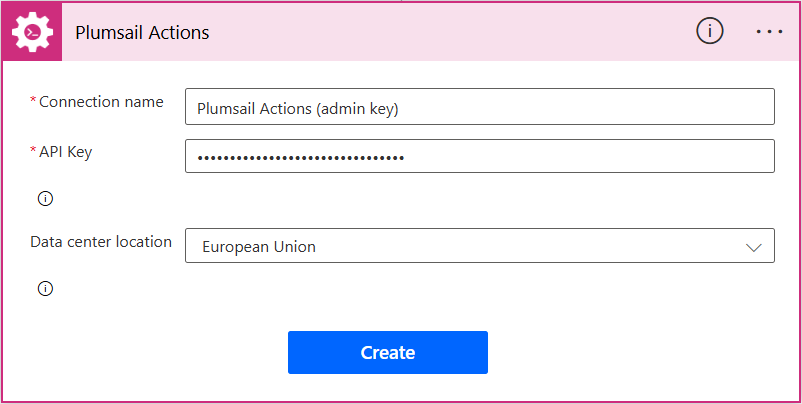
You can type any name for the connection, for example Plumsail Actions (admin key). Next create an API key on your Plumsail account page, copy, and paste it to the API Key field. Ensure that the selected data center location matches one of your account.
Here is a regex we are using in this flow to find three values: Title, Price, and Quantity in our email’s body:
Title: (?<Title>.+|)
Price: (?<Price>.+|)
Quantity: (?<Quantity>\d+)

You may notice that Regular expression match in this regular expression has a few outputs:
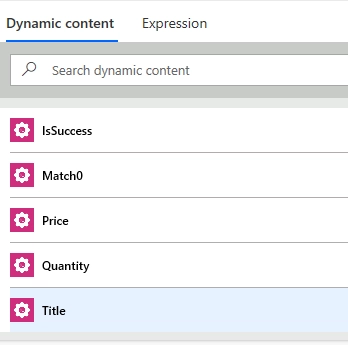
There is “Match0” is a full match for the whole regular expression. There are also separate output values for each named regular expression group: Price, Quantity, Title.
You can learn more about named groups on this page. The action is smart enough to create separate output value in Power Automate (Microsoft Flow) for each named regular expression group that is used in it. It dramatically simplifies extraction of values from text strings. You just write a regular expression with named groups and then use them across your flow.
You can easily put match regex into a named group like this: (?<Title>.+|). The name of this group will be “Title”, everything that matches regular expression .+| will be returned as a separate output of the action.
Note, the action returns array of matches, because you may have multiple matches in your text. This is how JSON representation of result may look with multiple matches:
[
    {
        "Match0": " Title: Tires\r\nPrice: 200\r\nQuantity: 4",
        "Title": "Tires",
        "Price": "150",
        "Quantity": "4"
    }, {
        "Match0": " Title: Cookies\r\nPrice: 30\r\nQuantity: 20",
        "Title": "Cookies",
        "Price": "30",
        "Quantity": "20"
    }, {
        "Match0": " Title: Tools\r\nPrice: 50\r\nQuantity: 10",
        "Title": "Tools",
        "Price": "50",
        "Quantity": "10"
    }
]
Conclusion
Now you should have an idea how to work with Regular Expression Match action in Plumsail Actions connector for Microsoft Power Automate. If you haven’t used it yet, registering an account would be the first step, you can learn about it here. It is quite easy to get started.
Note
Plumsail Documents connector also has similar action. Please check out the description .
