Check In multiple SharePoint documents in Power Automate flow
As you may know, the Check Out and Check In functions in SharePoint are necessary to avoid confusion when several people edit the same file or document simultaneously. For example, during the day, we work with the file in the SharePoint library but want to keep others from making changes before we finish it. To work with a file, we mark it as Check Out. Therefore every Checked Out document should be Checked In back to allow other users to work with a file. We will show you the action in Power Automate flow where we Check In multiple SharePoint documents/files at once.
Case example
For this case, I will use ‘Get files (properties only)‘ from the SharePoint Connector to get properties of documents that need to be Checked In. I will also use Check In SharePoint Document from the Plumsail Actions connector for each document from the first step.
Below you can find an example of the small flow that gets all documents in Check Out status and does Check In for each one:
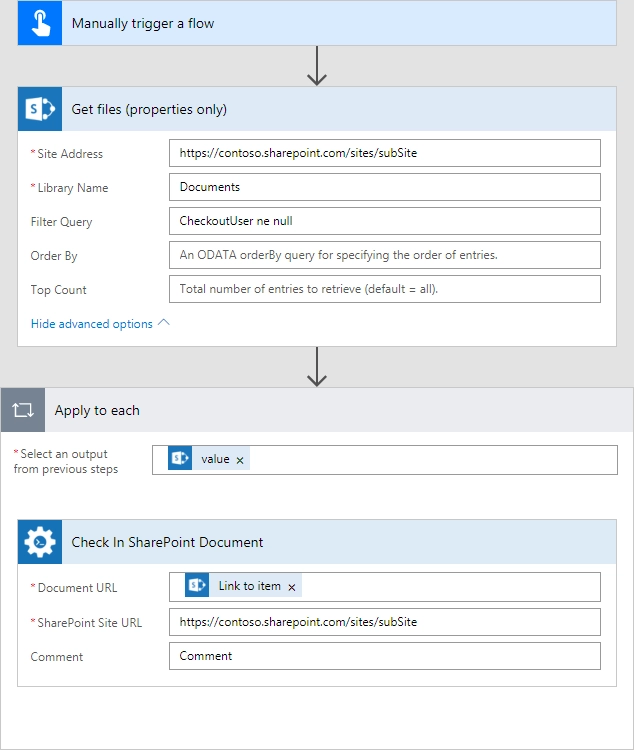
Manually trigger a flow
For this case, I’m using the trigger to manually start the flow. You can use any other trigger available in Power Automate (Microsoft Flow).
Get files (properties only)
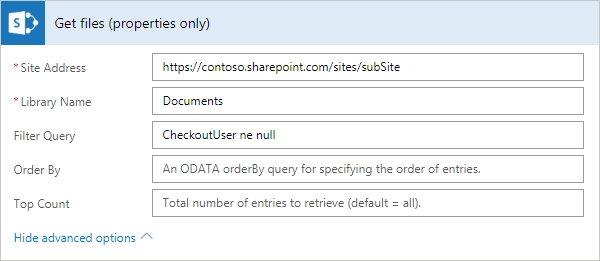
On this step, I get all documents in Check Out status:
‘Site Address‘ as https://contoso.sharepoint.com/sites/subSite - The URL of the site.
‘Library Name‘ as "Documents" - The name of the source folder.
The action is using OData filter as a value of ‘Filter Query‘ field. I compare the “CheckOutUser” field from the document’s properties with the null value. If the value of this field is not equal to null; it means this file has the Check Out status.
Check In SharePoint Document
The action Check In SharePoint Document is used in “each” cycle that based on results of Get files (properties only) action.
Adding the Plumsail action for the first time, you’ll be asked for a Connection name, API Key, and Data center location.
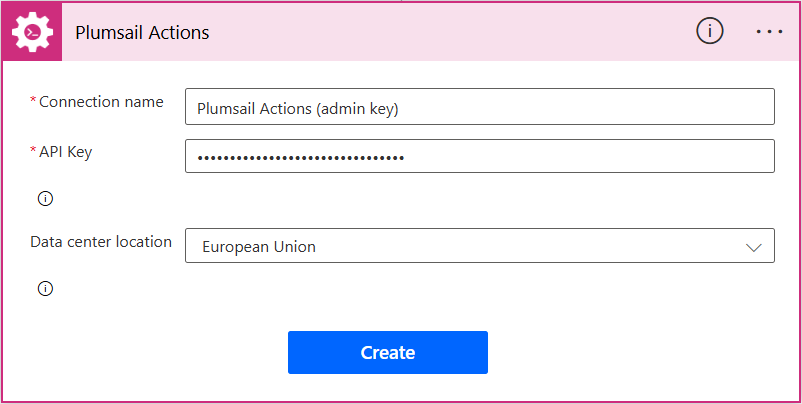
You can type any name for the connection, for example Plumsail Actions (admin key). Next create an API key on your Plumsail account page, copy, and paste it to the API Key field. Ensure that the selected data center location matches one of your account.
Then, fill in the required fields. As value for Document URL‘ I’m using the value of ‘Link to item‘ parameter from ‘Get files (properties only)‘ response:
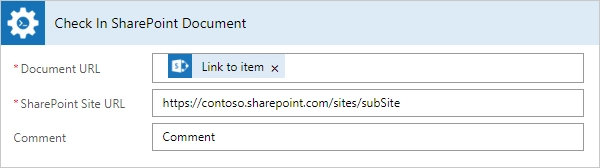
‘SharePoint Site URL‘ I specified as "https://contoso.sharepoint.com/sites/subSite" - The URL of the site.
‘Comment‘ as "Comment" - The comment to accompany document Check In.
Conclusion
That’s all! These few simple steps can help ease the work with documents for users.