Custom DocuSign tags for textboxes, checkboxes, and more
When you need to collect some extra information from the signers, you can use the next DocuSign tags.
Note
In the next table, the first number means the number of the recipient and n means the number of the element inside one document (from 1 to 10). For example, for tag txb1_3: 1 means the number of the recipient and 3 means the number of the element inside one document.
Tag type |
Signer 1 |
Signer 2 |
Signer 3 |
Signer 4 |
Signer 5 |
|---|---|---|---|---|---|
Date |
\date1_n\ |
\date2_n\ |
\date3_n\ |
\date4_n\ |
\date5_n\ |
Date (required) |
\date1_n_req\ |
\date2_n_req\ |
\date3_n_req\ |
\date4_n_req\ |
\date5_n_req\ |
Attachment |
\attachment1_n\ |
\attachment2_n\ |
\attachment3_n\ |
\attachment4_n\ |
\attachment5_n\ |
Attachment (required) |
\attachment1_n_req\ |
\attachment2_n_req\ |
\attachment3_n_req\ |
\attachment4_n_req\ |
\attachment5_n_req\ |
Text box |
\tbx1_n\ |
\tbx2_n\ |
\tbx3_n\ |
\tbx4_n\ |
\tbx5_n\ |
Text box (required) |
\tbx1_n_req\ |
\tbx2_n_req\ |
\tbx3_n_req\ |
\tbx4_n_req\ |
\tbx5_n_req\ |
Checkbox |
\cb1_n\ |
\cb2_n\ |
\cb3_n\ |
\cb4_n\ |
\cb5_n\ |
Checkbox (activated) |
\cb1_n_yes\ |
\cb2_n_yes\ |
\cb3_n_yes\ |
\cb4_n_yes\ |
\cb5_n_yes\ |
Radio button (a, b, c) |
\rb1_n_a\ |
\rb2_n_b\ |
\rb3_n_c\ |
\rb4_n_a\ |
\rb5_n_b\ |
SSN |
\ssn1_n\ |
\ssn2_n\ |
\ssn3_n\ |
\ssn4_n\ |
\ssn5_n\ |
Number |
\number1_n\ |
\number2_n\ |
\number3_n\ |
\number4_n\ |
\number5_n\ |
Number (required) |
\number1_n_req\ |
\number2_n_req\ |
\number3_n_req\ |
\number4_n_req\ |
\number5_n_req\ |
Let’s review some cases with the grouped tags.
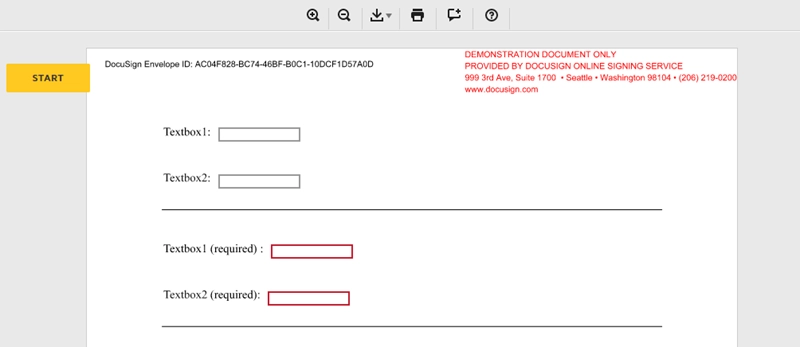
Textbox
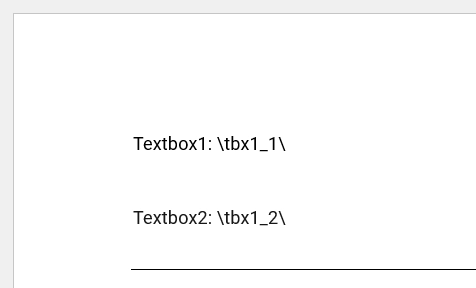
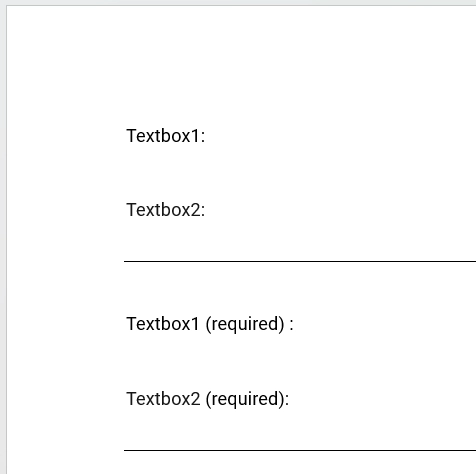
You can add one or more textbox fields to your document.
For example:
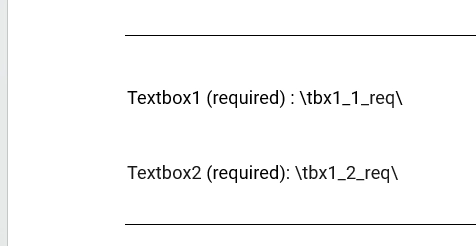
To make the textbox fields required use the texbox tags with _req element:
DocuSign will place textbox fields on the tags and to avoid an incorrect view I use white font for the tags.
This is how it looks in DocuSign:
If you want to use the textbox tag for multiple signers change the first number in the tag:
\tbx1_1\ - textbox for the first signer;
\tbx2_1\ - textbox for the second signer;
etc.
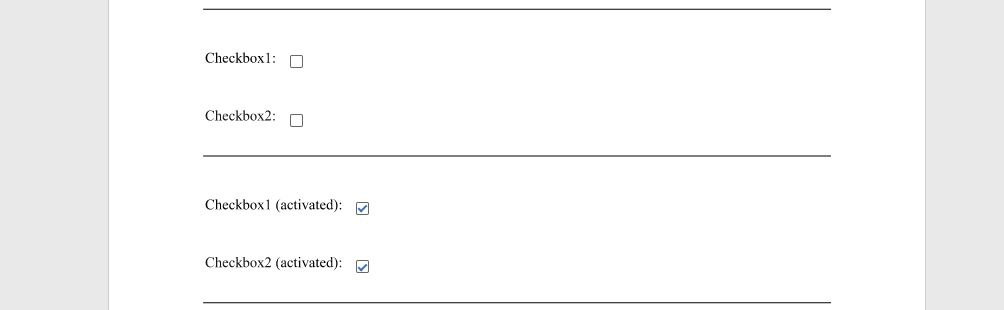
Checkbox
You can add an empty checkbox or activated to a document. For example:
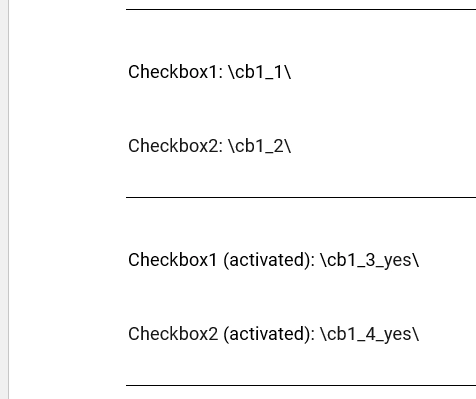
Use _yes to place an activated checkbox.
In this example I also used white font for the tags.
The result in DocuSign:
If you want to use the checkbox tag for multiple signers change the first number in the tag:
\cb1_1\ - checkbox for the first signer;
\cb2_1\ - checkbox for the second signer;
etc.
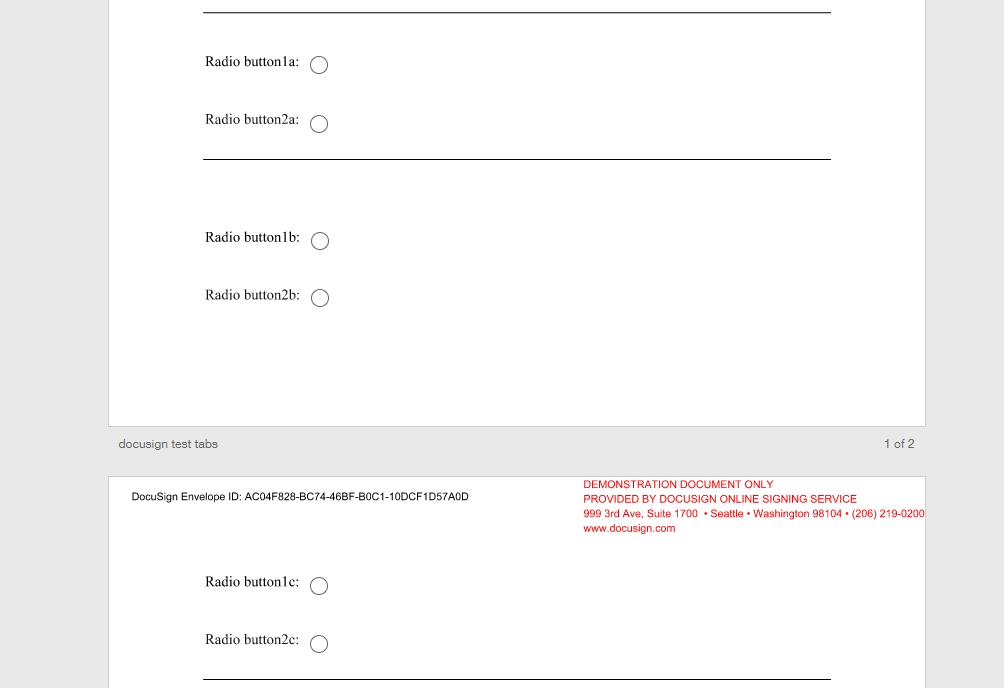
Radio button
You can group radio buttons using _a, _b and _c options of the tag.
For example:
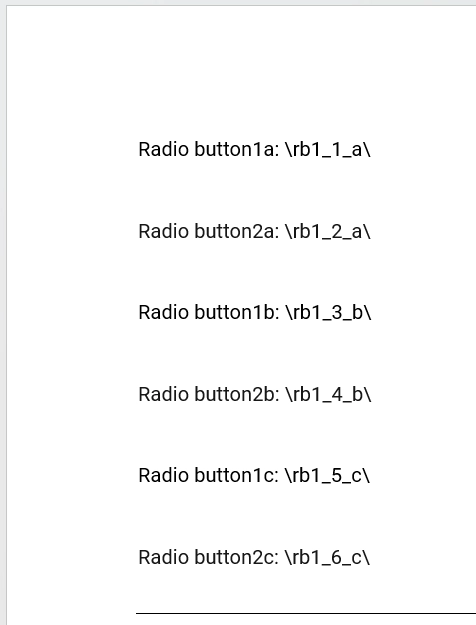
There are three groups of radio buttons for one signer.
\rb1_1_a\ and \rb1_2_a\ - first group of the radio buttons;
\rb1_3_b\ and \rb1_4_b\ - second group of the radio buttons;
\rb1_5_c\ and \rb1_6_c\ - third group of the radio buttons;
As before, I used white font for the tags.
The result in DocuSign:
If you want to use the checkbox tag for multiple signers change the first number in the tag:
\rb1_1_a\ and \rb1_2_a\ - checkboxes for the first signer;
\cb2_1_a\ and \cb2_2_a\ - checkboxes for the second signer;
etc.
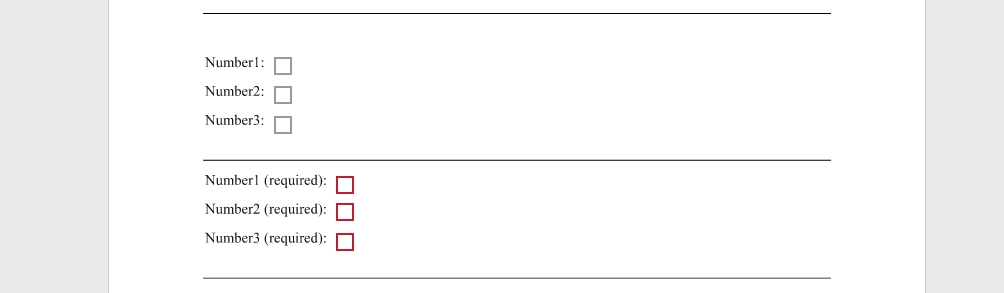
Number
You can add a required or non-required number field to a document. For example:
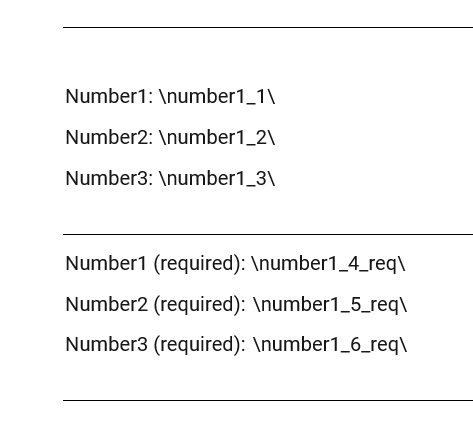
Use _req to place a required number field.
The result in DocuSign:
If you want to use the number tag for multiple signers change the first number in the tag:
\number1_1\ - number field for the first signer;
\number2_1\ - number field for the second signer;
etc.
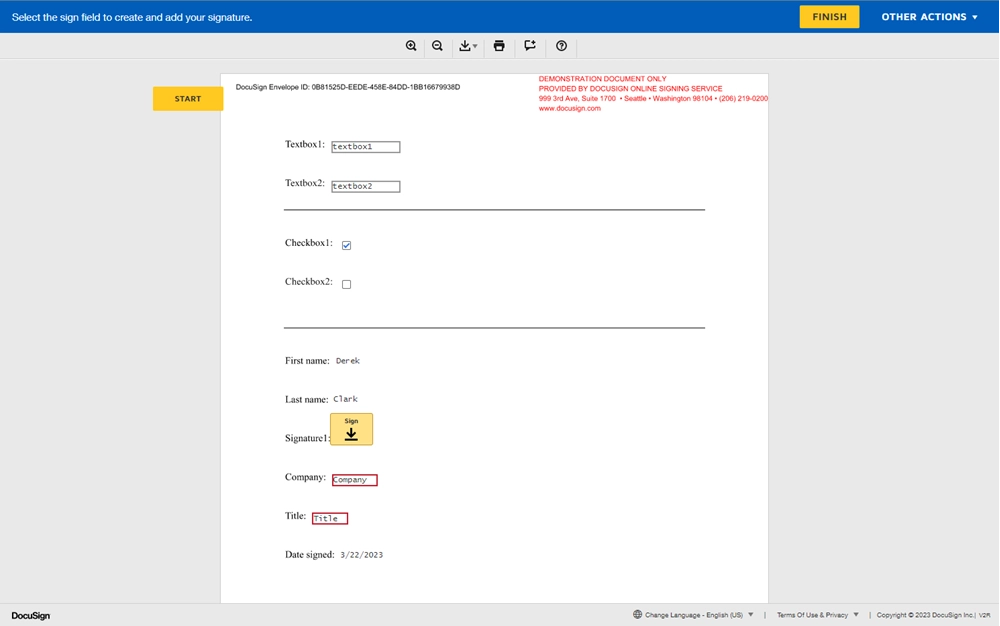
Example of a document
This is how an entire document with some of the elements looks in DocuSign: