Update OneDrive Excel file from SQL server using Power Automate (MS Flow)
This page contains step-by-step instructions for setting up a recurring flow to dynamically update an Excel file stored in OneDrive with data from the SQL server.
Excel file
You have two ways of creating a proper Excel file:
export the SQL table to an Excel file and upload it to your OneDrive account.
create a new Excel workbook with an empty table in the OneDrive account.
To create a new Excel workbook with an empty table do the following:
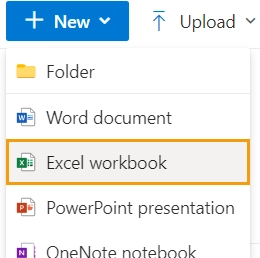
Log in to your OneDrive account. Click + New → Excel workbook:
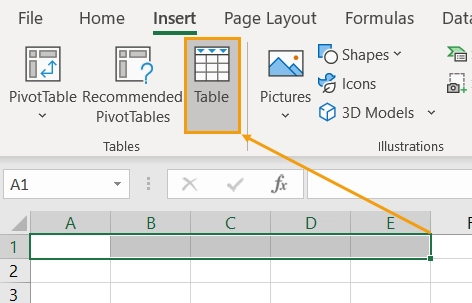
In the opened document, select the cells range and click Table on the Insert tab:
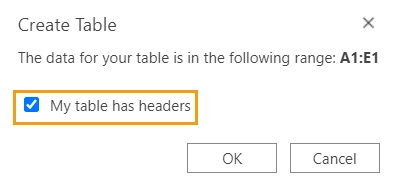
We recommend creating a table with the headers so that you can easily match Excel and SQL table columns in the flow. For this, check the My table has headers box:
You can leave the table empty. The rows will be added by the flow.

Flow
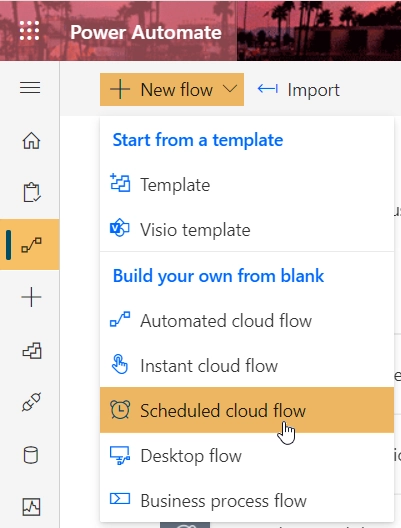
To create a recurring flow, sign in to Power Automate. On the navigation bar, select My flows. Then select + New flow → Scheduled cloud flow:
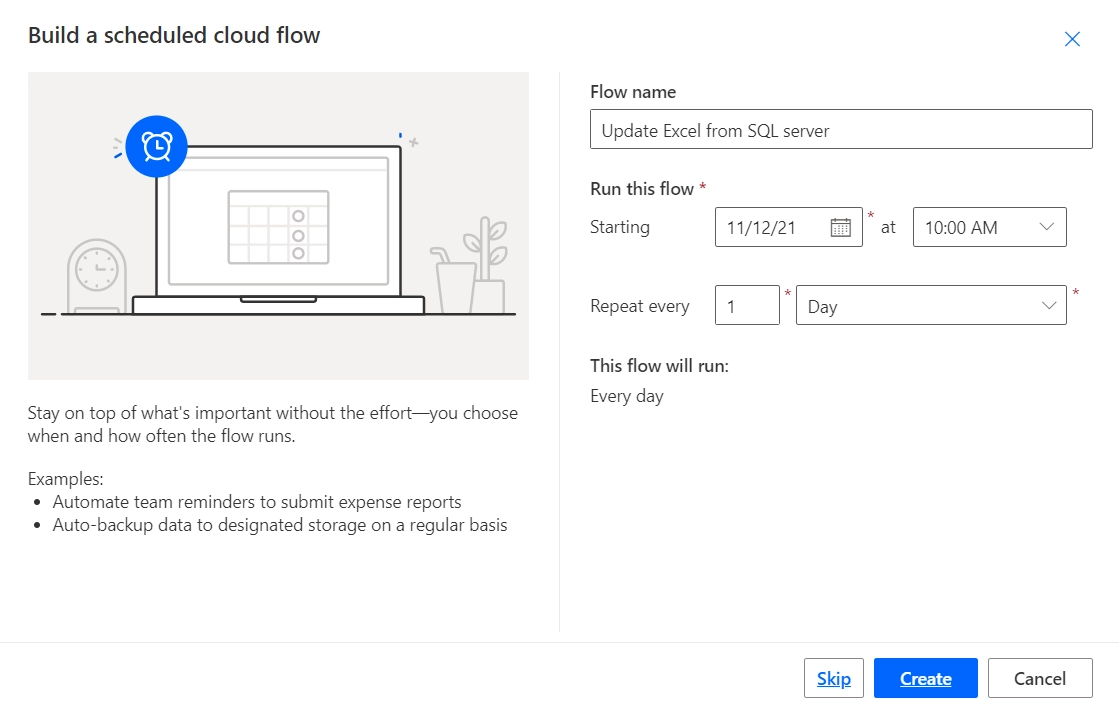
Give the flow a name. Specify the start date and how often you want to run this flow:
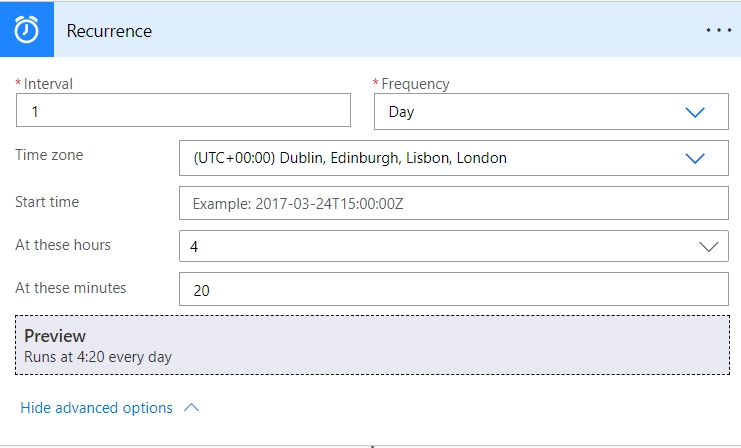
You can change the trigger settings at any time. In the trigger’s advanced options, you can specify the exact time when the flow should start, including the time zone:
These are the flow steps:
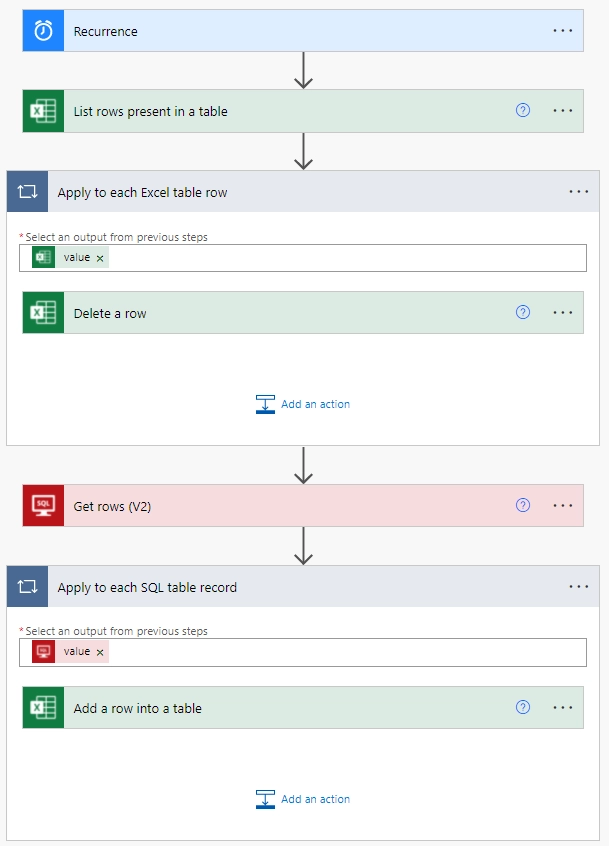
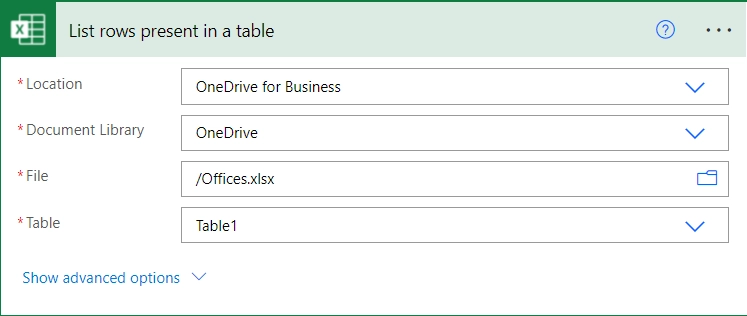
List rows present in a table action.
Gets all rows of the Excel table.
Enter the Excel file location details and select the table.
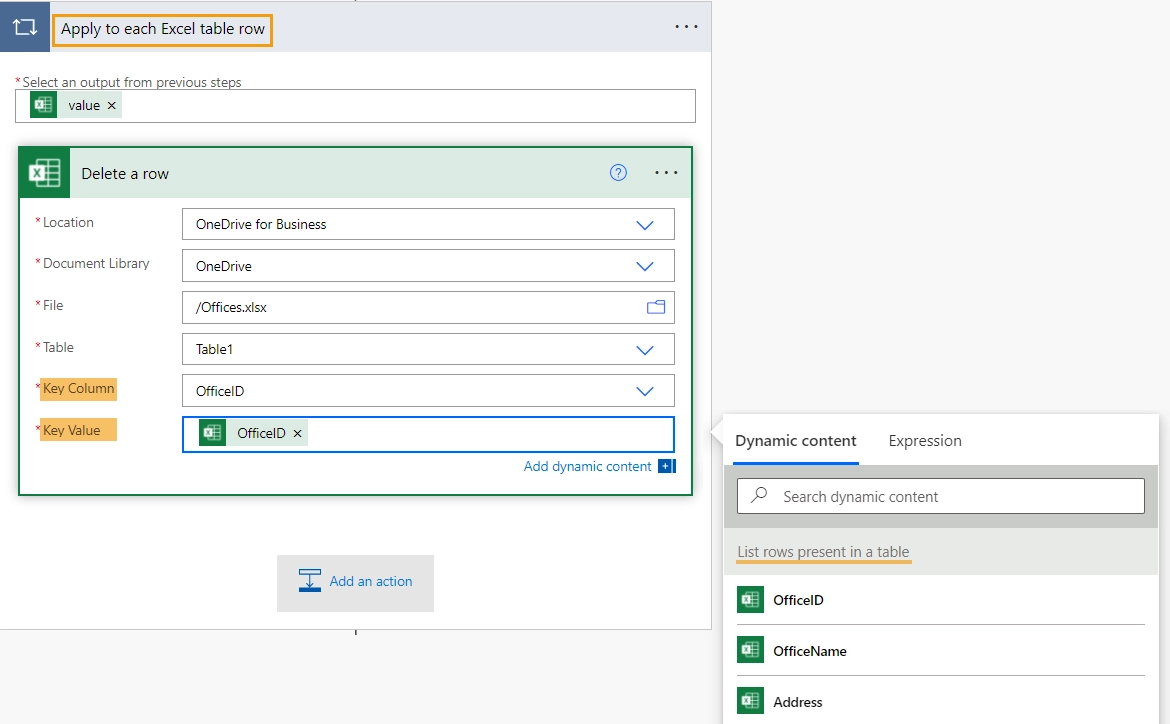
Delete a row action.
Deletes Excel table rows.
Enter the Excel file location details and select the table.
For the Key Column parameter, select a column name. And for the Key Value, add the same column from the List rows present in a table action output.
Once you add the value from the Dynamic Content tab, the Delete a row action will be wrapped inside an Apply to each action. Thus, the action will loop through the rows in the Excel table.
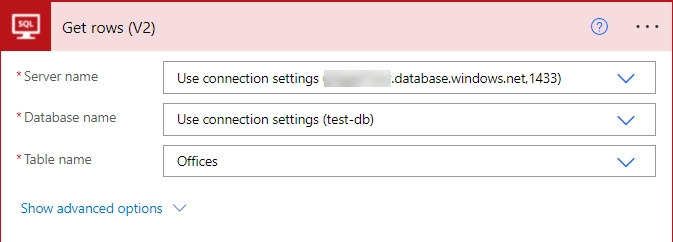
Get rows (V2) action.
Gets rows from a SQL table.
Enter the server and the database names, and select the table name from a dropdown.
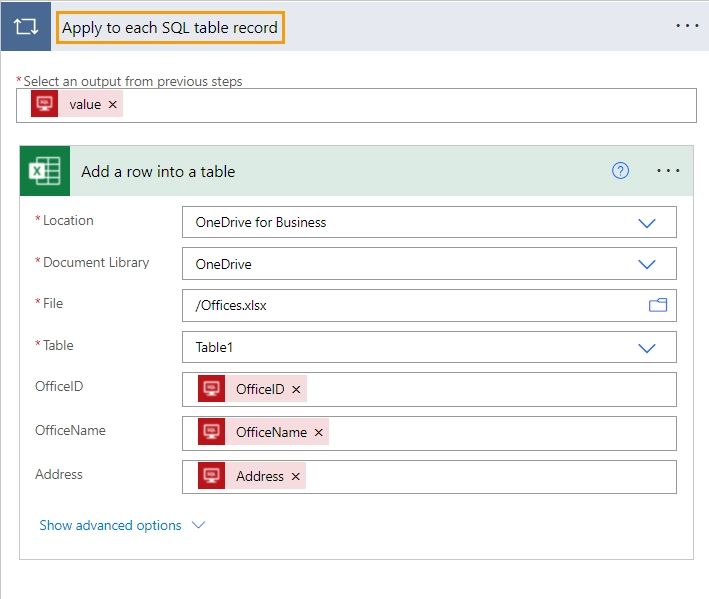
Add a row into a table action.
Adds a new row to the Excel table.
Enter the Excel file location details and select the table. After selecting the table, you will see a list of all available table columns.
For table columns that need to be updated, select the corresponding SQL table columns.
Once you add the value from the Dynamic Content tab, the Add a row into a table action will be wrapped inside an Apply to each action. Thus, the action will loop through the records of the SQL table.
