


 Documents
Sep 14
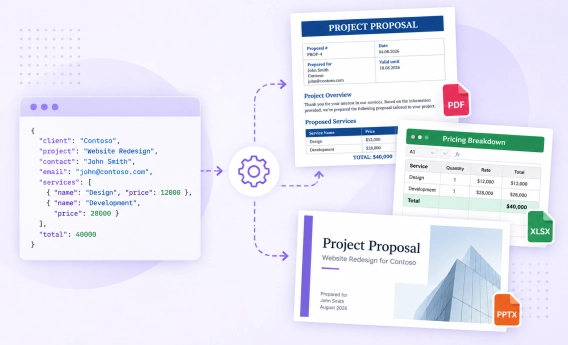
Generate a set of documents from one data source using multiple templates
Use multiple templates in a single Plumsail Documents Process to generate Word, Excel, PowerPoint, PDF, and HTML files from the same data.
 DocumentsSharePoint
When you need to generate several documents for the same order, it can be useful to save them together as a ZIP archive.
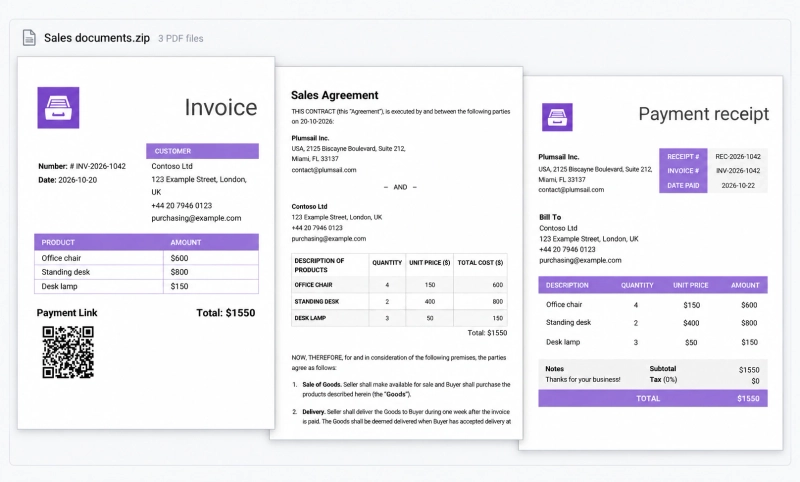
In this tutorial, we'll generate an invoice, an agreement, and a receipt from the same customer and order data, package the three PDFs into a ZIP archive, and save it to SharePoint. Everything is done within one Documents process.
In this article:
We'll use three Word templates based on the Plumsail Documents template library.
Download the modified versions to follow this example:
The modified templates use the same customer tokens, such as {{customerCompany}} and {{customerEmail}}, and the same products array for their tables. This lets one JSON object populate all three documents. Document numbers and dates have separate tokens for each document.
Set up the templates, ZIP output, and SharePoint delivery in one Process.
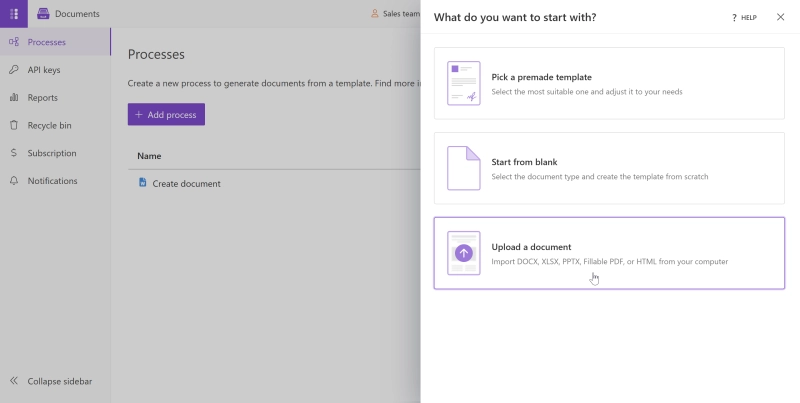
Log in to the Plumsail Documents account and create a new process. You can upload your own template, start with a blank document, or choose one of the ready-to-use templates.
To reproduce this example, select Upload a document and upload one of the downloaded templates, for example, Invoice template.
Name your process Generate sales documents and archive, select PDF as the output file type, and click Create:
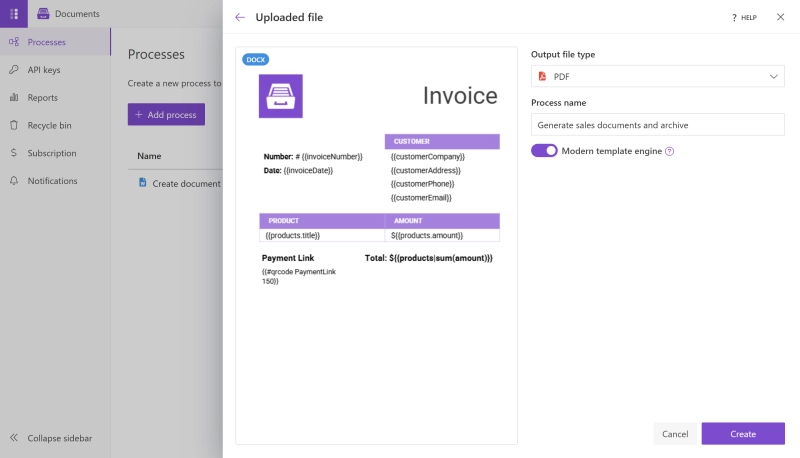
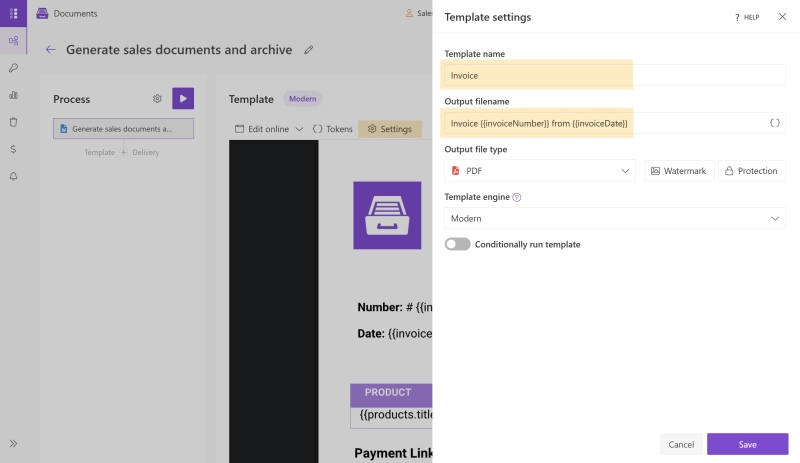
After creating the Process, rename the first template to Invoice. By default, it takes the Process name.
Click Settings above the template editor. Alternatively, hover over the template in the Process panel and click its gear icon. Enter Invoice under Template name.
You can make the output file name dynamic by using tokens in the filename.
Use Invoice {{invoiceNumber}} from {{invoiceDate}} as the output filename. Keep PDF as the output file type and click Save.
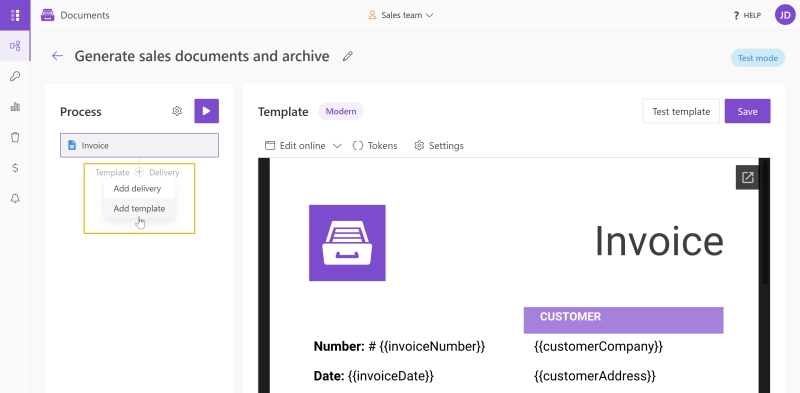
A Process can contain multiple templates, all populated from the same input data. Next, add the remaining templates: Agreement template and Receipt template.
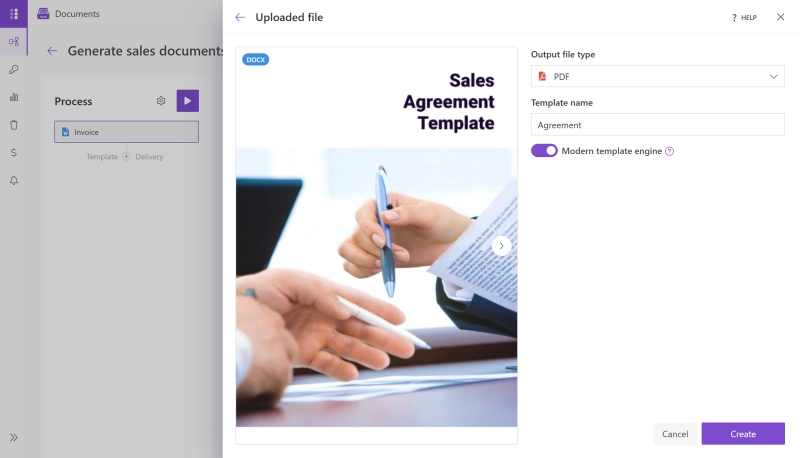
Click + beneath the first template in the Process panel and select Add template. Then select Upload a document and upload the agreement template.
Name the template Agreement, select PDF as the output file type, and click Create.
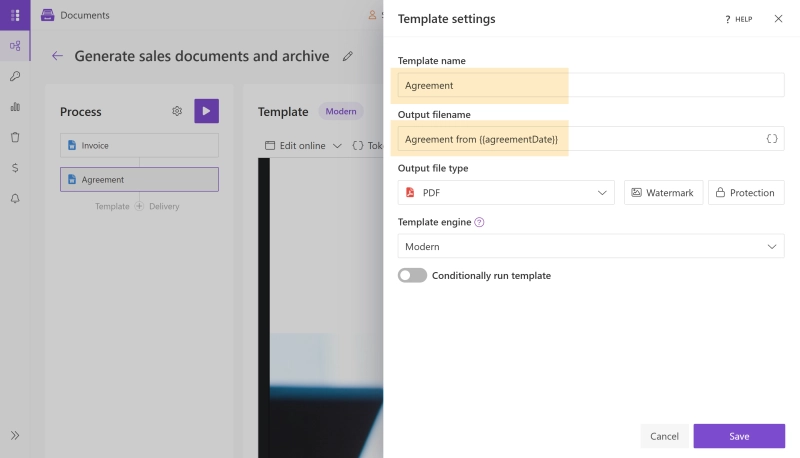
Open the Agreement template settings to configure its output filename.
Use Agreement from {{agreementDate}} and click Save. The {{agreementDate}} token uses the agreement date from the input data in both the filename and the document.
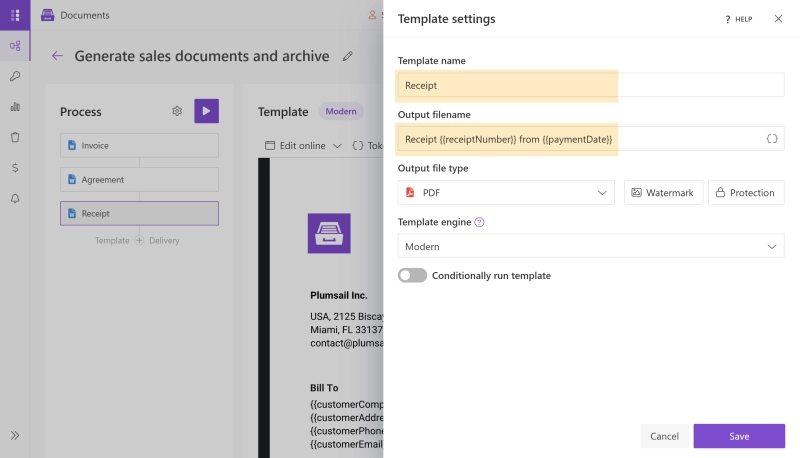
Upload the receipt template in the same way. Name it Receipt and select PDF as the output file type.
In its settings, use Receipt {{receiptNumber}} from {{paymentDate}} as the output filename and click Save.
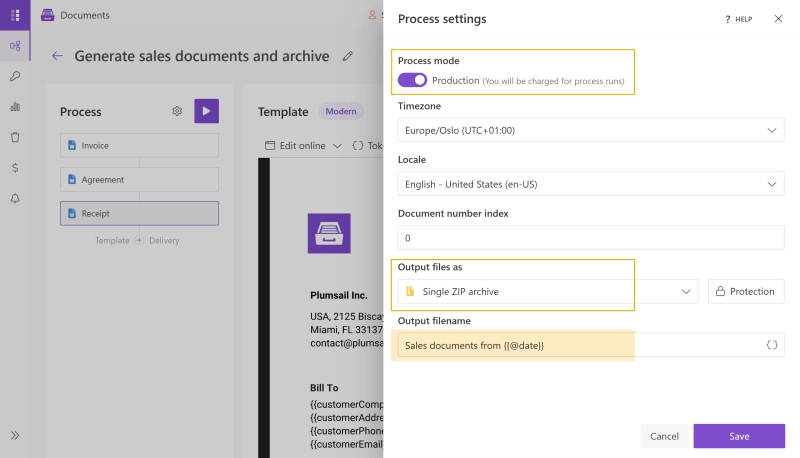
Click the gear icon beside Process in the left panel. Under Output files as, select Single ZIP archive. The Process will place the generated PDFs inside one ZIP archive. Each document keeps its own filename and remains a separate file inside the archive.
Set the archive output filename to Sales documents from {{@date}}. This adds the generation date and time to the ZIP filename.
Keep the Process in Test mode while checking the setup: test runs generate watermarked documents. Switch to Production when you are ready to generate documents without watermarks; production executions are charged. See Process mode for details.
Save the Process settings.
Next, add a SharePoint delivery to save the archive automatically:
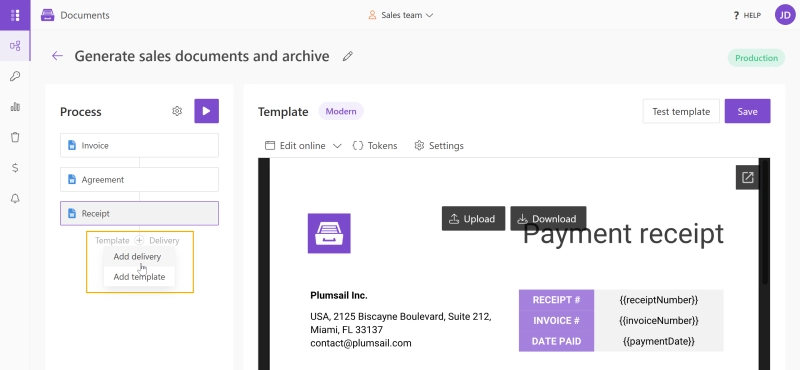
Click + below the templates in the Process panel and select Add delivery.
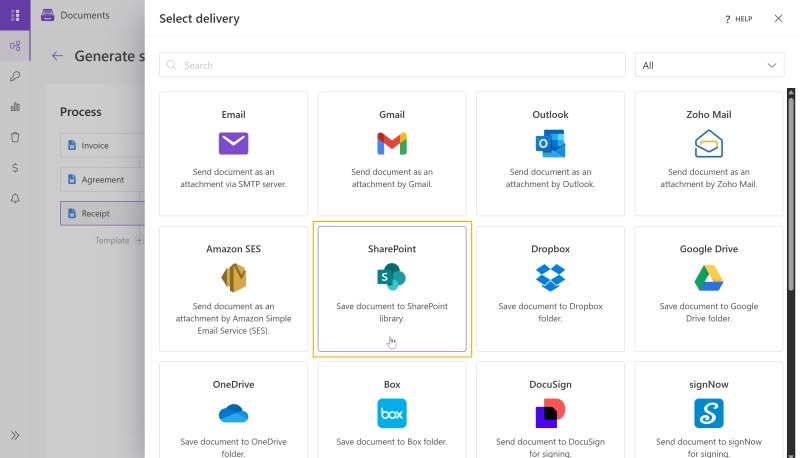
Select SharePoint.
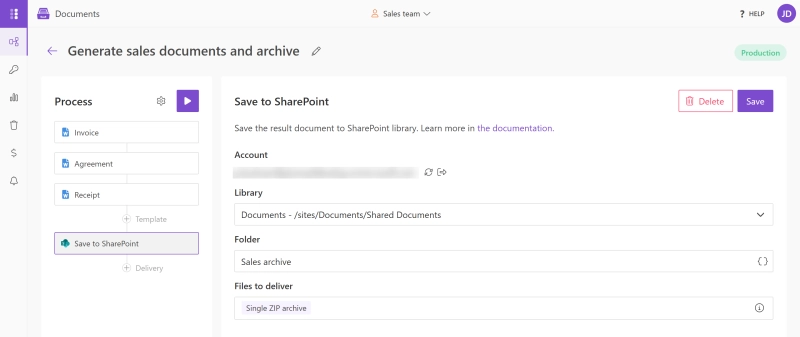
Connect your SharePoint account. Select the destination document library under Library and enter Sales archive under Folder. Check that Files to deliver shows Single ZIP archive, then click Save.
In this example, the archive is saved to the Sales archive folder in the site's Documents library. Choose the library and folder that fit your own setup.
If you prefer OneDrive, add a OneDrive delivery instead of SharePoint. Connect your Microsoft account, grant the requested access, specify the destination folder, and save the delivery. Keep the Process output set to Single ZIP archive.
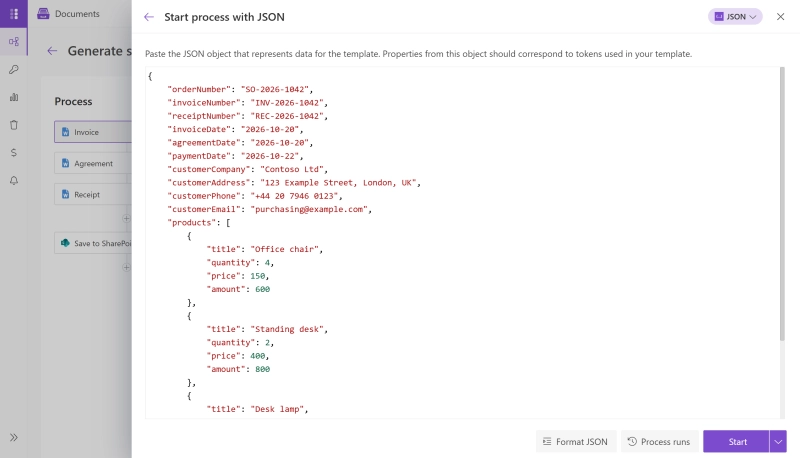
First, run the Process manually with sample data to check the templates, ZIP output, and SharePoint delivery. Use the following JSON object to generate the whole package.
You can copy the sample data below:
{
  "orderNumber": "SO-2026-1042",
  "invoiceNumber": "INV-2026-1042",
  "receiptNumber": "REC-2026-1042",
  "invoiceDate": "2026-10-20",
  "agreementDate": "2026-10-20",
  "paymentDate": "2026-10-22",
  "customerCompany": "Contoso Ltd",
  "customerAddress": "123 Example Street, London, UK",
  "customerPhone": "+44 20 7946 0123",
  "customerEmail": "purchasing@example.com",
  "products": [
    {
      "title": "Office chair",
      "quantity": 4,
      "price": 150,
      "amount": 600
    },
    {
      "title": "Standing desk",
      "quantity": 2,
      "price": 400,
      "amount": 800
    },
    {
      "title": "Desk lamp",
      "quantity": 3,
      "price": 50,
      "amount": 150
    }
  ],
  "PaymentLink": "https://example.com/pay/INV-2026-1042",
  "jurisdiction": "England and Wales"
}
The same customer and product data fills all three templates, while the document numbers and dates fill their respective fields. PaymentLink supplies the invoice's QR code, and jurisdiction fills the corresponding field in the agreement. The example payment URL is a placeholder; replace it with your own before using the invoice with customers.
Click the Start button at the top of the Process panel. Select Submit custom JSON data, paste the sample JSON, and start the Process.
When the run finishes, the ZIP archive appears in the SharePoint folder.
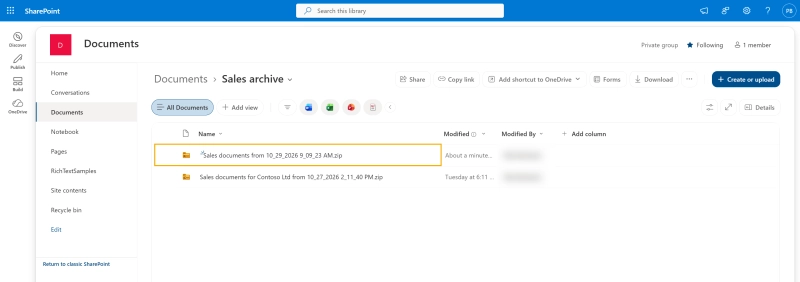
Download the ZIP file and extract it. It should contain three PDFs: an invoice, an agreement, and a receipt with the same customer data, three product rows, and a sum total.
Once you have checked the result, you can start the same Process automatically through Plumsail Documents integrations. For example, configure a workflow to run when a deal is marked as won in your CRM, or schedule it to generate document packages for completed orders each day.
Use an automation platform such as Power Automate, Make, or Zapier to set up the event trigger or schedule. Retrieve the customer, order, and payment details from your source app and pass them to the Process using the same field names as the sample JSON.
You now have one Process that generates a sales document package and saves it as a ZIP archive in SharePoint.
For more ways to use this feature, see Generate multiple documents from one data source.
To try it with your own templates, start with Plumsail Documents.
DocumentsSharePointDocumentsUse multiple templates in a single Plumsail Documents Process to generate Word, Excel, PowerPoint, PDF, and HTML files from the same data.
DocumentsSharePoint Power Automate
Learn how to export SharePoint list items to PDF file using Power Automate and create a PDF file from a template with step-by-step instructions.
DocumentsThis article explores what invoices are, what information they include, and how to automate the process of generating invoices.


