 Forms
FormsJun 03
How to create a high-converting lead capture form
Build and embed a lead capture form that turns visitors into customers with Plumsail Forms
 Formsn8n
Unqualified leads are a common complaint among sales teams. As one Reddit user in r/LeadGeneration put it:
I have talked with a few agency owners who mentioned that a large portion of their booked calls end up being unqualified. Some teams manually review every submission, others rely on HubSpot workflows and lead scoring. Some let the sales team figure it out during the call.
Automate your lead form processing and cut response times for high-priority leads using n8n and AI.
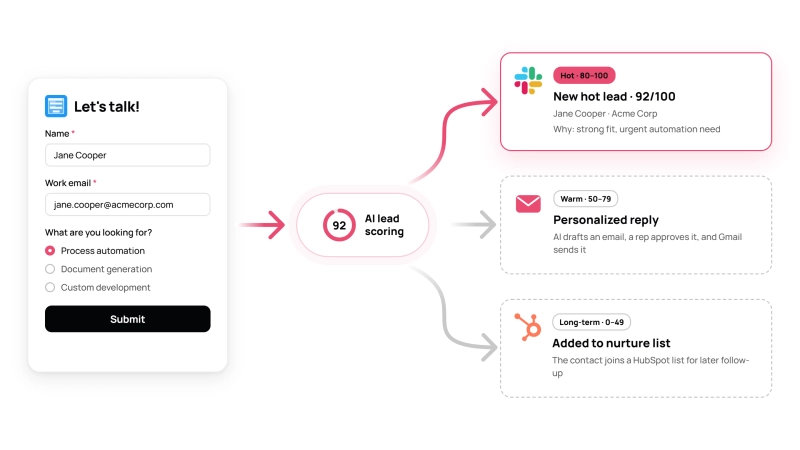
In this guide, we'll build an n8n workflow that picks up every new submission from a Plumsail Forms lead form, looks up the prospect's role and company, scores the lead with AI, and creates a record in HubSpot. Based on the score, the workflow then alerts sales in Slack, drafts a personalized reply to the prospect, or adds the lead to a nurture list.
AI can only score a lead as well as the data it receives. That makes the form the most important part of the workflow, and it's where Plumsail Forms helps the most:
On the n8n side, the workflow uses a few core nodes:
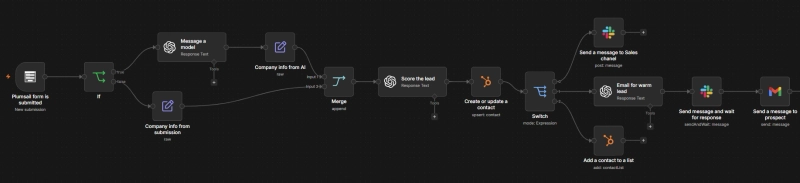
Here is the full flow we are going to build:
The AI can only score what it knows, so the form needs to collect a few qualification signals on top of the usual name, email, and message.
The primary rule for lead form is to remove friction for the prospective customer. So use fields with predefined options where possible and only ask what is necessary to qualify the lead. The fewer fields, the more likely a prospect is to complete the form.
For instance, you can use search tools or AI to populate the job title and company name when the prospect enters a business email. It is a little detail that can increase the form completion rate.
For this scenario, the form collects:
Tip: Add a Captcha control to the form to prevent bot submissions.
You can reuse this lead form template in Plumsail Forms and adjust it to your own products and qualification criteria.
Connect the form to n8n so every new submission starts the workflow automatically. Plumsail Forms provides a verified n8n community node that automatically triggers workflows whenever a form is submitted.
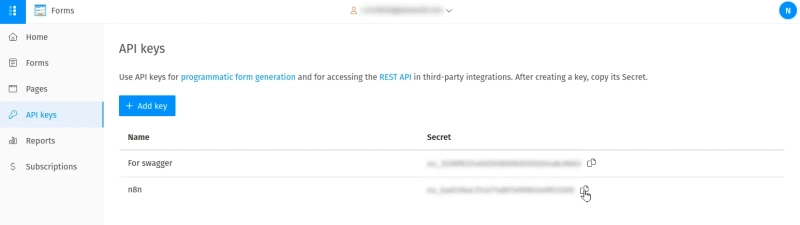
In your Plumsail account, open the API keys page, create a key, and copy its secret:
In a new n8n workflow, click Add first step and search for Plumsail Forms.
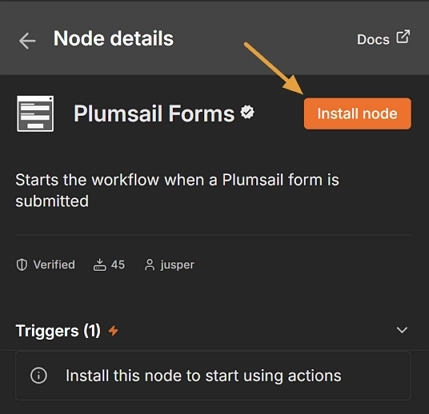
Click Install node to install Plumsail Forms in your n8n instance:
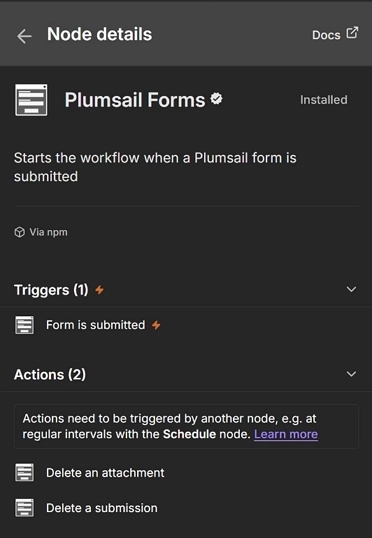
Select the Form is submitted trigger:
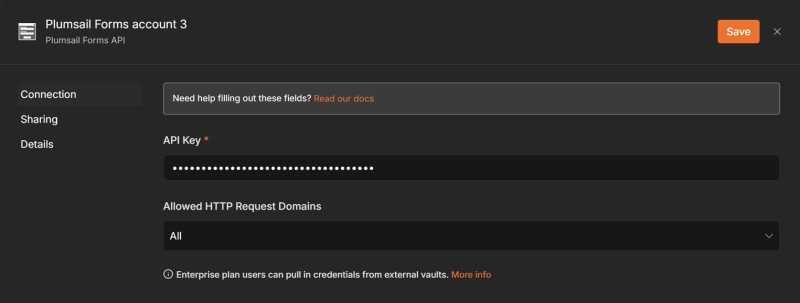
In the node settings, click Set up credential and paste the API key secret:
In the Form Name or ID dropdown, select the lead form you created.
Next, execute the trigger and submit test data through your form to generate the output schema. The captured fields will appear in the node output.
If you prefer a video walkthrough, here is a quick tutorial on how to set up the Plumsail Forms trigger in n8n:
The form has already done the work of telling business and personal emails apart: the company fields only appear for personal emails. So an empty Company name field means the prospect used a business email and needs research.
Add an IF node with a single condition: Company name is empty:
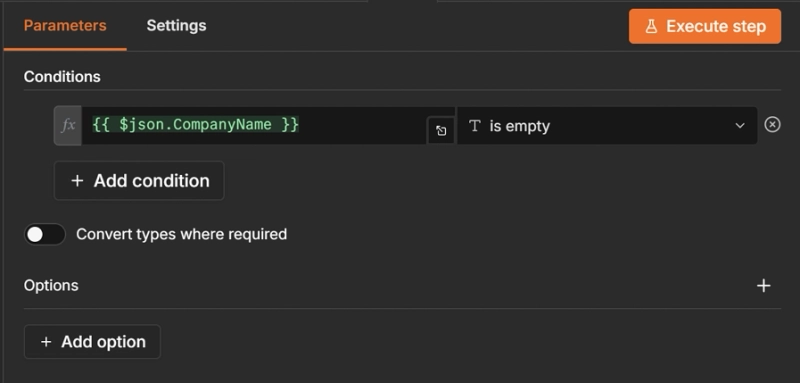
The true branch goes to research the company details; and the false branch skips it and uses the job title and company details from the form for scoring.
To make sure the scoring step always receives the same data set, add an Edit Fields (Set) node at the end of each IF branch and give the fields the same names in both, for example:
On the false branch, fill them from the form; on the true branch, fill them from the AI search output. Then connect both Edit Fields nodes to the next step.
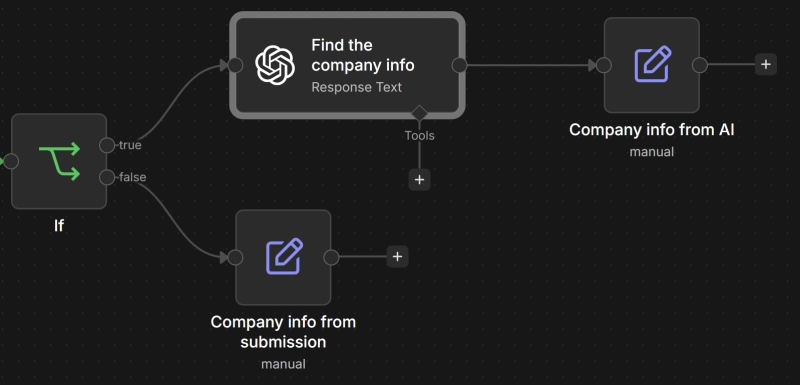
On the true branch of the IF node, add any AI Node node. n8n supports many chat models, including OpenAI, Anthropic Claude, Google Gemini. For this specific step we need a model that can do web search.
I decided to use OpenAI's Chat Model in this workflow with Web Search enabled:
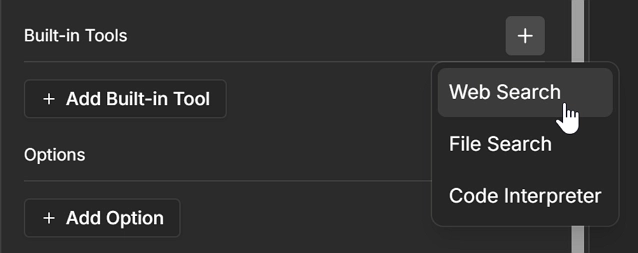
The main hint for this step is to give the AI a focused prompt that tells it exactly what to look for and how to return the results. For example:
Find the current job title of {{ $json.name }} at the company that uses the email domain {{ $json.email.split('@')[1] }}.
Also find the company name, industry, approximate number of employees, and a one-sentence description of what the company does.
If you can't find reliable information, return null for that field instead of guessing.
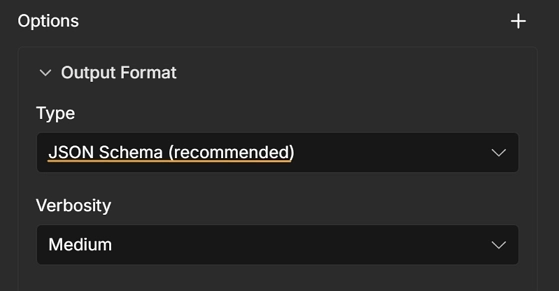
In the options, turn on Output Content as JSON so the answer comes back as fields the next steps can use:
Tip: Use a separate search tool like SerpAPI to find the company website and LinkedIn profile first. Then pass those URLs to the AI node so it can extract the information from reliable sources instead of guessing from search results.
After merging two branches, setup AI to evaluate the lead.
I'll again use an OpenAI's Chat Model node, and turn on Output Content as JSON.
In the prompt, pass the form answers and the fields from the Edit Fields nodes, and explain how to evaluate the lead. For example:
Evaluate the lead below on these factors:
- Company fit and size: how closely the company matches our ideal customer and target size range.
- Job title: the person's role in the buying decision. A CEO or department head usually makes the decision. A procurement specialist usually manages the purchase process but rarely decides alone. A team member is usually researching options.
- Budget: whether the selected budget range fits our pricing.
- Urgency: how soon they need a solution. *As soon as possible* is high, 'Just researching' is low.

Combine these factors into a lead_score from 0 to 100. Set lead_tier to "hot" for 80–100, "warm" for 50–79, and "long-term" for 0–49. Add a two-sentence summary for the sales team. If information is missing, score that factor conservatively instead of guessing.
The node returns a result like this:
{
  "lead_score": 87,
  "lead_tier": "hot",
  "summary": "Head of Operations at a 300-person logistics company. Needs workflow automation as soon as possible, with a budget that fits the mid-tier plan."
}
Tip: One AI step is enough to get started, but language models can give the same lead slightly different scores on different runs. For more consistent results, use an AI agent or a LLM chain.
Every lead should end up in your CRM, whatever its tier. Add a HubSpot node and choose Contact → Create or Update. Map the name and email from the form, the job title and company details from the Edit Fields nodes, and the lead score, tier, and AI summary.
Tip: If you are using Airtable or SharePoint instead of HubSpot, Plumsail Forms can be connected to those systems directly to save leads, skipping this step in the workflow.
The HubSpot node returns the contact ID, which you will use later to link to the record from Slack and to add the contact to a nurture list.
Tip: If you don't want to send a sales email to someone who is already a customer, check whether the company is already in HubSpot and what the contact's lifecycle stage is. You can add an IF node before this step to check.
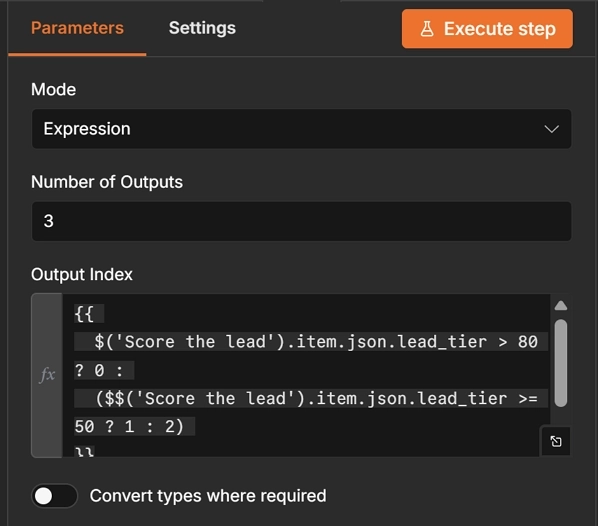
Add a Switch node after HubSpot and create three routing rules based on the lead tier from Step 5: hot, warm, and long-term.
The easiest way to do this is to use the Expression mode and write an expression for routing. Set the Number of Outputs to 3, and use this expression for the Output Index:
{{
  $('Score the lead').item.json.lead_score > 80 ? 0 :
  ($('Score the lead').item.json.lead_score >= 50 ? 1 : 2)
}}
The 0 top path is for hot leads, 1 for warm leads, and 2 for long-term leads.
Hot leads should reach the sales team within minutes. Add a Slack node to the hot branch and choose Message → Send to post to your sales channel.
Include everything a rep needs to decide on the next step, plus a link to the HubSpot record. This is an example of a Slack message for a hot lead:
New hot lead — 87/100
Mic89 Inc. · 200–500 employees
Jane Smith, Head of Operations
Looking for workflow automation · Timeline: as soon as possible
Why: Strong company fit, clear use case, suitable budget, and an urgent need.
[Link to HubSpot record]
The Why line comes from the AI summary. It's a small detail that makes a big difference to how much the sales team trusts the score. As one n8n community member noted when reviewing a similar workflow:
The main thing I'd add is a clearer “why this lead got this score” field beside HOT/WARM/COLD. If a human approver can see the source, score reason, suggested next step, and email draft in one row, the workflow becomes much easier to trust.
Warm leads don't need an immediate call, but they should get a relevant reply while their request is fresh. On the warm branch, I add another OpenAI Chat Model node, and pass it the form answers and the lead summary.
You can use a prompt like this:
Write a short, helpful email reply to this lead based on their form answers and qualification summary. Refer to their specific needs rather than using a generic sales message. Don't make claims that aren't supported by the information provided. Suggest booking a meeting and include this link: [your booking link].
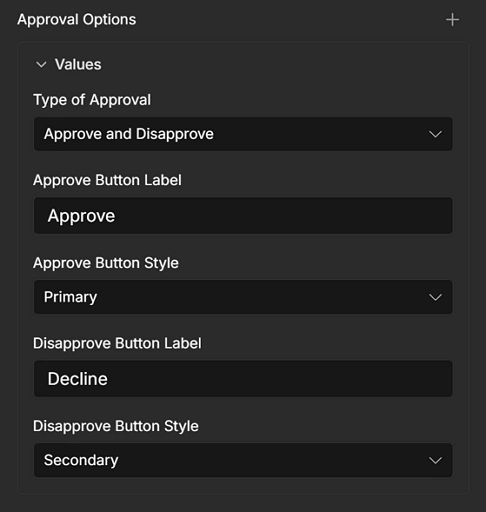
Tip: Before the email goes out, you can add a review step. Add a Slack node with the Send and wait for response operation, set the response type to Approval, and include the draft in the message. The workflow pauses until a sales rep clicks Approve or Decline.
And add a node to send the email with the AI generated message. You can use SMTP, Gmail, or any other email node n8n supports.
Some leads have a relevant use case but aren't ready for a sales conversation. They are already in HubSpot from Step 6, so all that's left is to mark them for later follow-up.
Add a HubSpot node to the long-term branch and choose Add a contact to a list. Select a list, such as Nurture – long-term leads, and map the contact ID from the Create contact in HubSpot node.
You can then use this list in HubSpot to start a nurture sequence or schedule a follow-up.
At this point, every submission is handled according to its qualification:
Lead qualification doesn't have to mean reviewing every form submission by hand. With Plumsail Forms and n8n, one workflow collects the right information, fills in missing company details, scores the lead with AI, logs it in HubSpot, and takes the right next step based on its score.
The same approach works with different qualification criteria, response channels, and CRM systems, so you can adapt it as your sales process evolves.
To try it yourself, create a lead form in Plumsail Forms, connect it to n8n with the Plumsail Forms – Form is submitted trigger, and build the qualification process around the way your sales team works.
If you need help, you can reach out to Plumsail support and book a demo call to discuss your lead scoring and response workflow.
Formsn8nFormsBuild and embed a lead capture form that turns visitors into customers with Plumsail Forms
FormsSharePoint Power Apps
See the pros and cons of using different form builders for SharePoint lists when it comes to conditional logic.
FormsLearn how to generate a QR code for sharing a Google Form. Plus, discover how Plumsail Forms does it automatically the moment your form is published.