Forms
May 26
Build dynamic Plumsail Forms with no-code conditional logic
Show, hide, or disable form fields with no-code conditional logic rules in Plumsail Forms for SharePoint, Airtable, and web forms.

When your SharePoint list grows in complexity, it's important to properly design its forms, so that you and other SharePoint users won't get bogged down filling out a huge static form. Ideally, you want your form to adapt, and conditionally show the parts you actually need to fill out.
And while built-in forms can be customized and supports some conditional logic, are they really the best we can have? SharePoint is designed to be extensible, and so there are plenty of alternative ways to make forms for SharePoint lists, including Power Apps and Plumsail Forms.
Let's take a look at the different form builders, their capabilities for conditional logic and what it takes to implement it.
Before going further, let's quickly give a definition to be on the same page. Conditional logic is when you perform some sort of action when a condition is met. If X happens, do Y, that sort of stuff.
When we talk about conditional logic in online forms, these are some of the usual scenarios:
So why should we even bother with conditional logic? Well, there are several meaningful benefits:
As I've said, SharePoint is extensible, and so there are a bunch of form builders that can be used for SharePoint lists. So which option is the best one?
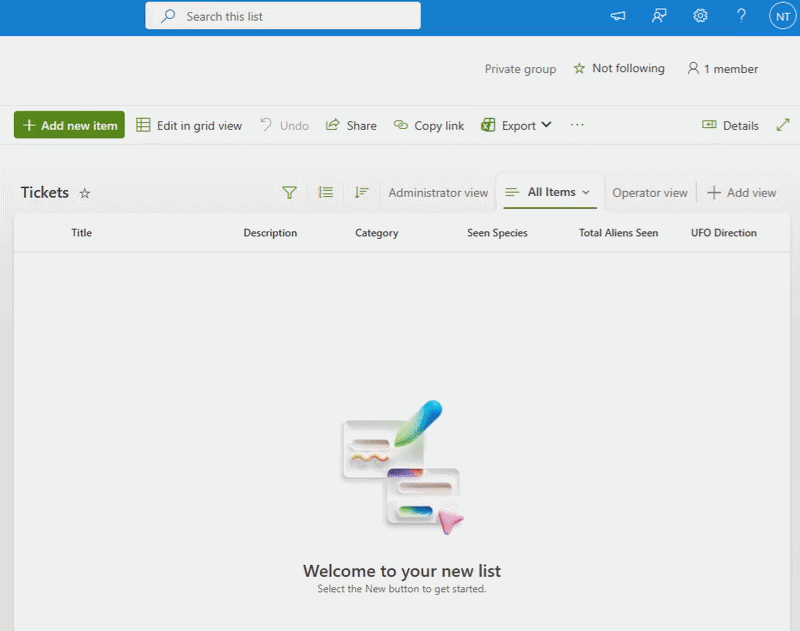
For comparison, we'll use a simple ticketing system for a secret UFO research agency. Our tickets will be split into two categories - "UFO Sighting" and "Alien Sighting". Naturally, we only want our operators to fill columns relevant to the ticket category, so a field listing the alien species should only be shown if there was an alien sighting.
This is a very basic example for conditional logic, but it covers one of the most common use cases, and helps to see the general workflow with conditions. We'll check different form builders, see how to implement this logic, and decide which option is the best.
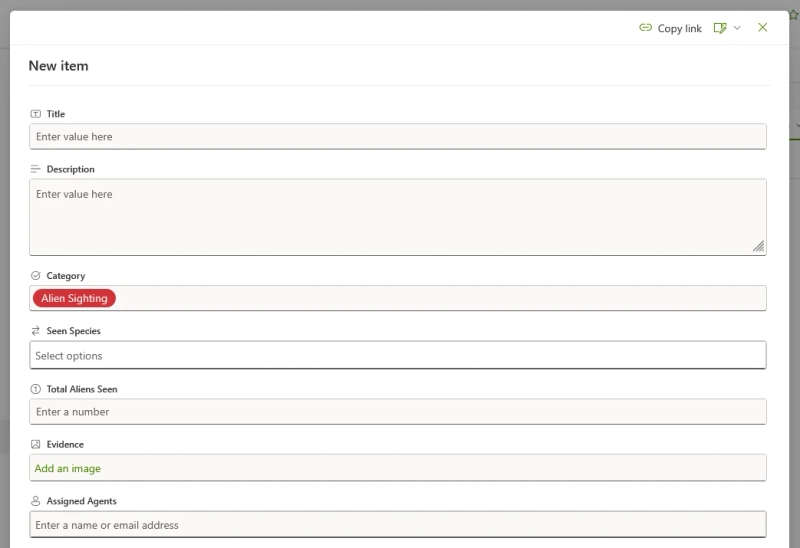
These forms are what you see by default when you edit or create a list item. It's the most basic option, and when it comes to conditional logic, they can only show or hide columns. But, for our simple scenario this is enough.
To edit this form, click the "Add new item" to open it, and then open the dropdown menu on the top-right:

Click the "Edit columns" menu, and then find the column you want to conditionally hide. Then, hover over the column name, click on the triple dot menu, and choose "Edit conditional formula":
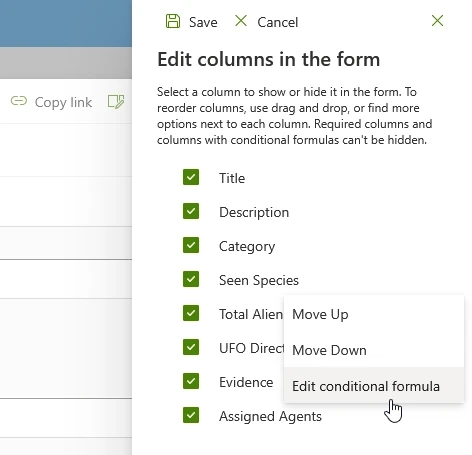
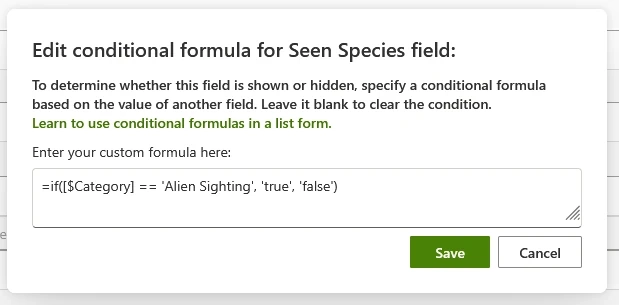
Yes, things are not that simple, you'll need to learn a special formula syntax to hide your columns. In our case it's not that hard:
After we do the same with other fields and save the form, we can see that now our form conditionally shows the relevant fields:
Pros:
Cons:
This alternative form builder is also available from the get-go. To open it, click the "Forms" button in the ribbon above the list:

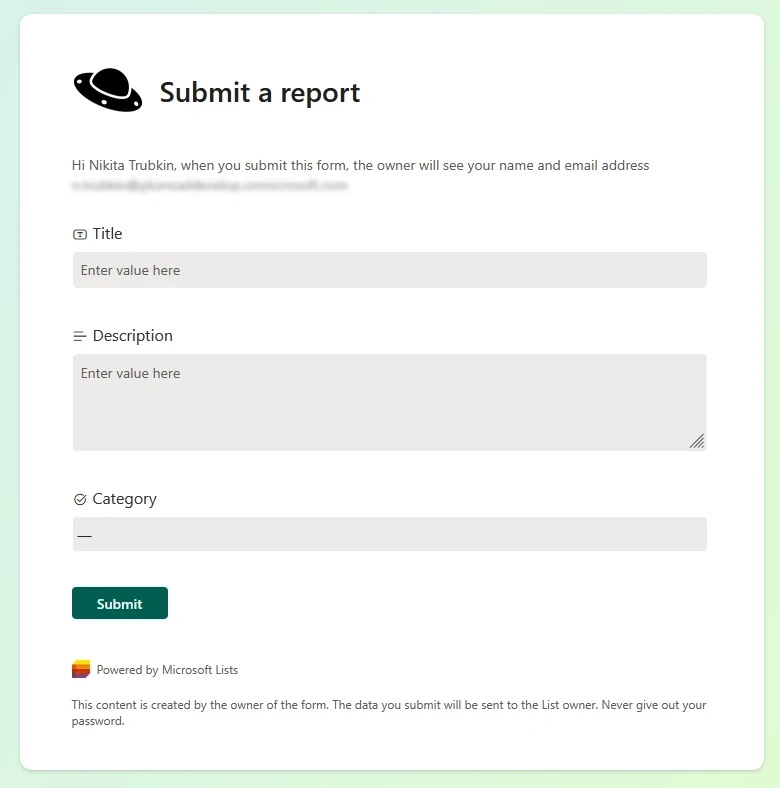
Compared to other options, this one has a big caveat — instead of using these forms directly in the list view, you share them using a URL that can be accessed by users from your organization. Another thing to note is that you can't edit list items using these forms.
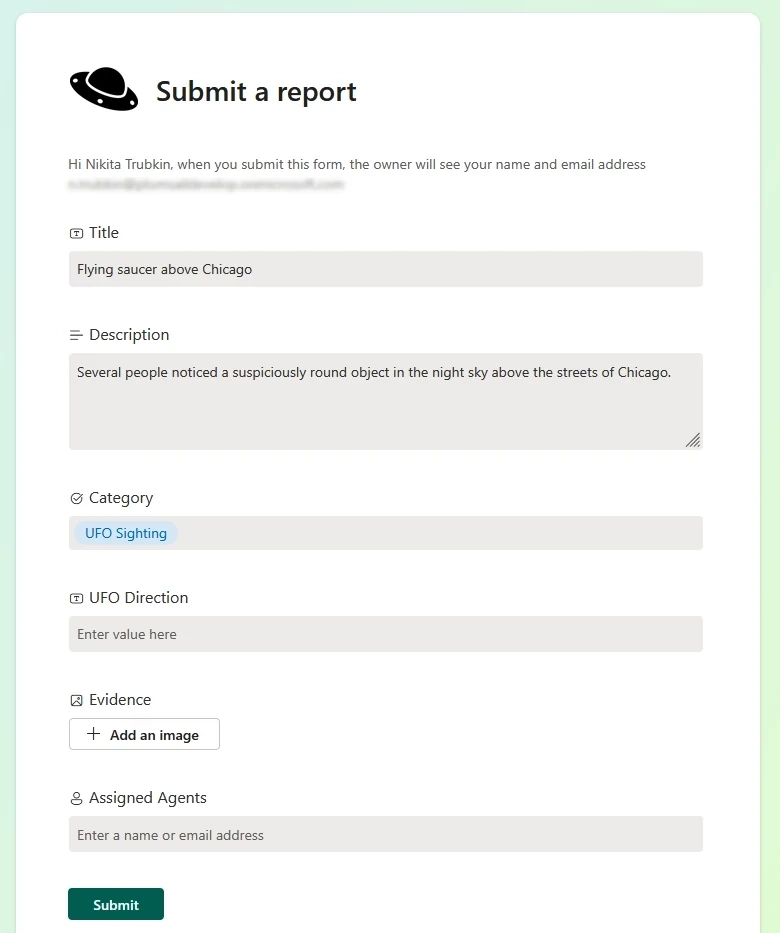
Microsoft Lists form uses branching to show users only the fields they need, and this can be a powerful tool. In our case, instead of adding a condition to each field, we tell the form to skip all the alien-related fields if the category is "UFO sighting":
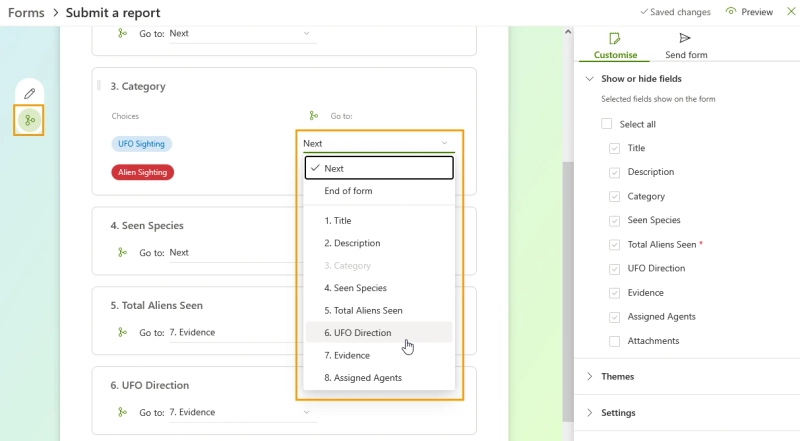
If we follow the form link, we will see that all the fields after "Category" are hidden:
That's because we effectively created two different branches when we chose different next steps depending on the category value. Once we choose the UFO sighting category, the form immediately shows us the next steps, skipping the branch for alien sighting:
Pros:
Cons:
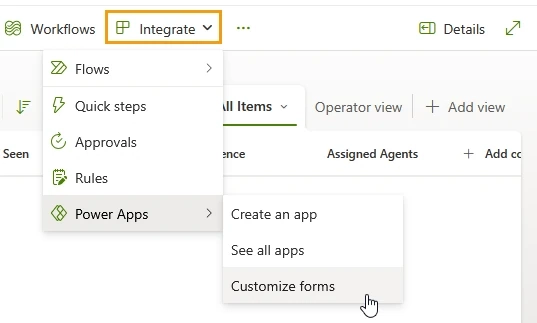
Power Apps is a Microsoft solution to no-code apps, and has a tight integration with SharePoint. To create a Power App form for a SharePoint list, open the "Integrate" dropdown and then choose "Power Apps" → "Customize forms".
Once we do that, we see the Power App editor:
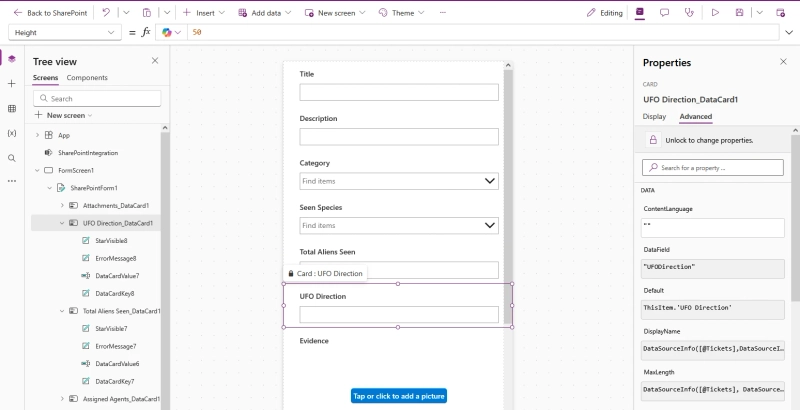
I'll be honest, while the full-blown editor hints we have a much higher level of customization, I find Power Apps to be clunky and unintuitive. Still, let's continue with our example.
You can notice that when you select a form element on the screen, the right panel shows its properties. All of these properties can be edited, and you can use formulas to dynamically calculate the property value. That means we're not limited to hiding the field, we can also change the whole look based on conditional logic! That also means we have to learn yet another formula language called Power Fx.
We'll select the "Visible" property in the dropdown above, and enter the following formula to show a field only if we have an alien sighting:

After you update your visibility formula you might notice this field disappears. Power Apps has a sort of live preview during editing, so your condition immediately triggers, but you can still select it in the tree view on the left.
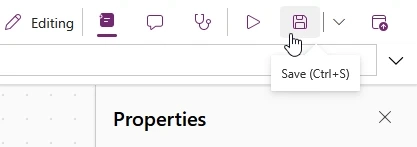
Once we've added conditional logic to our fields, we'll save our form by clicking on the save icon in the top-right:
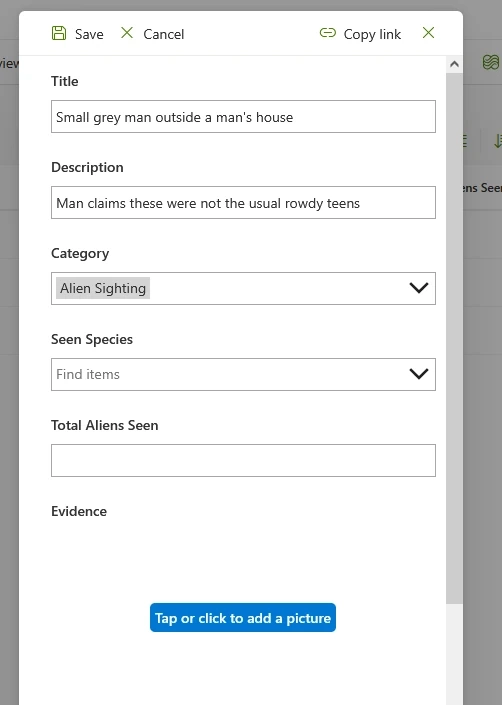
Now, when we use the "Add new item" button, we see the Power Apps form we created:
Pros:
Cons:
Finally, let's look at Plumsail Forms. Unlike other options, this is a third party product, so we'll have to install its app package and the desktop application first. The installation process is very straightforward, so I'll skip it here. If you don't believe me, take a look at the installation guide, it really is simple.
When you open the designer app we can see this is another fully-fledged editor:
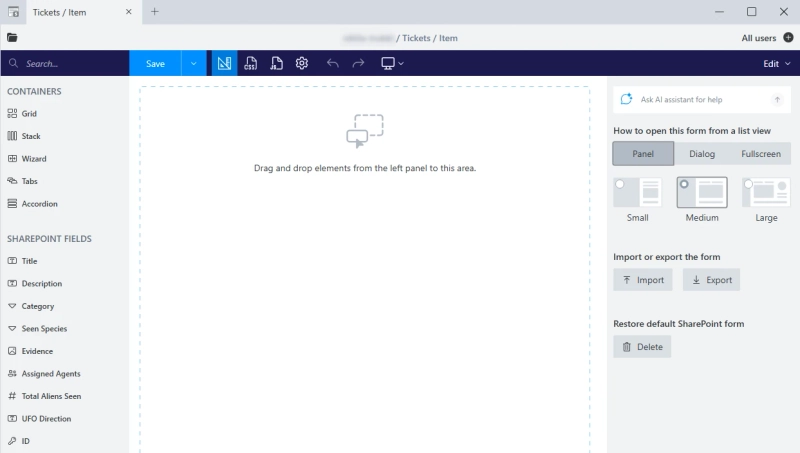
We start with a blank form, but we can easily recreate our standard layout by dragging the SharePoint fields from the element list on the left to our canvas:
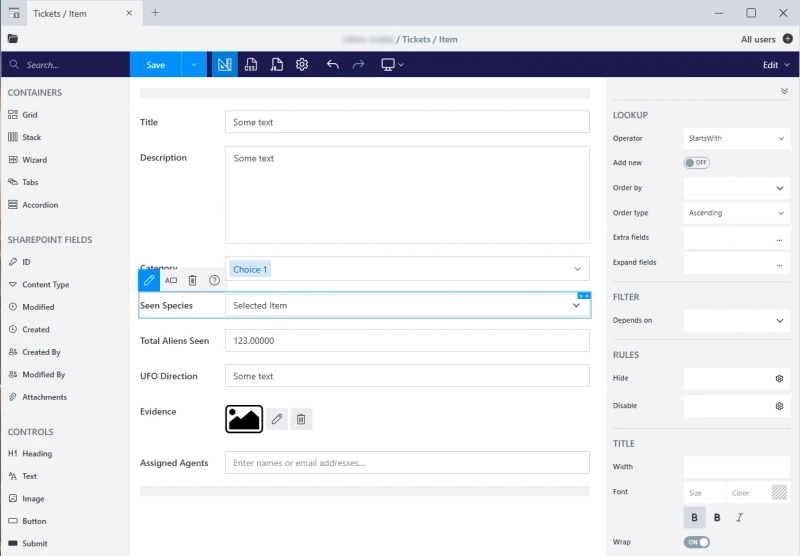
When you select a form element you can see its properties on the right, just like in Power Apps. However, notice the rules category — this is where we can add no-code conditional logic:
Before adding the rules to hide our fields, let's instead put the fields related to alien sighting into a separate container. I'll drag a Grid container onto our canvas, and then move the relevant fields inside it:

With this I only need to apply the hide rule once. This ability to hide containers with several elements makes it easy to implement your own branching logic.
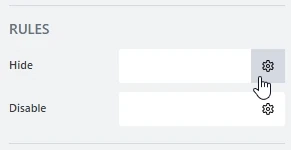
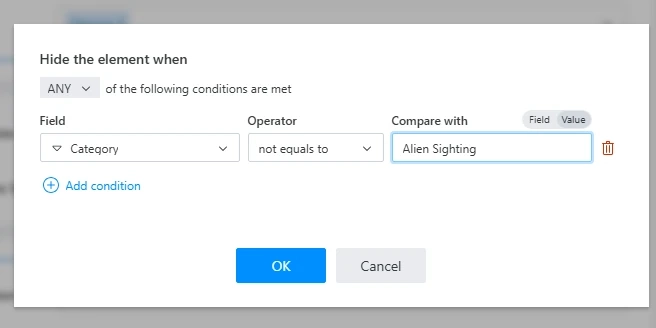
All we have to do now is move to the Grid container's "Hide" property, and add a condition to check the currently selected category:
It's also worth noting that while I stick to no-code rules for this comparison, you can write your own JavaScript code for complex logic. This gives you near-limitless options for form customization.
After adding conditions, let's save our form for all three form types - New, Edit and Display:
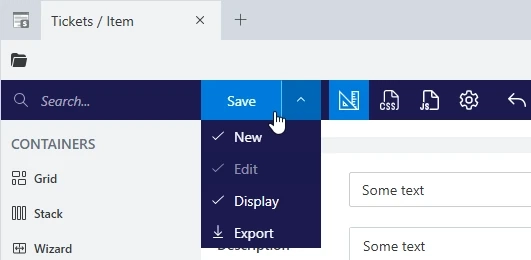
Once you save your form, your SharePoint list will automatically use it when adding, editing or displaying items:
Pros:
Cons:
All in all, Plumsail Forms for SharePoint wins it for me. Easy and accessible no-code rules give you powerful ways to make your form deeply interactive. And remember — you can apply these rules to any form element, not just its fields. This means you can disable the submit button, easily hide whole sections and more.
And if rules are not enough, custom JavaScript gives you complete freedom in implementing complex scenarios, without relying on some rigid formula syntax.
Of course this is just my opinion, so I encourage you to do the comparison yourself! Plumsail Forms for SharePoint comes with a free 30-day trial, which means you just need to sign up and download the app to your SharePoint tenant.
Show, hide, or disable form fields with no-code conditional logic rules in Plumsail Forms for SharePoint, Airtable, and web forms.
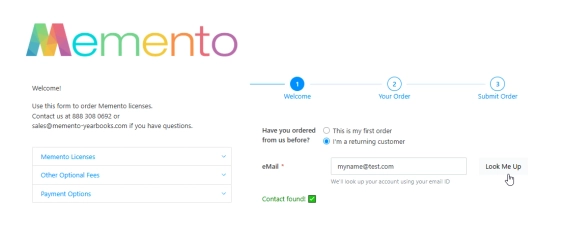
See how a yearbook software company automated their ordering process using Plumsail Forms with complex calculations, conditional logic, and Airtable integration.