Airtable Forms don't automatically generate custom PDF documents after a submission.
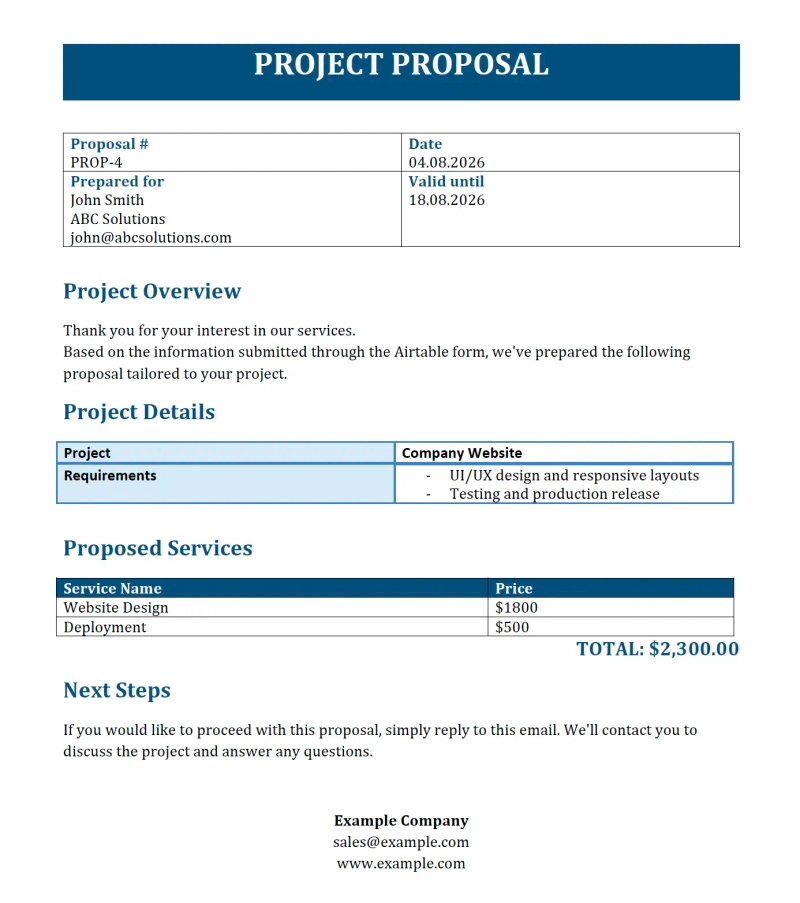
In this tutorial, you'll learn how to automatically generate a custom PDF from an Airtable form submission using Airtable Automations and Plumsail Documents. The generated PDF can be emailed to the customer, saved back to Airtable, or both.
Automatically generating PDF documents from Airtable Forms can save time, reduce manual work, and help create a more professional experience for your customers. Some of the key benefits include:
Generate proposals, quotes, invoices, contracts, and other business documents automatically from Airtable form submissions.
Keep a consistent, professional design by using reusable templates with your company branding.
Reduce manual work and avoid copying data between Airtable and your documents.
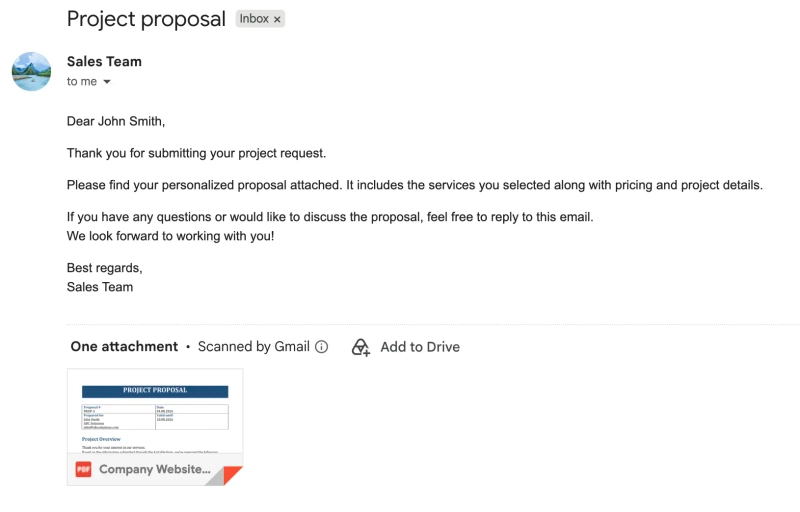
Automatically email the generated PDF to the customer or save it back to your Airtable base.
Start by creating a new Airtable base that will store both your customer submissions and the list of services used to generate proposals.
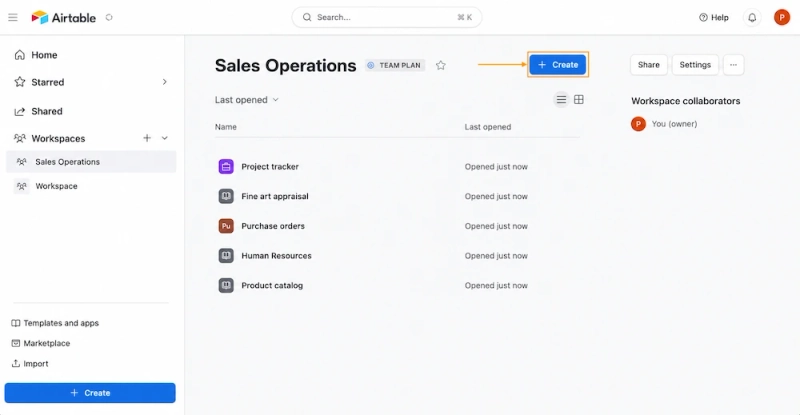
First, create a new base in your Airtable workspace:
Create the Services table
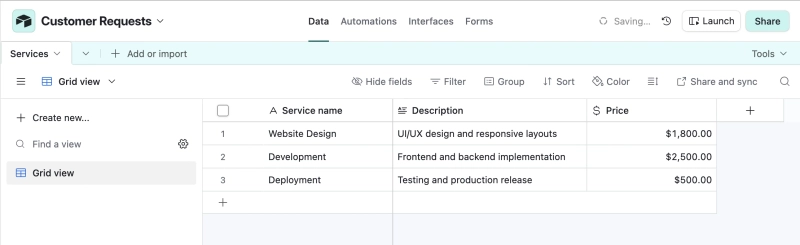
Create a table named Services and add the following fields:
Name
Description
Price
This table acts as your service catalog. Customers will be able to select one or more services when submitting the form. These selections will later be included in the generated proposal.
Create the Form Submissions table
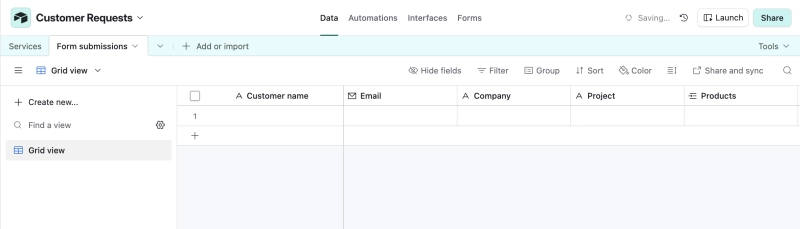
Next, create a second table named Form Submissions. This table will store all responses submitted through your Airtable form.
Add the following fields:
Customer name
Email
Company
Project
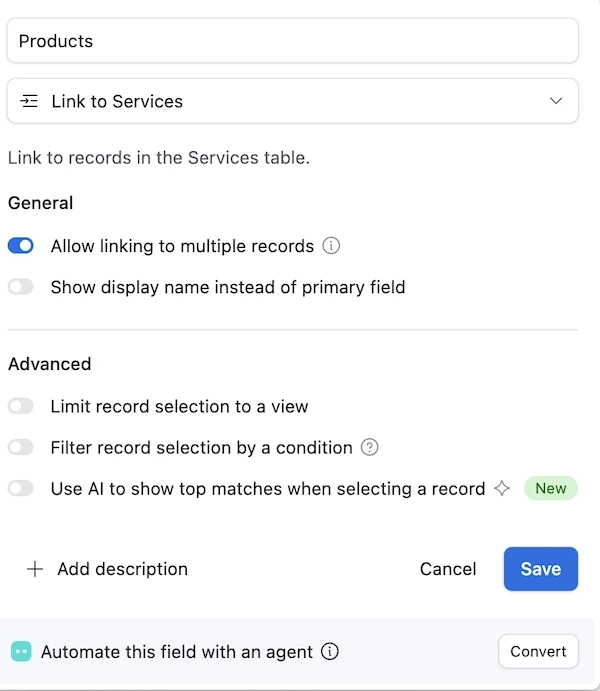
Services (Link to another record) - link this field to the Services table so users can select one or more services from your catalog:
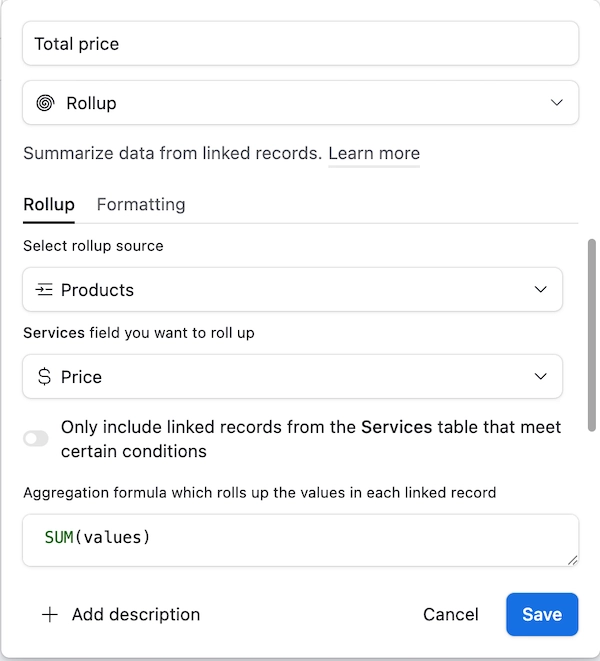
Total price (Rollup) - calculate the total cost of all selected services using the following formula:
SUM(values)
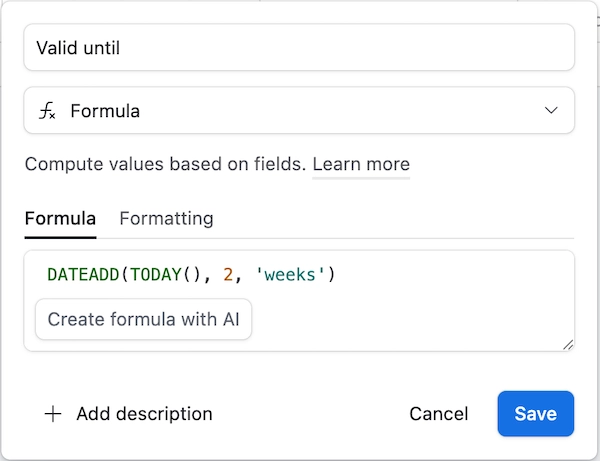
Valid until (Formula) - automatically calculate the proposal expiration date using the following formula:
Now it's time to create a form that customers will use to submit their project details.
Go to the Forms tab in the top navigation
Select Build it yourself:
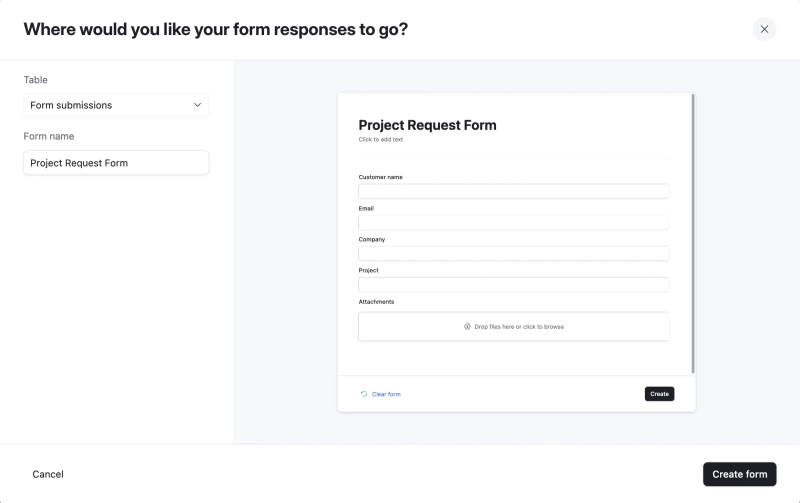
Select the Form Submissions table and enter a name for your form:
Click Create form
You can customize the form as needed by adding or removing fields, renaming them, and changing the description, logo, background, and other settings.
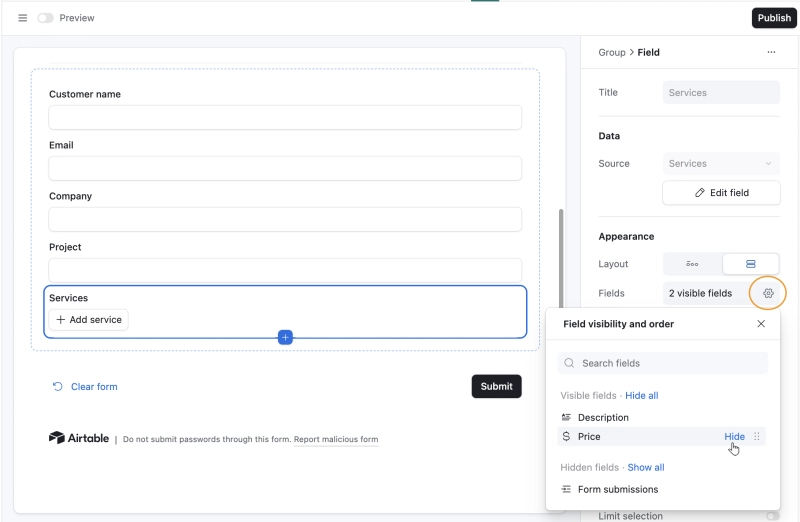
The main step is to add the Services field and hide service prices from the form. This way, customers can choose the services they need, while prices will only appear in the generated PDF proposal.
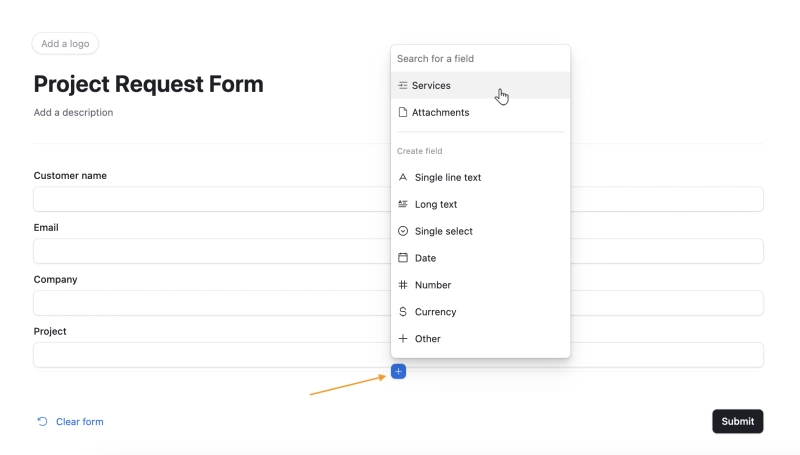
Click + to add a field. You'll see all available fields from the Form Submissions table, including Services:
You can configure the field from the panel on the right. For this example, hide the service price:
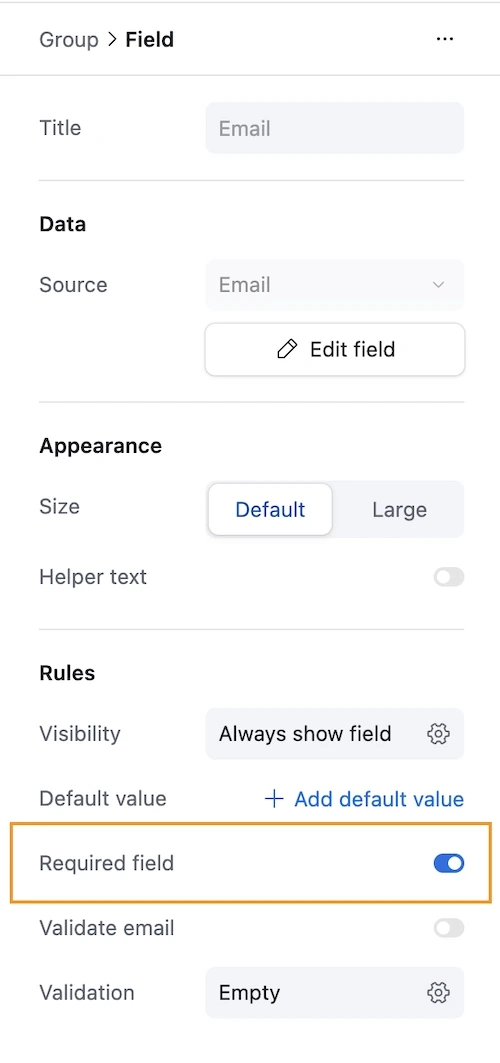
You can also mark any fields as required:
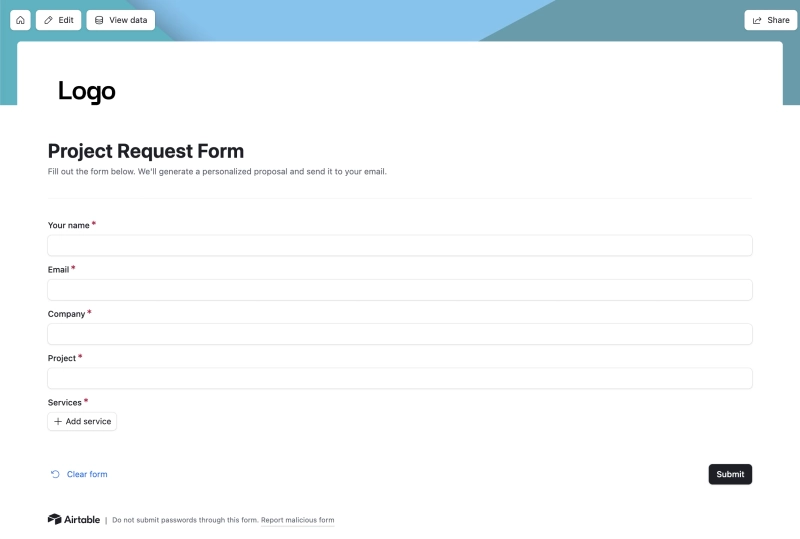
Once your form is ready, click Publish to make it available.
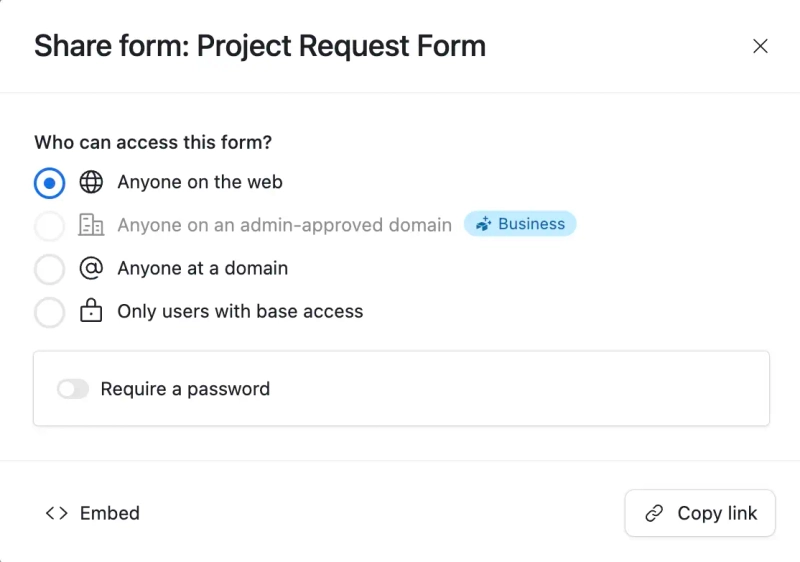
After publishing, you'll be able to share the form publicly, restrict access to people in your organization, or choose another sharing option. We'll return to the published form in the final step, after connecting it to Plumsail Documents.
Now switch to Plumsail Documents and create a new document generation process. This process will generate PDF proposals from Airtable records submitted through your form.
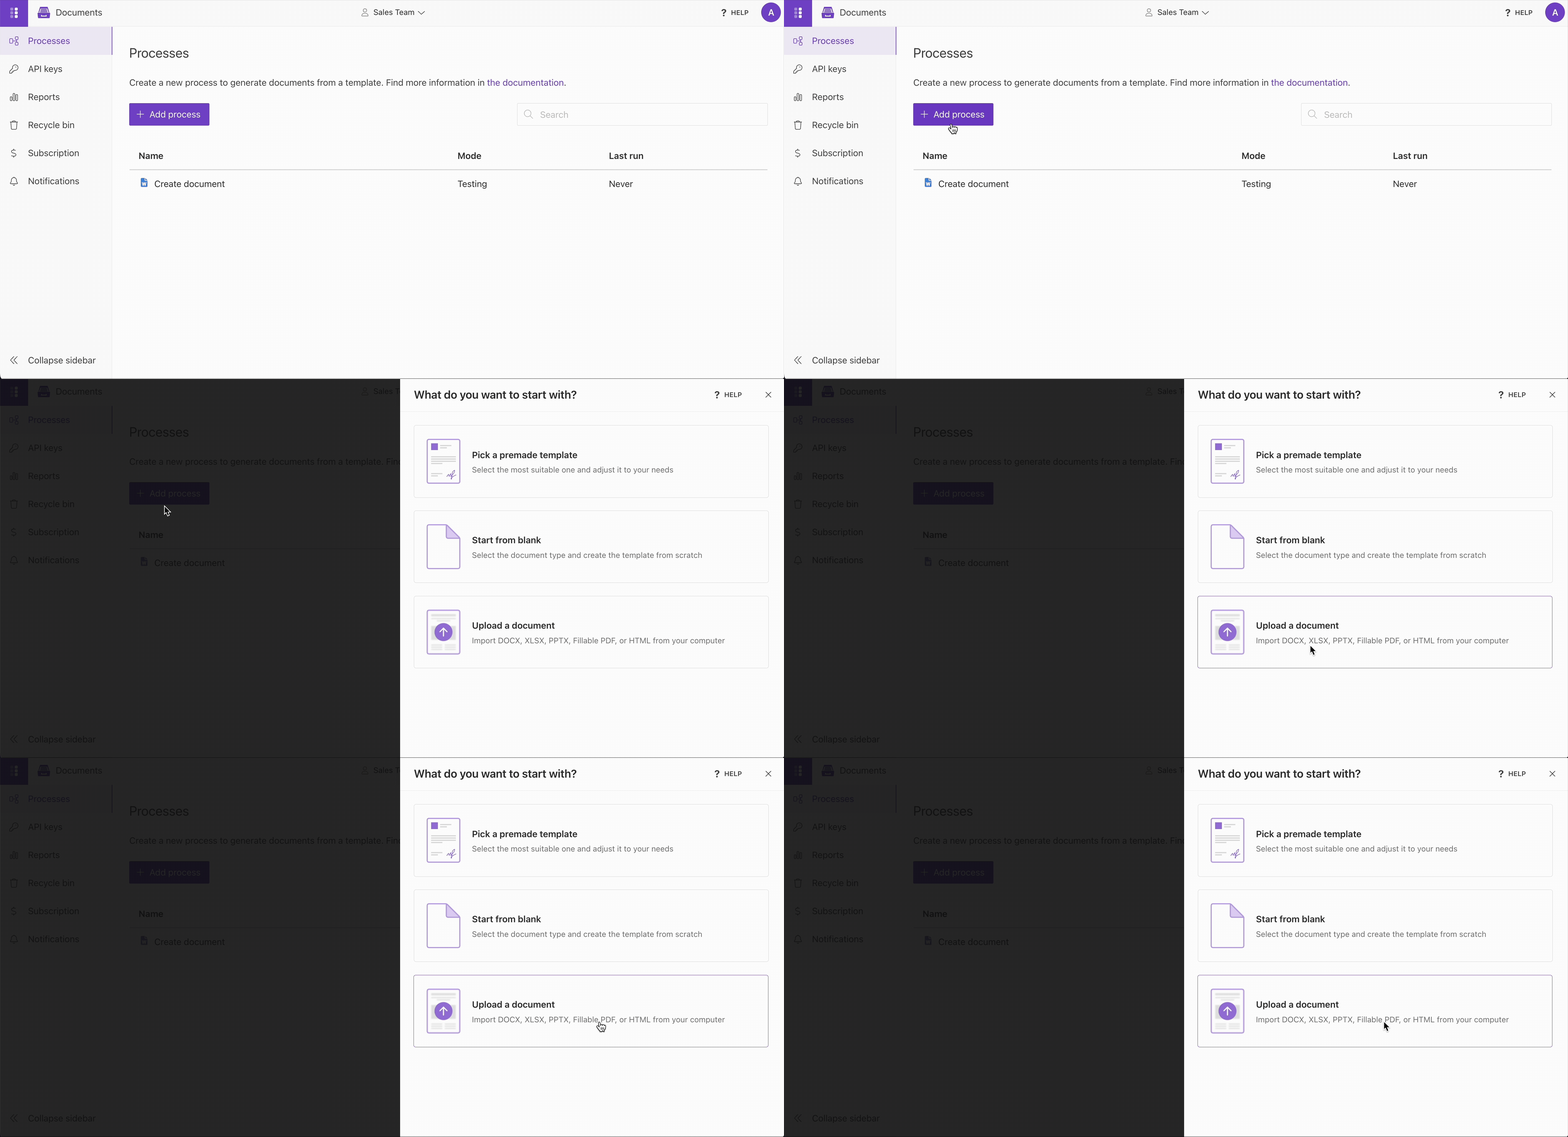
Log in to the Plumsail Documents account and create a new process. You can upload your own template, start with a blank document and build the template from scratch, or choose one of the ready-to-use templates.
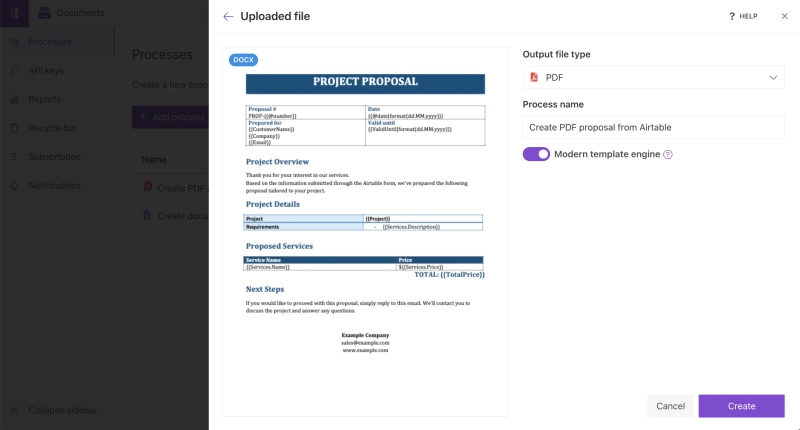
Enter a process name (for example, Create PDF Proposal from Airtable), select the output file type, and click Create:
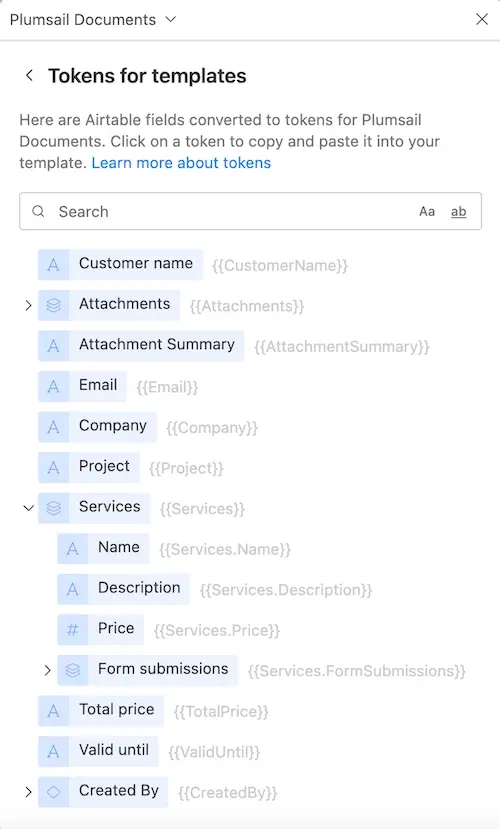
After the process is created, the template editor opens automatically. The template already contains sample tokens. We'll update them later in the tutorial after connecting Airtable to Plumsail Documents and add the correct Airtable field names.
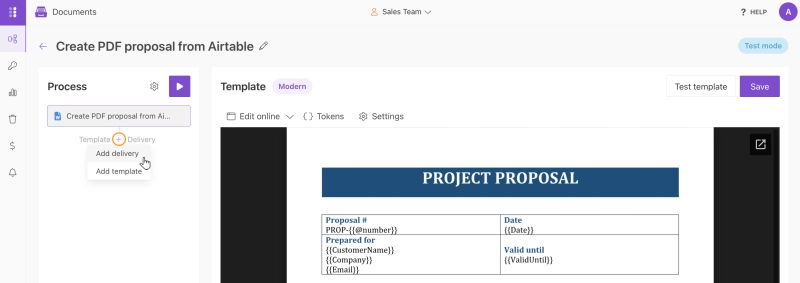
The next step is to send the generated proposal to the customer automatically. To do this, add an email delivery to your process:
Choose one of the available delivery providers. For this example, we'll use Gmail.
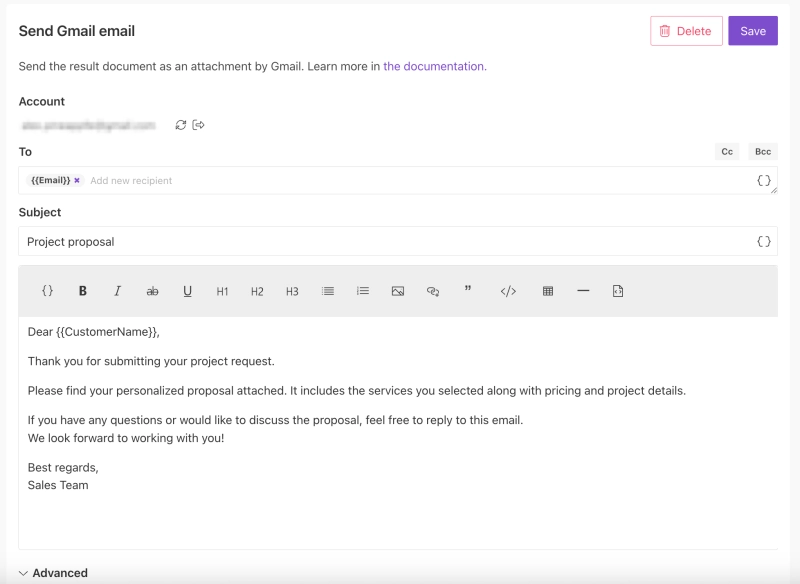
Connect your Gmail account and configure the delivery settings:
You can also use document tokens in the delivery settings. For example, use the customer's email address in the To field or include their name in the email subject or message.
First, add the Plumsail Documents extension to your Airtable base:
Open your Airtable base and click Extensions in the top-right corner
Select Add an extension
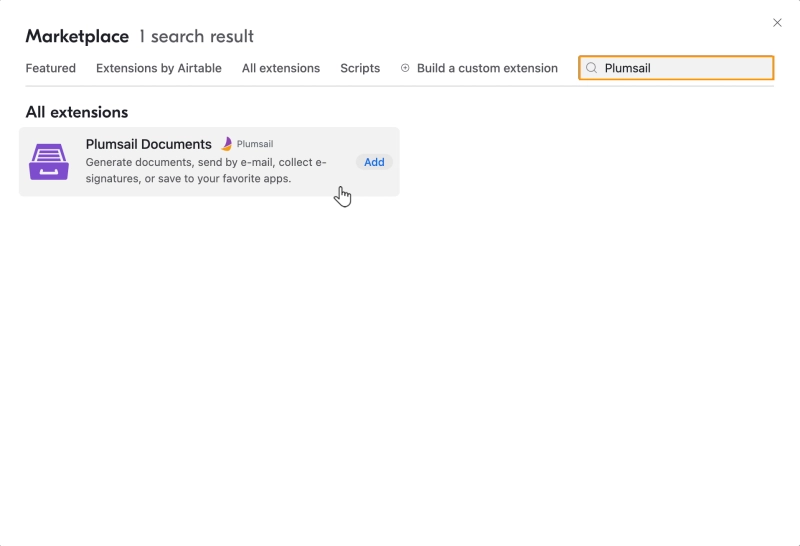
Search for Plumsail Documents and install it:
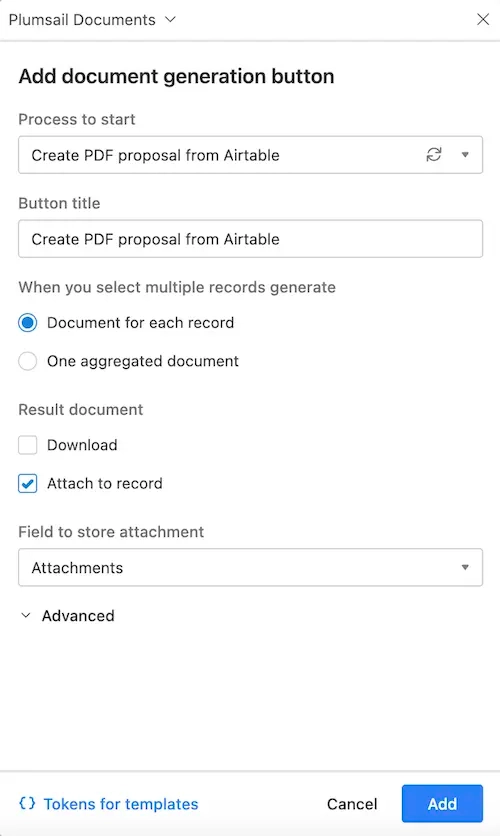
After connecting your Plumsail account, click Add document generation button. Although the button won't be part of the final workflow, we'll use it to generate the automation script in the next step.
Configure the button:
Select your Plumsail Documents process
Enter a button name
Choose whether to download the generated document or attach it to the Airtable record:
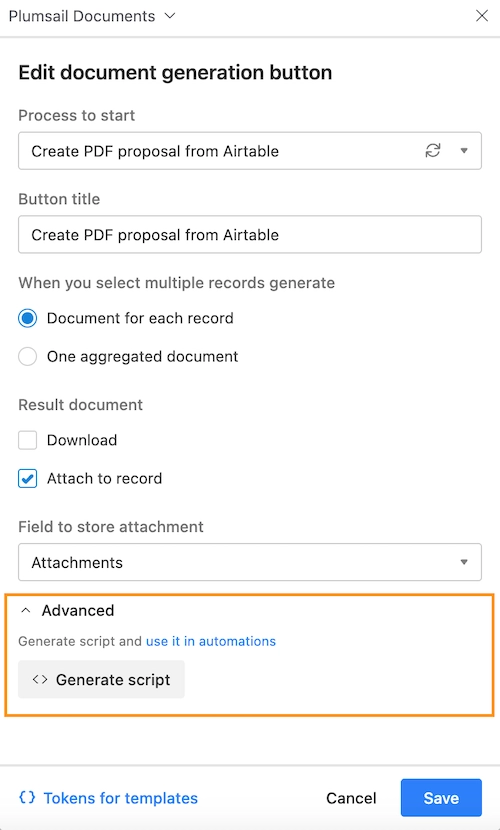
Open the Advanced section of the extension and generate the automation script:
Copy the generated script. We'll use this script in the next step to start the Plumsail Documents process automatically.
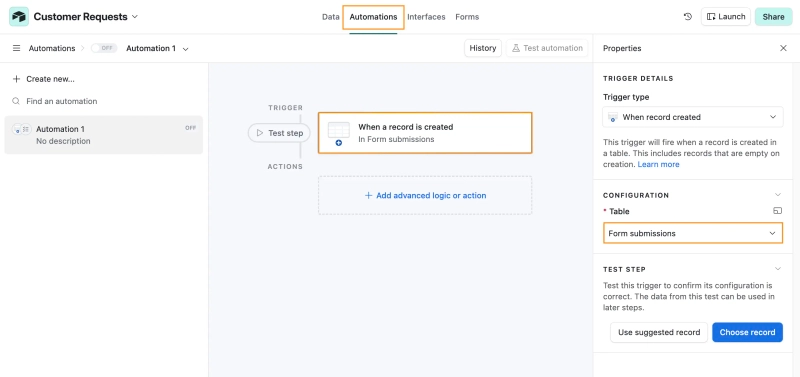
Then open the Automations page in Airtable and create a new automation. For the trigger, select When record is created and choose the Form Submissions table:
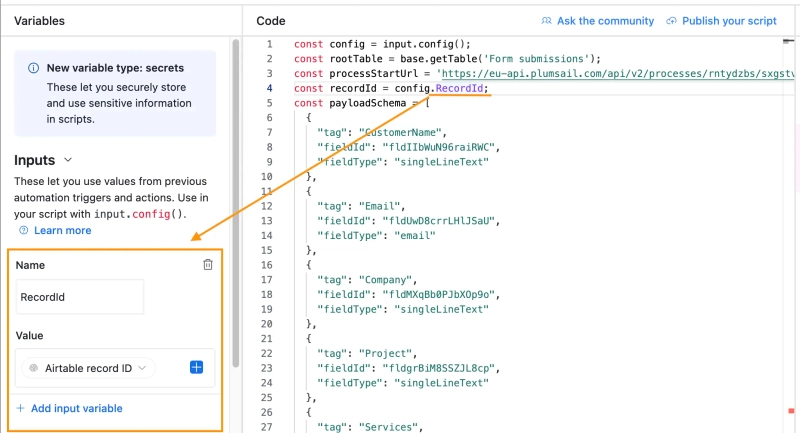
Add a Run script action, paste the generated script, and create an input variable named RecordId. Map it to the Airtable Record ID from the trigger:
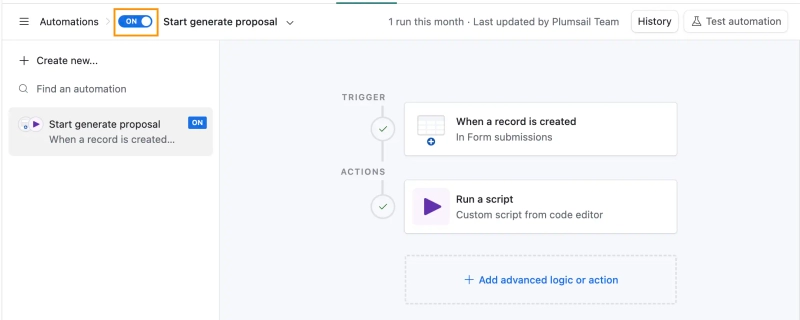
Test the automation and, if everything works correctly, turn it on:
Airtable Forms work well for many data collection scenarios. However, if you need more control over the form itself, Plumsail Forms can be a better choice.
With Plumsail Forms, you can build fully customized forms with conditional logic, advanced layouts, file uploads, electronic signatures, and additional features that aren't available in Airtable's built-in forms.
Plumsail Forms integrates seamlessly with Plumsail Documents, allowing you to generate proposals, quotes, contracts, invoices, and other PDF documents automatically after a form is submitted.
For example, see how Northern GeoSeptic uses Plumsail Forms together with Airtable and Plumsail Documents to automate proposal and site report generation.
We use Plumsail Forms for everything from client onboarding to job applications. This data now feeds directly into Airtable without me lifting a finger.
The combination of Airtable Forms and Plumsail Documents allows you to automatically generate professional PDF proposals from every completed form.
The same approach works with quotes, contracts, reports, and many other business documents. Once configured, the entire workflow runs automatically, saving time and reducing manual work.
Start your free 30-day trial of Plumsail Documents and build your first document automation. Need help getting started? You can always book a free introductory call with our team.
Related posts
Customer storyDocumentsFormsAirtable
Last updated: Sep 20
Airtable forms and document generation for proposals and site reports at Northern GeoSeptic
Learn how Northern GeoSeptic reduced manual data entry by using Airtable, Make, and Plumsail for proposals and site reports.
Todd Heiman
Owner at Northern GeoSeptic
FormsAirtable
Mar 12
Airtable form examples: intake, feedback, order forms and more
Find the Airtable form examples designed with Plumsail Forms and get inspired to create your own forms for Airtable bases.
Margarita Nikitina
Customer Support Engineer
DocumentsAirtable
Feb 27, 2024
Create and manage documents in Airtable Interfaces and Automations
Plumsail Documents extension for Airtable got new feature for document creation and management in Airtable Interfaces and Automations.






 Documents
 FormsAirtable