 DocumentsAirtable
Last updated: Jun 25
How to generate Excel documents from Airtable records automatically
Learn how to generate an Excel file from an Airtable record using a Plumsail Documents extension button inside your table.
 DocumentsSharePoint
 Power Automate
I've come across a bunch of tickets where customers asked how to populate images into Excel using Power Automate, and this seems to be a common question in the Power Automate community. Here are a few examples of such requests:
I am trying to build a flow that pulls a selected item from a SP list and the attachments (Photos) and insert them into an excel file. ... I'm just a bit stuck on best process and actually getting the images into excel itself.
I am trying to make a flow where, on submission of a Microsoft Form (which contains text and pictures) all the data is added to an excel sheet based on specific user inputs to my OneDrive business folder.
That's why I decided to compile everything into a blog post, where I explain how to use the object operation #picture in an Excel template to populate images from a SharePoint list and Microsoft Forms submissions.
In the article:
If you prefer to watch the full process in action, here's a short video based on this article:
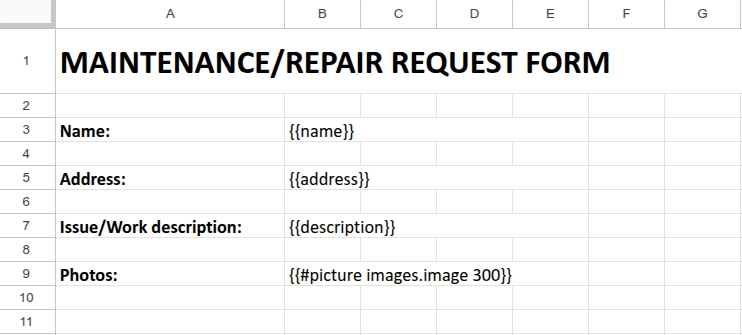
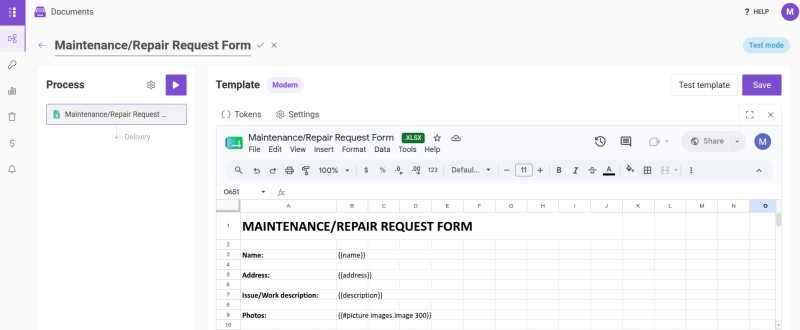
We need to prepare an Excel template, which will work as a Maintenance/Repair request form. We'll pull information from a SharePoint list containing such requests or from a Microsoft Form and insert it into this template.
To insert pictures, we'll use the picture operation and some size parameter.
Since we'll insert two or more images, we need to use an array of images. To define an array in the Excel template, we use a token with a dot. Please review the Excel templates syntax.
{{#picture images.image 300}}
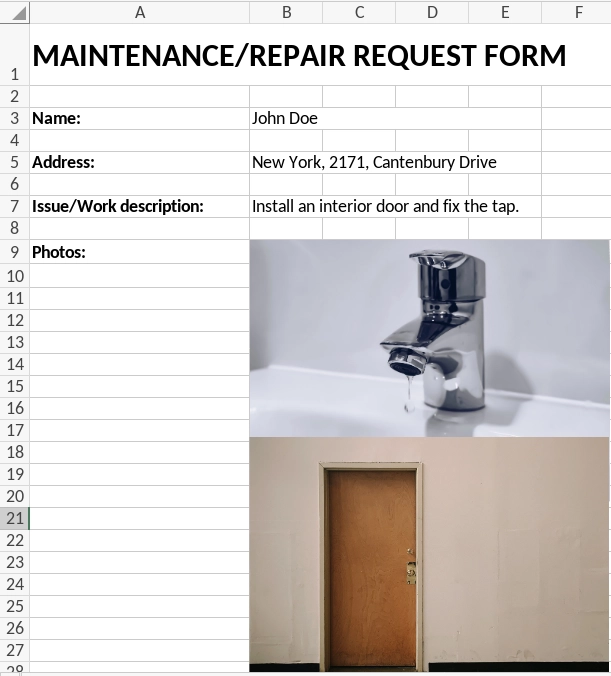
The result looks like this:
The first case is getting data from a SharePoint list and using the data to create a Maintenance/Repair request Excel file.
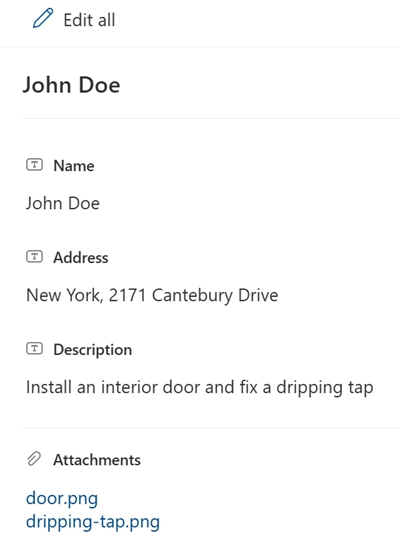
The SharePoint list item contains the name of the client, their address, a description of the issue, and a few photos as attachments.
The entire flow looks like this:
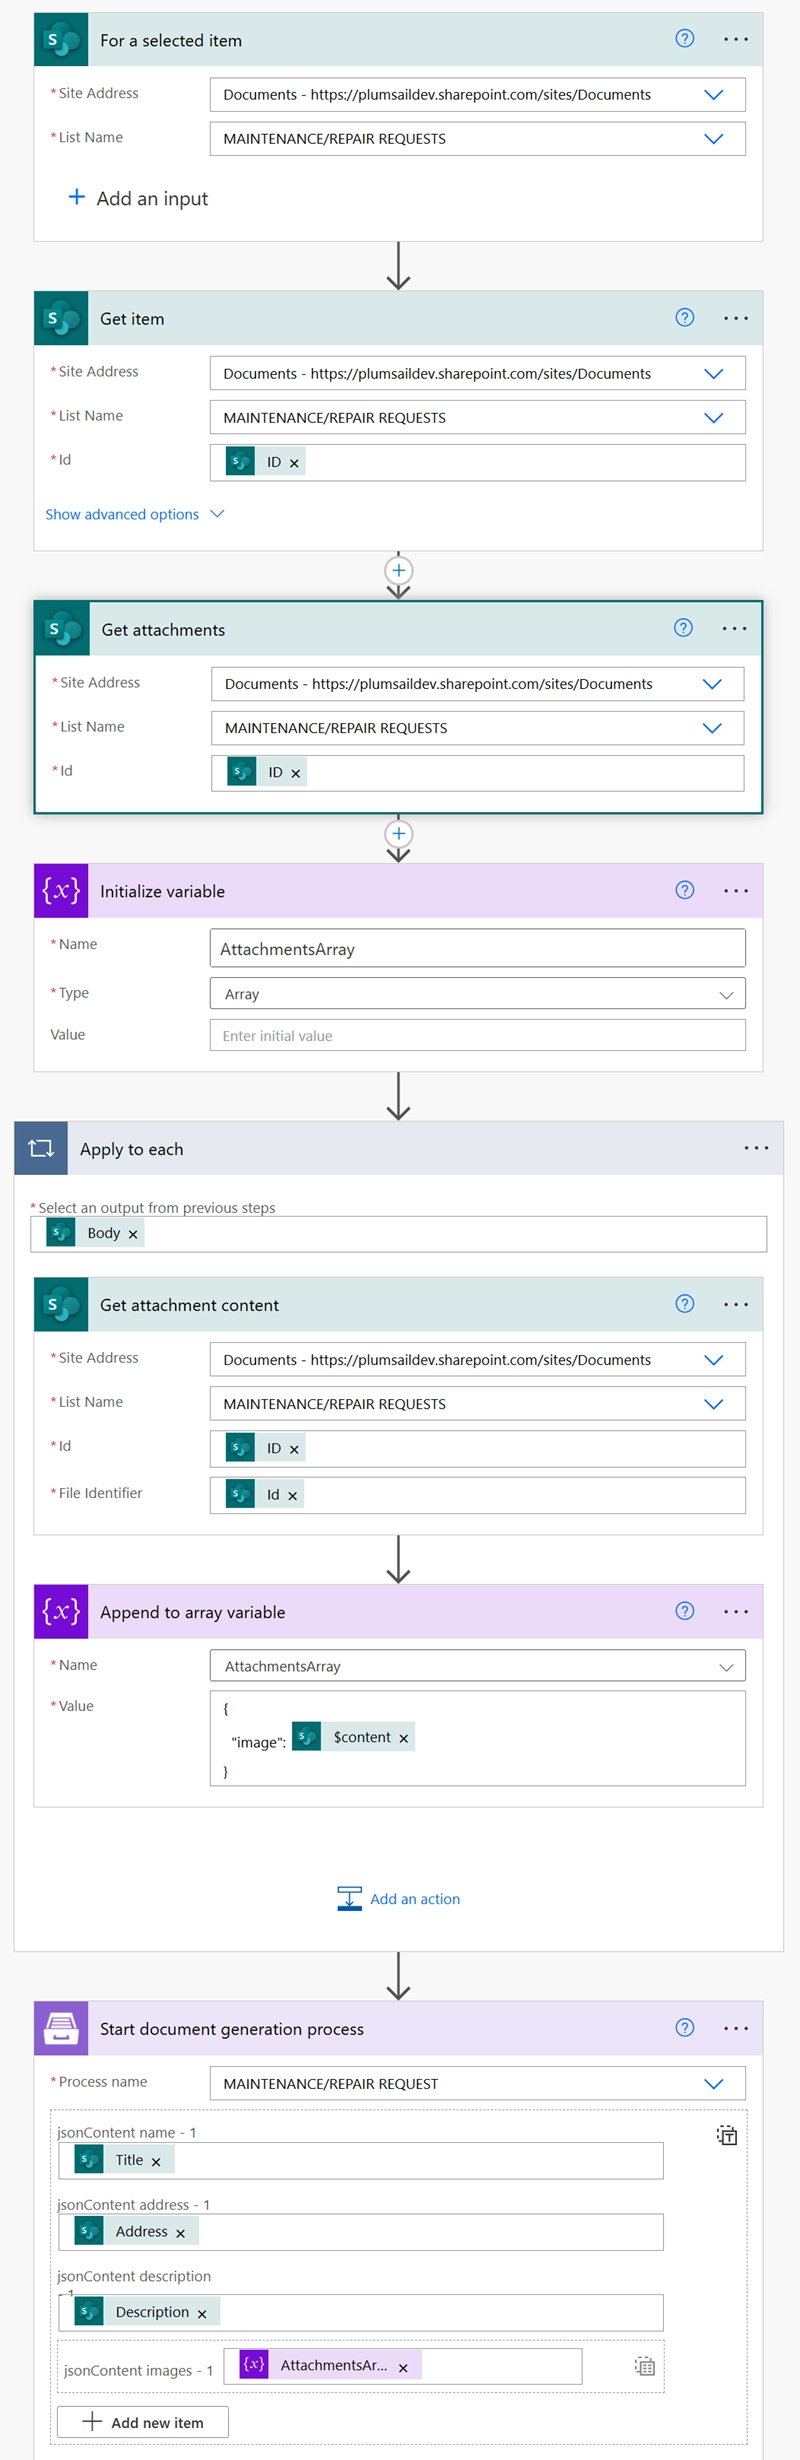
Let's review the flow in detail.
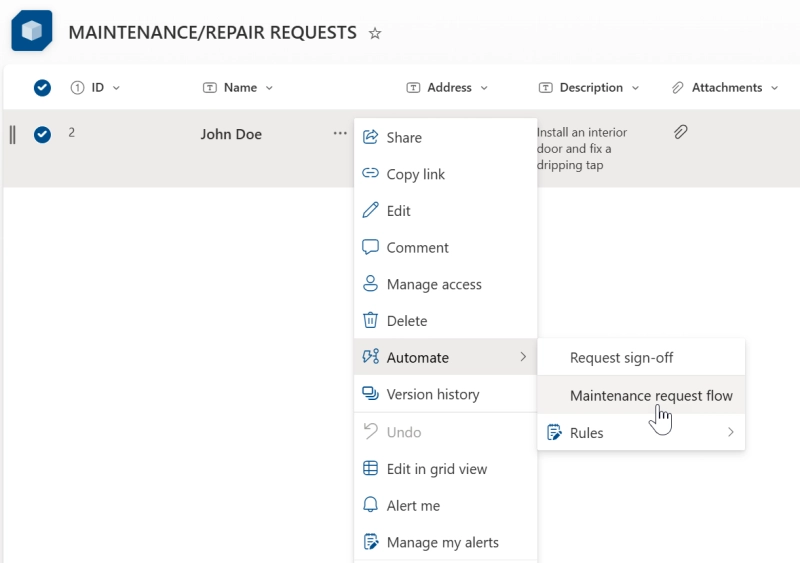
Our flow is designed to be started from the SharePoint list itself: open the SP item menu - Automate - select the Power Automate flow.
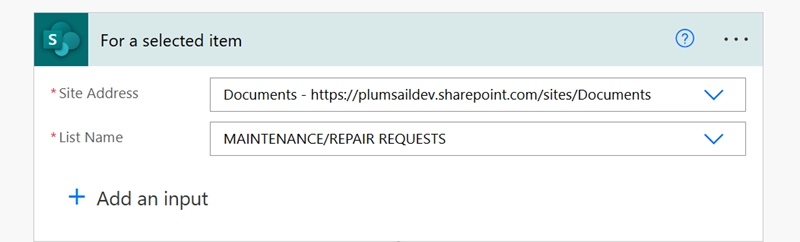
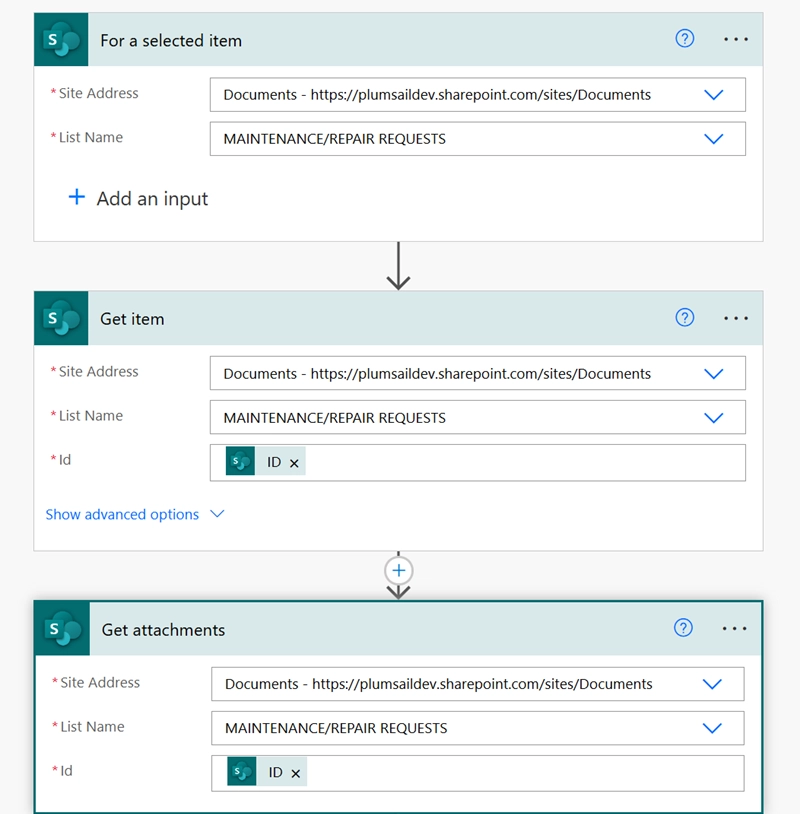
To link the flow with the SharePoint list we use For a selected item trigger.
Next, we're getting information about the selected item using Get Item and Get attachments SharePoint actions:
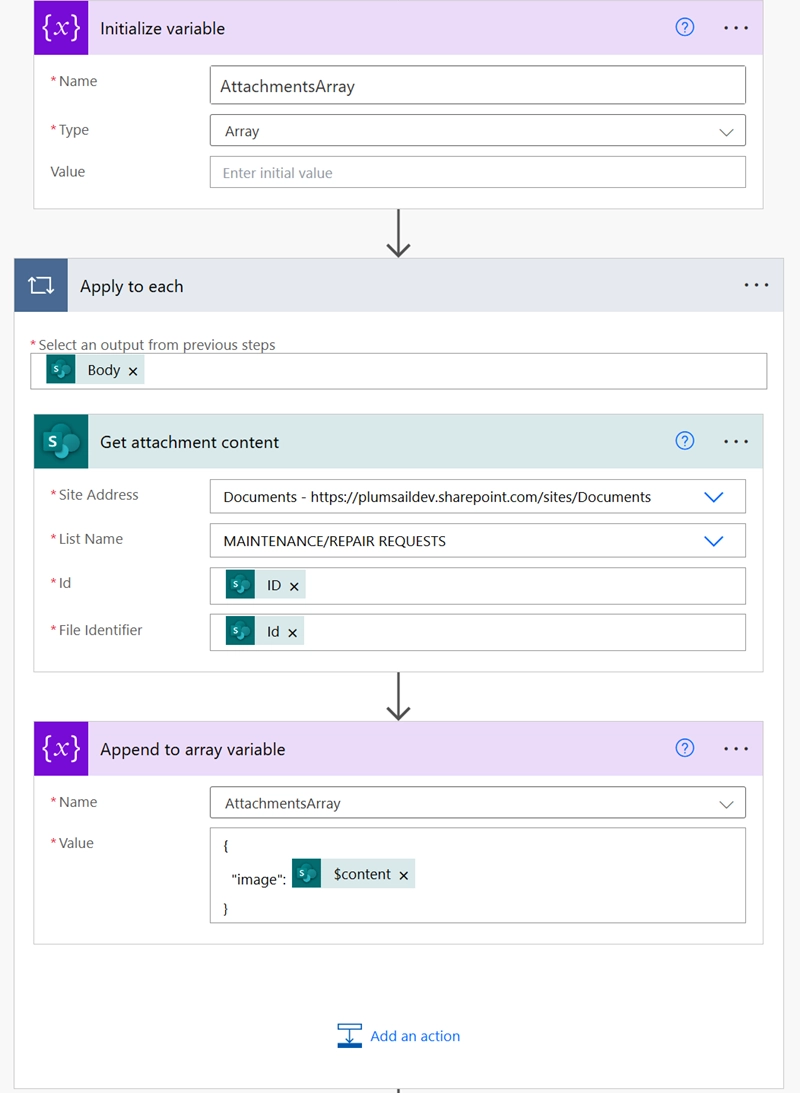
To insert the image attachments into our XLSX template, we need to store them in an array variable. We initialize the variable, retrieve the attachments content, and append it to the array in a loop.
The last step of the flow is Start document generation process.
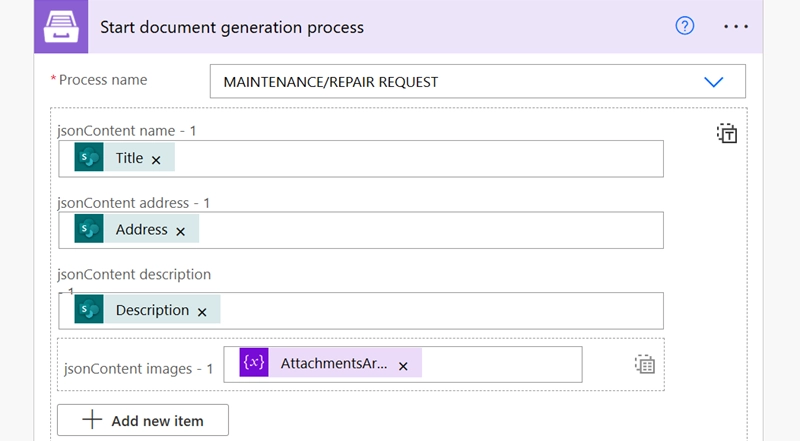
This action starts a Documents process that creates and sends the generated Excel file via Outlook. To configure the process follow the steps below.
Register or log in to your Plumsail account to start configuring the process.
Then, go to the Processes section in your Plumsail account, click Add process, and select Blank document to start from scratch:
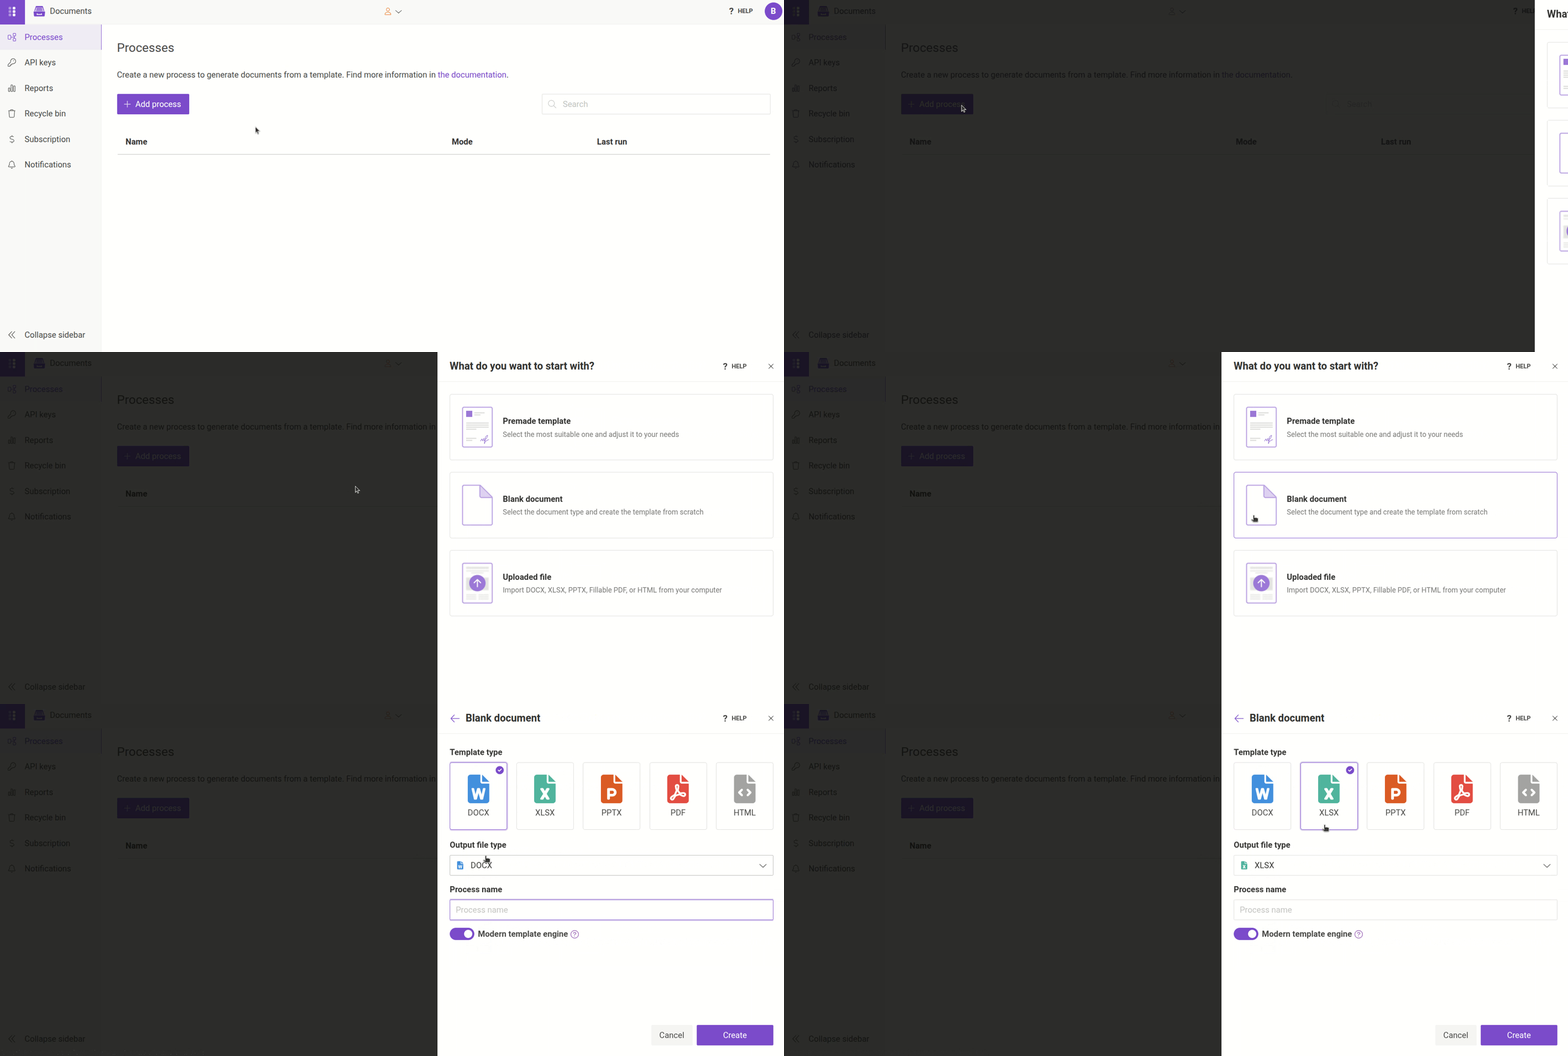
Name the process, switch to XLSX template, click Create, and proceed to the Editor.
Here we upload the Maintenance/Repair request XLSX template:
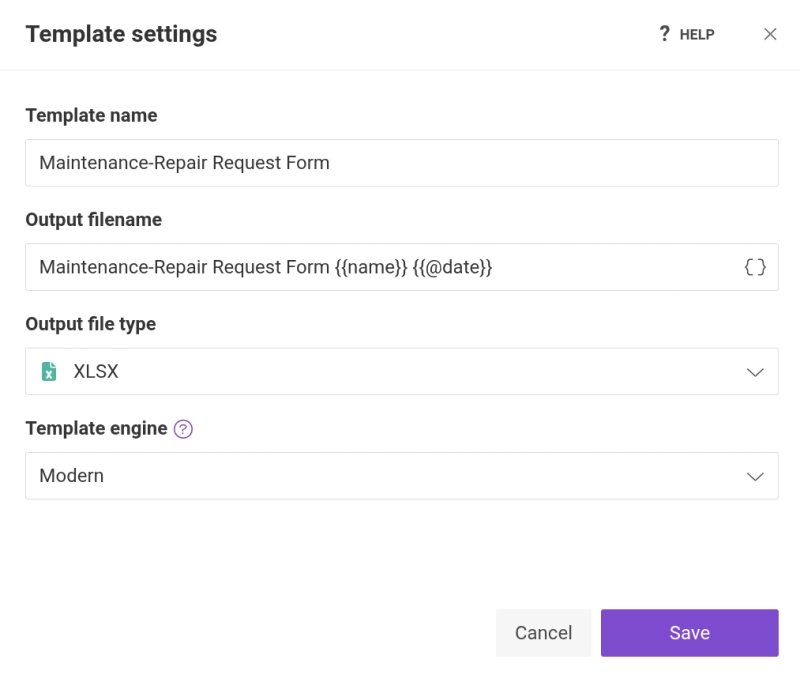
And configure the settings:
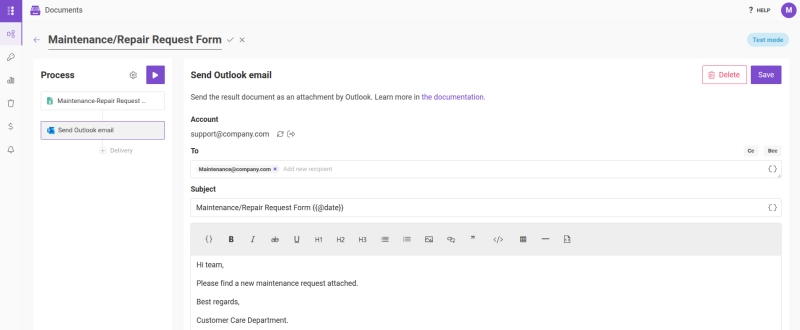
The next step is Delivery. We will deliver the result document via Outlook delivery. See all the available delivery methods here.
That's all for configuring the process. You can find more details about Processes in the documentation.
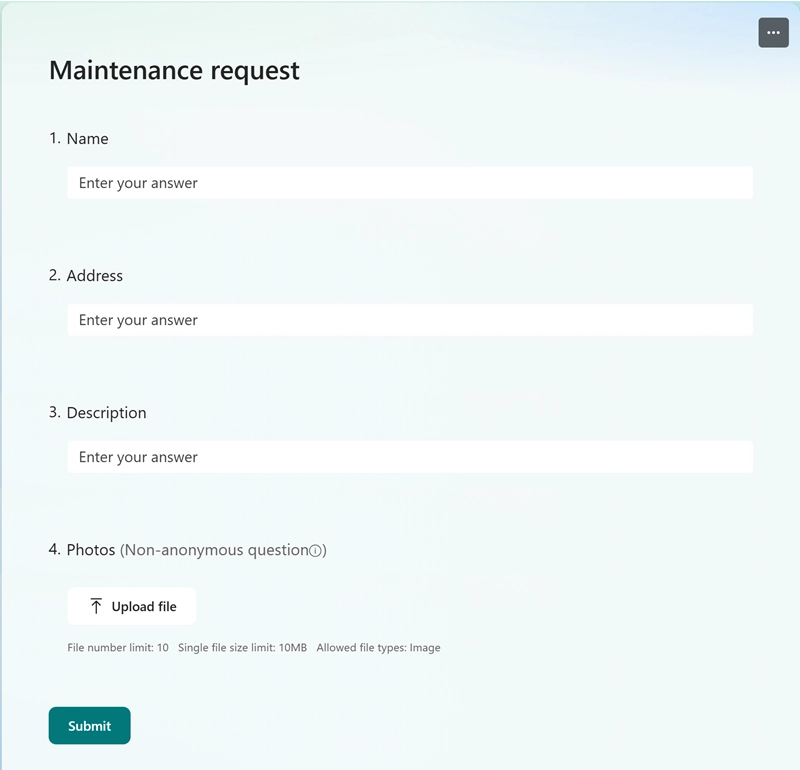
The second case is getting data from a Microsoft Form and using the data to create a Maintenance/Repair request Excel file.
The Microsoft Form looks like this:
And this is the entire Power Automate flow:
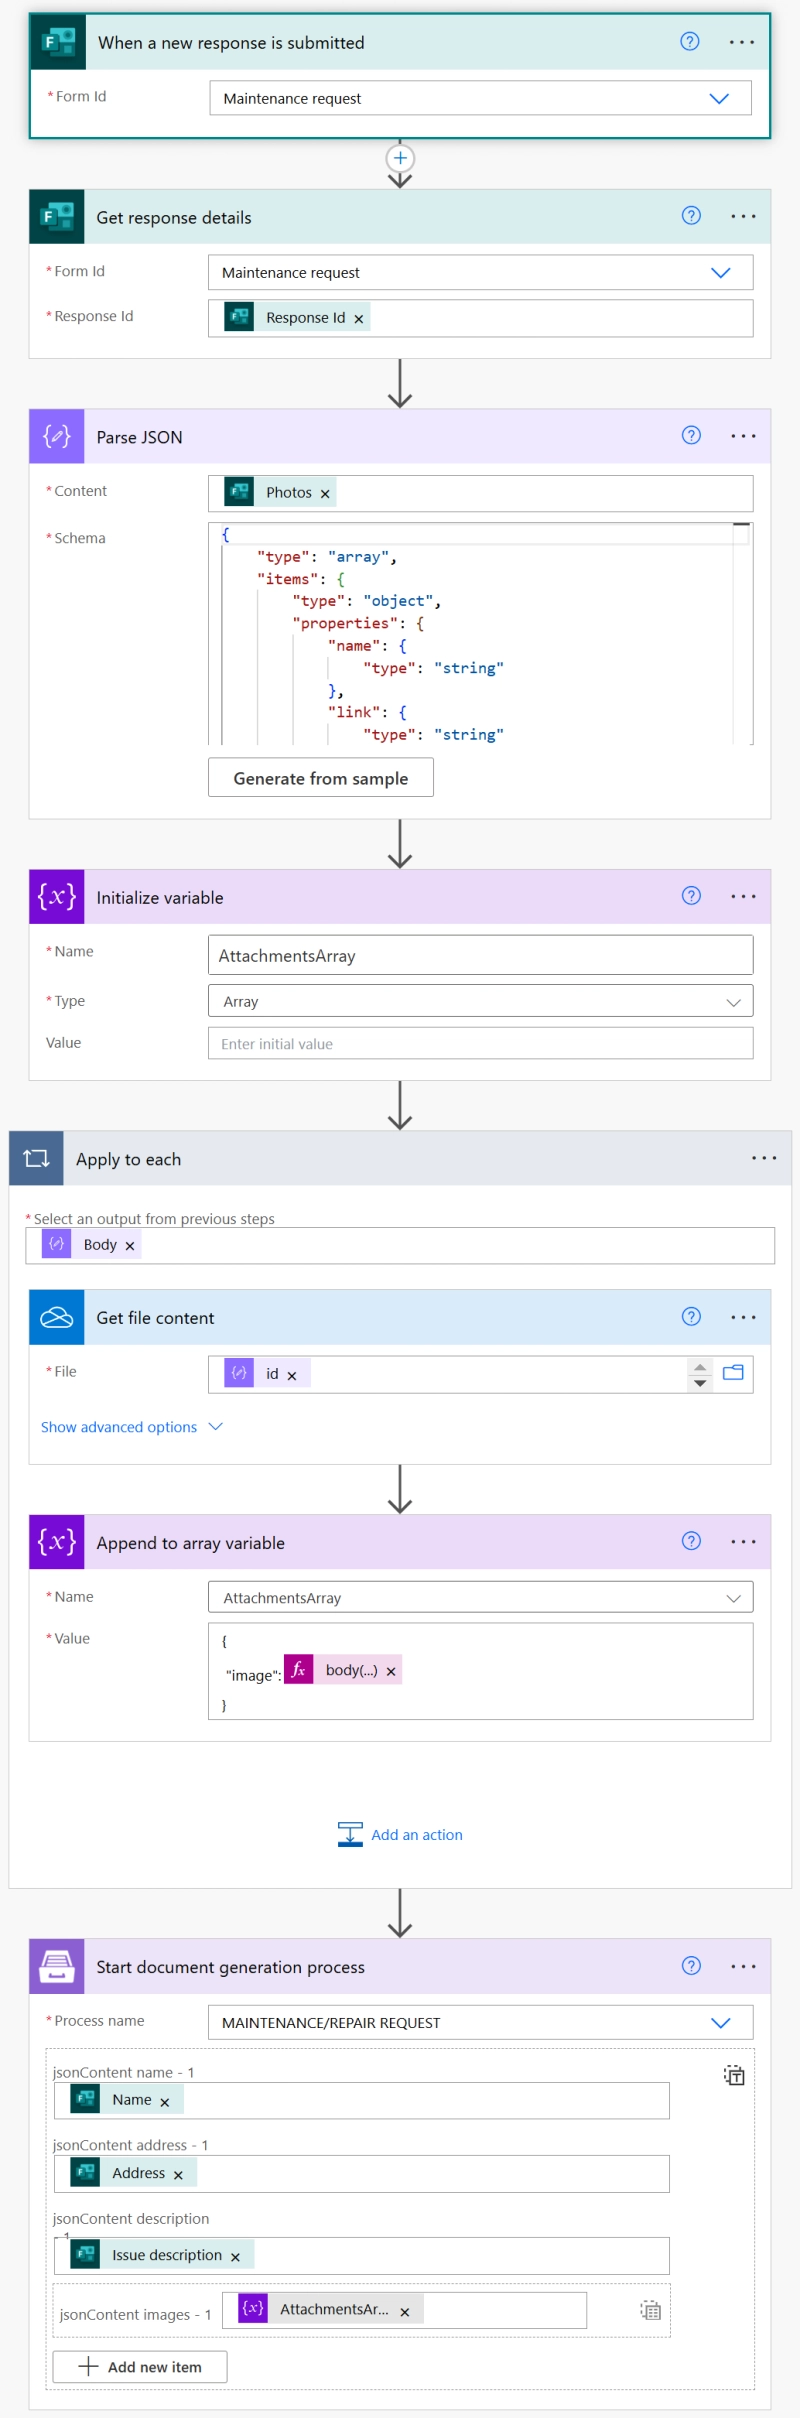
There are some new actions in this case. Let's review them.
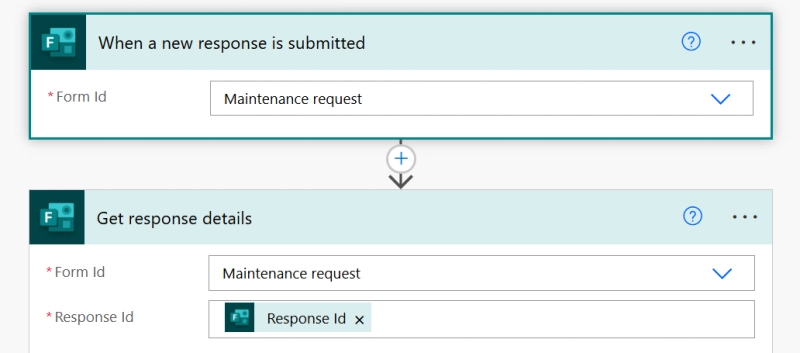
The flow starts when a Microsoft Form is submitted. For this we use When a new response is submitted trigger:

Next, we're getting the response details using Get response details action:
We add Parse JSON action to get the image dynamic content.
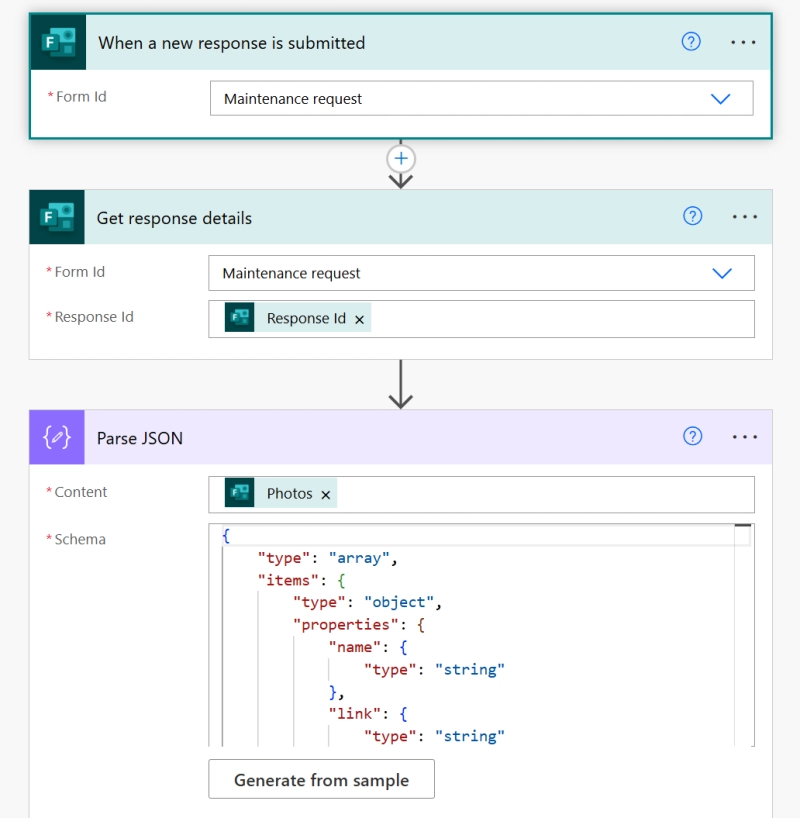
We generate the scheme from a sample. To get the sample we can run our flow with the Get response details action and copy the line from the Photos field.
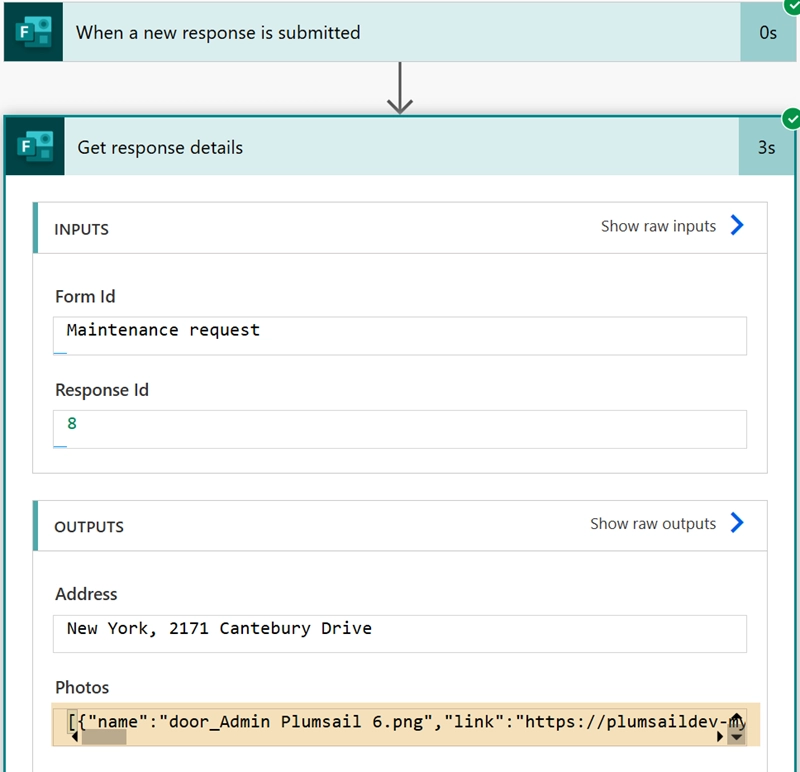
Then click Generate from sample in the Parse JSON action and insert the copied sample JSON payload.
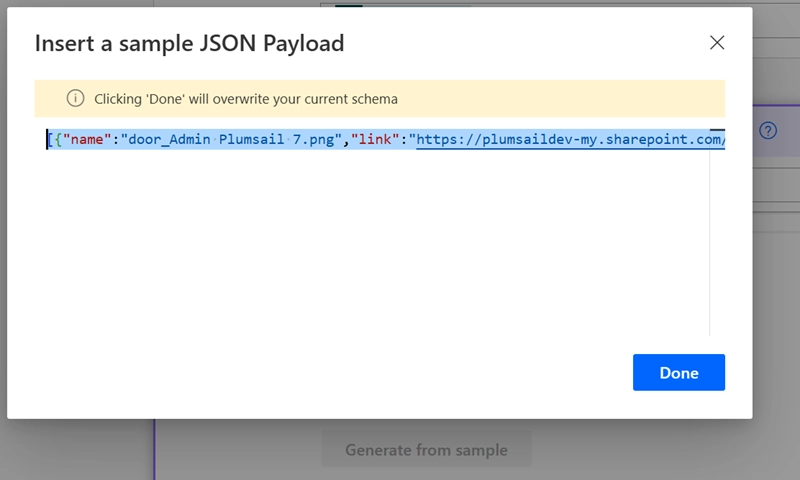
This flow also includes an array variable, similar to the case with a SharePoint list.

In this step, we retrieve the image file content using the OneDrive for business connector and use id dynamic data from the Parse JSON action. Power Automate automatically adds Apply to each action.

Then we append the image content to the array variable using the following expression:
body('Get_file_content')['$content']
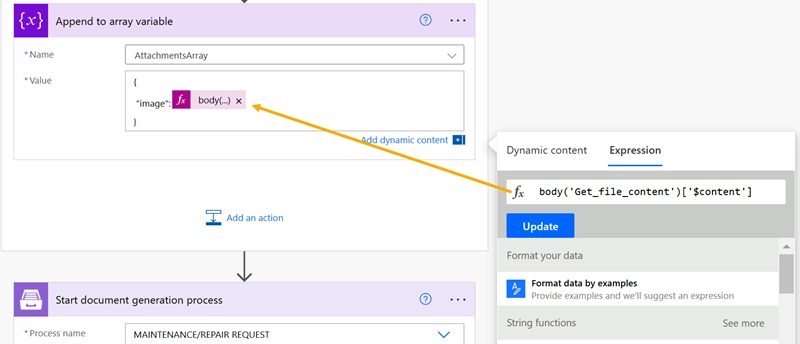
This is the same action as we use with the SharePoint list example. However, in that case, we select dynamic content from a Microsoft Form. Also, click on the button and then select the array variable.
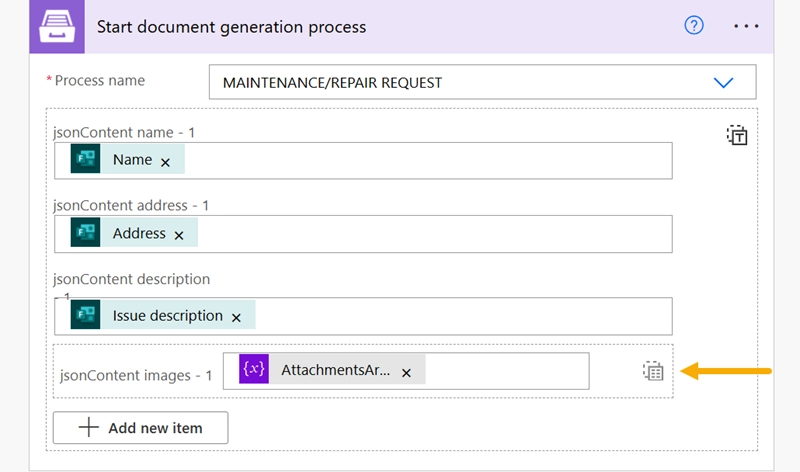
By following these steps, you can efficiently generate Excel documents with embedded pictures from SharePoint lists or Microsoft Forms submissions. Whether you're managing maintenance requests, processing surveys, or handling other tasks, these methods ensure accuracy and automation.
If you're new to Plumsail Documents, register an account and try the steps yourself. Feel free to book a call with our team to discuss the product and your requirements.
DocumentsSharePointPower AutomateDocumentsAirtableLearn how to generate an Excel file from an Airtable record using a Plumsail Documents extension button inside your table.
DocumentsMakeGenerate one PDF from a single row or multiple PDFs from a list of rows in Google Sheets using Make.
DocumentsPower AutomateA step-by-step guide to converting JSON arrays to Excel in Power Automate using Plumsail Documents.