Turning a single SharePoint list item into a document is fairly straightforward. The challenge starts when you want to pull multiple SharePoint list items, filter them, and display them together in one document.
I'm trying to create a scheduled flow to export items from my SharePoint list into a Word document ... I read something about composing but I'm not quite sure how I can apply it here. Can someone please list out the steps for the flow that I should build?
I want to setup a Flow (recurring) that aggregates all of the list items for the current week and sends them in an email ... I'm having a little trouble wrapping my head around how to do this. Any suggestions?
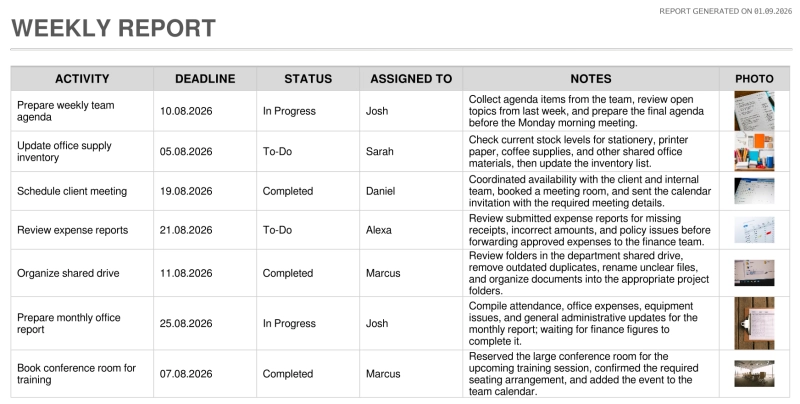
In this article, we'll show you how to use Power Automate and Plumsail Documents to collect multiple SharePoint items and images, pass them to a Word DOCX template, and generate a single report.
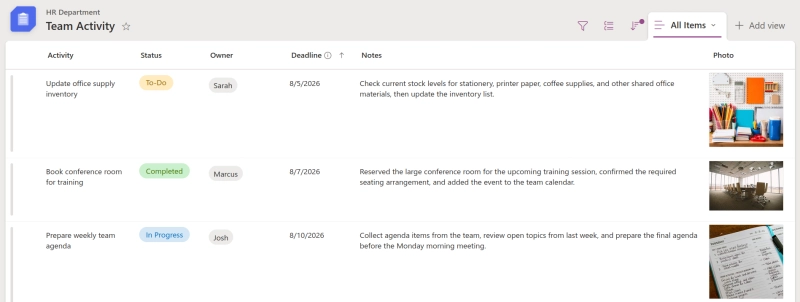
We'll start our example with a SharePoint list that contains our team's activities. Each item represents one activity and includes fields such as:
Activity
Status
Owner
Deadline
Notes
Photo
As you can see, the columns don't all have to be simple text fields. For example, Status can be a Choice column, Owner can be a Person column, and Photo can be an Image column.
This last case can be useful when you need to associate one image with each item. However, if you need to store several files or images for an activity, you should consider using an attachments column instead.
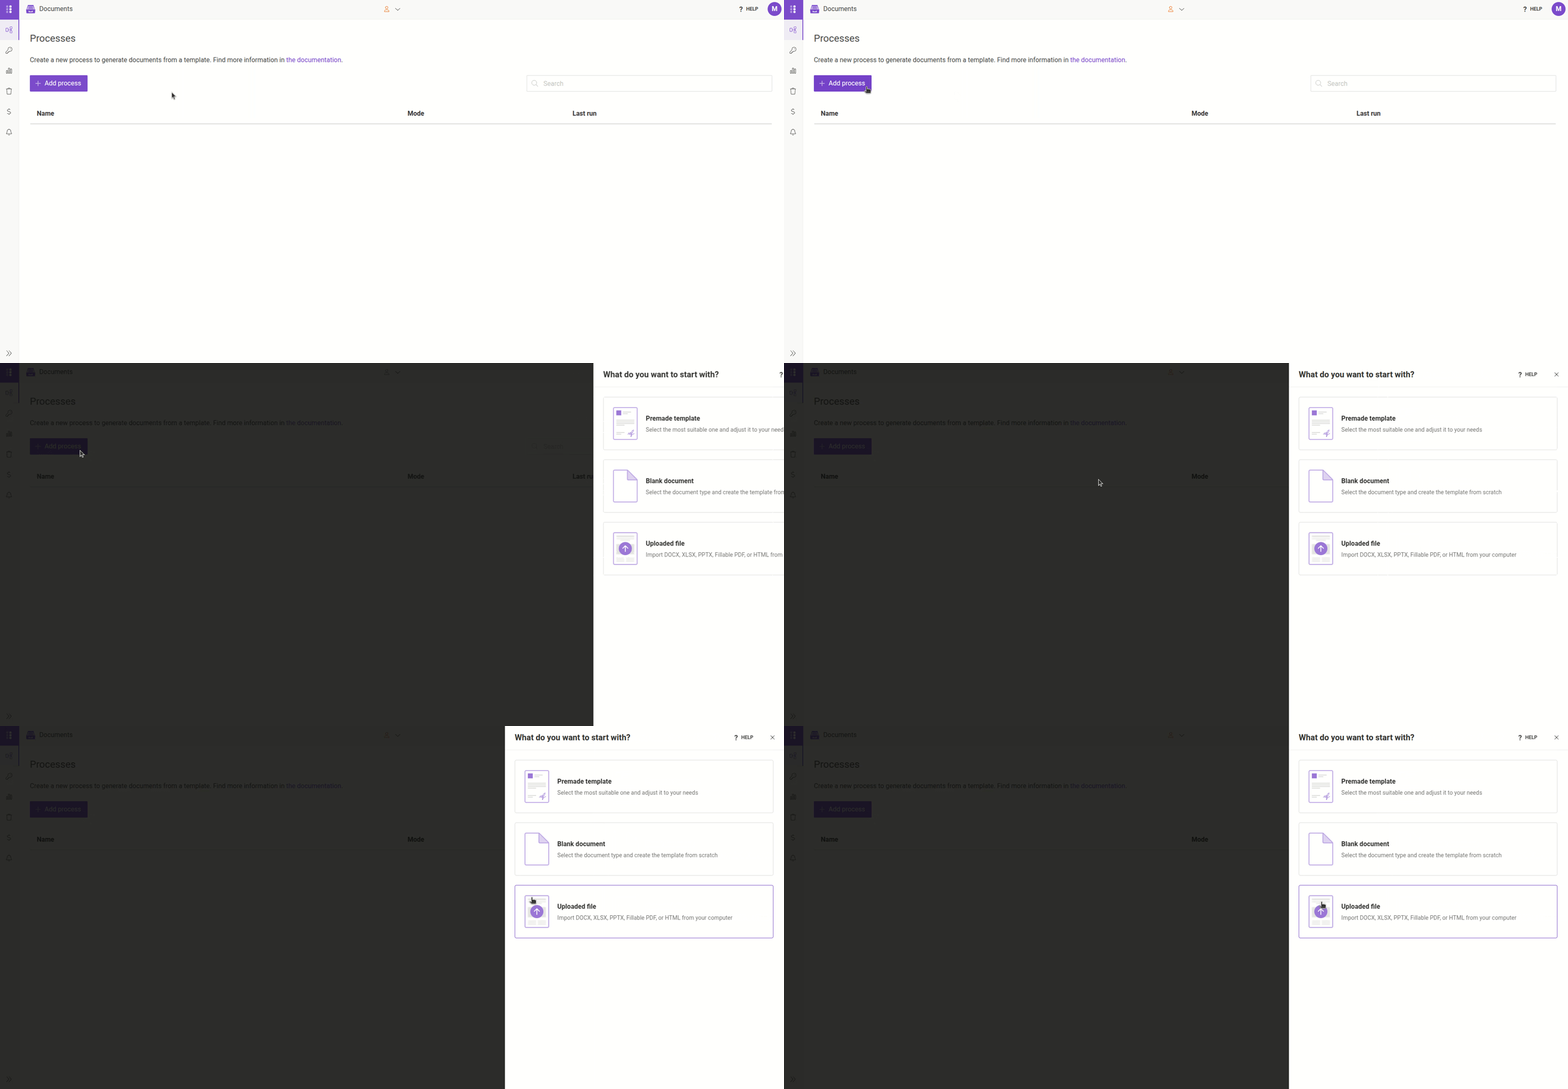
Once the list is ready, we can create the Word template that will turn these items into a report.
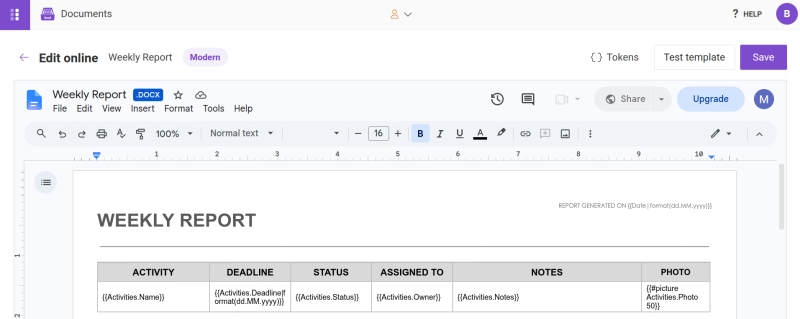
Once the template opens in the editor, you'll see the fields that will be populated with data from SharePoint:
The values inside curly brackets {{ }} are tokens. When Power Automate sends the data to the process, these tokens are replaced with the corresponding values.
You can also use object operations to format the data before it appears in the document. In our example:
Deadline and Date use the format function to keep dates readable and consistent.
Photo uses the picture operation to insert the image and control its size.
The most important part of the template is the table. Because we want to include several activities in the same document, the table will work as a repeating table. Each SharePoint item becomes one row, so the resulting document contains all activities together rather than generating a separate document for every item.
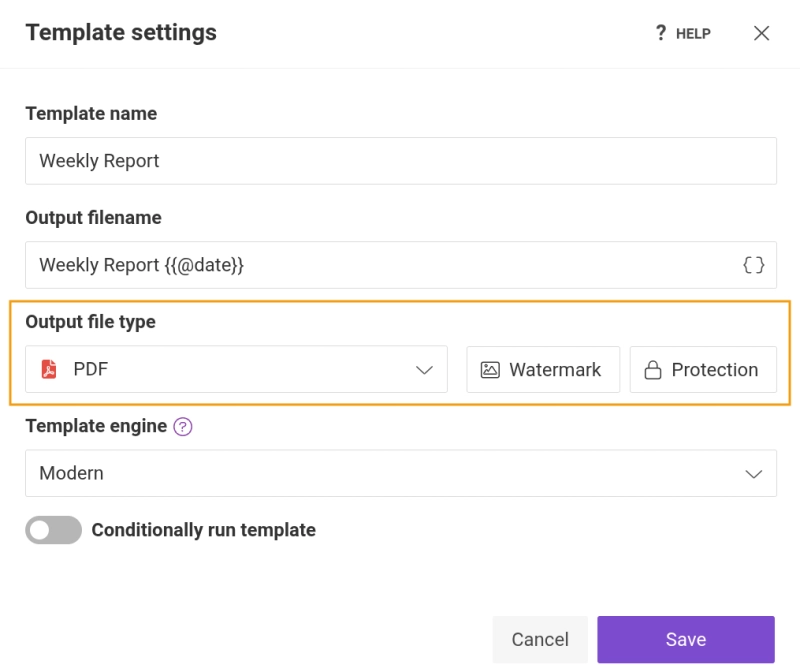
At this point, you can also choose to generate the final file as a PDF. Open the template settings and change the output format if needed:
Save the template when you're ready, then move to Power Automate.
Now let's build the flow that will collect the data and send it to our Word template.
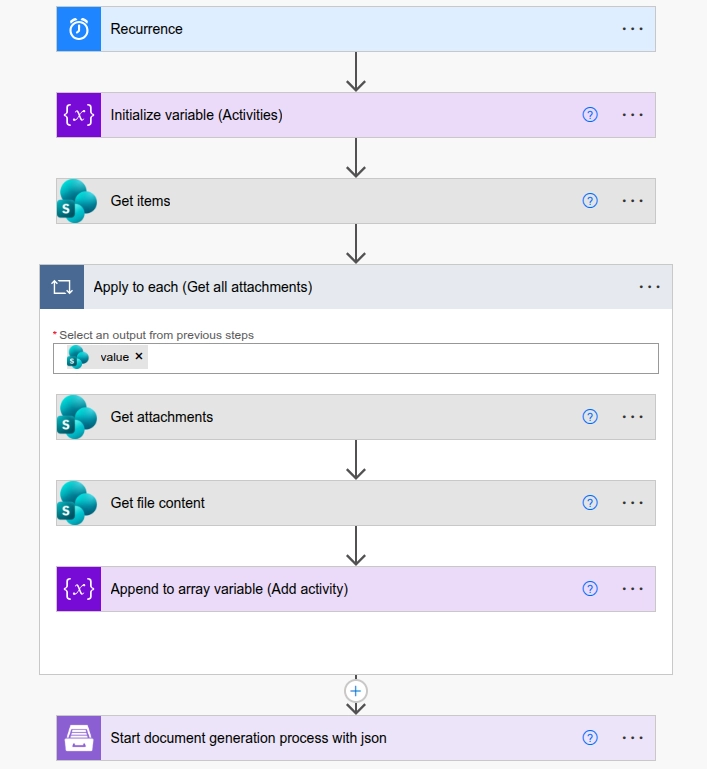
The complete flow will look similar to this:
We'll go through each part step by step.
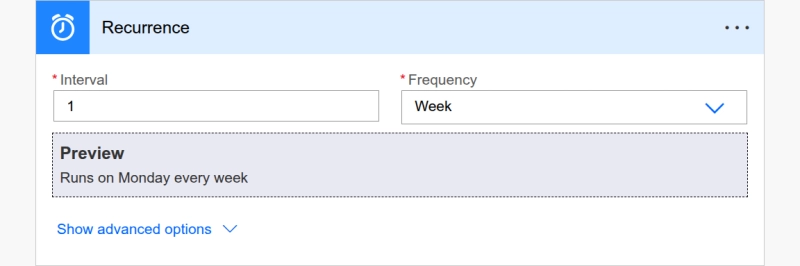
Because we're creating a weekly report, we'll start with a Recurrence trigger. In this example, the flow runs every Monday at 7:00 AM.
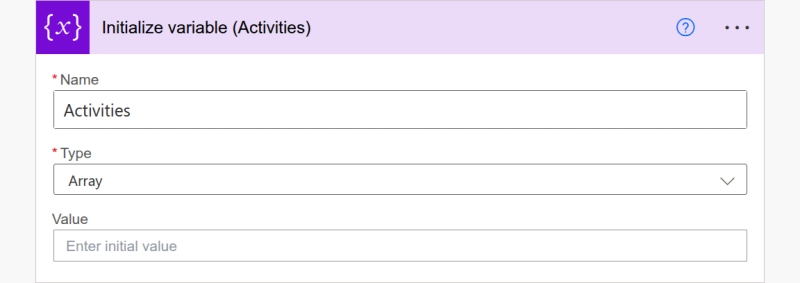
Next, initialize an Activities variable with Array type. We'll use it to collect the SharePoint items before sending them to the document generation process.
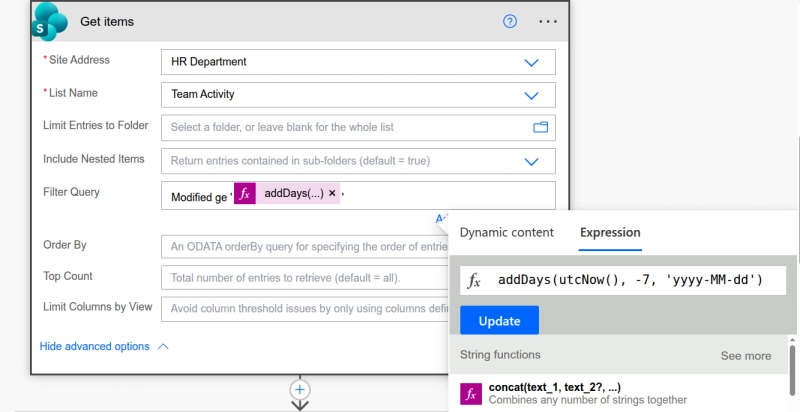
From the SharePoint connector, add a Get items action. Select the site and the list where your activities are stored.
This action can return all items from the list, but you probably don't want every activity in a weekly report. You can use the Filter Query field to retrieve only the items that belong to the reporting period.
For example, the following filter and expression retrieves items modified during the last seven days:
Modified ge '@{addDays(utcNow(), -7, 'yyyy-MM-dd')}'
You can adjust the filter to match your reporting requirements. For example, to retrieve activities with a deadline within the next seven days, you could use:
Deadline ge '@{utcNow()}' and Deadline le '@{addDays(utcNow(), 7, 'yyyy-MM-dd')}'
Once the items are retrieved, we can prepare their data for the Word template.
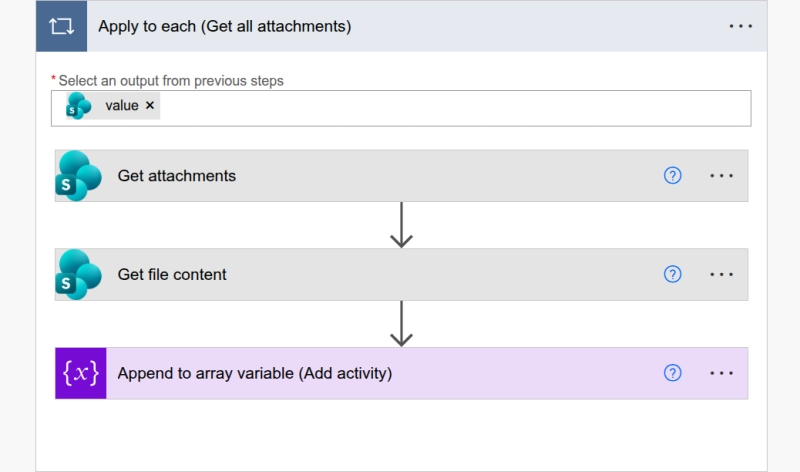
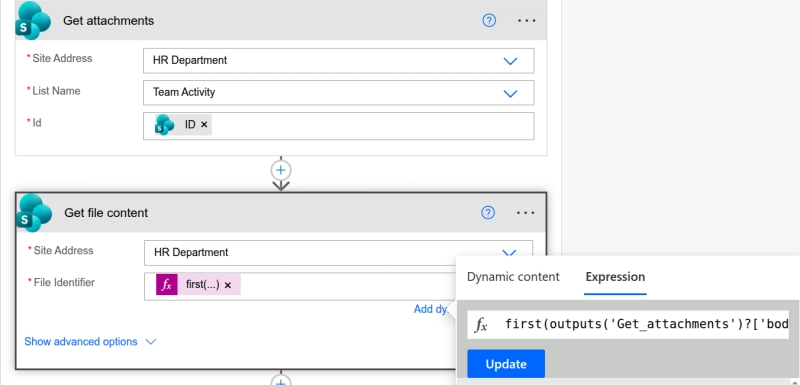
For this example, start by adding the Get attachments action. Select your SharePoint site and activity list, then use the ID from Get items. Power Automate will automatically create an Apply to each loop for the returned items.
Inside the loop, add Get file content. Select your SharePoint site again and use the following expression as the File Identifier: first(outputs('Get_attachments')?['body'])?['Id']
This retrieves the first attachment associated with the item. In our example, we're only expecting one photo from the column we created, so this is enough, but if your items have multiple attachments, you'll need to identify the image you want to retrieve, for example by checking its file name or extension.
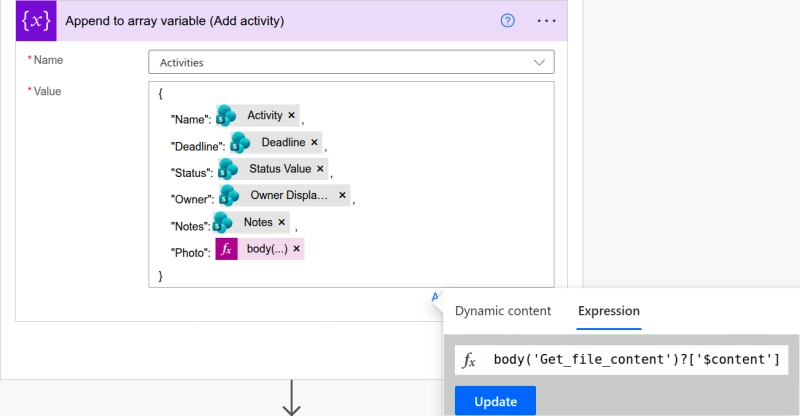
Now we can build the object that will represent each activity and append it to the Activities array.
For the Photo value, use: body('Get_file_content')?['$content']
This expression passes the actual file content to the template so that Plumsail Documents can render the image.
At this point, the Activities array contains the SharePoint items we want to include in our report. Now it's time to send them to the template.
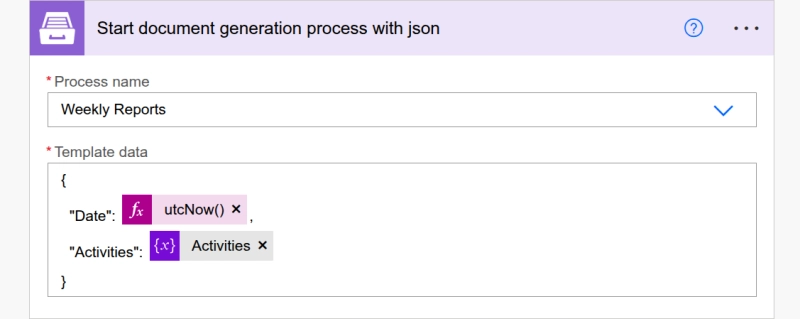
Add the Start document generation process with json action from the Plumsail Documents connector. Select the process you created earlier and pass the Activities variable as the template data.
You can also include other values, such as the report date.
When the process receives the array, the table in the template will populate each item and create a new row.
This is the key to putting multiple SharePoint items in one Word document: instead of starting a document generation process for every list item, you collect the items into an array and pass the whole collection to the template.
Save the flow and run a test. Check that the expected items are included, that your date filters work correctly, and that images appear as expected.
A weekly activity report is just one example of what you can do with this approach. The same Power Automate SharePoint list to PDF workflow can be replicated to create:
Project status reports
Sales reports
Newsletter digests
Product lists
Invoices and order summaries with multiple line items
Customer or employee reports
Meeting summaries
And although Word is a natural choice for reports, you can use repeating data with Excel and PowerPoint templates as well.
Power Automate makes it easy to retrieve SharePoint list items, but the real flexibility comes from deciding how to use those items later.
By storing the results into an array and passing them to your Plumsail Documents template, you can turn multiple SharePoint list items into one final document instead of generating a separate file for every record. And once the basic flow is in place, you can complement it with filters, images, additional calculations, delivery options, and different layouts.
This makes it a practical way to generate a report from a SharePoint list automatically, whether you need a weekly team report, a project summary, or another repeating document.
Related posts
DocumentsPower Automate
Last updated: Jun 11
Power Automate: populate a Microsoft Word template action step by step
Learn how to use the Populate a Microsoft Word Template action in Power Automate. Follow a step-by-step guide, understand its limitations, and explore options for advanced document generation.
Anton Cox
Customer Support Engineer
DocumentsSharePointPower Automate
Jul 22
How to use SharePoint images in Power Automate
Learn to retrieve SharePoint images and use them with Plumsail Documents to generate branded Word and PDF reports automatically.
Milagros Bunda
Customer Support Engineer
DocumentsAirtable
Last updated: Jun 22
Create PDF from Airtable records with image attachments. Step-by-step guide
Discover how to create and generate PDFs from Airtable records, including images, using Plumsail Documents. Follow our step-by-step guide.



 Documents
 Power Automate