HelpDesk
Mar 13, 2025
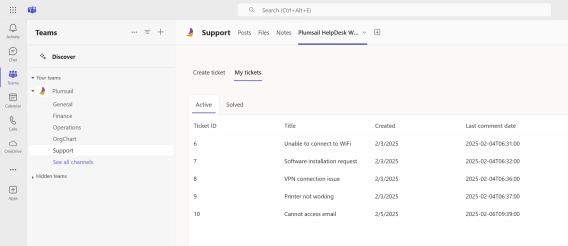
Microsoft Teams Ticketing System
Learn how to efficiently organize and manage Plumsail HelpDesk ticketing system directly within Microsoft Teams.

If you are already using Microsoft 365 in your organization and need a solution for an internal support system, SharePoint help desk ticketing system might seem like a perfect next step. It allows you to track and manage incidents, problems and requests within the familiar Microsoft 365 ecosystem, whether it’s for IT Support, HR requests, or facility maintenance.
But, how to create a ticketing system in SharePoint?
In this article, I will walk you through two different ways of creating a SharePoint help desk. The first one is using native tools like SharePoint Lists, Power Apps, List Forms, and Power Automate. Then I will introduce a much easier and more powerful alternative, which is perfectly made to fit into your SharePoint and look as native as possible, Plumsail HelpDesk for SharePoint.
Both approaches will be described in this article to help you decide which one is better for you based on your current and future requirements.
When using Microsoft 365, leveraging SharePoint as an internal and external ticketing system might be a very natural and logical solution. Apart from being cost-effective, it also provides an extra layer of security as it uses Microsoft 365 stack and provides a well-known work environment for your employees.
Here are some reasons why you should consider using SharePoint as a ticketing system if you are already using Microsoft 365:

If you are looking to build a basic ticketing system in SharePoint using SharePoint lists, customized forms and create some workflows using Power Automate, it is possible. Here is the step-by-step instruction on how to do it:
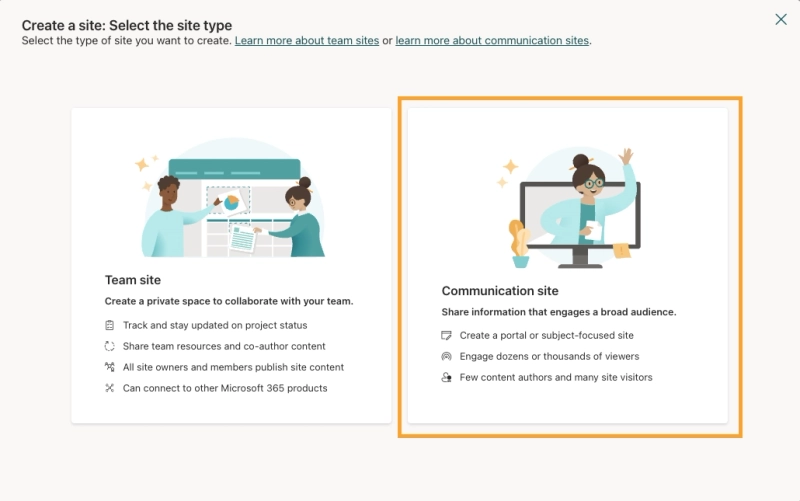
Start by creating a new SharePoint site for your help desk. I would recommend creating a new Communication site. This way you will have a help desk on a separate site, clearly marked and customized for that purpose.
After creating a site, create a SharePoint list to serve as a database for your tickets. Make sure to include all necessary fields such as:
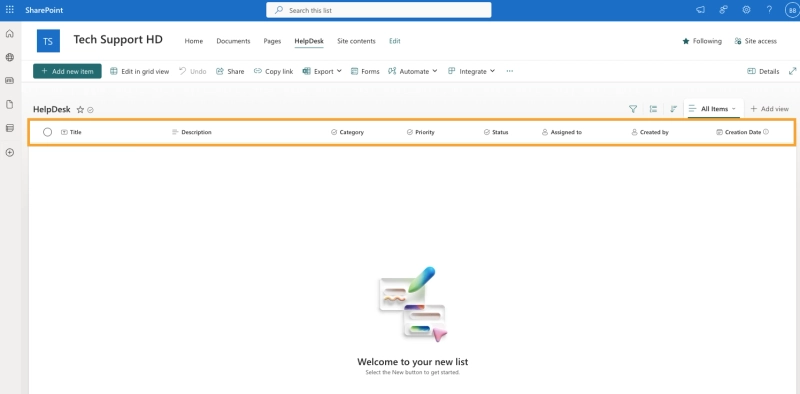
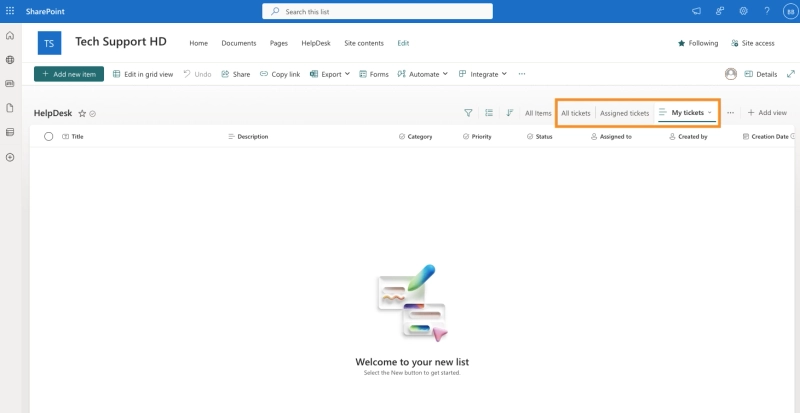
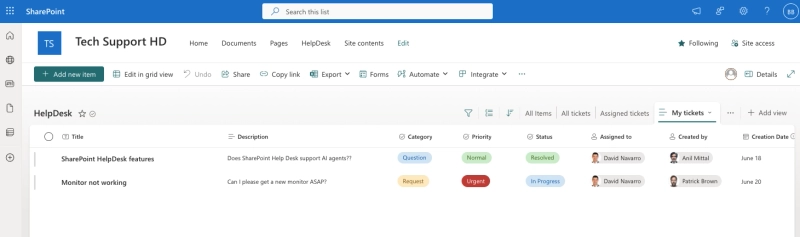
Create filtered views for different user types based on SharePoint permissions. Suggestion is to create the following views:
Use Power Automate to setup workflows and notify support agents when a ticket is assigned or when a ticket status is changed. While powerful, these workflows require some experience using Power Automate to set up a proper logic.
To build a submission form for your help desk, there are a couple of option depending on your level of experience and requirements:
SharePoint permissions setup is the key to data security and access control. Some examples:
This step is optional. You can connect to Power BI or create SharePoint pages and include web parts to display dashboards with important KPIs.
Design a nice and user-friendly home screen, include announcements and other important resources for support agents.
While it is entirely possible to create a SharePoint ticketing system from scratch, using only native tools in SharePoint, the question is how expensive it will get in terms of lower productivity costs, efficiency and time saving using automations with prebuilt and ready to go solutions. Teams might face significant challenges when the need for support grows and becomes more complex.
Here are the most common challenges:
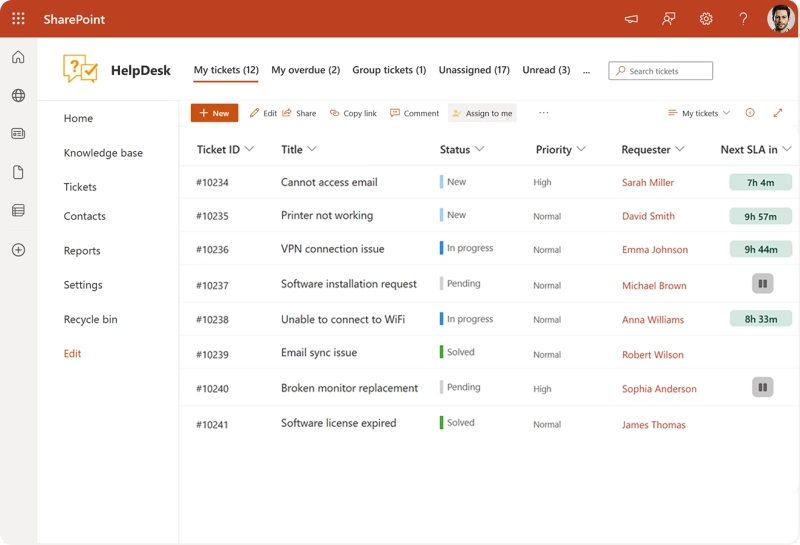
If you are looking for a faster way to implement a more advanced SharePoint help desk ticketing system, Plumsail HelpDesk is built just for that purpose, and it can be installed on your SharePoint online and on-perm 2019/SE.
Rather than building everything from scratch, Plumsail HelpDesk gives you a fully functional SharePoint HelpDesk with all necessary features right out of the box, and it will take only minutes to deploy it.
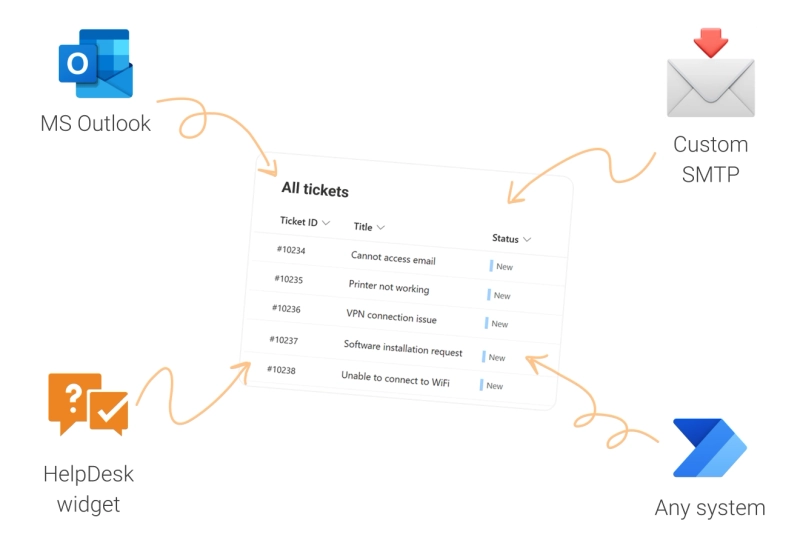
It comes with built-in ready to go features like:
Benefits of using Plumsail HelpDesk ticketing system for SharePoint include:

As a result, response times to customer queries have significantly improved, and service quality has been elevated.
When it comes to a decision when to choose a paid solution, like Plumsail HelpDesk for SharePoint, over a native in house-built solution, there are a few instances when it’s smarter to go for a paid solution and save yourself from a hassle:
Register for a 30-day free trial to test Plumsail HelpDesk for SharePoint and decide if it’s a good option for your needs. You will be able to use all features without any limitation.
If you have any questions and need to consult with our team, you can always book a free 15-minute call to discuss your requirements.
Learn how to efficiently organize and manage Plumsail HelpDesk ticketing system directly within Microsoft Teams.
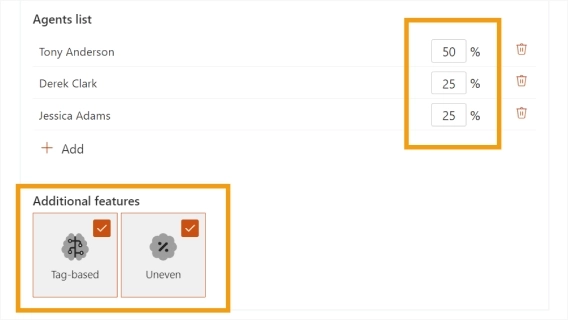
Explore new features in HelpDesk for SharePoint, including automated skill-based ticket assignment, automatic tag management, import/export settings, and new localization options.
Set up an AI assistant for SharePoint Help Desk using SharePoint Agents and Plumsail HelpDesk for SharePoint and Microsoft Teams. Boost efficiency.