Documents
Feb 02, 2021
Create documents from a template and electronically sign them using signNow eSignature solution
Complete guide on how to merge custom data into a sales contract and electronically sign it using signNow

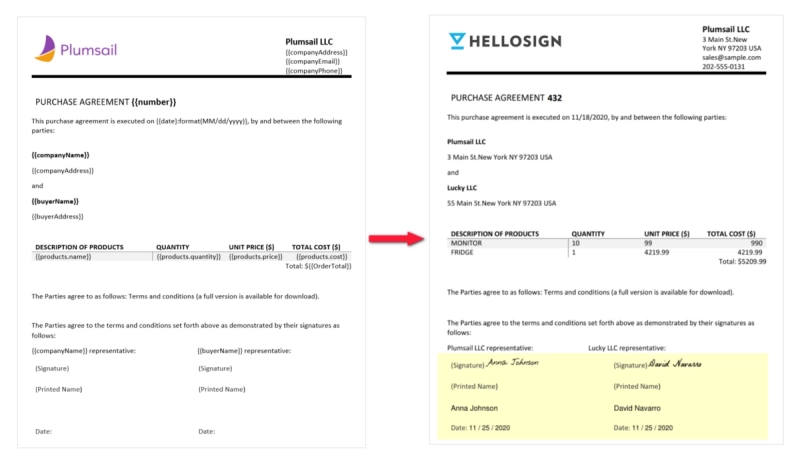
With the Plumsail document generation tool, you can easily merge data from your favorite web services such as CRM systems, public web forms, databases, and more, into custom-built documents. And now it’s directly integrated with Dropbox Sign (formerly HelloSign) eSignature solution.
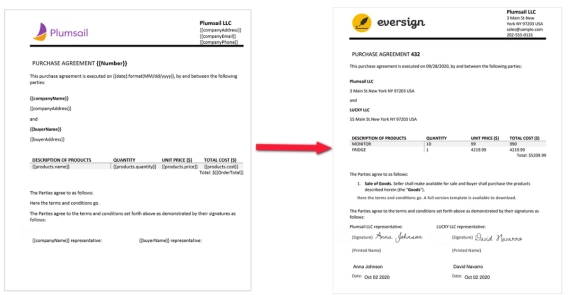
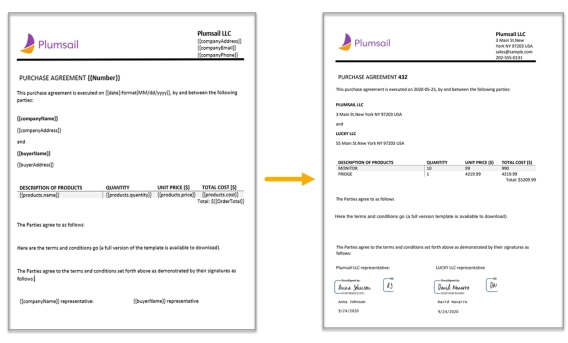
Let’s see how it works. We’ll use a web form to populate a sales contract template and send the resulting document to Dropbox Sign for electronic signature. As a result, a Word template will turn into a custom PDF document with legally-binding digital signatures.
To use Plumsail Documents and Dropbox Sign integration, you need to create a document generation process inside your Plumsail account.
Feel free to sign up for a free trial if you don’t have the Plumsail account yet.
There create a new process — name it and select DOCX for the template type.
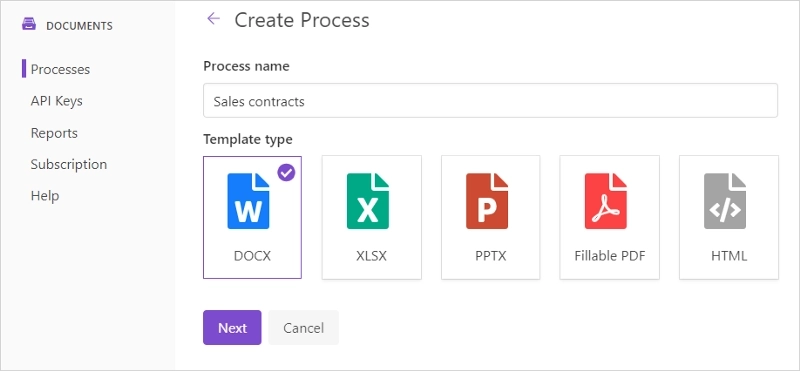
Click on the Next button to go to the process first step — Configure Template. Here we work on the document template — create it and specify its settings.
We have already prepared the purchase agreement DOCX template. You can download the template and upload it to the process to follow the same steps as in the article.

Otherwise, you can learn how Plumsail Documents templates work and compose your own document template.
On the Settings substep, we defined the output filename and changed the output type to PDF. We won’t go into much detail about the Configure step here. Please, find more information about creating and setting the document generation process in the documentation.
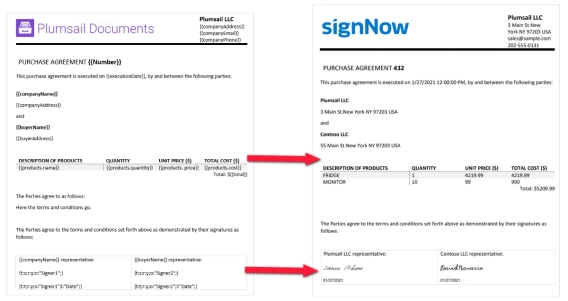
Use special Dropbox Sign text tags to place the signature and other related fields in a particular part of the document.
For instance, we have three text tags at the bottom of our contract template. They’re invisible as we changed their font color to white. Here they are:
[sig|req|signer1]
[text|req|signer1|Full Name|name_1]
[date|req|signer1]
As you see, Dropbox Sign text tags are a series of options and identifiers divided by the pipe symbol and wrapped in squire brackets. Text tag values are self-explanatory — sig means the signature field; req means this field is required; signer1 identifies the signer.
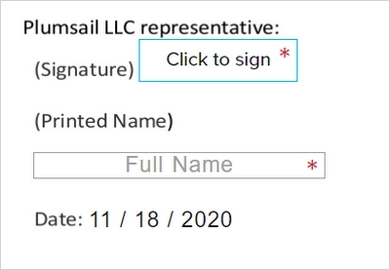
On the left, you can see how these Dropbox Sign text tags will appear for the first signer.
The same logic is used for the second signer. Read more about Dropbox Sign text tags in our documentation.
Click on the Add delivery and select Dropbox Sign. After that, you will see the Dropbox Sign delivery settings screen:
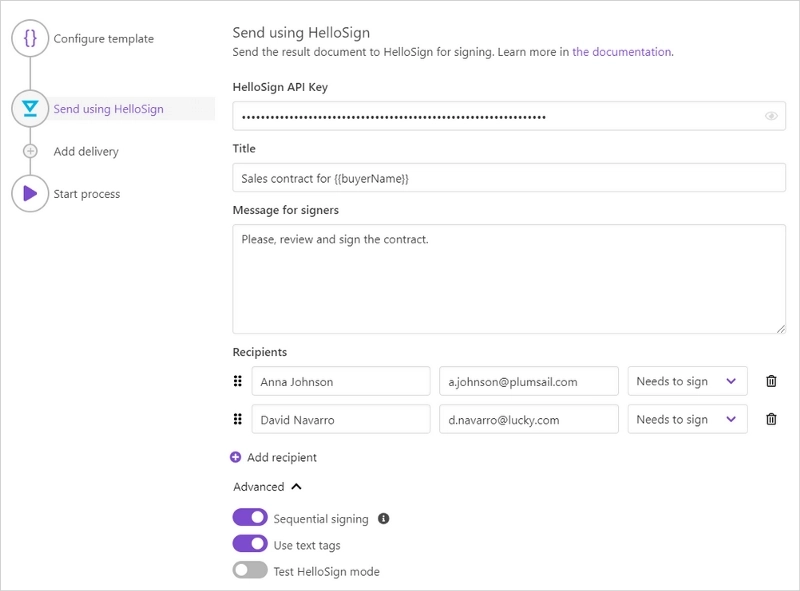
To connect Dropbox Sign to Plumsail Documents, you need to provide an API key. It can be found in your Dropbox Sign account: Integrations → API →API key. Copy and paste into the Dropbox Sign delivery of the process.
Now you can configure other settings in the Dropbox Sign delivery:
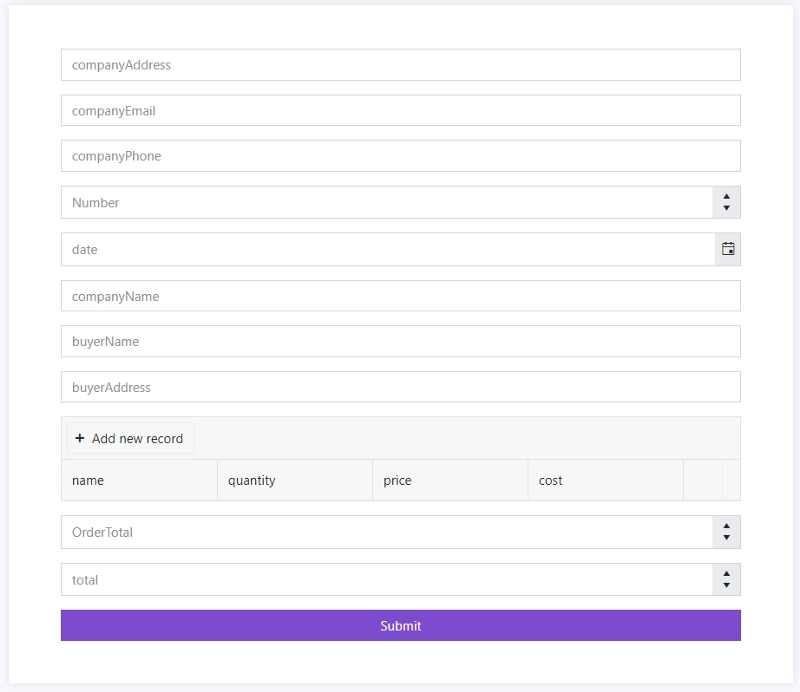
Now we’re done with the Dropbox Sign delivery step and ready to launch our process. We’ll start the process from a default web form:
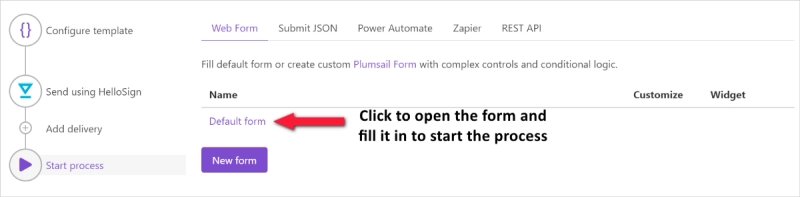
This is the default form. It’s possible to customize it in a handy Pumsail Forms web designer with a drag-and-drop interface.
You can pull data from third systems and pass it to the process to populate the document template. Please, review other ways to start the document generation process.
Use the approach shown in the article to generate any other custom documents such as invoices, quotes, reports, and more.
Just register a Plumsail account to get started and follow the steps described in the article to create your document generation processes. If you have any questions, do not hesitate to drop us a line — support@plumsail.com.
Complete guide on how to merge custom data into a sales contract and electronically sign it using signNow
New e-signature integration in Plumsail Documents.
DocuSign integration for Plumsail Documents is released