Documents
Feb 02, 2021
Create documents from a template and electronically sign them using signNow eSignature solution
Complete guide on how to merge custom data into a sales contract and electronically sign it using signNow

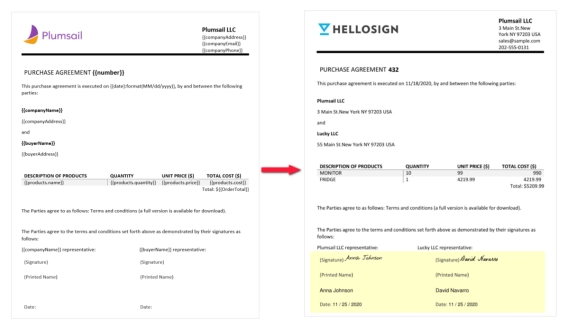
Try eversign e-signature solution together with Plumsail Documents to facilitate exchanges of contracts and any other legal materials. The more so as Plumsail Documents has got a direct integration with eversign.
So, you can easily generate documents from a template and send them to eversign for signing inside the Plumsail account. As a result, you’ll get a personalized document signed with electronic signatures:
To benefit from the new feature, you need to have:
When you’re ready, go to the Processes section in your Plumsail account. To stick to this example, create a new process with a DOCX template type.
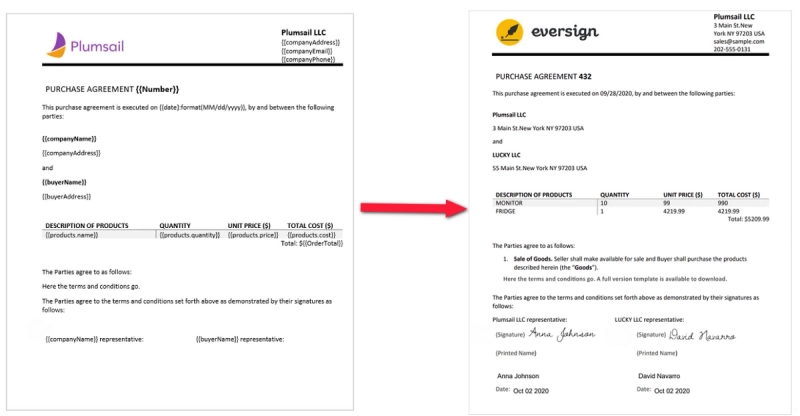
On the first step, you’ll be offered to compose a document template online or to upload a pre-made one. Feel free to download a sales contract template from our example:
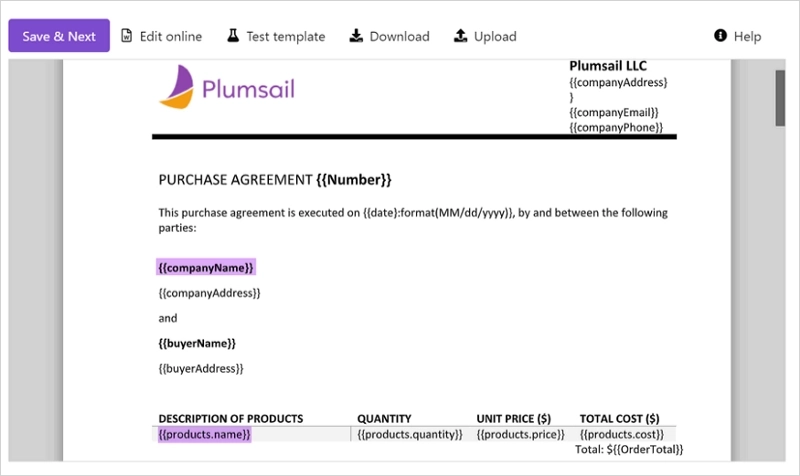
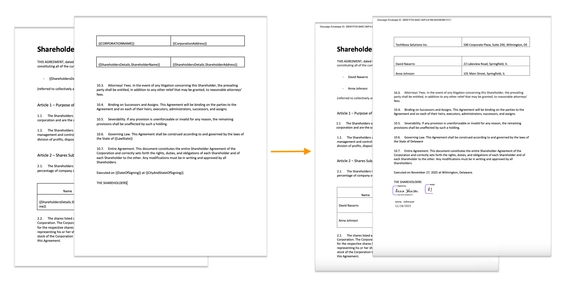
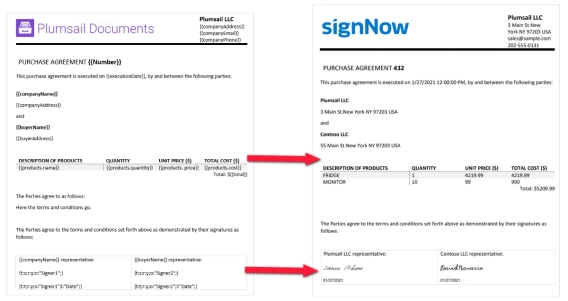
Highlighted tokens in the picture above are variables that dynamically turn into real values. Find more information on how Plumsail Document Word DOCX templates work in the documentation.
To ease the process of signing, use eversign tags to define the location of signatures and other related fields for signers. Thus, each signer will see where to place his/her signature and what fields are required to complete.

You may think that such tags are difficult to build, but actually, they aren’t. It’s a collection of options in a specific order divided with a | symbol and wrapped by squire brackets.
The simplest example is [sig|req|signer1] . The option going first is a field type, second shows whether the field is required or not, and third identifies the signer's number.
Learn about other options from the article about eversign delivery.
When you’re done with the template settings, you’ll proceed to add deliveries. Add the eversign delivery, then connect to your eversign account from the Plumsail account. And you’ll be able to customize the eversign settings.
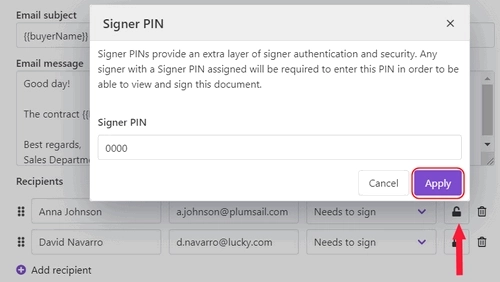
You just fill in the email subject and body. Then you add recipients and assign roles to them.

Additionally, you can provide an extra level of security and enable PINs for signers:
There are other options in Advanced settings like “Sequential signing”, “Require all signers to sign to complete document”, and others. Read about them in the eversign delivery documentation.
In our example, we’ll start the process from a web form. But there are other ways to start the process — manually, from Zapier, from Power Automate, using REST API.
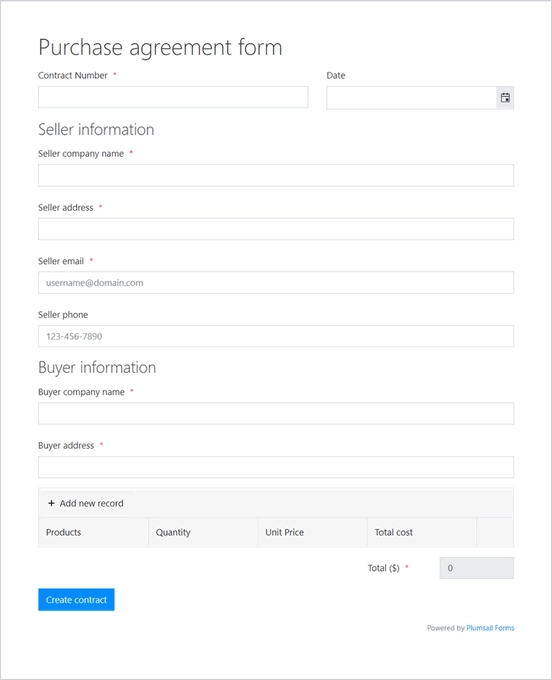
We’ll launch the process by such a Plumsail web form we have created for sales contracts:
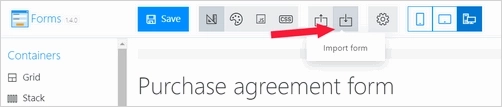
To follow the same, download the form by this link, then go to the Forms in your Plumsail account, click on Create form, import the downloaded file to the web designer:
Save, and you’ve got the same web form as we do. Bind it to the process:
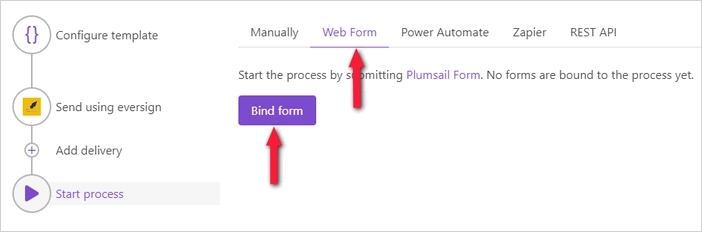
This bound form being submitted will trigger the process. The submission data will populate the document template, the process will convert it to PDF and send to eversign for signing.
Enjoy the automation!
More details on how to generate documents from a template and electronically sign using eversign in this how-to guide.
You saw that the integration is quite self-explanatory in setting up. You can start using it right away.
Sign up for Plumsail Documents to get a month free trial.
Plumsail team is always here for you — just drop us a line to support@plumsail.com.
Complete guide on how to merge custom data into a sales contract and electronically sign it using signNow
Merge data from your favorite web services such as CRM, public web forms, and more into custom documents and send to Dropbox Sign (formerly HelloSign) for signing.
DocuSign integration for Plumsail Documents is released