In Plumsail Forms, you can create interactive forms with no code by adding rules to fields, controls, and containers. You can hide or disable elements by checking if a field is empty, or by comparing two field values against each other or against a static value.
This no code logic is a great addition to JavaScript capabilities of Plumsail Forms and is available for internal and external SharePoint forms, Airtable forms, and public web forms.
In this post, we will go through what Plumsail Forms conditional logic is capable of and share practical examples of how to make your forms smarter.
See the video overview of no-code conditional logic in Plumsail Forms:
Build no-code conditional forms
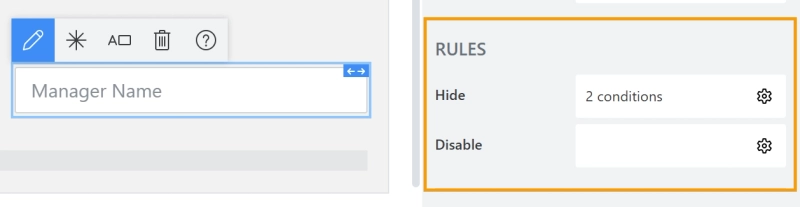
To set up conditional logic for a form element, select the element you want to hide or disable, and configure the rule for the corresponding action under the Rules section:
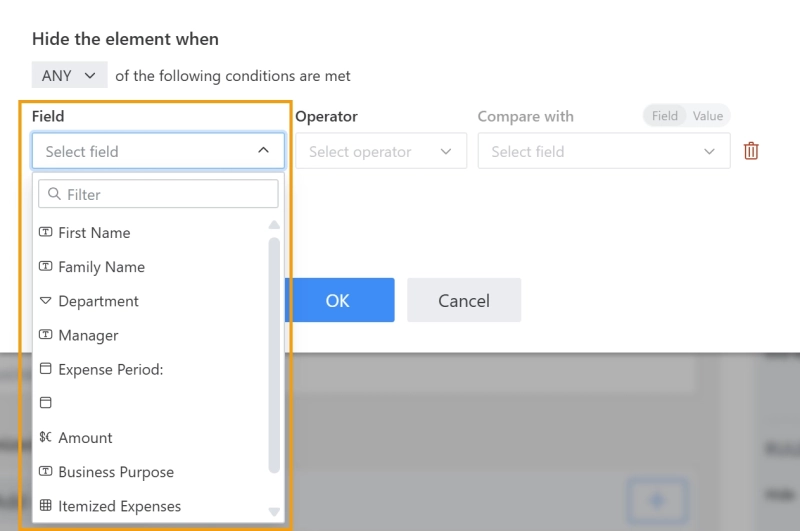
Click the gear icon to configure the rule. In the Field drop down, you'll see a list of all fields and controls on the form available for building your logic. If you're working with an impressively long form, use the search bar to quickly find the exact one you need.
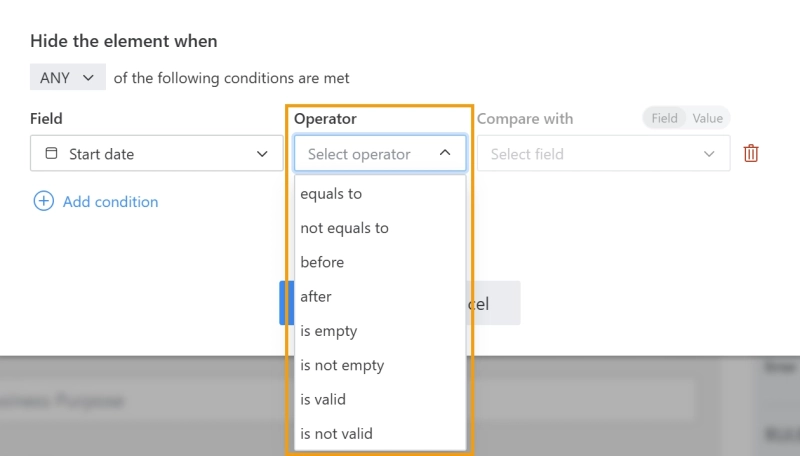
Next, select an operator. Alongside the standard equals to / not equals to and is empty / is not empty, there are dedicated operators for numeric and date. You can also use the Valid / Not valid operator to trigger a validation check for specific fields or controls.
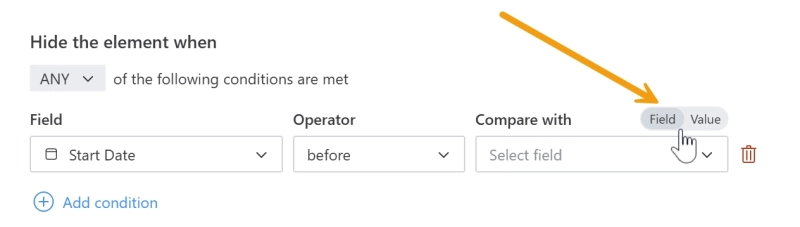
On the right side of the menu, choose whether to compare to a static value or to another field:
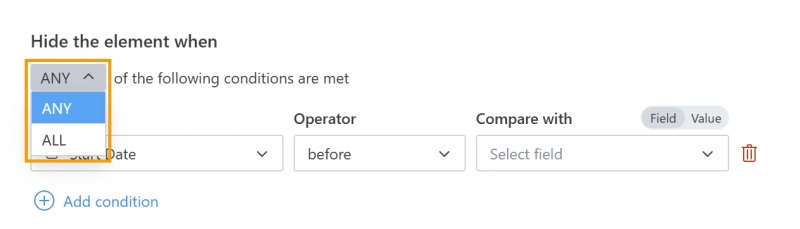
You can list multiple rules and define whether ALL or ANY of the conditions must be met to apply the rule:
Now that we've covered the basics, let's look at a few practical ways to use these rules to make your forms more dynamic.
Add condition with static value
The most basic example, that creates a branching logic form, is to show an element only if users selects a specific option from the dropdown.
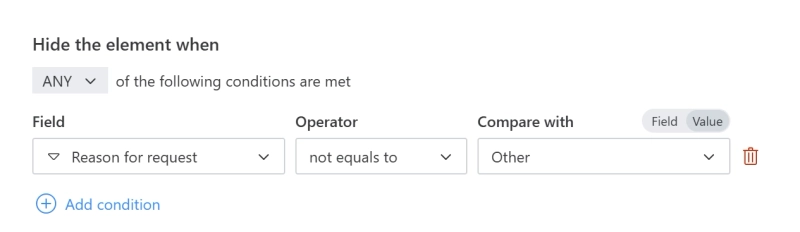
For instance, to show the Custom Reason field only if the user selects Other in the dropdown with predefined options:
Rule to check selected value
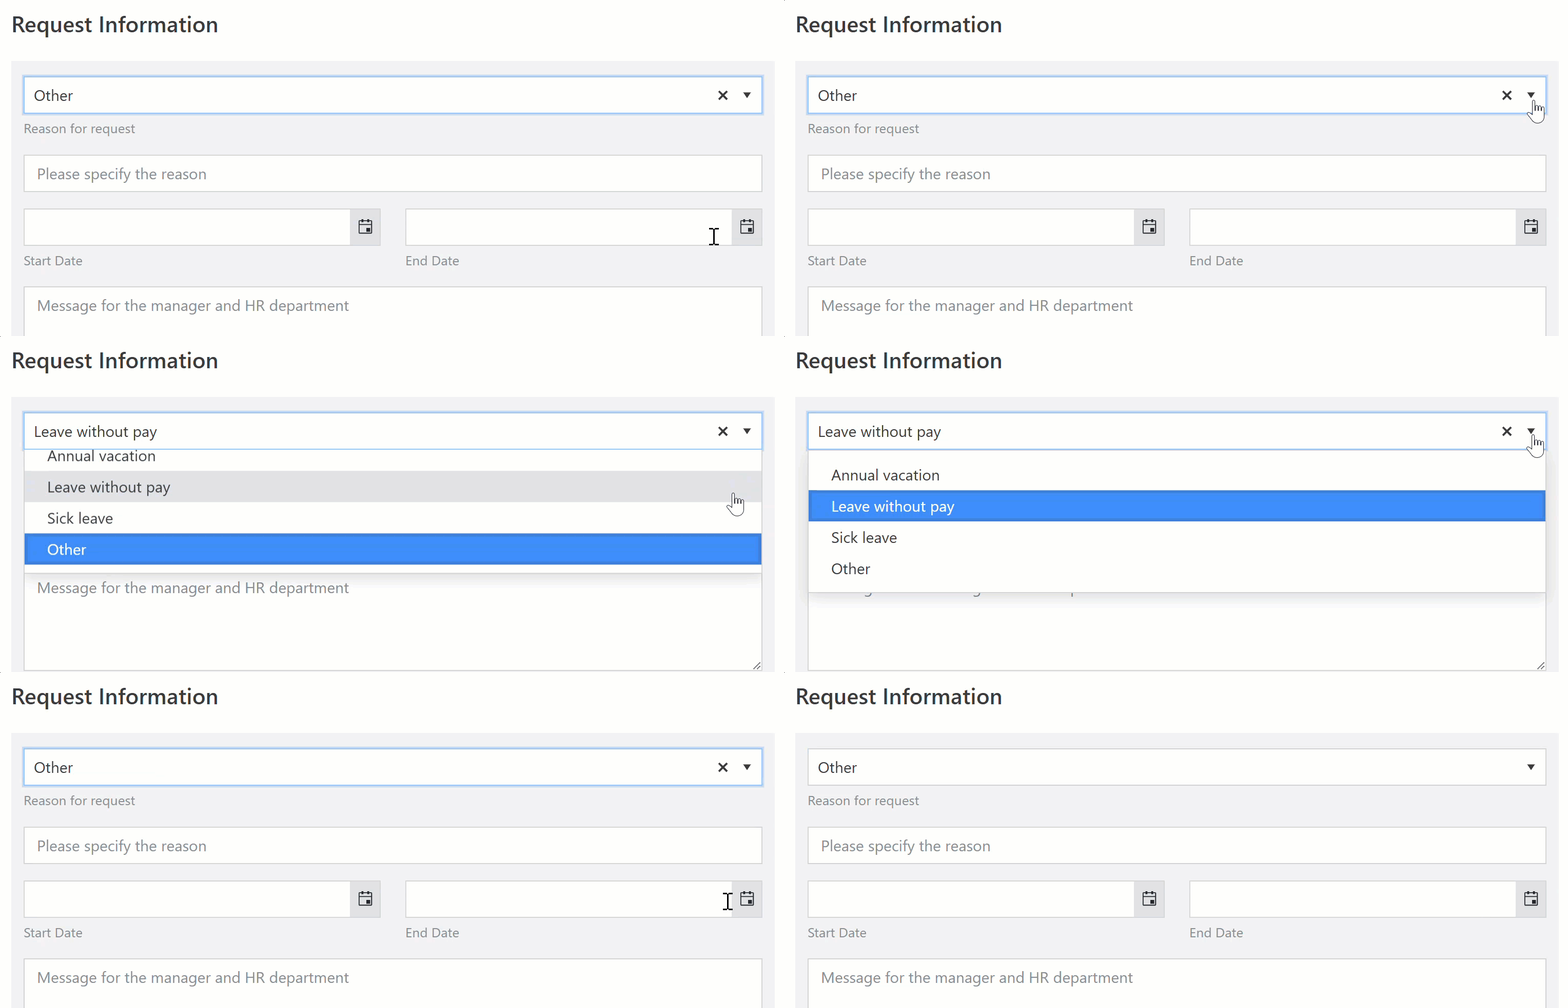
The Reason field shows only when 'Other' is selected
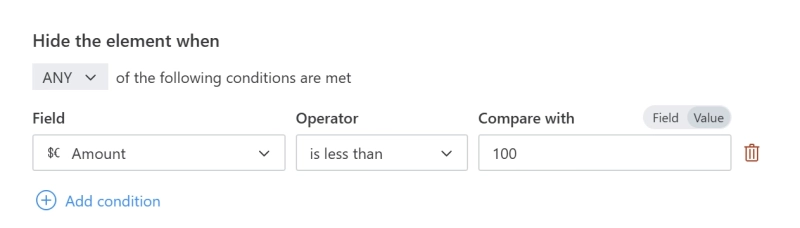
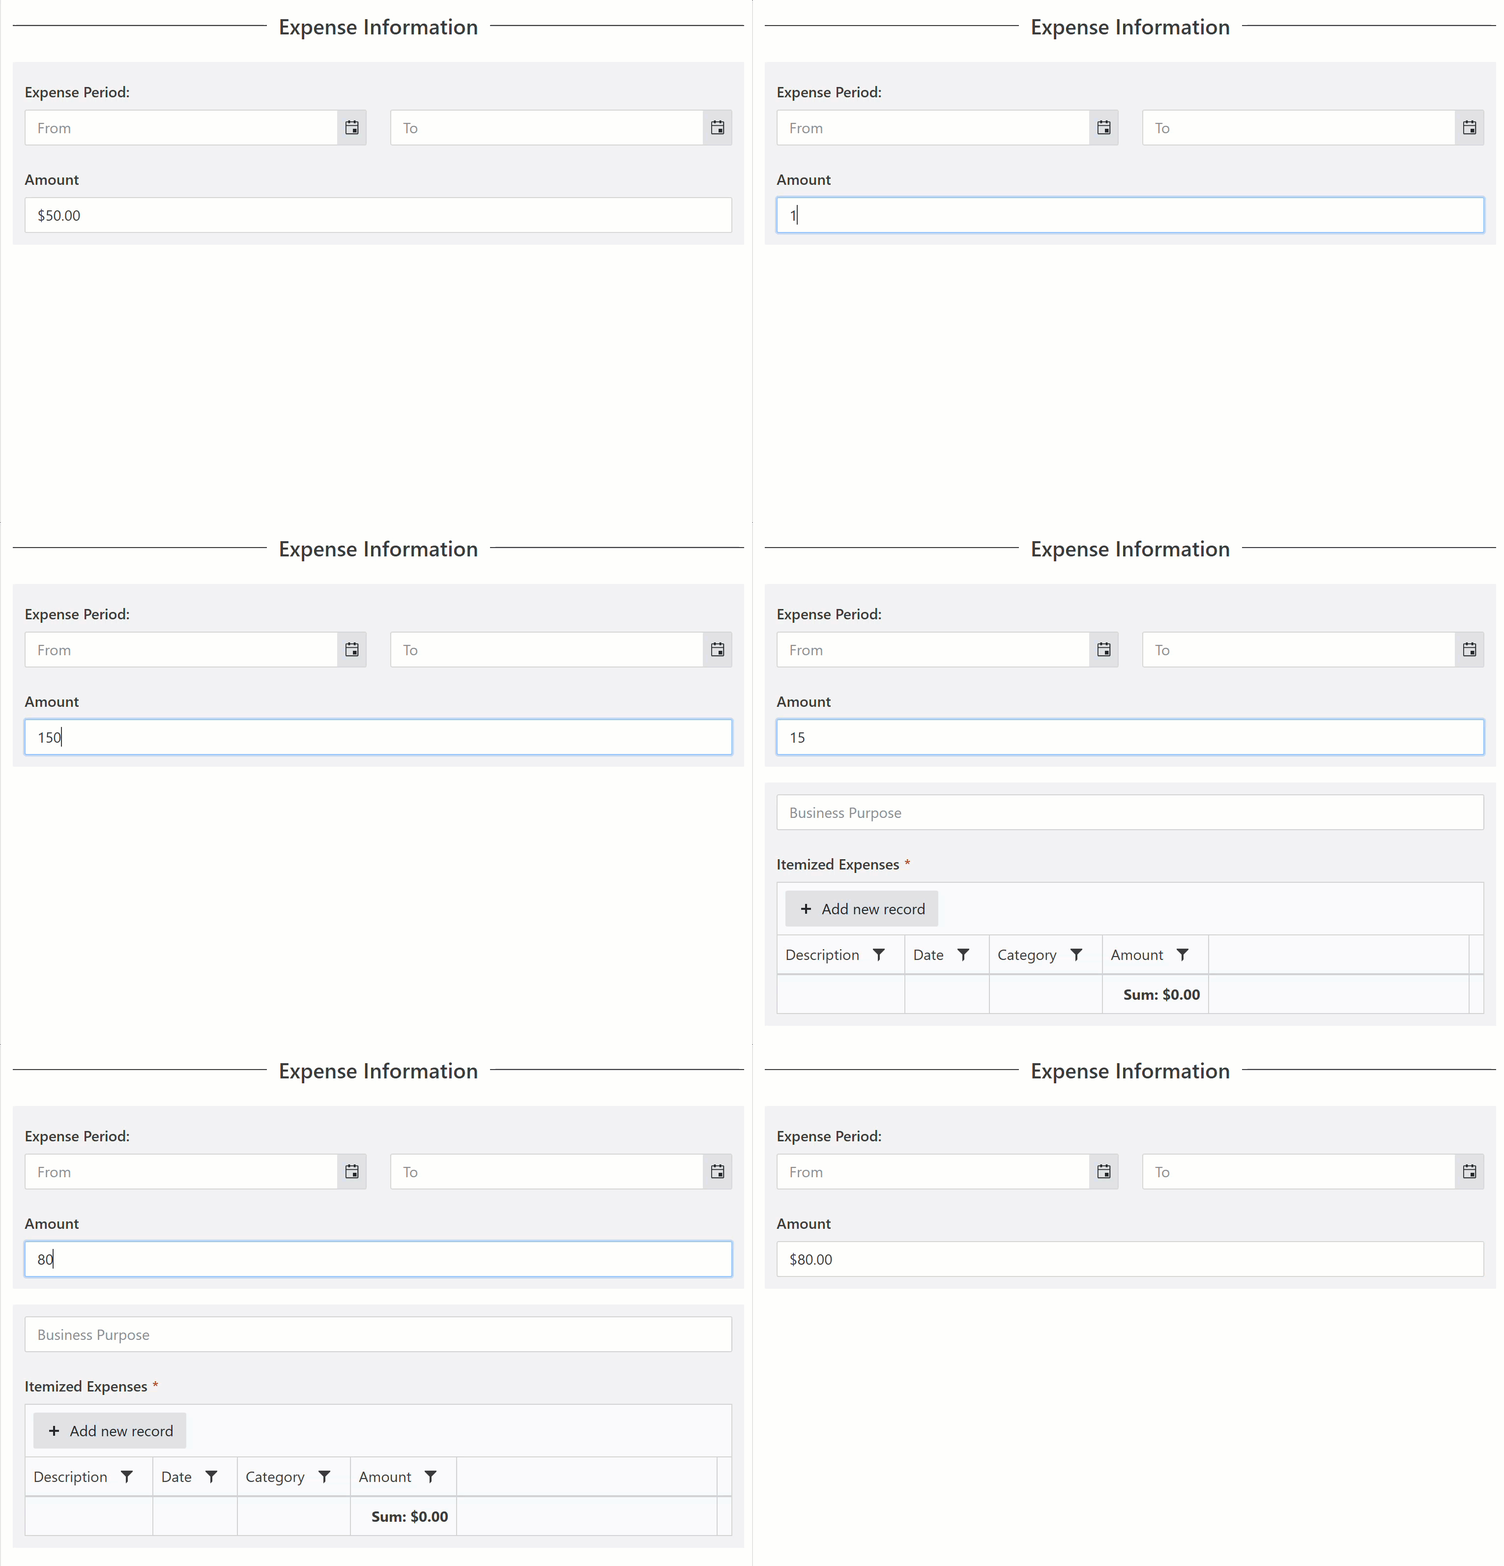
You can also show or hide an entire container at once, not a single field. Say you want the More details section to appear when the expense amount exceeds $100:
Rule to check Amount value
The More details section shows only when the expense amount exceeds $100
Add rule comparing two fields
Taking it a step further, you can set up rules that compare one field against another. This works as a validation safeguard.
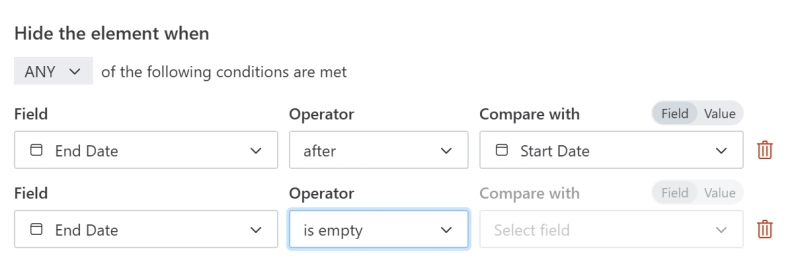
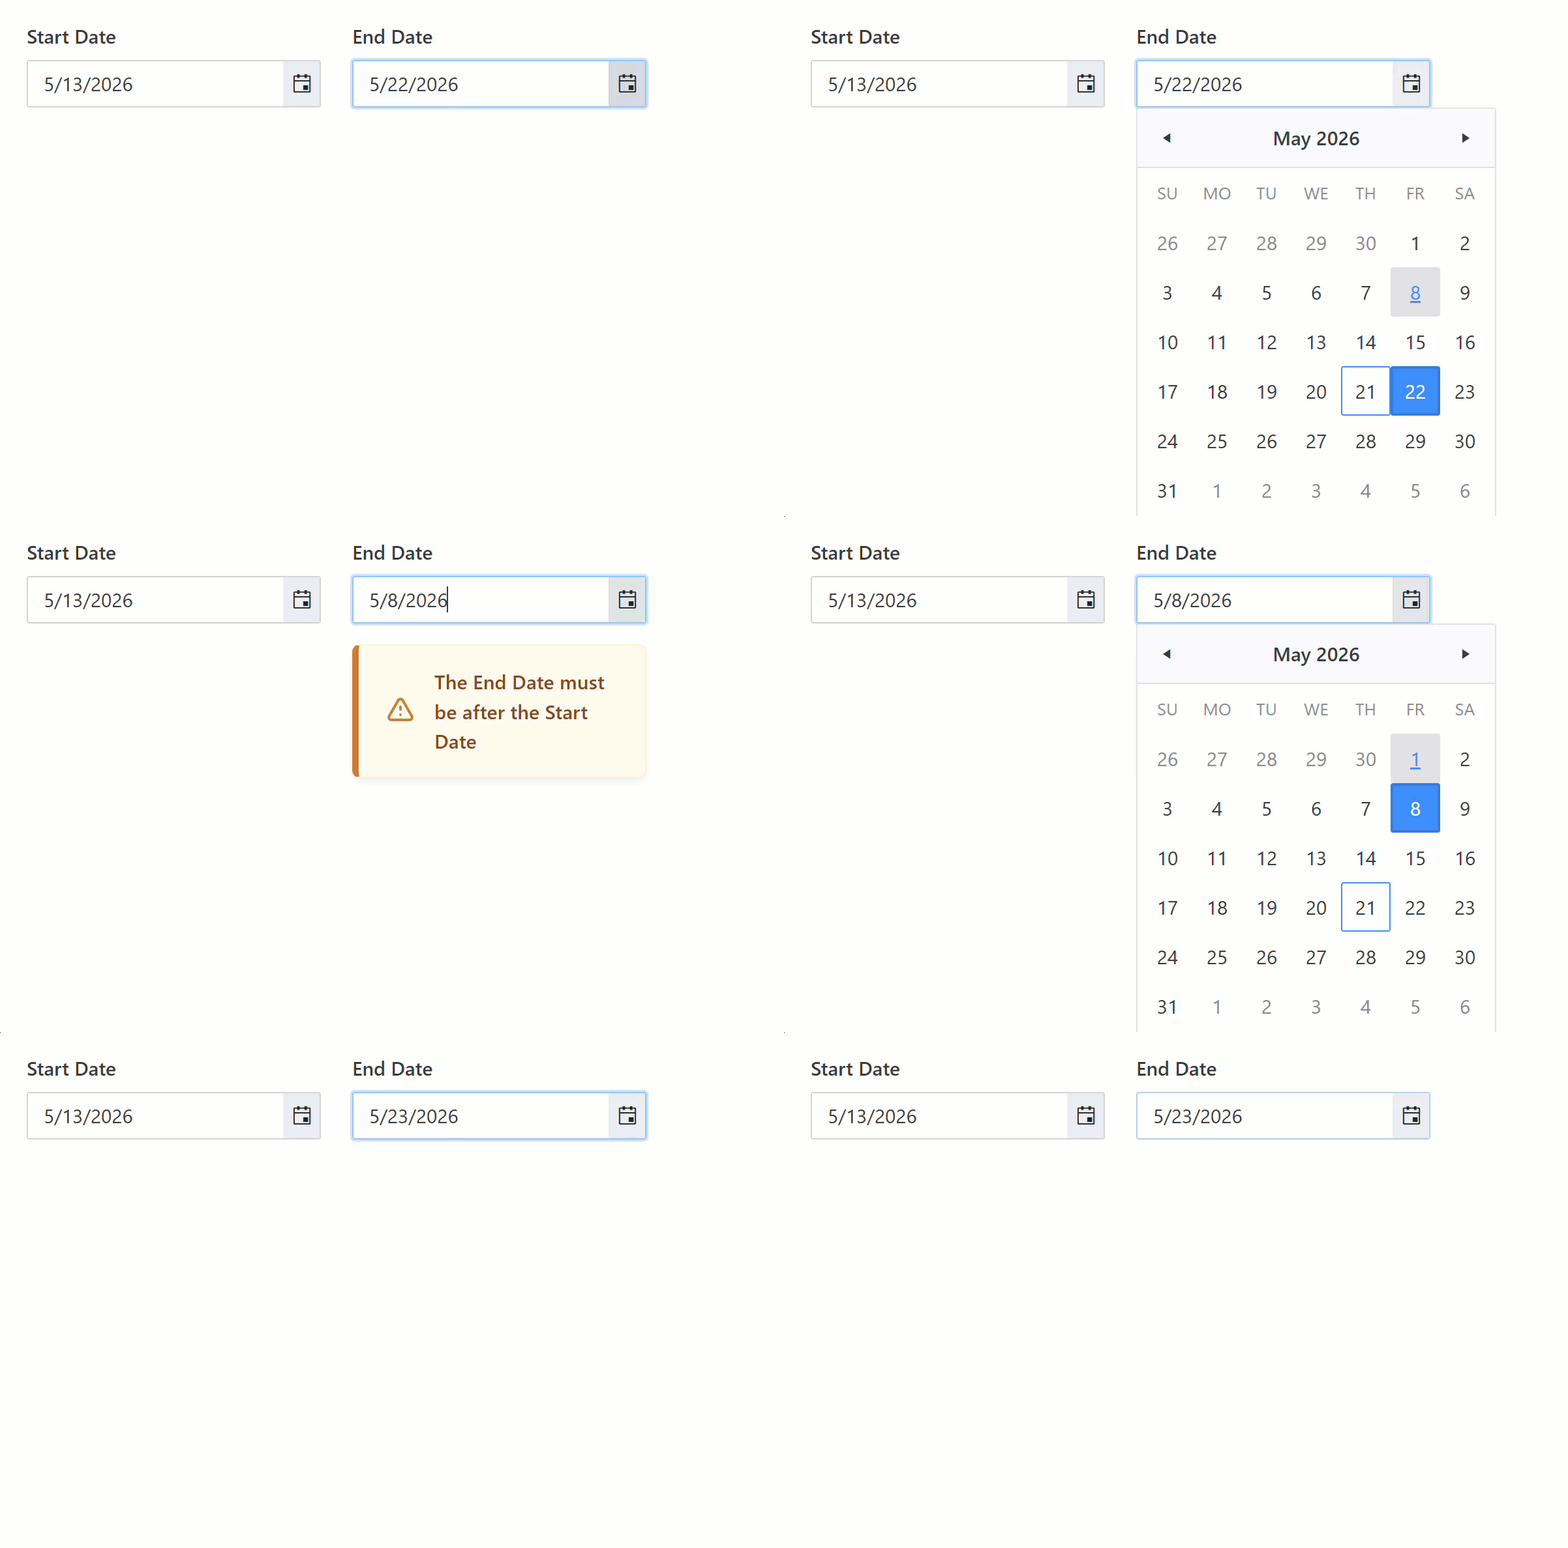
For instance, you can compare two date fields and show a warning message — HTML control with a custom message — when the end date is earlier than the start date:
Rule to compare two date fields
Warning message appears when end date is earlier than start date
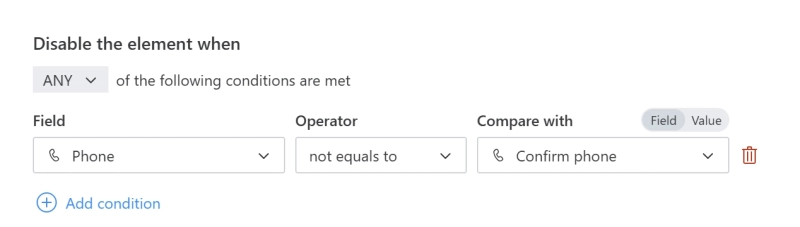
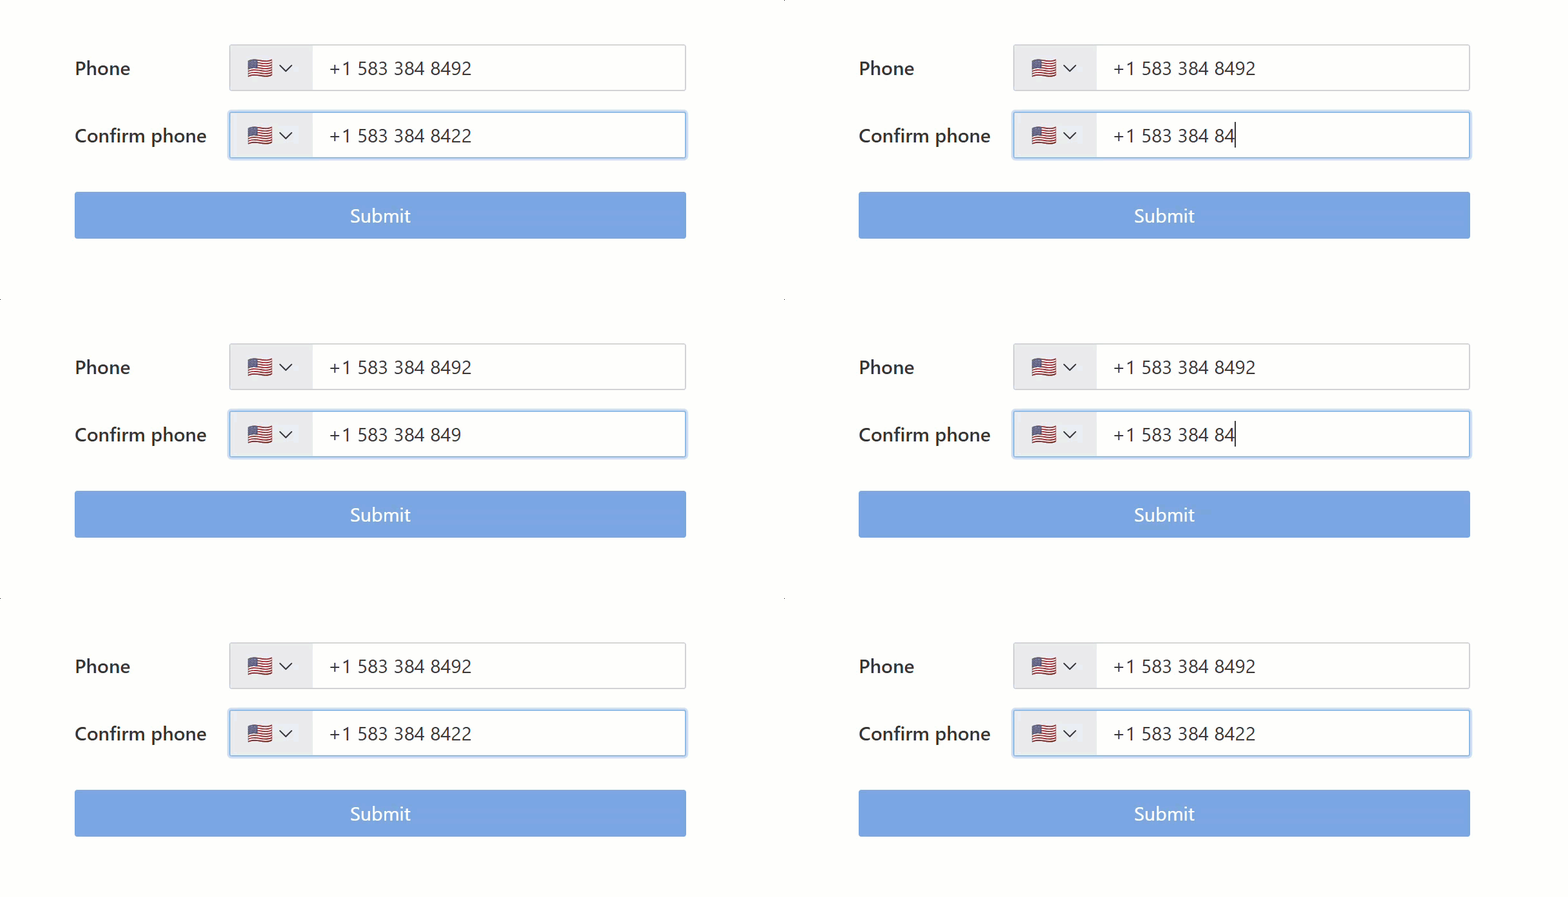
A similar approach prevents typos in essential fields. You can disable the submit button until the value in the Confirm phone field matches the Phone field exactly:
Rule to validate phone number
Submit button is disabled until phone numbers match
Add rule checking if value is empty
Another good way to improve form logic and data validity is to check if the field is empty or not.
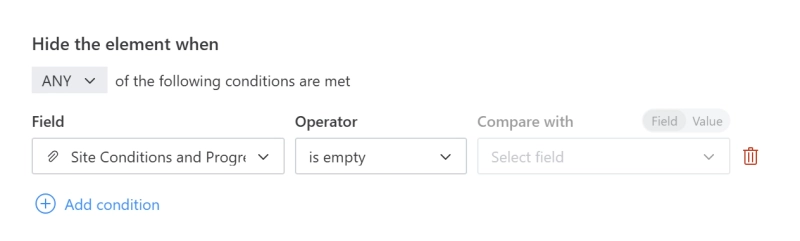
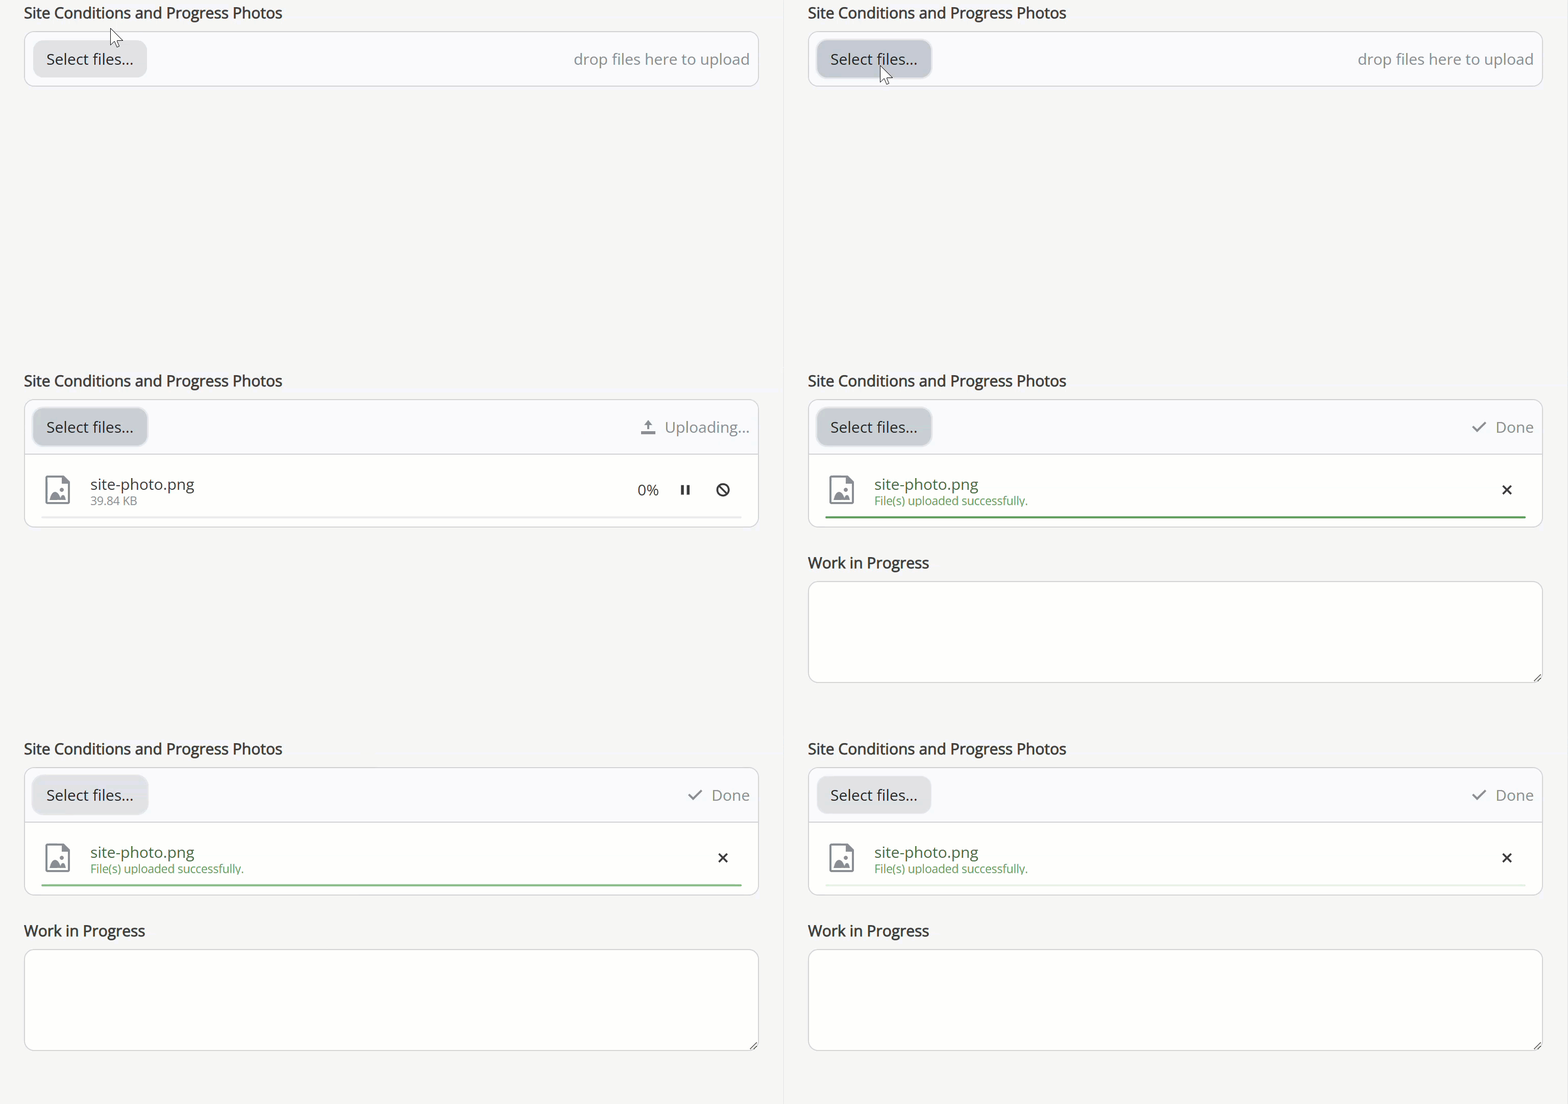
For instance, you can show the Comment field asking to provide some explanation only when a user uploaded a file in the attachment control:
Rule to check attachment
Comment field shows only when an attachment is uploaded
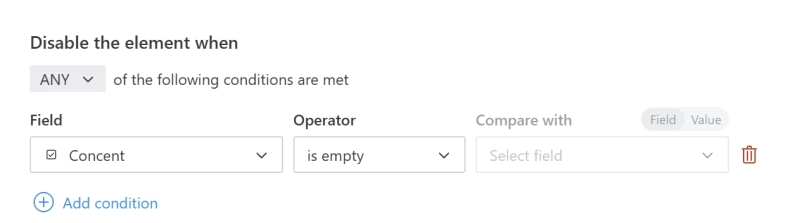
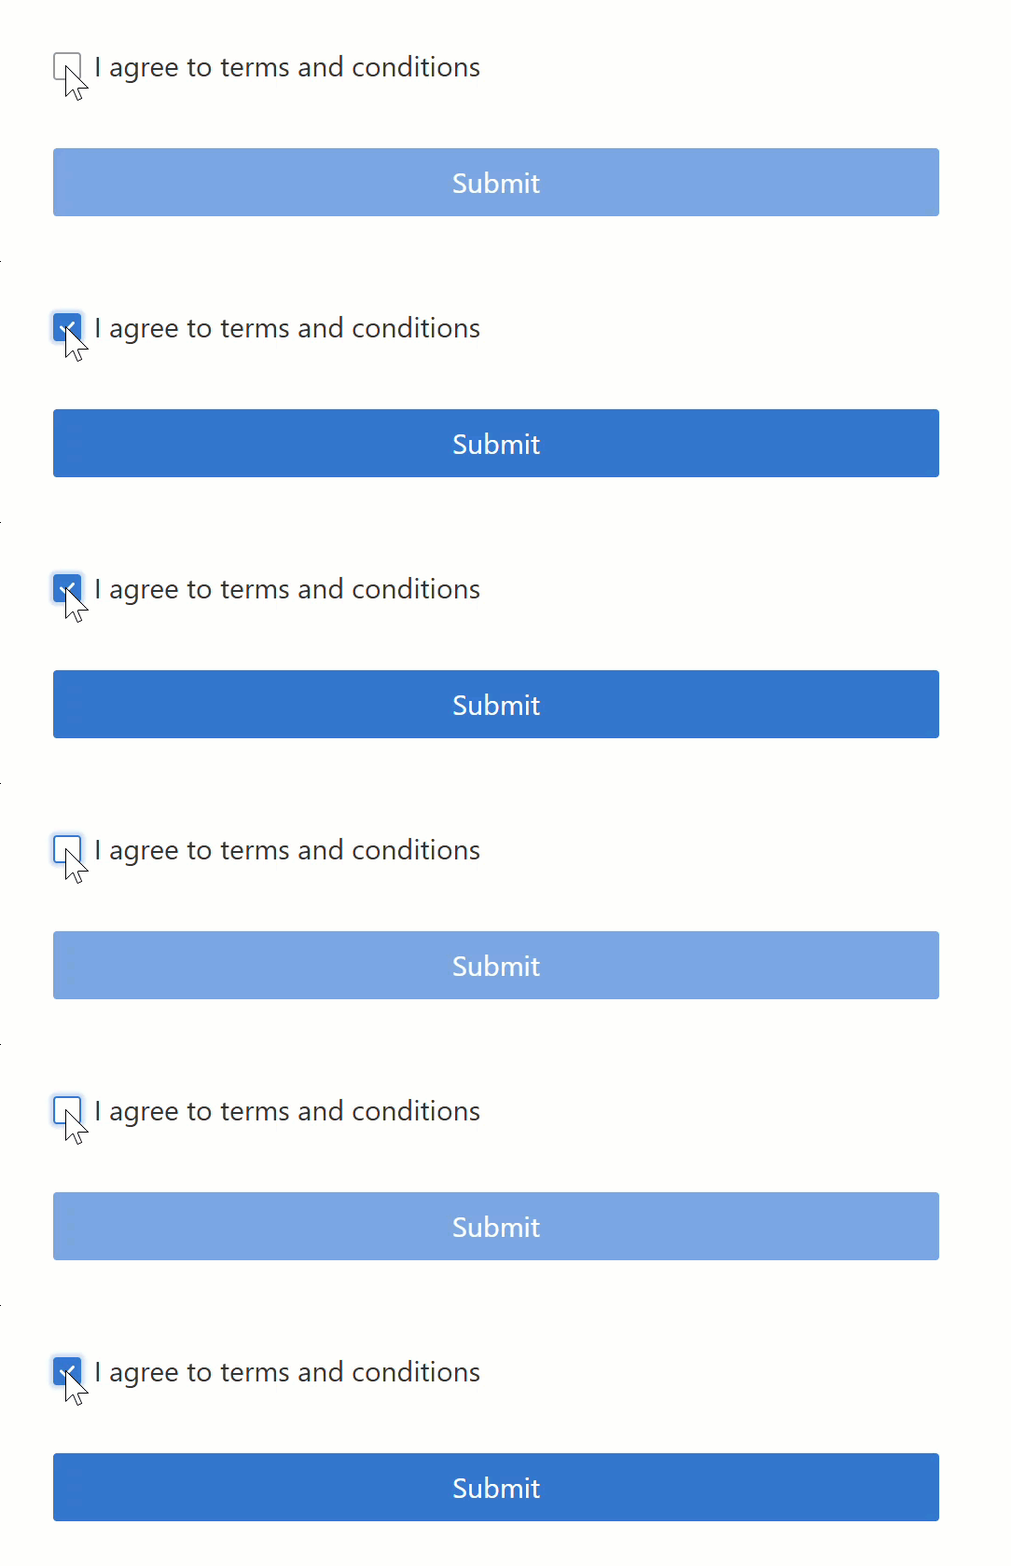
Or disable submit button until the user agrees to the terms and conditions by ticking the checkbox:
Rule to check checkbox
Submit button is disabled until checkbox is ticked
Combine multiple rules for advanced logic
You can stack as many rules as you need, crating logic that fits your business and simplifies the user experience.
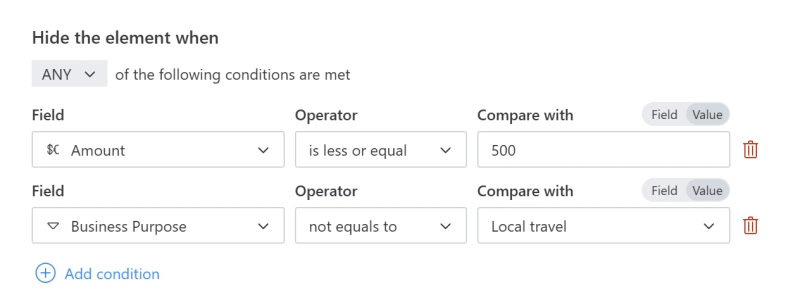
Take a complex expense form. Let's say you want to show the Comments field only if the travel expenses exceed $500 and expense type is Local travel. Here is the condition you need:
Rule using ANY operator
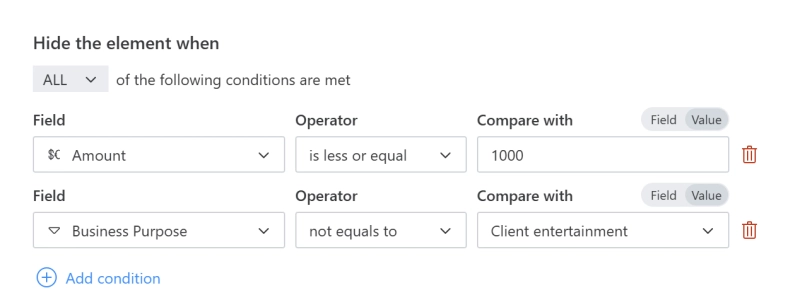
You also want to show the Itemized Expenses table when the amount exceed $1000 or the expense type is Client Entertainment:
Rule using ALL operator
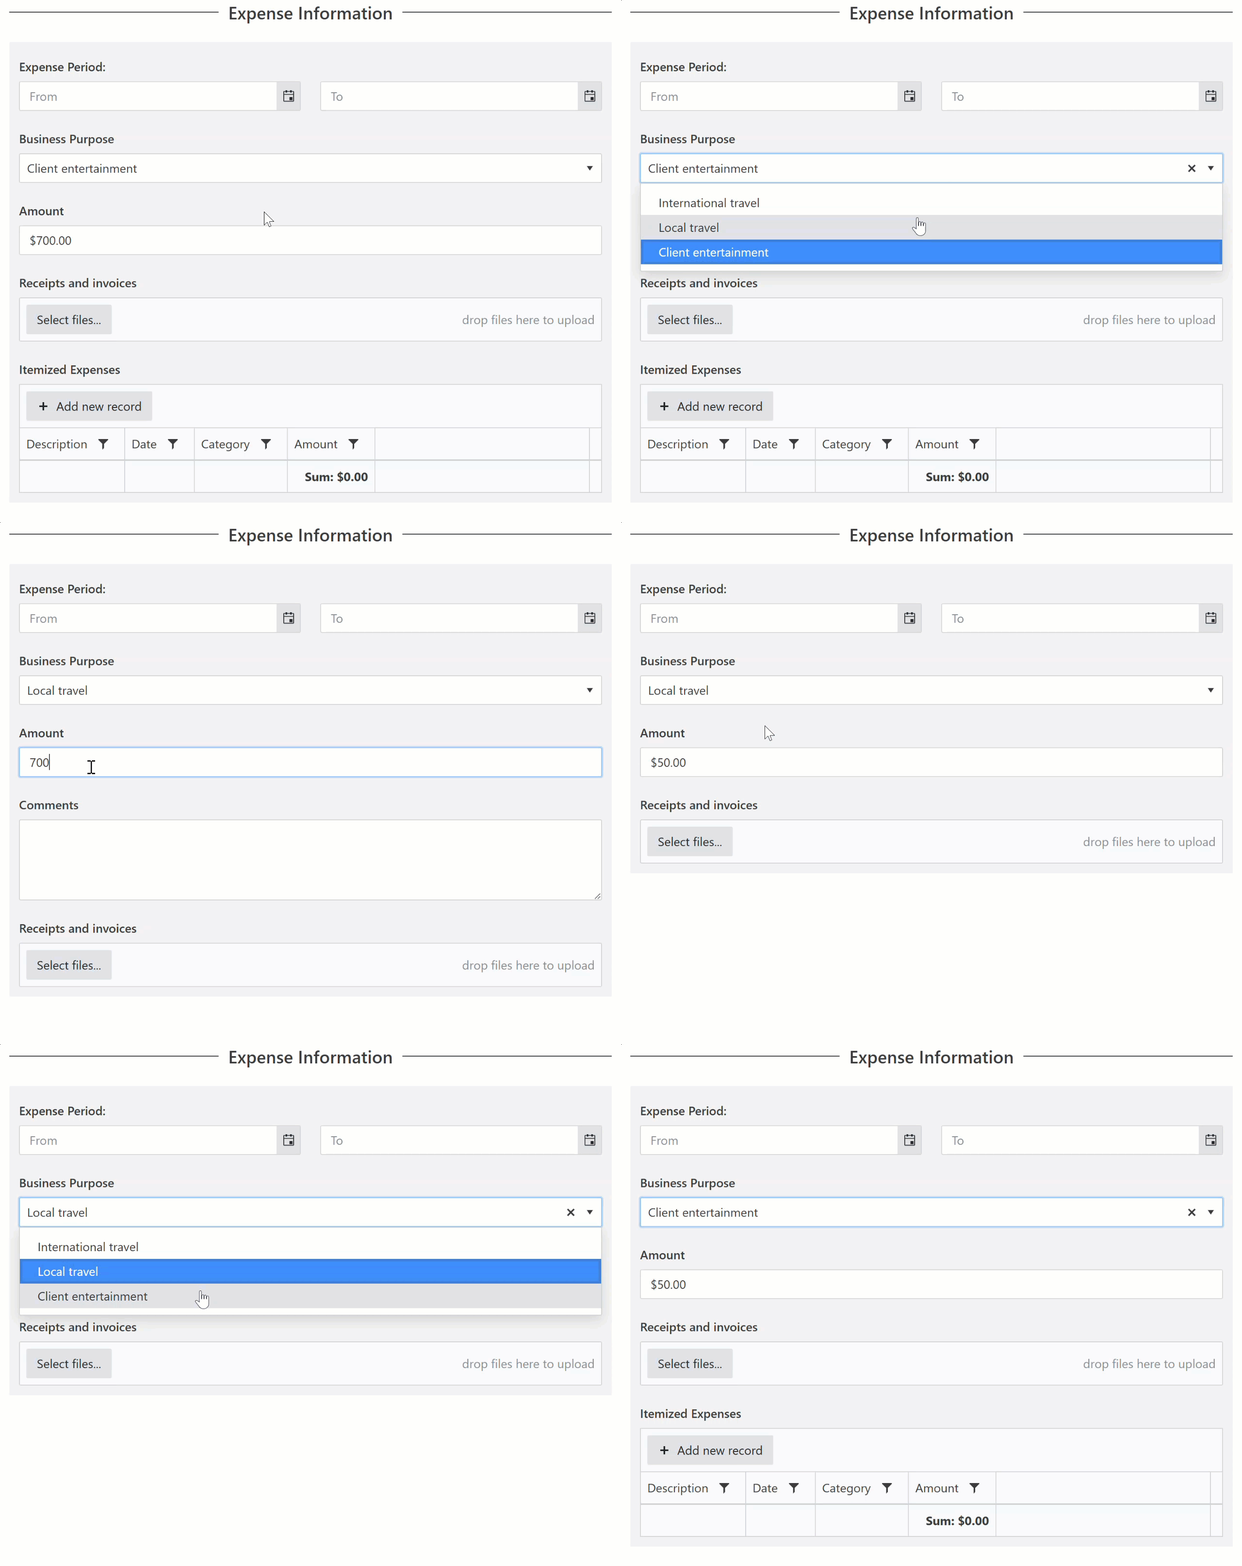
And here's the dynamic, no-code form with all the rules in action:
The visual rules cover most validation patterns. Reach for JavaScript when you need:
Complex cross-field calculations
Calling external APIs
Triggering custom actions and validations
Changing form logic based on user roles or specific user names
Limitless custom UI/UX adjustments
If your form logic needs to go beyond visual rules, you don't have to be a developer to write the necessary JavaScript. You can use the built-in AI chat, or your favourite AI tool to draft the code, browse Plumsail documentation for ready-made snippets — there are plenty!
Create your own dynamic form with no code rules
Plumsail Forms no-code conditional logic is designed to simplify the form creation process and make your layouts more dynamic. And we hope these examples spark some ideas for your own processes to be transformed with dynamic forms.
How to automate multi-step approval process in SharePoint with PDF timesheet result
See how FileBank Inc. built a four-stage timesheet approval workflow in SharePoint Online — with auto-calculated hours, signature capture, and final PDF generation — with Plumsail and Power Automate.
Farook Golam
IT Director at FileBank Inc.
Forms
Last updated: Aug 31
How to share a feedback form by QR code
Share a feedback form with a QR code. See how Plumsail Forms can boost collecting reviews
Nikita Trubkin
Customer Support Engineer
FormsAirtable
Last updated: Aug 31
Connect a website form to Airtable
Learn how to create an Airtable form with Plumsail and embed it on any website for free.




 Documents
 FormsSharePoint
 Power Automate