Getting started
- Register account and get API key
- Use in Power Automate (Microsoft Flow)
- Use as REST API
- License activation
User guide
- API Keys
- Reports
- Subscription and notifications
- Account settings
- Audit log
- Invite team members to account
Power Automate (Microsoft Flow) actions
General
- Licensing details
- Release notes
- Data protection and security
- Data center location
- Service Level Agreement
REST API
Power Automate (Microsoft Flow) examples
- Provisioning
- Create Modern team or communication site
- Create Modern site using custom PnP template
- Create Modern page using PnP template
- Create list or library using PnP template
- Apply a site design to SharePoint site
- Start Power Automate (Microsoft Flow) with PnP provision from a site design
- Create subsite using custom template and grant permissions
- Debug provisioning PnP template
- Permissions management
- Documents management
- List items management
Create modern team or communication SharePoint site in Power Automate
In this article, we will demonstrate how to configure a Power Automate (Microsoft Flow) that will automatically create a new site in SharePoint on an item creation. This approach works in SharePoint Online (Office 365).
In this flow, we are using Create Modern SharePoint site action from the Plumsail Actions connector. This action allows you to create modern team and communication sites.
When you create a modern team site there is automatically created an Office 365 group. With Office 365 Groups your team can collaborate and communicate easier using all or any of the following:
Shared Planner for tasks management: to create new plans, organize and assign tasks, share files and chat about what you are working on
Shared Outlook Inbox for emails and conversations
Shared Yammer Group to chat
Shared Outlook Calendar
Shared SharePoint Document Library
Shared OneNote Notebook
Let us take a simple example of a project management system where an administrator creates a new list item for a project in a SharePoint list specifying a Title, an URL and a Description for the new project site.
Create a modern SharePoint site
Create a Projects List
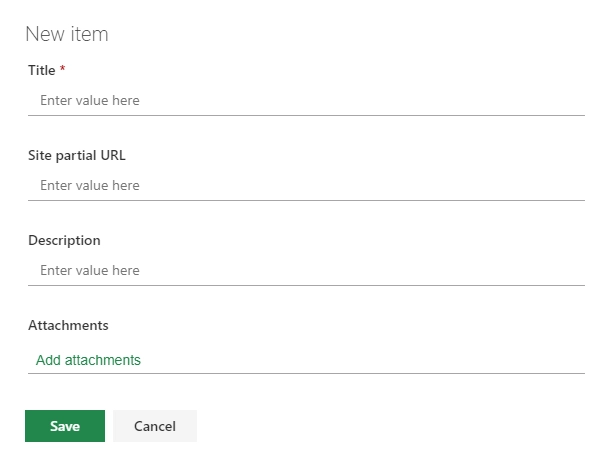
First of all, let us create a new Projects SharePoint list with the following structure:
Title - A default text field.
Site partial URL - A single line text field. A partial URL for a new project site (for example, project1 value can be used to create a subsite with an URL like this:
http://yourdomain.sharepoint.com/sites/project1)Description - A single line text field. A description of a new project.
This is how looks the form to add a list item:

Now, we are ready to create the flow.
First use of Plumsail Actions
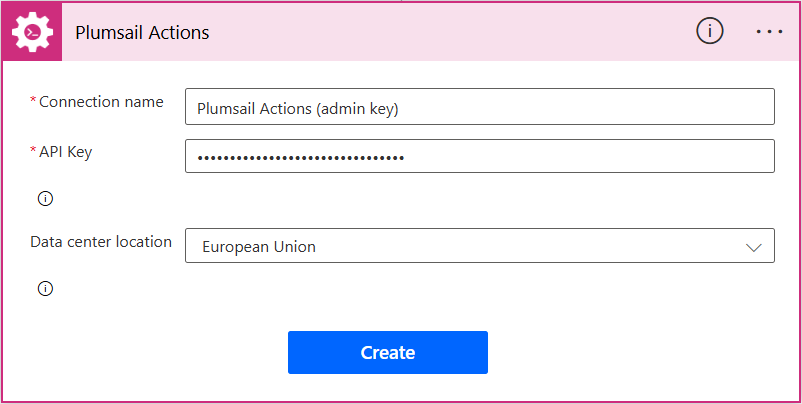
Adding the Plumsail action for the first time, you’ll be asked for a Connection name, API Key, and Data center location.

You can type any name for the connection, for example Plumsail Actions (admin key). Next create an API key on your Plumsail account page, copy, and paste it to the API Key field. Ensure that the selected data center location matches one of your account.
Create a modern team site
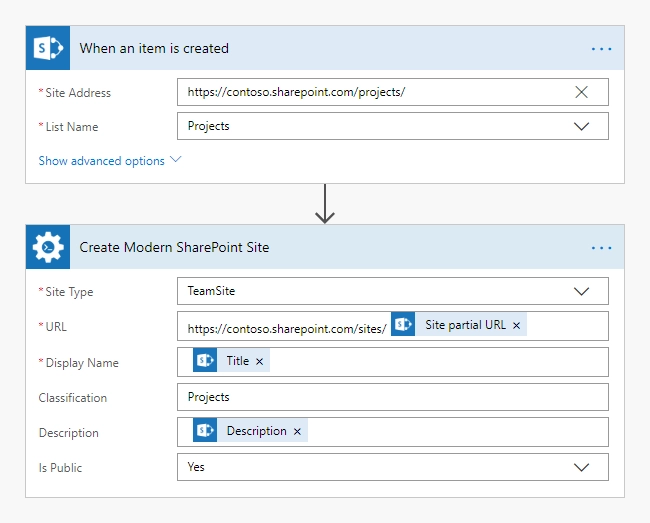
We configure a flow that starts on an item creation in Projects list. To do that, we just add When an item is created action from SharePoint connector and specify Site Address and the name of our Projects list.
On the next step, we add Create Modern SharePoint site action to the flow and use Title, Site partial URL and Description from the output of the previous action to specify the fields values.
This is how our flow looks like:

We defined our Office 365 group as public, but you can choose to make the group private so others in your organization can not see inside it.
We simplified this example to keep it clear. You may add more fields to the projects list to work with your projects. For example, you can add fields Classification or Is Public to use this information in the action.
Create a modern communication site
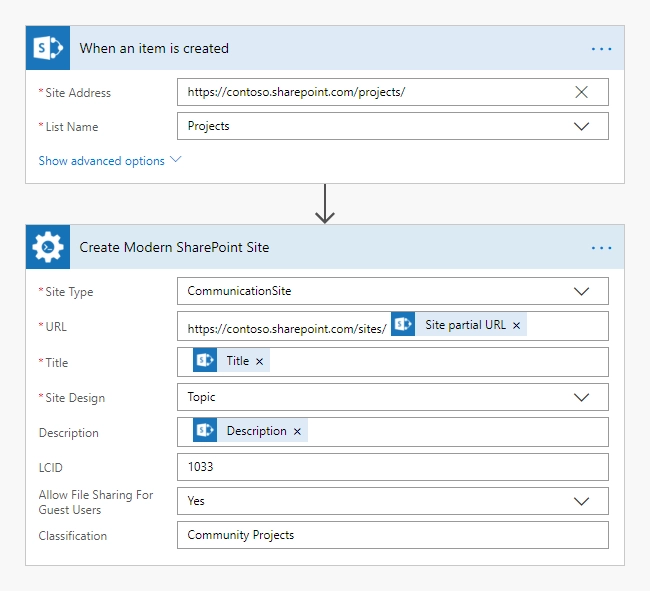
You may use a similar approach to create communication sites with help of the same Create Modern SharePoint site action.
Please see an example of a configured flow below:

Conclusion
That is it. These few simple steps can help you to manage your company’s projects more effectively.
Hint
You may also be interested in this article explaining how to Create SharePoint site by a custom template and grant permissions in Power Automate (Microsoft Flow) and Azure Logic Apps.