Getting started
- Register account and get API key
- Use in Power Automate (Microsoft Flow)
- Use as REST API
- License activation
User guide
- API Keys
- Reports
- Subscription and notifications
- Account settings
- Audit log
- Invite team members to account
Power Automate (Microsoft Flow) actions
General
- Licensing details
- Release notes
- Data protection and security
- Data center location
- Service Level Agreement
REST API
Power Automate (Microsoft Flow) examples
- Provisioning
- Create Modern team or communication site
- Create Modern site using custom PnP template
- Create Modern page using PnP template
- Create list or library using PnP template
- Apply a site design to SharePoint site
- Start Power Automate (Microsoft Flow) with PnP provision from a site design
- Create subsite using custom template and grant permissions
- Debug provisioning PnP template
- Permissions management
- Documents management
- List items management
Create SharePoint list or library using PnP provisioning template in Power Automate
This article will show how to create a custom SharePoint list or library using PnP provisioning template. You can use this approach to create lists or libraries of any complexity in SharePoint. For example, you may want to create an employees list with a set of predefined columns for your team. We will do it below.
PnP template is an XML file that contains a description of SharePoint entities (lists, libraries, pages, etc.) that will be created. You can create own XML template for your SharePoint list or library. Then use the Provision PnP template to SharePoint action from Plumsail Actions to apply PnP templates to your SharePoint sites using Power Automate (Microsoft Flow) or Azure Logic Apps.
If you are new to Plumsail Actions, follow this getting started instruction.
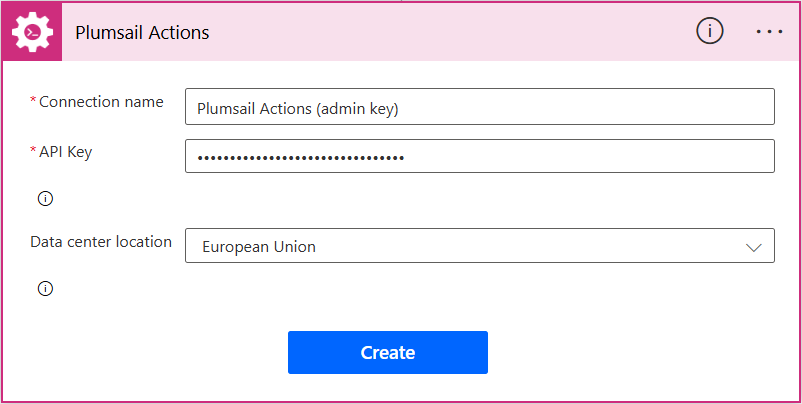
Adding the Plumsail action for the first time, you’ll be asked for a Connection name, API Key, and Data center location.

You can type any name for the connection, for example Plumsail Actions (admin key). Next create an API key on your Plumsail account page, copy, and paste it to the API Key field. Ensure that the selected data center location matches one of your account.
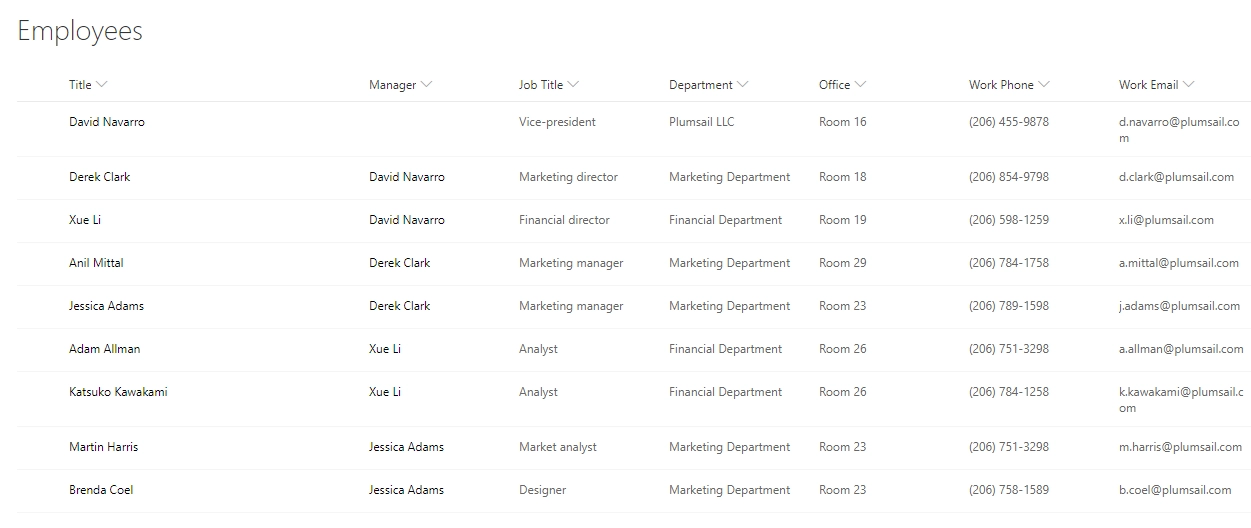
After the preliminaries, we need to create a PnP provisioning template for our list. Let us say we have the employees list:

There are two ways to create a PnP template:
Write a PnP template manually and provision a simple list - It is useful for simple lists without custom views or content types.
Get a PnP template from an existing list and provision a complex list - It is useful for complex lists with content types, views, site columns.
You will find the description of both approaches below. Pick the one that you like more.
Write a PnP template manually and provision a simple list
Note
Our action supports the PnP template schema V202209 (or earlier).
This approach is useful for creation of simple lists or document libraries without custom content types, site columns, etc. Below you can see example of a template for simple employees list:
<?xml version="1.0"?>
<pnp:Provisioning xmlns:pnp="http://schemas.dev.office.com/PnP/2018/07/ProvisioningSchema">
  <pnp:Preferences Generator="OfficeDevPnP.Core, Version=3.7.1903.0, Culture=neutral, PublicKeyToken=5e633289e95c321a" />
  <pnp:Templates ID="CONTAINER-TEMPLATE-C1181F206BE84C09AAAC4B3CB21FBE32">
    <pnp:ProvisioningTemplate ID="TEMPLATE-C1181F206BE84C09AAAC4B3CB21FBE32" Version="1" Scope="Web">
      <pnp:Lists>
        <pnp:ListInstance Title="Employees List3" TemplateType="100" Url="Lists/EmployeesList3" EnableFolderCreation="false">
          <pnp:ContentTypeBindings>
            <pnp:ContentTypeBinding ContentTypeID="0x01" Default="true" />
            <pnp:ContentTypeBinding ContentTypeID="0x0120" />
          </pnp:ContentTypeBindings>
          <pnp:Views>
            <View Name="AllItems" DefaultView="TRUE" Type="HTML" DisplayName="All Items" Level="1" BaseViewID="1" ContentTypeID="0x">
              <Query>
                <OrderBy>
                  <FieldRef Name="ID" />
                </OrderBy>
              </Query>
              <ViewFields>
                <FieldRef Name="LinkTitle" />
                <FieldRef Name="Manager" />
                <FieldRef Name="PhotoUrl" />
                <FieldRef Name="JobTitle" />
                <FieldRef Name="Department" />
                <FieldRef Name="Office" />
                <FieldRef Name="WorkPhone" />
                <FieldRef Name="WorkEmail" />
              </ViewFields>
              <RowLimit Paged="TRUE">30</RowLimit>
            </View>
          </pnp:Views>
          <pnp:Fields>
            <Field ID="{4512a091-1007-4cd9-900b-411f01f2b119}" DisplayName="Manager" Name="Manager" Type="Text"/>
            <Field ID="{2980c003-7607-46de-8676-6c64cd2a3431}" DisplayName="Photo URL" Name="PhotoUrl" Type="Text"/>
            <Field ID="{50ef44ad-091f-4955-a957-b0fb9b42811b}" DisplayName="Job Title" Name="JobTitle" Type="Text"/>
            <Field ID="{346ada44-fd5f-4ed2-85af-d9be52a79f51}" DisplayName="Department" Name="Department" Type="Text"/>
            <Field ID="{f3340208-afe4-404e-bbe3-86edf38e4e52}" DisplayName="Office" Name="Office" Type="Text"/>
            <Field ID="{d9c0a3c9-b591-4646-92d2-95ebc693bed9}" DisplayName="Work Phone" Name="WorkPhone" Type="Text"/>
            <Field ID="{8c612e69-e32d-4d34-9e38-32fadedc9575}" DisplayName="Work Email" Name="WorkEmail" Type="Text"/>
          </pnp:Fields>
        </pnp:ListInstance>
      </pnp:Lists>
    </pnp:ProvisioningTemplate>
  </pnp:Templates>
</pnp:Provisioning>
Let us review what you can change in the template.
<pnp:ListInstance> tag
<pnp:ListInstance> tag represents a list. You can change list title (Title) and list URL (Url). Also, if you want to create a document library, you need to change TemplateType to 101 instead of 100.
You can find all the available template types in the official Microsoft documentation.
<Field> tag
<pnp:Field> tag represents a column in your list. You can add new fields by adding new tags like this:
<pnp:Fields>
  <Field ID="{4512a091-1007-4cd9-900b-411f01f2b119}" DisplayName="Manager" Name="Manager" Type="Text"/>
  ...
</pnp:Fields>
DisplayNameis a display name of the field.Nameis an internal name of the field.Typerepresents a type of the field. You can find all the available types in this article.IDis a unique ID of the field. You can put here unique GUID or fill it dynamically in your Power Automate (Microsoft Flow). See the example below.
<FieldRef> tag under <ViewFields>
<FieldRef> tag under <ViewFields> represents a field in a list view. If you want to add your new field in the list view, create the <FieldRef> tag for it:
<ViewFields>
  <FieldRef Name="Manager" />
  ...
</ViewFields>
For more information about tags available in PnP templates review PnP provisioning schema.
Example of Power Automate (Microsoft Flow)
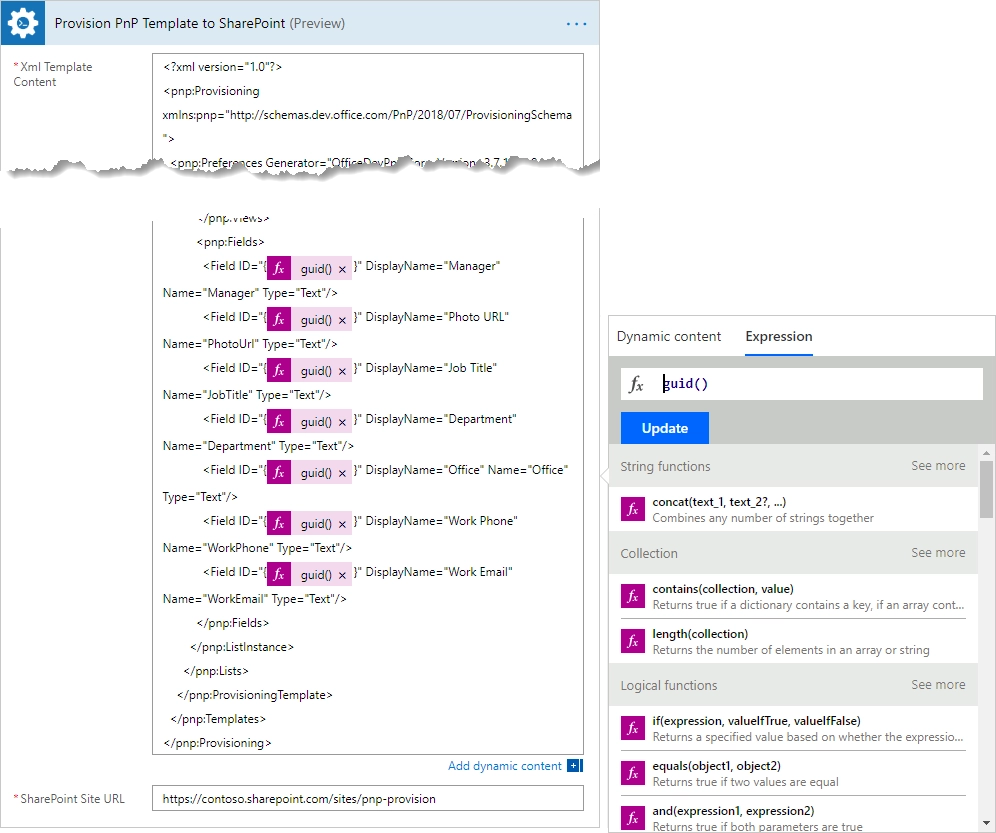
Copy and paste your template into Provision PnP template to SharePoint action in your Flow:

You need to replace all values for Field IDs using Power Automate (Microsoft Flow) expressions like on the screenshot above. It will ensure that your fields will always have unique IDs.
This approach is useful when you want to create simple SharePoint lists or document libraries. If you have a complex list with many views you may consider another option with creating your template from an existing list using PowerShell. For more information read below.
Get a PnP template from an existing list and provision a complex list
PnP PowerShell allows you to execute various commands for manipulating SharePoint, including exporting one or more lists to provisioning template from a SharePoint site.
First of all, you need to install PnP PowerShell. Follow the installation instruction. Then connect to your SharePoint site. Execute the command below and specify your own URL for the site where your List is stored:
Connect-PnPOnline -Url "https://contoso.sharepoint.com/sites/mysite"
To export one or more lists to a provisioning template execute this command:
Export-PnPListToSiteTemplate -Out template.xml -List "Documents" -Schema V202209
Note
You should specify the schema version explicitly to ensure that it is supported by our service (V202209 or earlier).
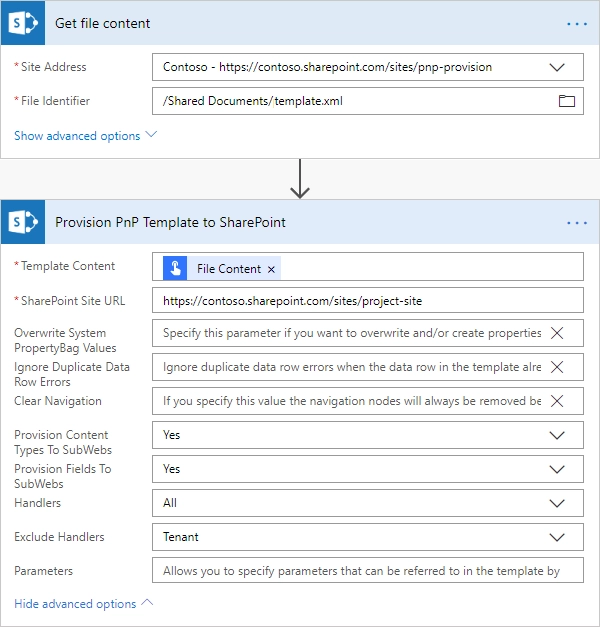
That is all. Now you can save the template file somewhere in your SharePoint and use this file as a template in the Provision PnP template to SharePoint action:

If you haven’t used Plumsail Actions yet, registering an account would be the first step. It is quite easy to get started.
Hint
You may also be interested in this article explaining how to provision site using PnP template.