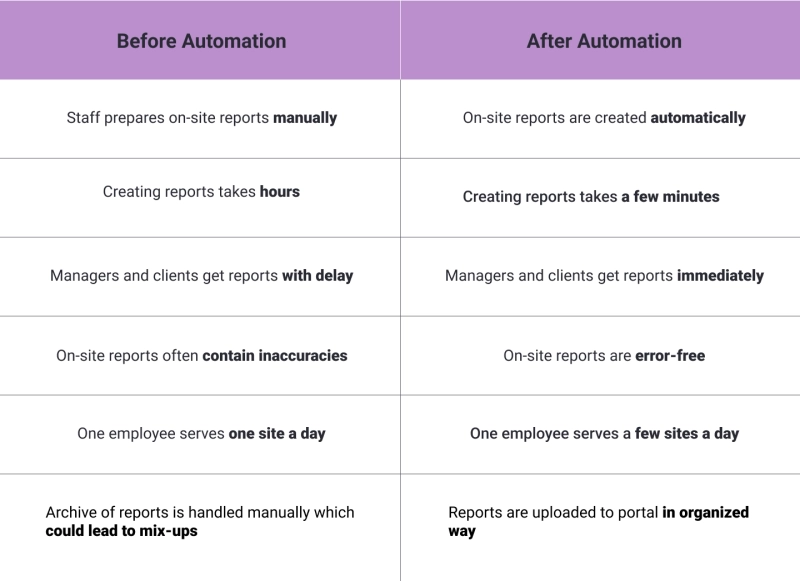
The average cost increase is 80% of original value.
The average slippage is 20 months behind original schedule.
For example, in operations, the site manager might have a signing limit of $100,000; that could be far too low for a megaproject and could end up wasting management time as people run after signatures.
With the automation example described in this article, your site managers won't need to waste time running after signatures, and their field employees will create and send error-free site reports in time.
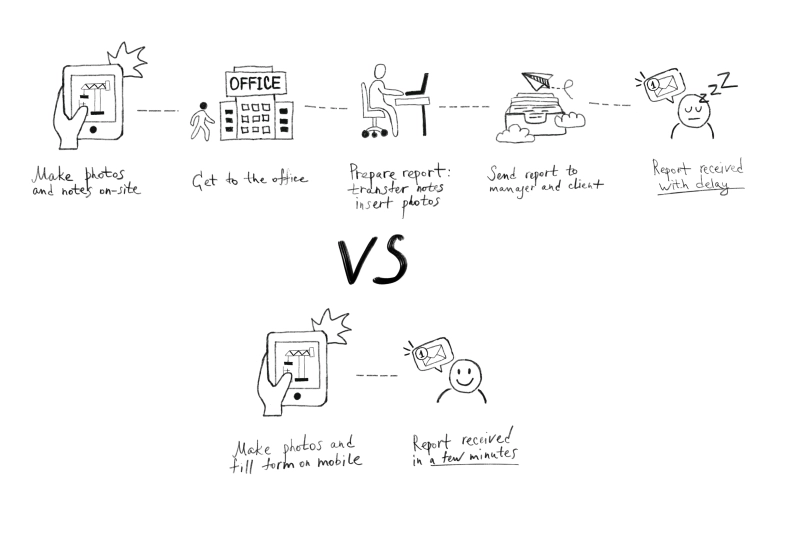
We'll take an example of a construction site report, but the logic can be applied to any field report in any sphere where staff is required to report the progress or results of the work done.
The logic of the automated workflow is the following:
Step 1. Staff makes the photos and fills in the form on a mobile device attaching those photos. Step 2. Form submission triggers document creation – data along with the photos populates a predefined site report template. Step 3. The resulting documents land in your inbox, CRM, or any place you need.
We'll go through each step of setting up such automation.
1. Prepare template
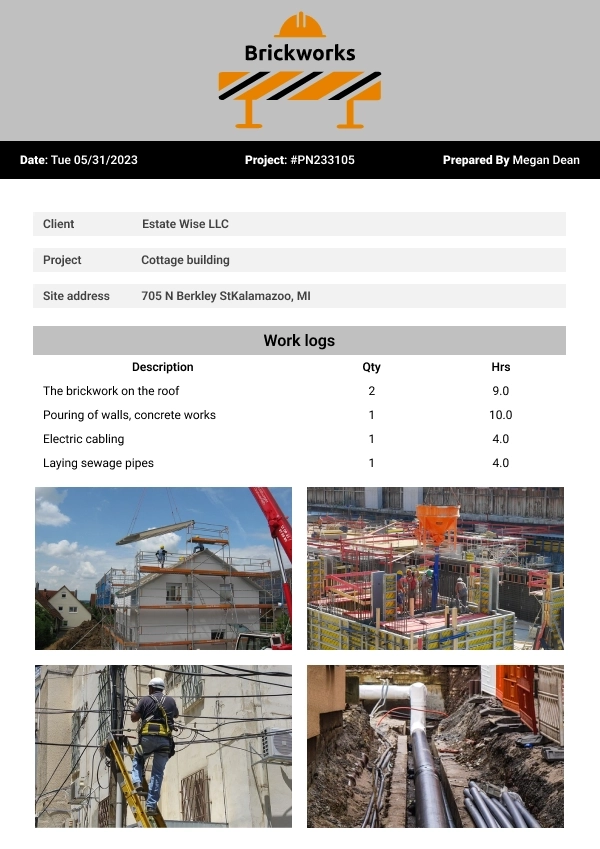
We’ll use a ready-to-go construction site report template from the Plumsail Documents library of templates.
A document template is a preformatted document with special placeholders that indicate the location where data should fill dynamically. You can transform your documents into reusable templates by simply adding these placeholders, aka tokens, to places you usually copy and paste.
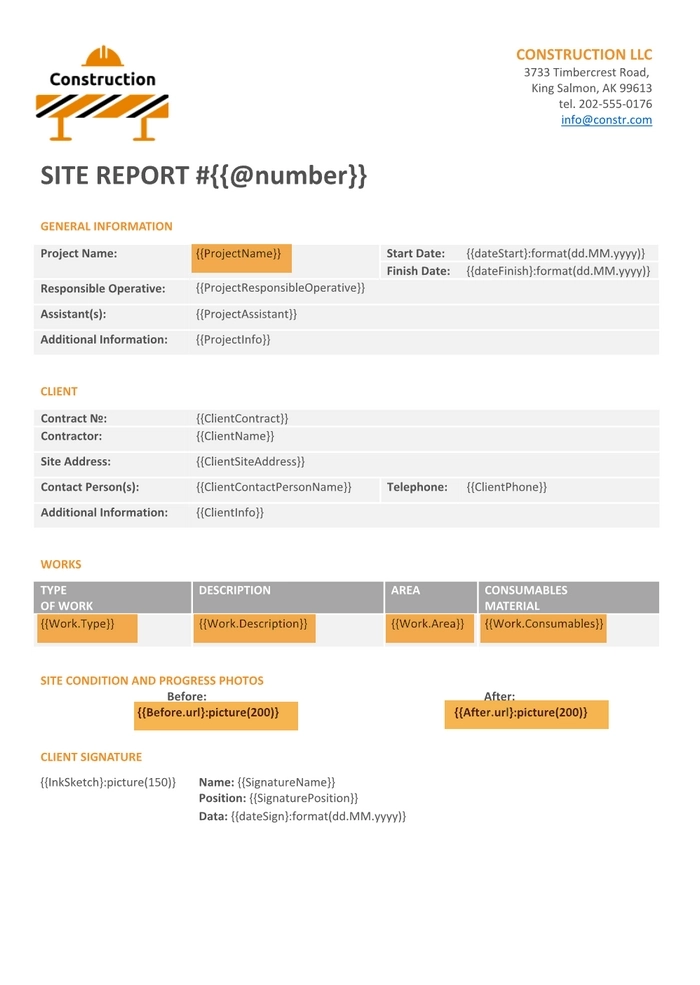
See how the template for the construction site report looks in our case:
Tokens are enclosed in double curly brackets. We orange-highlighted some of them to draw your attention and describe the logic:
We use nested tokens with a dot operator inside a table with Works details to indicate that properties refer to the same collection of the object: {{Work.Type}}, {{Work.Description}}, etc. The templating engine is smart enough to understand what content needs to be duplicated. It will iterate through all objects in the array to render them and add rows automatically.
We use a picture formatter to handle photos from the construction site: {{Before.url}:picture(200)}. A picture formatter lets the templating engine know that incoming data will be a picture and it should be processed properly. This token is also nested as we need an ability to add multiple photos. The photos' urls will come from the web form submission. 200 is the size limitation for the pictures inserted into the resulting documents.
We also use a picture formatter to handle a client's handwritten signature.
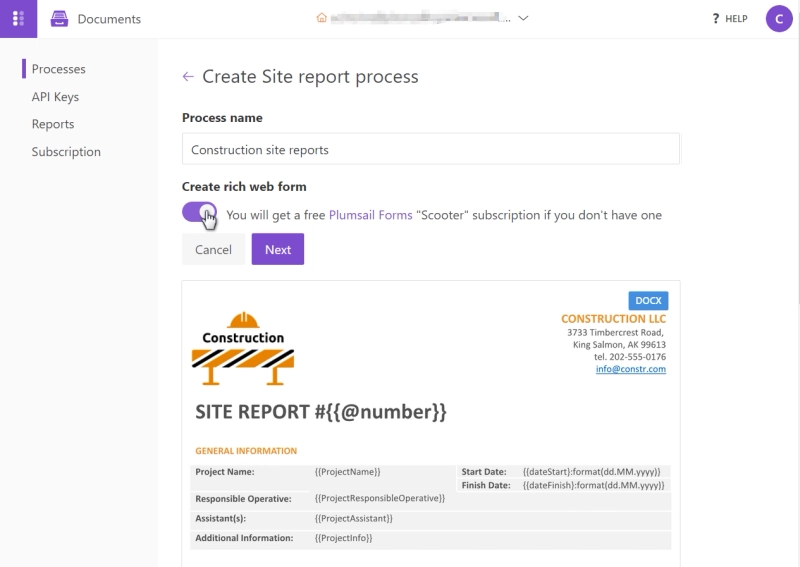
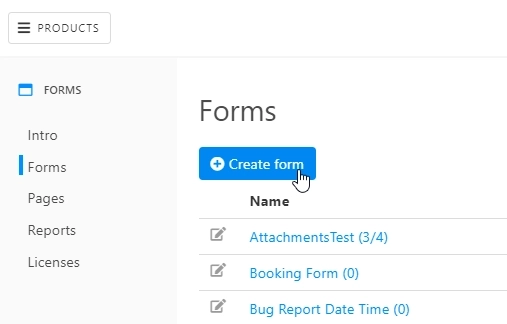
2. Create document generation process in Plumsail Documents
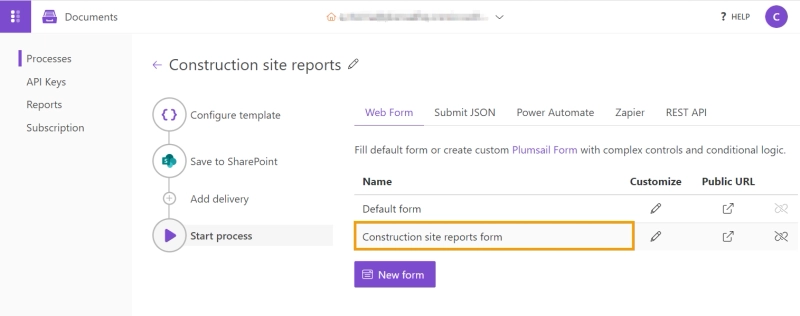
Inside the Plumsail account create a new process from the on-site report template.
Enable the toggle to create a rich web form to have a nice-looking multi-step form associated with the on-site report.
Note: It’s possible to create forms from scratch or customize default forms that automatically generated for each document template.
Alternatively, it’s possible to create a document generation process from blank, and then upload the document.
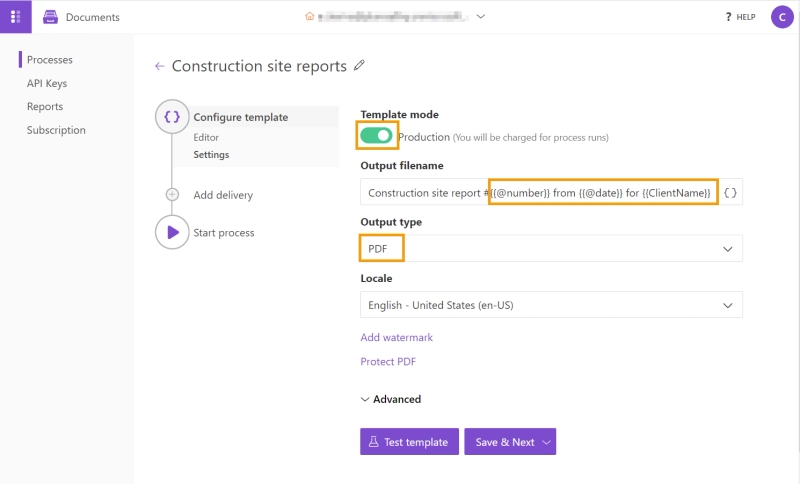
3. Configure output file settings
The first step is Configure template, that includes two substeps: Editor and Settings.
We don’t need to edit the template, jump to the Settings where we configured the following settings:
Set to get the output document in PDF which means it’ll be automatically converted from Word to PDF.
Enabled the Production mode to remove the Plumsail watermark from finalized documents.
Inserted tokens into Output filename to make it distinct and descriptive. They will work the same way as in the document template: depending on the form submission data, the output filename will always be unique.
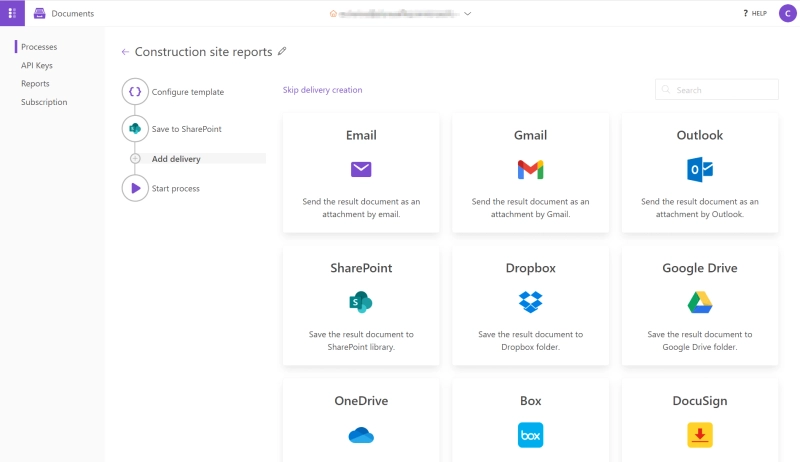
4. Add deliveries
Next, add deliveries, as many as needed. We added a SharePoint delivery – to upload resulting site reports to the SharePoint document library. It’s possible to upload generated documents to other storages, send by e-mail, or send to collect e-signatures. Alternatively, if the needed option of delivery is missing, you can manipulate a resulting file in Power Automate, Zapier, or Make platforms and send it to any app.
5. Start site report creation process
The next step is to launch our process to dynamically populate the template and create construction site reports automatically. We’ll do it on the form submission using the rich web form that we ticked to create at the very beginning of the process creation:
6. Overview the form
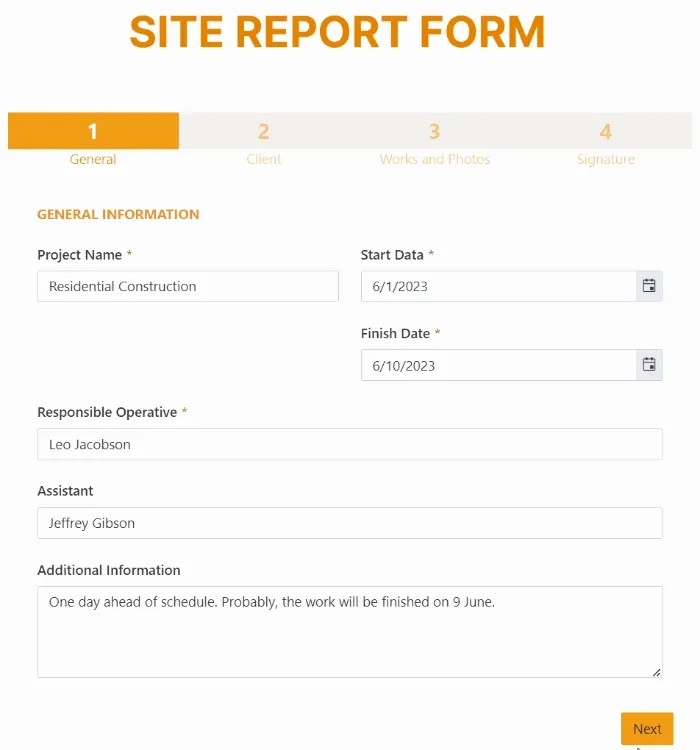
This is how our filled web form looks:
It is divided into 4 steps, so it will be handy for a field employee to fill out the form on a tablet without scrolling the pages. The Plumsail Forms wizard container allows you easily create such multistep forms.
The form includes a few fields and controls that deserve our special attention:
Data table control for the Works list allows adding as many rows of works as needed.
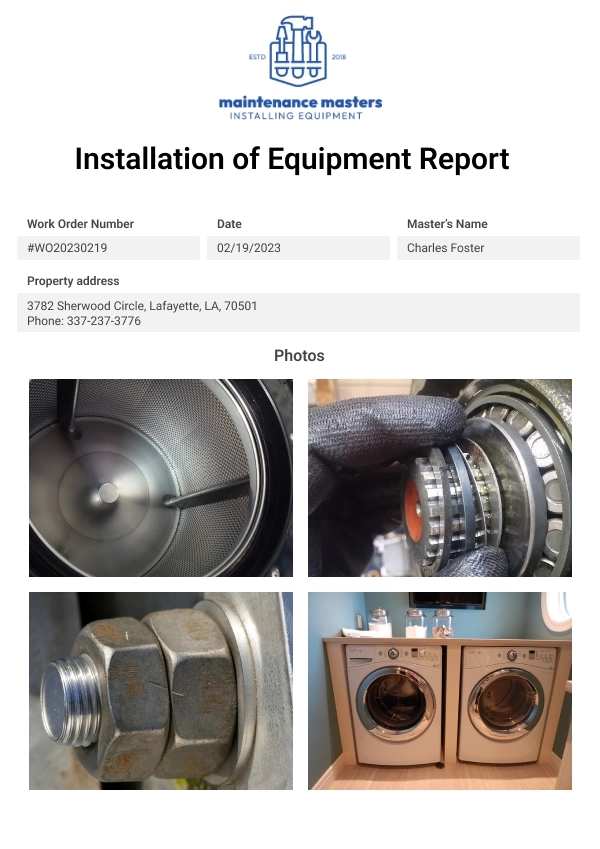
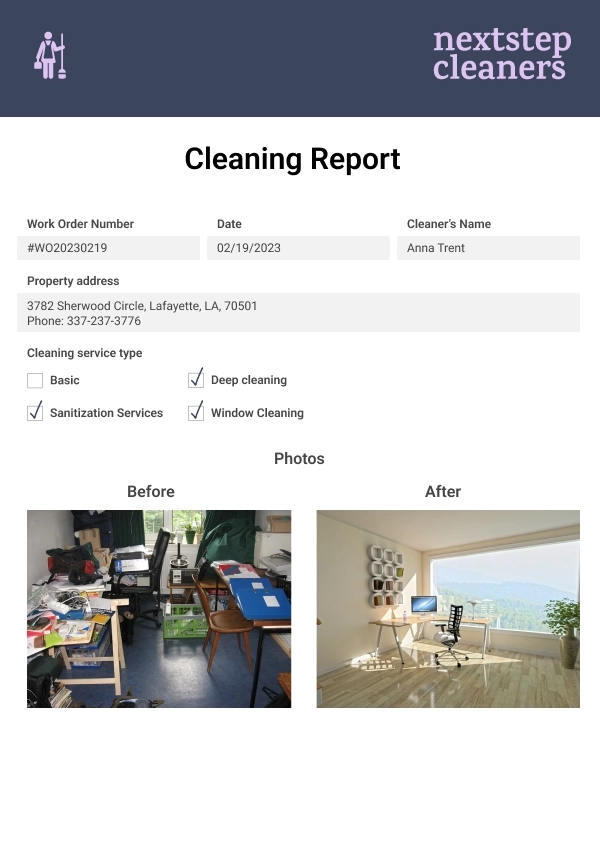
The attachment field is used for uploading photos of the construction site.
The InkSketch control enables the client to leave a handwritten signature that will be passed to our final report.
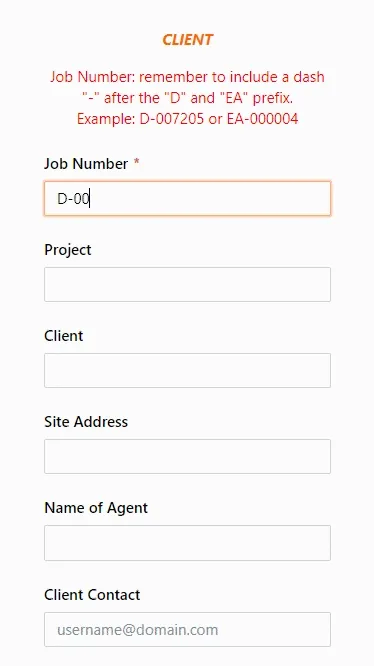
This is only a small part of what you can do with Plumsail public forms. It’s possible to go further and add advanced logic to the form using the JavaScript framework. As an idea, you can automatically fill particular fields based on other field data. Pull that data from your CRM or any other database. For instance, LDD Construction Ltd populates client's data from their Dynamics 365 based on the Job number field:
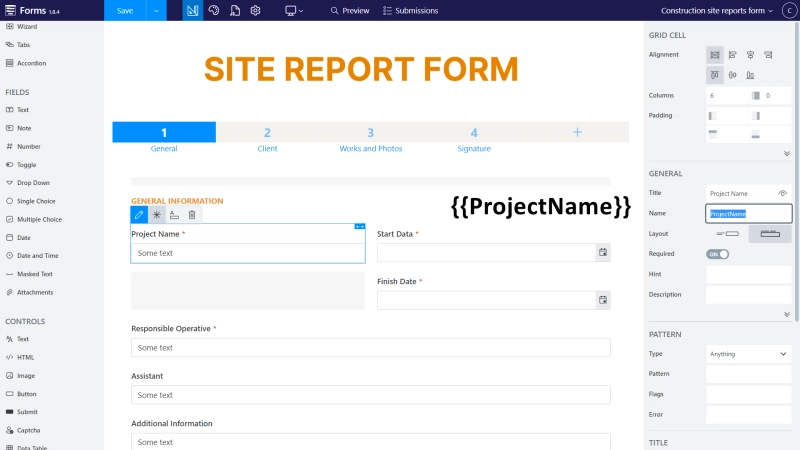
6. Understand form structure
When the form is submitted, it sends JSON data to the template to create a report. Each form field has a name matching the particular template's token:
For nested tokens of Works log, we have a data table in the form: the name of the table is what goes before the dot operator {{Work., and the name of the columns are what goes after the dot in the token: .Type}}, .Description}}, etc.
We also have nested tokens for photos. In the form, we have the attachment fields for them. The attachment field name is what goes before the dot in the token. And after the dot we have url. The form submission returns a data array with all photos and their properties, one of which is url. The templating engine uses url addresses to pull images and insert them into the resulting document.
Test the automation and launch the creation of on-site reports
We’re all set and submitting the form.
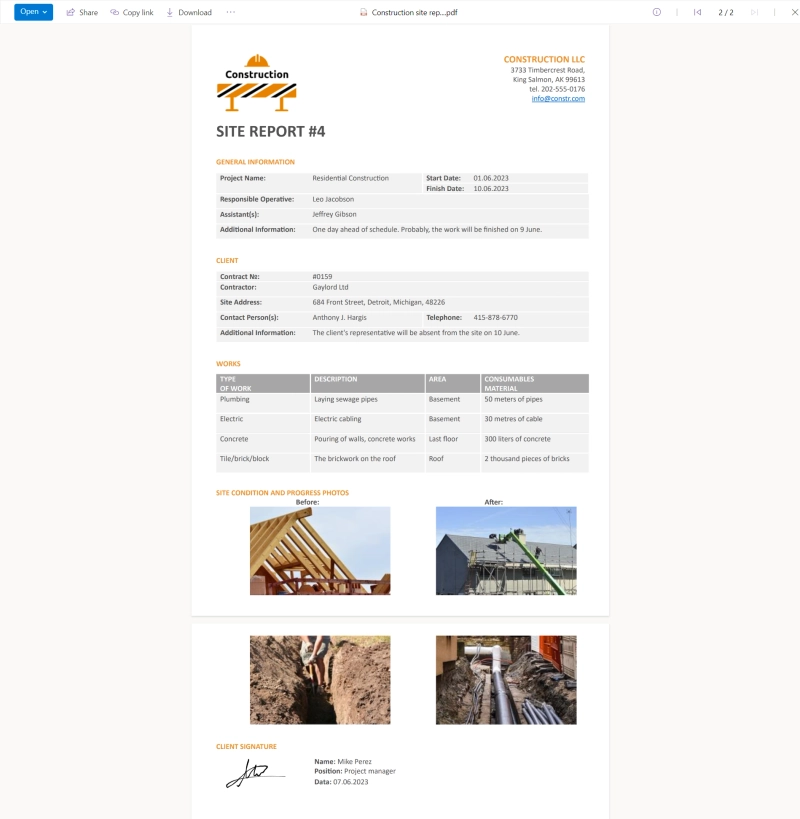
Checking the SharePoint folder where we set the resulting document to land, here is the construction site report with multiple images and the signature!
This is a simple example of how you can set up the automated creation of on-site reports. It will take you not more than one day, but the impact will be incredible.
Results of site report automation
On-site reports keep up to date with the work progress and predict the risk of delays, they also protect the company from possible lawsuits. When managers know everything going on at a construction site, they can promptly take measures, and the chances of disputes are low.
Automated creation of on-site reports empowers:
field employees to create their reports automatically on form submission instead of manual data input to documents;
managers to track the work on the construction site without personal presence;
to instantly send the reports to clients so that they don’t worry about the progress of work;
to automatically upload reports to the portal and be able to get back to them in case of an audit or any disputes.
We're cutting down on the amount of paper we use in our everyday procedures within the company. We no longer have to deal with delays, lost pieces of paper, photos of our filled in forms that are too blurry to understand or cannot be read because we don't understand someone's handwriting.
Viorel Boeru, Operations Assistant at LDD Construction Ltd
By sharing use cases and practical examples we hope to encourage you to automate things. If you have any questions, or maybe suggestions on what you’d like to learn more about, feel free to leave a comment.