Forms
Dec 12, 2019
Modern and classic SharePoint UI — differences and advantages of switching
What’s this Modern UI all about?

This case was described to us by an IT services provider Lucidica and used for their client in real-life application.
As we'll be using abbreviations and system internal names throughout this article, here's a glossary you can go back to and refer to:
The task at hand was to develop a system on SharePoint for Lucidica, that could seamlessly manage the integration between Managed Cloud Services (MCS), our internal subscription service, and Pax8, an external third-party Reseller Platform.
This system would be capable of generating new subscriptions, incorporating existing license data into our in-house SharePoint hosted PSA/ERP, CORE4, and modifying the existing subscriptions housed in Pax8. Given that we generate invoices for our clients through CORE4, it is crucial to maintain accurate records of their subscriptions and their respective quantities.
Considering the extensive variety involved in creating MCS items, our goal was to develop a versatile form that could accommodate all possibilities while remaining clear and user-friendly to prevent confusion.

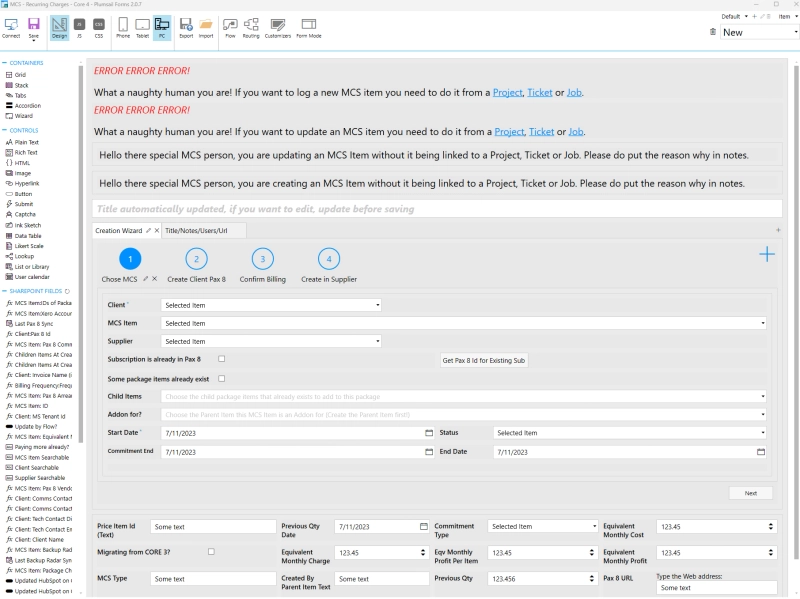
Custom JavaScript within the form allowed us to dynamically show or hide fields based on the engineer's selections and automatically fill in fields as needed. At Lucidica, our Lead SharePoint Developer, Jamal, leveraged Plumsail forms to create a form with an integrated wizard.

This Wizard feature allowed us to outline the various stages in creating an MCS item for a client, serving as a systematic guide for our engineers, ensuring a seamless process, which would have been impossible without Plumsail Forms.
All of these features and more allowed to create seamless subscription management integration between SharePoint CORE4 and Pax8.
We have so much going on in the form, but to the end user all they see is a clean form.
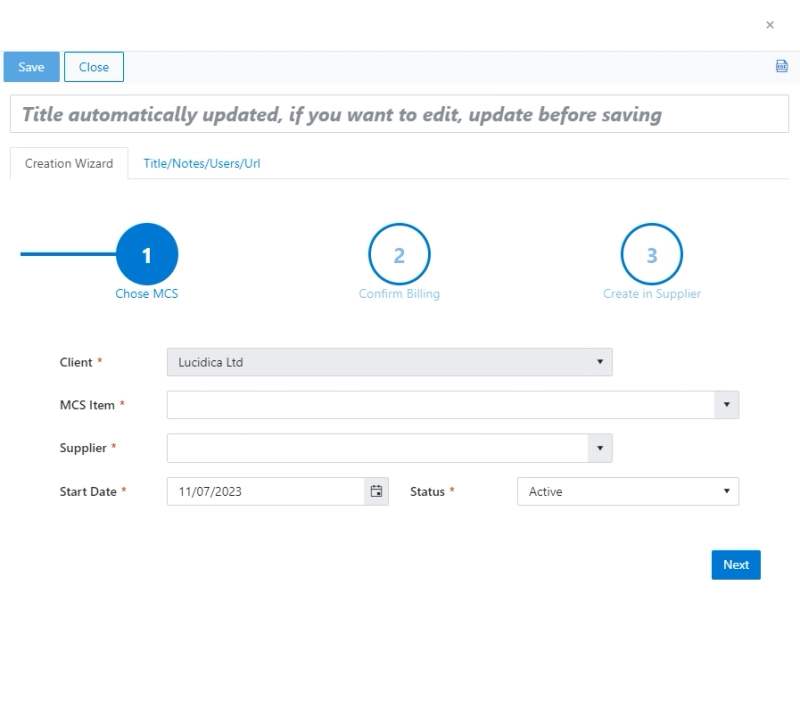
What the user sees when they first open the form.
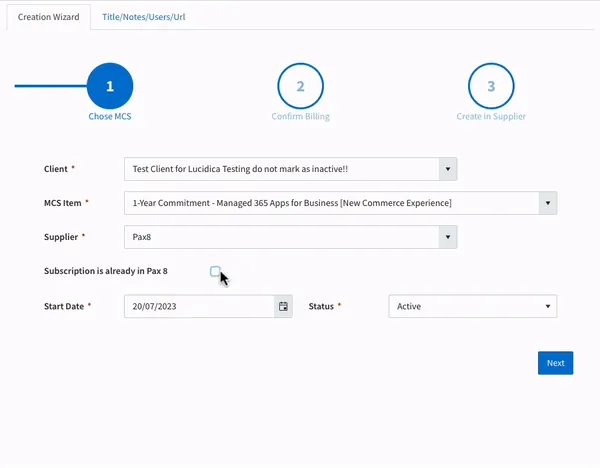
Engineers needed a way to link an existing subscription in Pax8 when adding the Managed Cloud Service (MCS) item to CORE4, as we did not always need to create a new MCS item with an associated new subscription in Pax8.
We introduced a checkbox, visible only when a Pax8 item is selected. The checkbox provided engineers the choice to confirm that the subscription already exists in Pax8. If checked, a button appears that triggers a custom JavaScript function to collect and validate the unique subscription ID, initiating a Power Automate API flow to retrieve the subscription information via Pax8's API.
Upon receiving a response from the API, the form is automatically updated with the relevant subscription information, running multiple background lookups in the process. If the subscription type does not exist in CORE 4, the engineer is prompted to have an MCS manager create the subscription and billing information within CORE 4. This ensures that it is available for future use by the engineer.
During testing, we observed that engineers occasionally selected incorrect MCS products when importing an existing MCS item from Pax8.
We refined our JavaScript to cross-verify the product GUID with the MCS product selected by the engineer, ensuring accuracy and consistency in product selection. If a discrepancy were detected, the system would automatically select the correct product. This adjustment relied on the built-in 'pnp' functions of Plumsail Forms.
We aimed to ensure that only MCS managers could create or modify MCS items from the MCS Items List, whereas regular engineers could only do so through a Ticket, Project, or Job dialog.
We initially thought about creating a SharePoint group exclusively for MCS managers, enabling us to set up separate forms for them and the non-managers. However, this approach would require maintaining two forms, which could complicate updates.
So, we opted for a simpler solution. We used a single form for all users and applied a 'pnp' function to verify if the current user belonged to the MCS Managers group. If they did not belong to this group, they would see an error message. If they were part of the group, they would receive a reminder to update the 'Notes' field for the item, which was made mandatory.
However, anyone opening the MCS items form from a Project, Ticket, or Job would not see these messages, ensuring a seamless experience.

The CSS (Client Satisfaction Score) tab's flexibility in the forms designer is incredible. It lets me hide HTML elements before the form loads and reveal what I want through a JavaScript function. It is a powerful tool for creating forms that are both user-friendly and easy to maintain!

What a normal engineer sees when they try to create a MCS item outside of a Project, Job, or Ticket item.
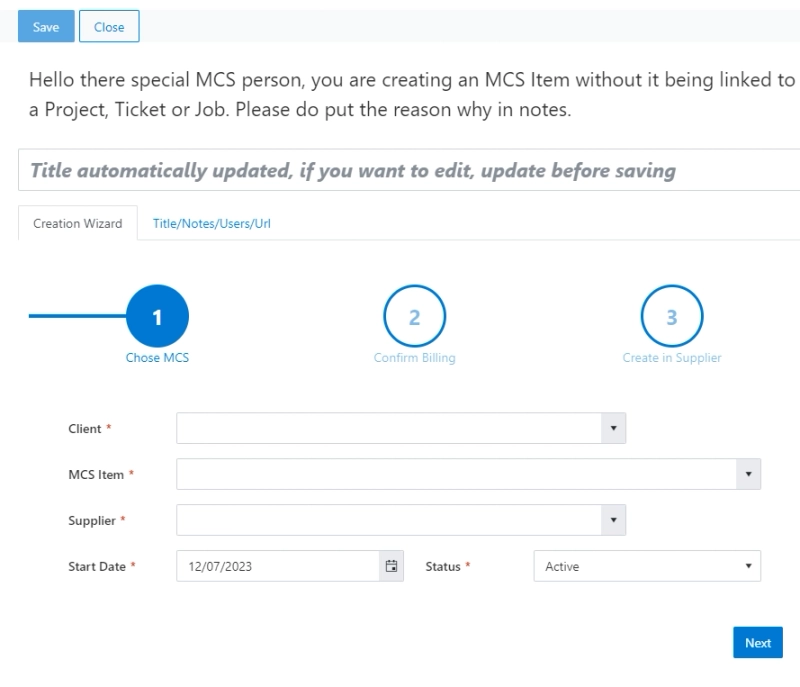
What an MCS Manager sees when they open the MCS dialogue.
If the client for whom we were creating the MCS item was not yet established within Pax8, we needed the form to enable engineers to handle this task via CORE4 and obtain the client's subscription.
Our solution capitalized on the wizard container's ability to house a dynamic number of steps. By default, the wizard consisted of three steps:
However, if the client was not already in Pax8, we included an additional step, thereby restructuring the process:
A custom JavaScript function activates when the client and MCS item is selected, integrating the extra step into the wizard steps array, and facilitating the creation of the client in Pax8.
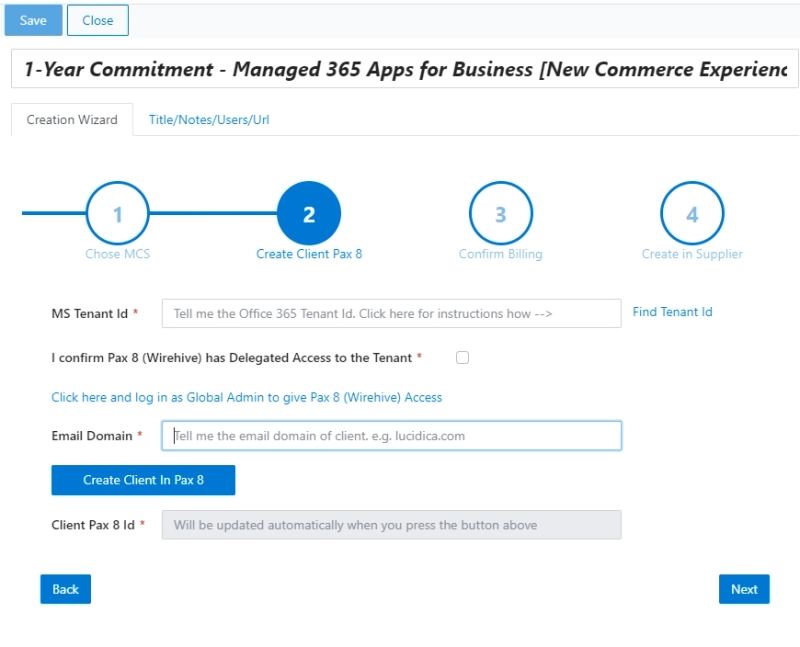
Adding Client to the Pax8, before the confirmation of billing.
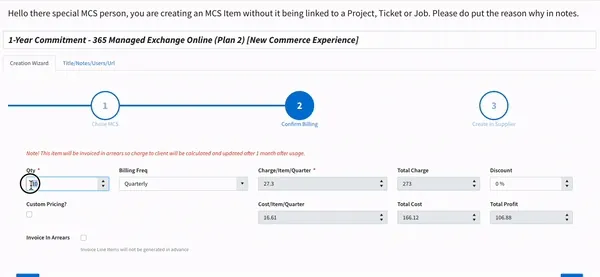
We needed to ensure consistent pricing for each product sold while retaining the flexibility to offer discounts if required. Engineers should not be permitted to sell an MCS product for less than a predetermined amount set by the MCS Manager.
We employed the dynamic field restriction capabilities of Plumsail forms, which allow certain fields to be locked down yet updated automatically. When the quantity is altered, a custom function activates that calculates the proposed client price. This function retrieves information from the MCS.
Item Price List performs the necessary calculations and populates the fields accordingly. However, we allow the engineer to adjust the billing frequency and discount amount as needed.
By taking advantage of Plumsail Forms for SharePoint, companies can customize different forms for different users, streamline their internal processes, create solutions integrated with Power Automate, and much more!
If you'd like to try the product for yourself, get started with 30 days free trial of Plumsail Forms for SharePoint Online by following the installation instruction in our documentation, which includes a full video walkthrough.
If you're using SharePoint 2019 or Subscription Edition, follow the SharePoint On-Premises installation guide.
What’s this Modern UI all about?
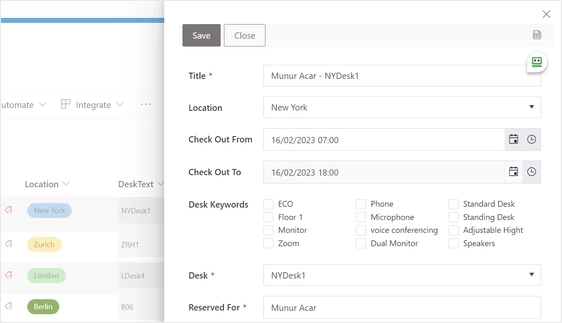
Discover real business cases from Room Manager 365, one of the great users of our product, who shares his solutions for booking desks and rooms in the office with Plumsail Forms
KKiT from Australia helps their clients automate processes with Plumsail Forms, ranging from travel requests and office pre-visit questionnaires to more complex workflows.