How to create charts from SharePoint lists with Power Apps and Plumsail Forms
Visualize data with column, line, pie and other charts in SharePoint forms using data from the same or other SharePoint lists in Power Apps and alternatives
In this article, we will show you how to set up a SharePoint leave request approval workflow for your employees. We'll create a leave request SharePoint list, customize the request form, and automate the approval process using Power Automate. Additionally, we'll use Plumsail Forms to improve the form, making it more user-friendly by hiding approval fields from the requester and adding validation to prevent scheduling conflicts.
In this article:
Otherwise, watch the quick video overview of the process:
Let's jump into the practical process of creating a SharePoint leave request approval workflow. We'll start by setting up a leave request list in SharePoint, turn it into a calendar view, customize the form with validation, and set up an approval process in Power Automate to manage requests efficiently.
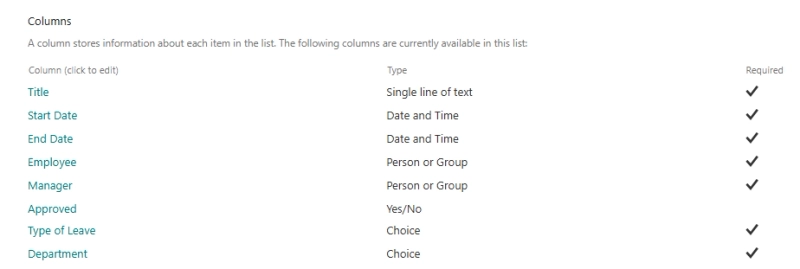
First, set up a SharePoint List. You don't need many columns, we'll use basic ones:
We're also making most of the fields required as we'll need them for the approval process.
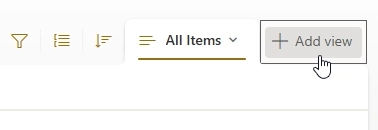
Inside the List, click Add view:
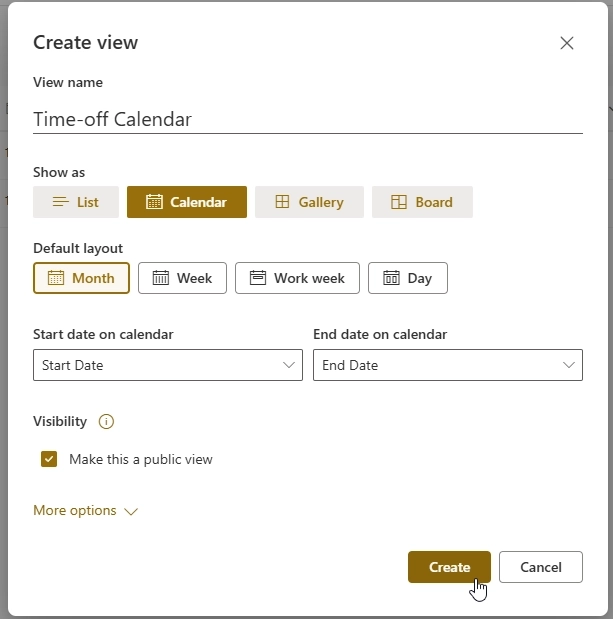
We'll setup a calendar view:
And we'll click add or remove fields:
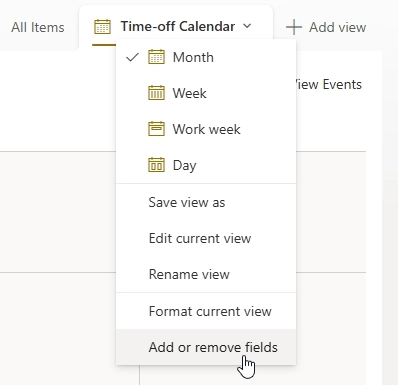
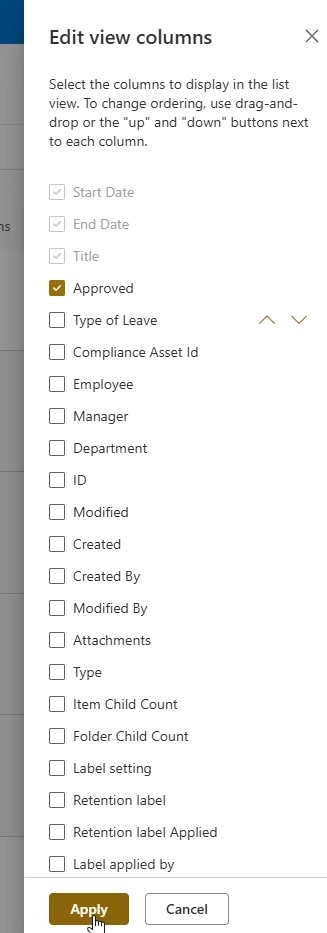
To add the Approved column to the freshly created calendar view:
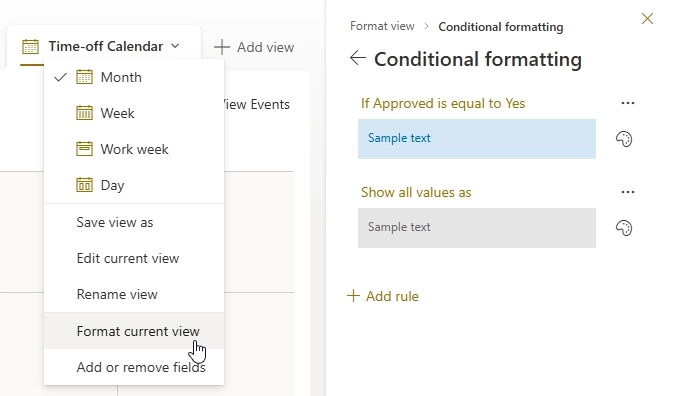
It will not appear in the view, but we can now use it to add conditional formatting and highlight approved requests with different color:
Customizing the form with Plumsail Forms for SharePoint is extremely easy. If you want to get started, check out the step by step installation guide in our documentation.
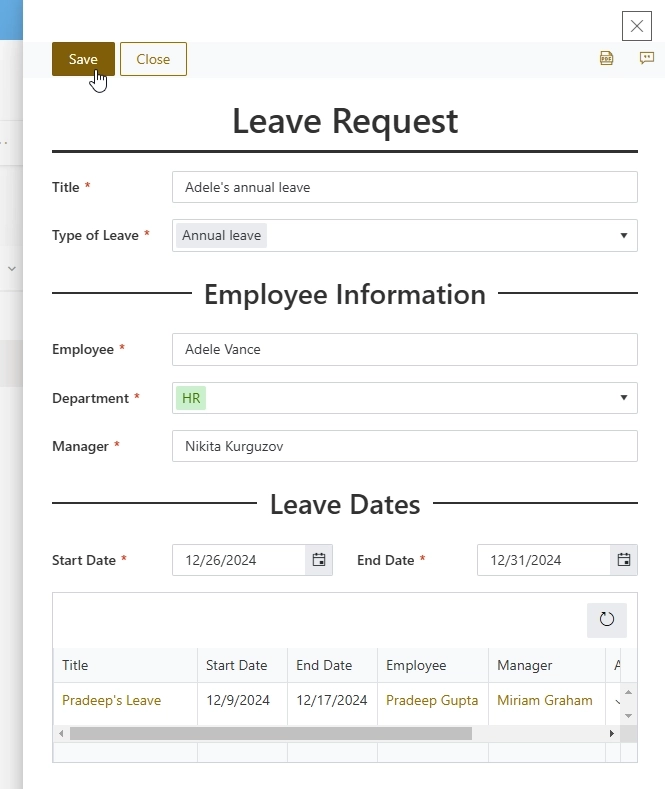
We'll just drag-n-drop fields onto the form:
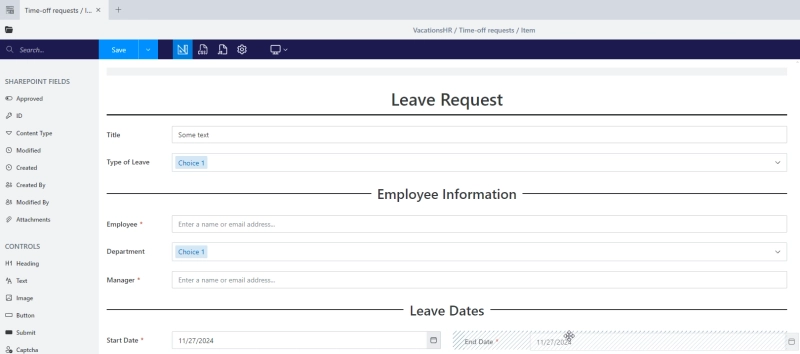
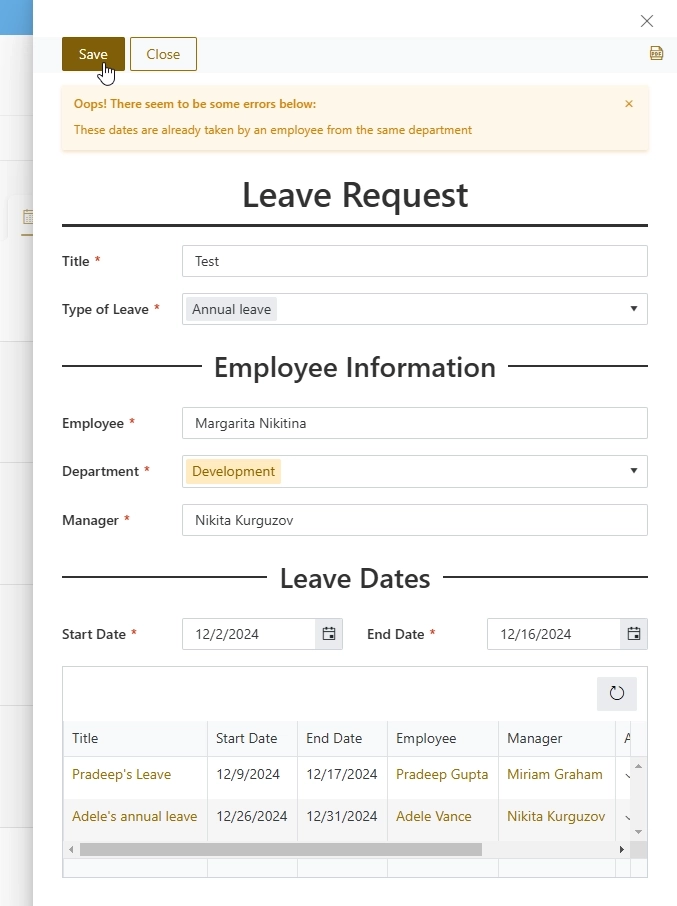
It will look great and adjust to screens of all sizes. We'll also add List or Library control to make existing requests visible to the user.

Finally, we'll play with some code, and we'll add custom validators for the Start and End dates: first of all, Start Date should be before or equal to End Date. Secondly, we'll add a form validator with pnpjs to check whether there is a conflict - an existing request from the same department that has been approved already, and if so - prevent the form from saving.
fd.spRendered(function() {
    fd.validators.push({
        name: 'Dates conflict validator',
        error: 'These dates are already taken by an employee from the same department',
        validate: function() {
            // check whether there are requests already
            return pnp.sp.web.lists.getByTitle('Time-off requests').items
                    .select('Title', 'Id', 'StartDate', 'EndDate')
                    .filter("Department eq '" + fd.field('Department').value + "' and Approved eq 1")
                    .get()
                    .then((items) => {
                        // see if we got something
                        if (items.length > 0) {
                            for(var i = 0; i < items.length; i++){
                                var item = items[i];
                                var startDate = new Date(item.StartDate);
                                var endDate = new Date(item.EndDate);
                                //check for conflict
                                if ((startDate < fd.field('StartDate').value && endDate < fd.field('StartDate').value) ||
                                   (startDate > fd.field('EndDate').value && endDate > fd.field('EndDate').value)){
                                   continue;
                                }
                                else {
                                    return false
                                }
                            }
                        }
                        return true;
                    });
        }
    });

    fd.field('StartDate').addValidator({
        name: 'StartDate validator',
        error: 'StartDate cannot be after End Date',
        validate: function(value) {
            if (fd.field('EndDate').value && value > fd.field('EndDate').value) {
                return false;
            }
            return true;
        }
    });

    fd.field('EndDate').addValidator({
        name: 'EndDate validator',
        error: 'EndDate cannot be before Start Date',
        validate: function(value) {
            if (fd.field('StartDate').value && value < fd.field('StartDate').value) {
                return false;
            }
            return true;
        }
    });
});
Now, this code will ensure that the dates are specified properly and there is no conflict with existing approved requests.
With our setup, creating an approval flow in Power Automate will require just a few steps.
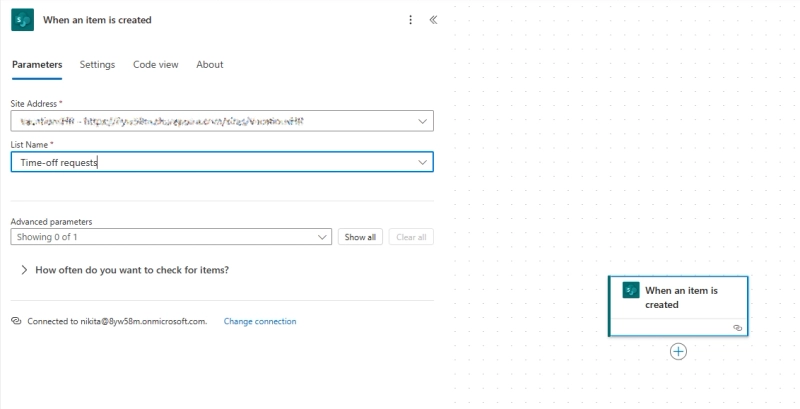
First of all, we'll create an automated flow which is triggered whenever an item is created in our Time-off requests list:
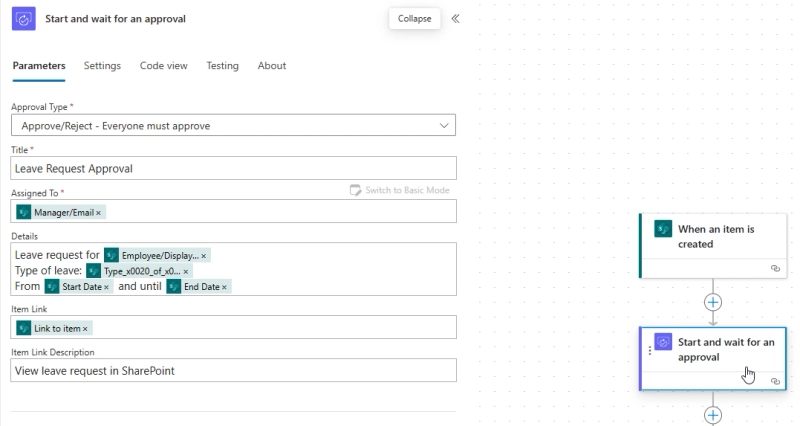
We'll then use the information on the form to send an approval request to the manager, specified on the form with Start and wait for approval action:
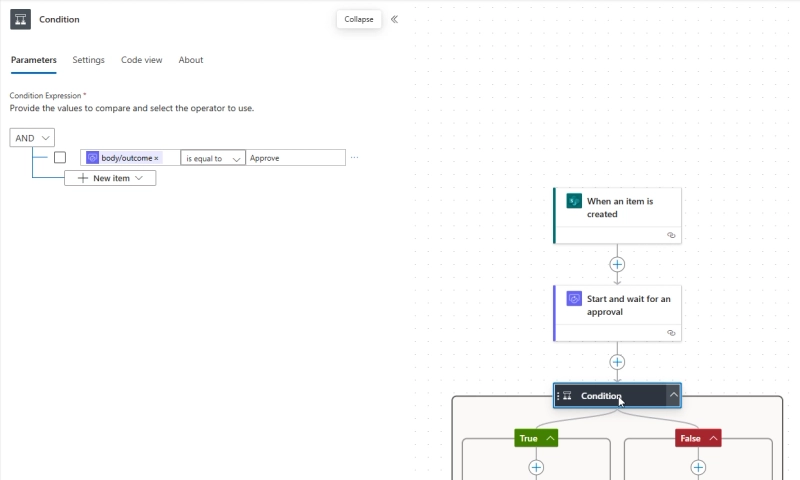
Adding a Condition block will allow us to check the approval status by comparing Outcome to Approve:
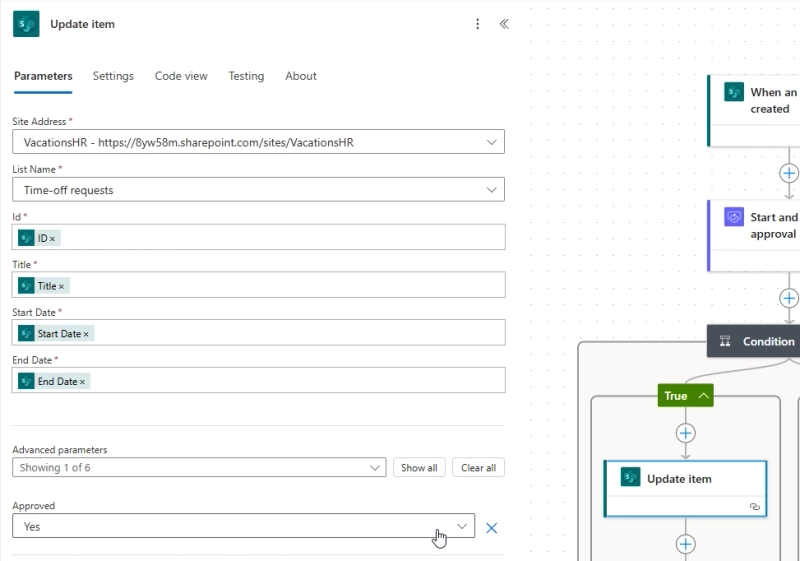
If the request is approved, we'll update item Approved field to Yes:
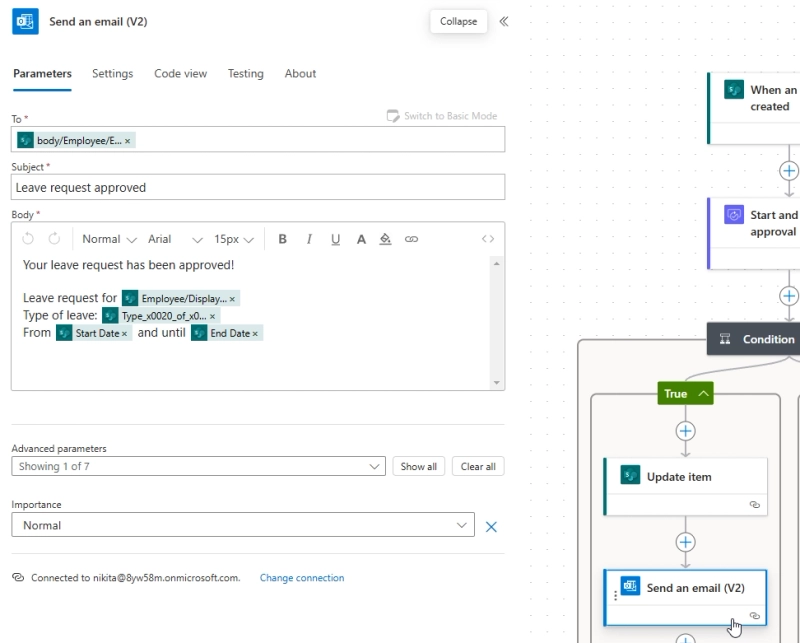
And we'll send an email to the employee, notifying them that their request was approved.
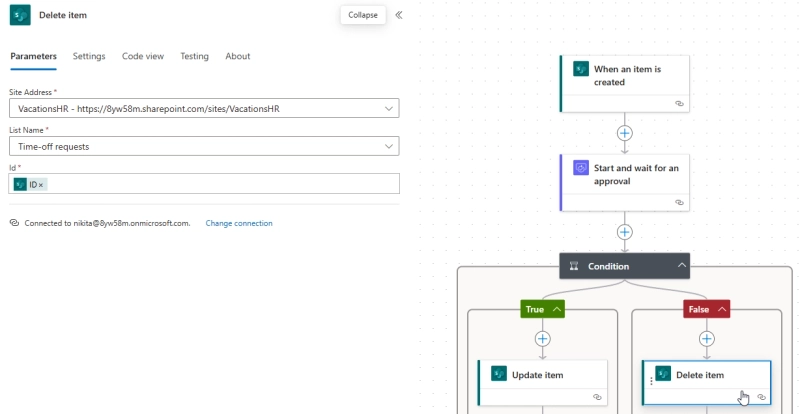
Now, if the request is not approved, we'll delete the item right away:
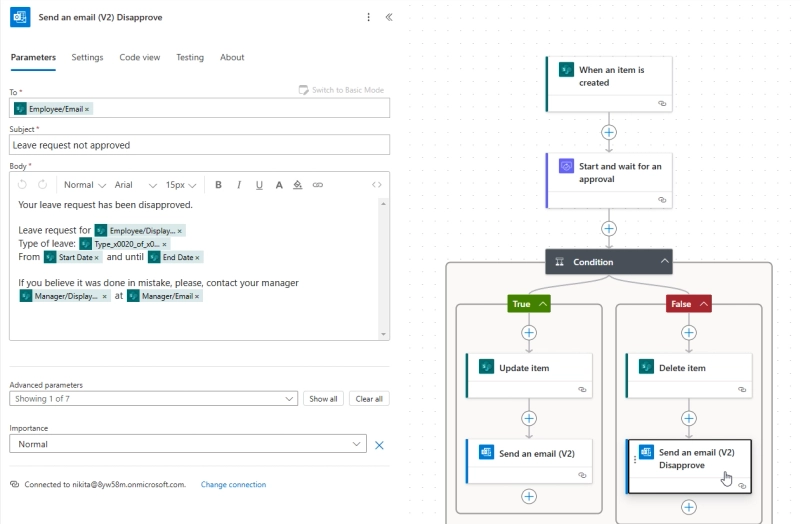
And we'll also send an email to the employee, asking to contact the manager directly to discuss why the request got disapproved.
We'll test the flow with a simple request:
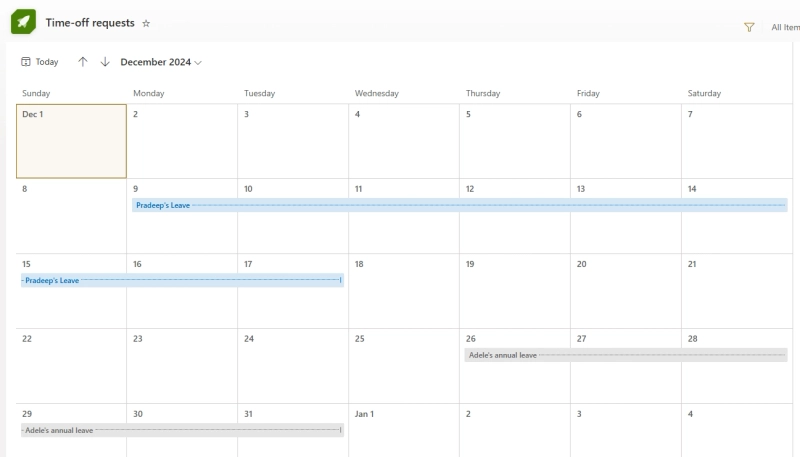
Here's how it looks before approval:
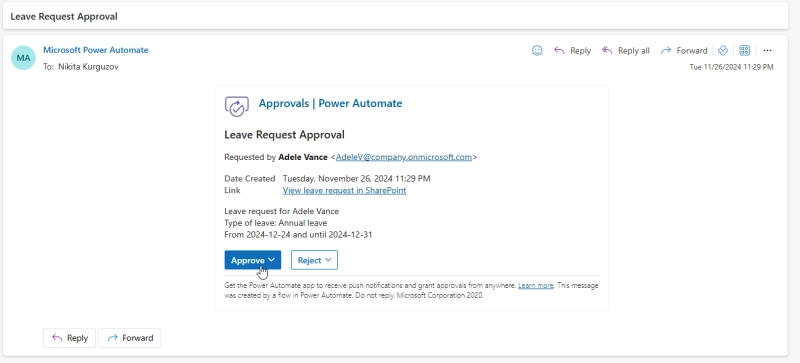
We'll receive the following approval request to our inbox:
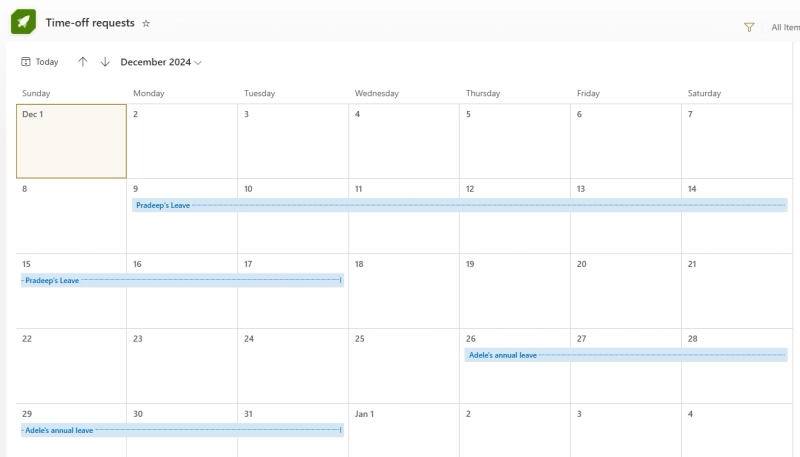
And if it's approved, that's what we see:
Hope that this article was helpful and inspires you to create your own SharePoint leave request approval workflow. With Plumsail Forms for SharePoint, you can easily create custom leave request forms, add validation and so much more. For even more inspiration, check out this actual SharePoint leave request management system in use: Leave requests management with SharePoint Forms at EFAFLEX.
If you'd like to try it out and see if it works for your needs, get started with 30 days free trial of Plumsail Forms for SharePoint Online by following the installation instruction in our documentation, which has a video walkthrough.
If you have any questions, our support team at support@plumsail.com and big community will be happy to help to get started with anything you might need!