Create a Ticketing System in SharePoint with Power Automate
Improving the communication with clients or inside a company does not require much effort. A simple way to do this is to create a custom form for sending feedback, reporting a problem, requesting assistance, or getting some information.
In this article, we will explain how to create a ticketing system in SharePoint using Power Automate. We will use Plumsail Forms as a sample web form service, but you can replace it with Microsoft Forms or any other service that can trigger a Power Automate flow. The latter will generate tickets in Plumsail HelpDesk for Microsoft 365 using a native connector.
Design form for SharePoint ticketing system
The first step is to design a form for collecting responses from users. We will do it with the help of Plumsail Forms, but you can use any other web-forms solution that allows submitting data to Power Automate. This brief article gives a better understanding of how to work with Plumsail Forms.
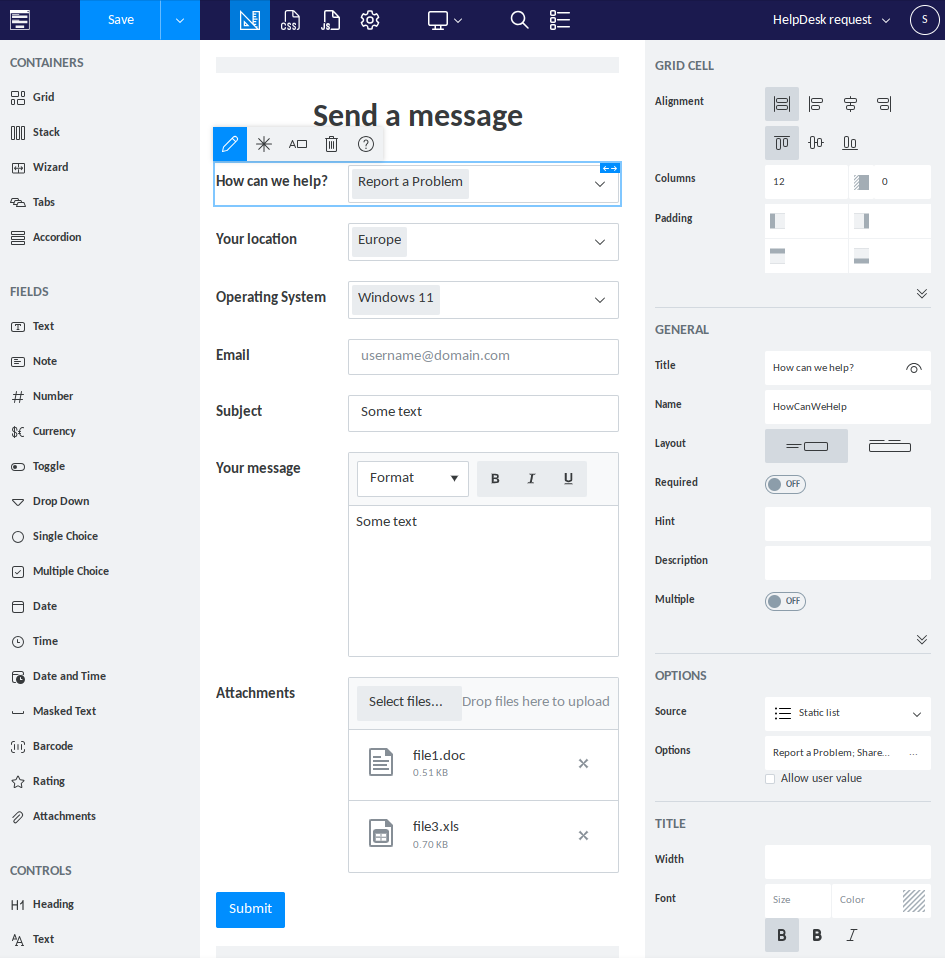
Think about what information might need to be specified: a subject for the ticket, request’s category, customer’s location, operating system, etc. Do not forget to include the Submit button so that users can send the filled form: the flow starts operating only once the form is submitted.
Here is a simple form designed to receive messages from customers.
Once you have designed and saved the form, place it on a page where you would like it to appear. You can add it to your public website or a SharePoint page in Microsoft 365.
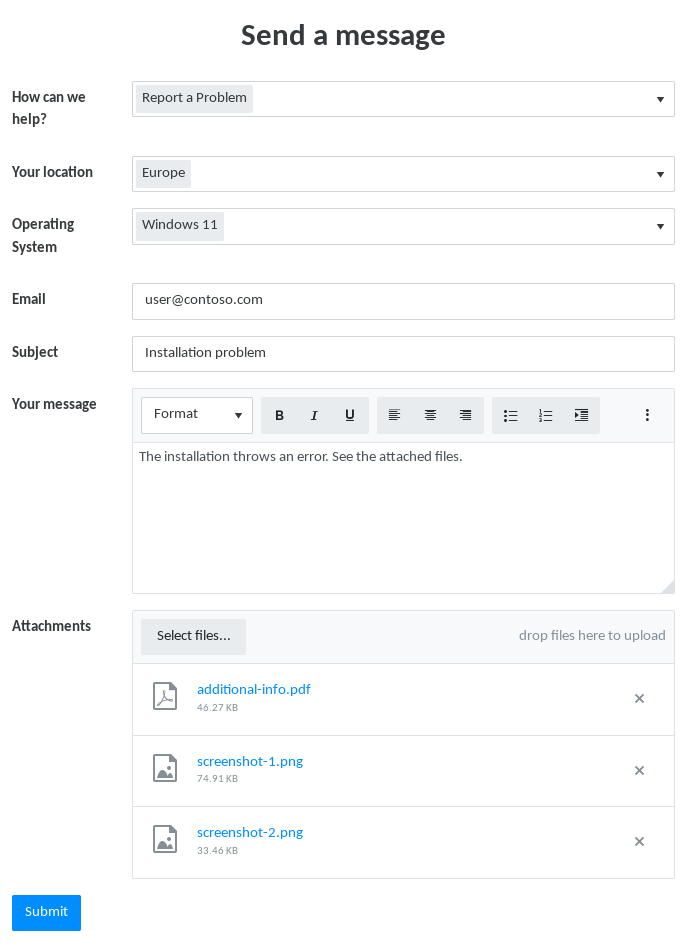
Here is a preview of the created form filled with some information for demonstration purposes.
Create flow in Power Automate for SharePoint ticketing system
The complete flow includes the following steps:
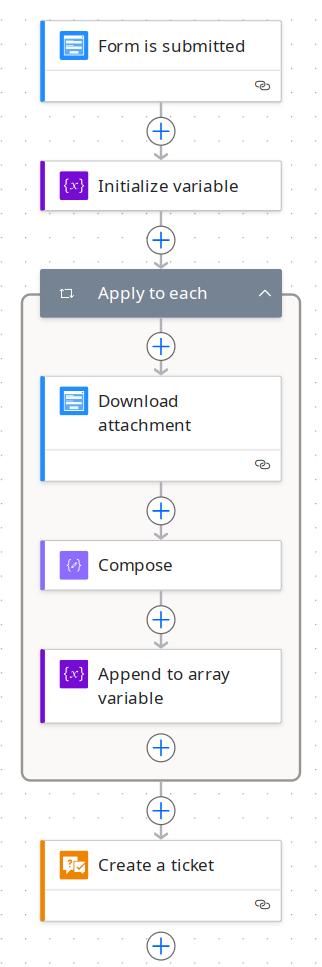
Now, we will explain step-by-step the process of creating the flow in Power Automate. It will generate a HelpDesk ticket when the web form is submitted.
First, open Power Automate, go to Create, and click an Automated cloud flow. Search for and add Plumsail Forms – Form is submitted trigger. Name and create the flow. Then choose the form you want to use from a drop-down menu in the trigger.

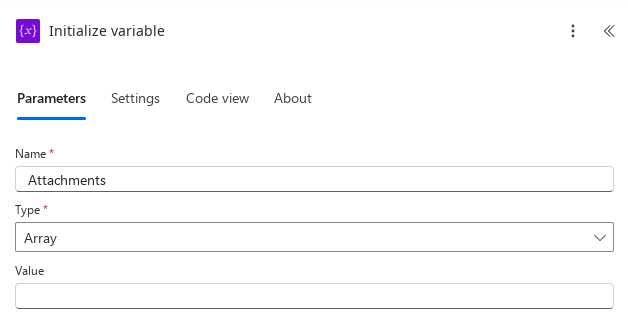
We need to prepare an array of attachments to provide them in a Plumsail HelpDesk – Create a ticket action when composing the ticket. Add a new action and search for a Variables – Initialize variable action. Name the variable and choose the Array type for it.
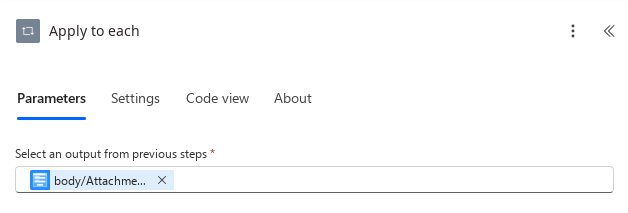
Now, add an Apply to each control to iterate over the submitted attachments. Add an Attachments output from the trigger to the control input.
Inside the control, download each attachment using a Plumsail Forms – Download attachment action. It requires an attachment URL for that.

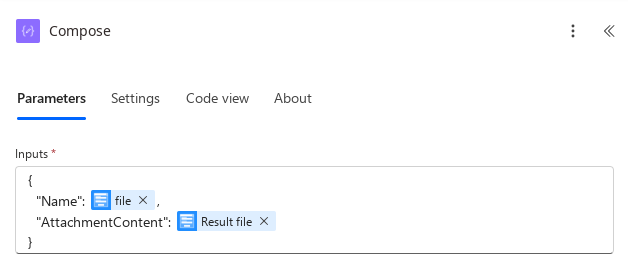
Then add a Data Operations – Compose action. Compose a JSON object as shown in the screenshot below: the file is the output from the trigger, and the Result file is one from the previous step.
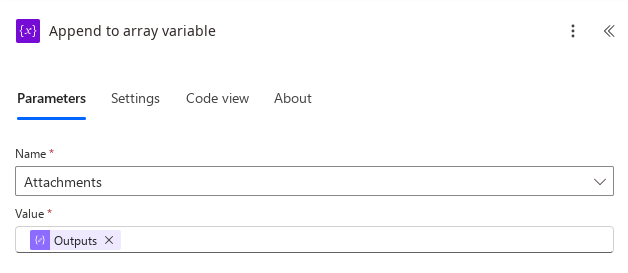
Add a Variables – Append to array variable action and pass here the output from the Compose operation:
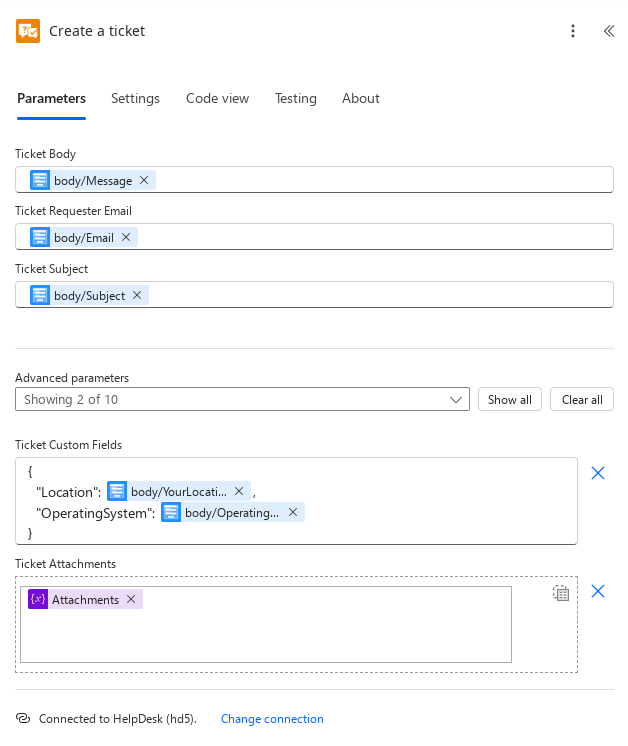
The attachments array is ready, now we can move to the last step – creating a ticket in Plumsail HelpDesk. We will use a Create a ticket action from the Plumsail HelpDesk connector. Add it outside the Apply to each control.
In the action, use the fields from the form to compose the ticket. Check Ticket Custom Fields and Ticket Attachments in the Advanced parameters menu to display additional fields. Build a JSON object with custom fields and their values. For the attachments, switch the input mode of the field to provide an entire array and pass the variable there.
If required, you can add further steps to the flow after creating the ticket.
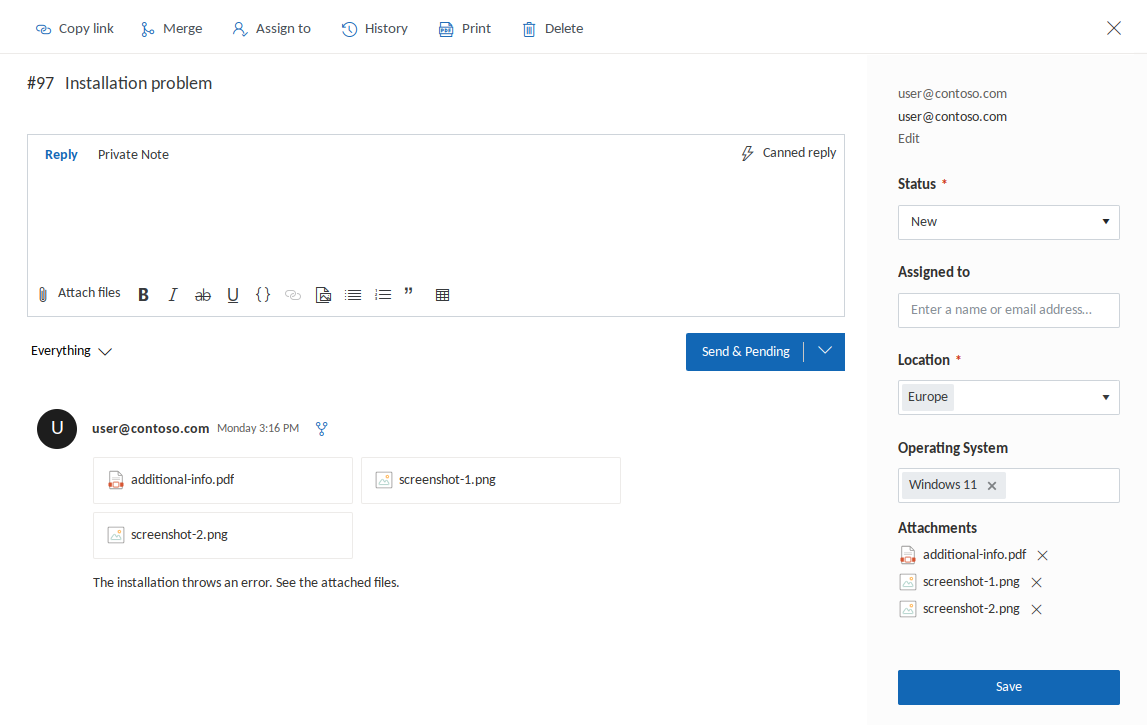
Final Result
That is it. These simple steps will help you to improve communication with clients or within your company. The ticket created in Plumsail HelpDesk through a Power Automate flow is below. Get a free 30-day trial of Plumsail HelpDesk and explore all the features of this powerful tool. Try to create a ticketing system in SharePoint Online.
Learn more