
HelpDesk
Jul 03, 2025
How to Create a SharePoint Helpdesk Ticketing System
Learn how to create a SharePoint HelpDesk ticketing system with native SharePoint tools or a ready-to-use powerful alternative with advanced features.

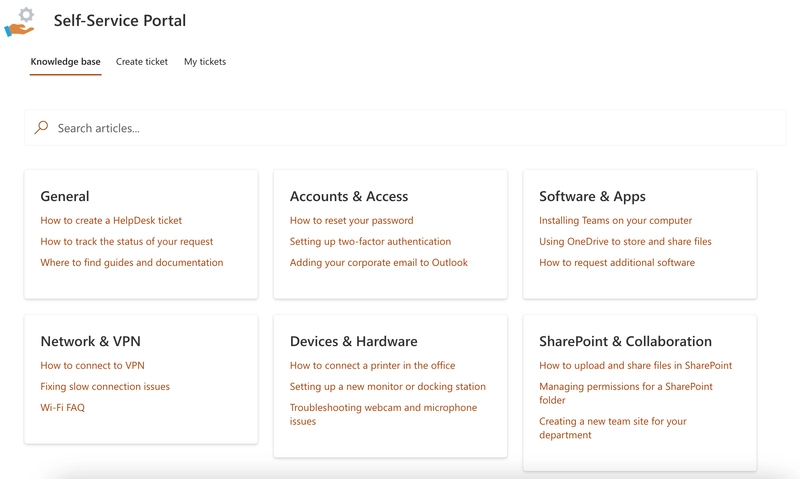
If your SharePoint HelpDesk is filled with repetitive IT support requests, it’s time to build a self-service portal. A SharePoint self-service portal lets users find answers in a Knowledge base before creating a ticket, helping your IT service desk save time and focus on complex issues.
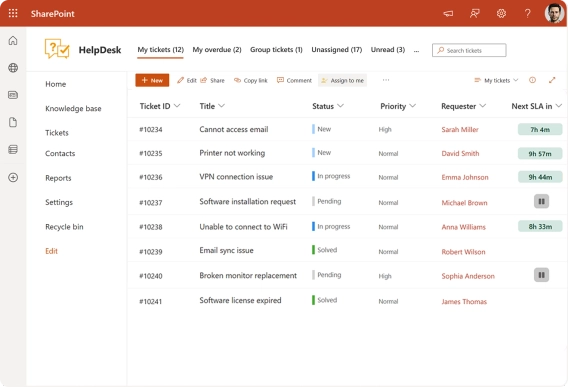
With Plumsail HelpDesk for SharePoint, you can easily add a Knowledge base to any SharePoint site without complex setup or coding required. The built-in Web widget gives users one place to search for articles, create new tickets, and track their ticket status.
In this article, you'll learn how to create a SharePoint self-service portal with a Knowledge base and set it up step by step.
Further in the article:
Implementing a self-service portal in SharePoint greatly reduces the workload of your IT service desk and improves the user experience. Instead of creating a ticket for every issue, customers can quickly find answers themselves.
Here are the key benefits of adding a Knowledge base on top of your SharePoint HelpDesk:
Users often ask the same questions: “How do I reset my password?”, “Where can I download a template?”, “How do I install the latest updates?” With Plumsail HelpDesk Knowledge base, these articles are always at hand, and users can resolve issues without submitting a ticket.
Support agents also benefit from it: instead of repeatedly typing the same explanations in tickets, they can simply send a link to an existing article. This saves time on both sides and ensures consistent, standardized responses.
Users are no longer dependent on the agents’ working hours. The Knowledge base is always accessible, which means common issues can be resolved instantly.
The faster people find answers, the more satisfied they are. A self-service portal reduces waiting times and makes IT support more transparent.
Your support team no longer wastes time answering the same questions over and over. Instead, they can focus on complex and high-priority cases.
In short, a self-service portal with Knowledge base improves support efficiency, reduces repetitive work, and makes the service more convenient for everyone.

My colleagues can be anywhere and either submit a ticket via the widget or send an e-mail direct to HelpDesk to create a ticket. It just works!
Before configuring the self-service portal in SharePoint, let’s take a closer look at the Knowledge base. It is a built-in feature of Plumsail HelpDesk for SharePoint that powers the portal content.
The Knowledge base is managed by your HelpDesk agents. They can create categories and articles directly inside the HelpDesk site, keeping your content organized and easy to navigate. Each article includes a visibility setting that allows you to determine who can see it:
HelpsDesk staff only — for internal use and technical documentation.
Anyone in the organization — visible to everyone through the Knowledge base widget on your SharePoint self-service portal.
Articles marked as visible to the whole organization automatically appear in the Knowledge base SharePoint widget, allowing end users to browse and find answers without contacting the IT service desk.
Later in this section, we’ll walk through how to create categories and articles, configure visibility options, and connect the widget to your HelpDesk SharePoint site. It’s all quick and straightforward.
The Knowledge Base is a built-in feature of Plumsail HelpDesk for SharePoint that agents can use to create and organize useful content for both internal use and for users. It requires no separate setup, you can start adding categories and articles right away.
Go to the Knowledge base section on your HelpDesk site.
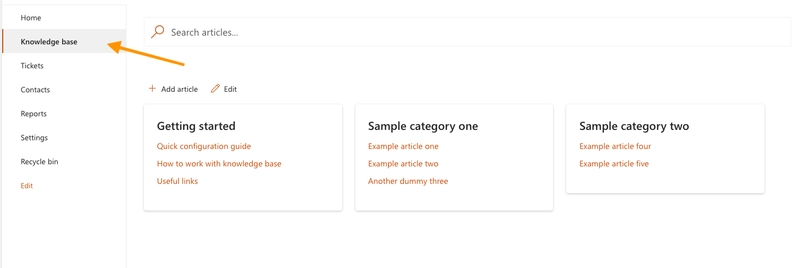
By default, you’ll see some sample categories and articles. To remove them, click Edit to open the management view, then click the bin icon to delete categories along with their included articles. After that, you can create your own categories by clicking the Add category button.
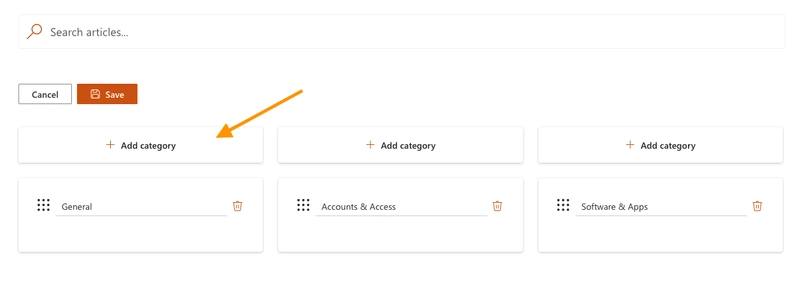
Click Save when done.
Click the Add article button to open the article editor. Information that needs to be entered:
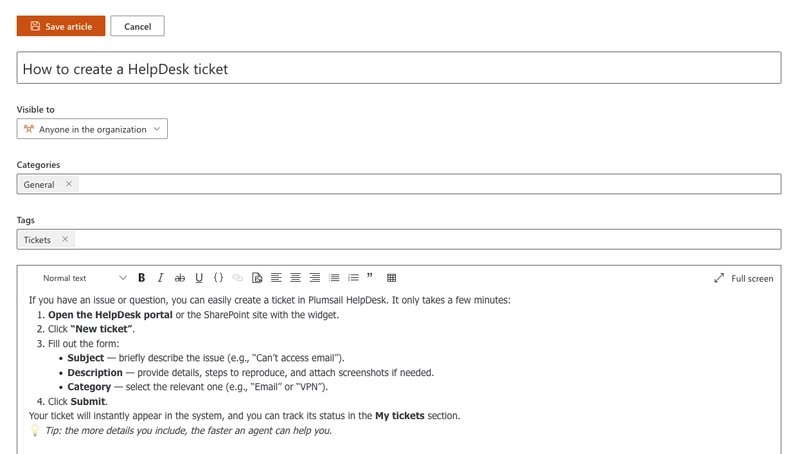
Don’t forget to Save article.
If you need to move an article to another category, you can do it right from the category settings, simply drag it to where you want.
For a quick visual overview, check out this short video on creating a Knowledge base in SharePoint HelpDesk:
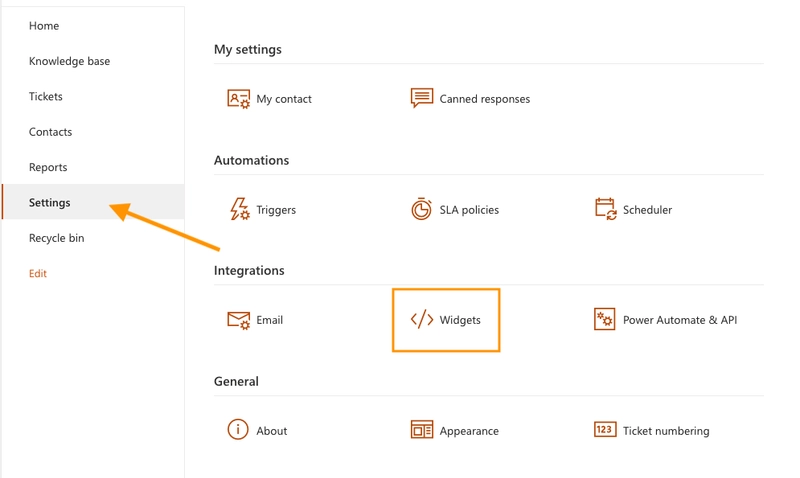
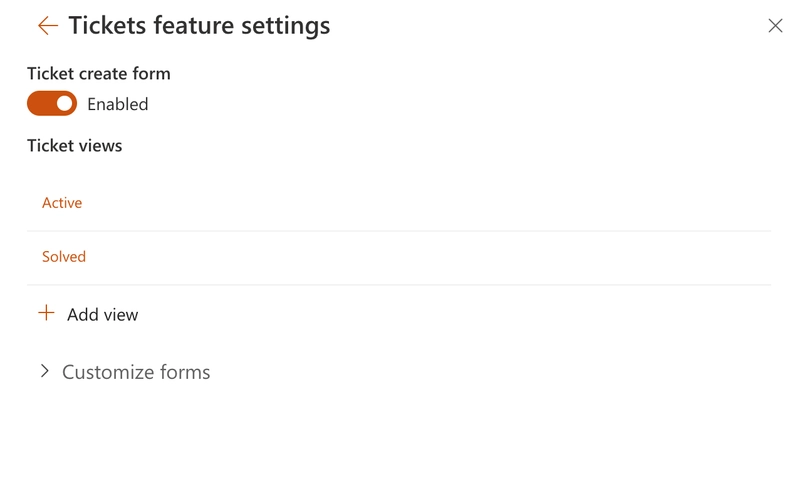
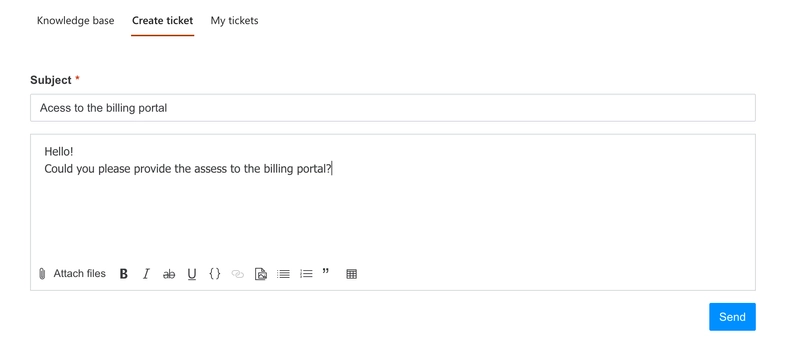
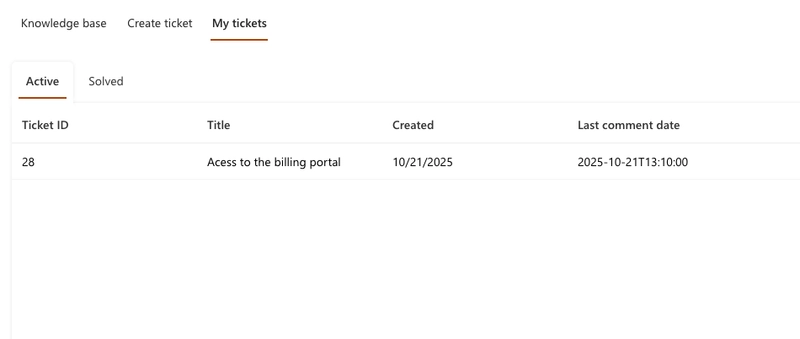
Once your Knowledge base is ready and filled with helpful articles, it’s time to make it accessible for users through a self-service portal in SharePoint. The Plumsail HelpDesk widget combines your Knowledge base and a tickets feature in a single interface, allowing users to search for answers, create new tickets, and track existing ones directly on your SharePoint site.
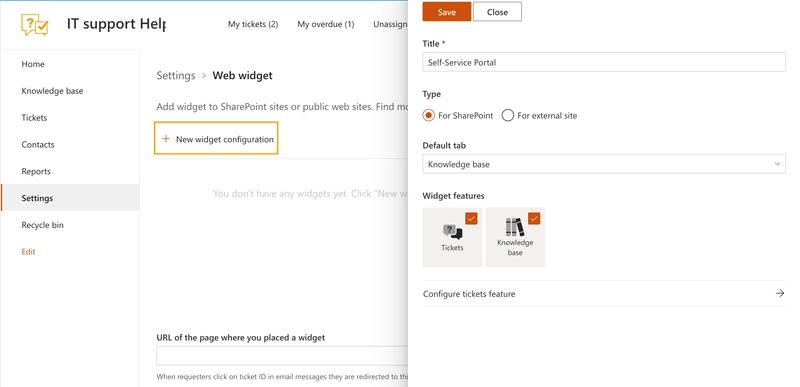
In addition, you can customize the ticket view by clicking Configure tickets feature:
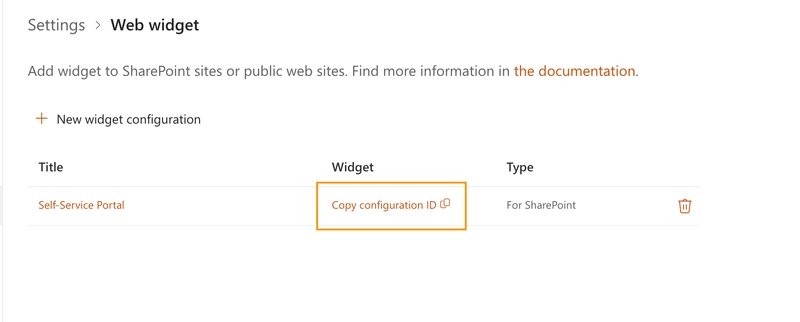
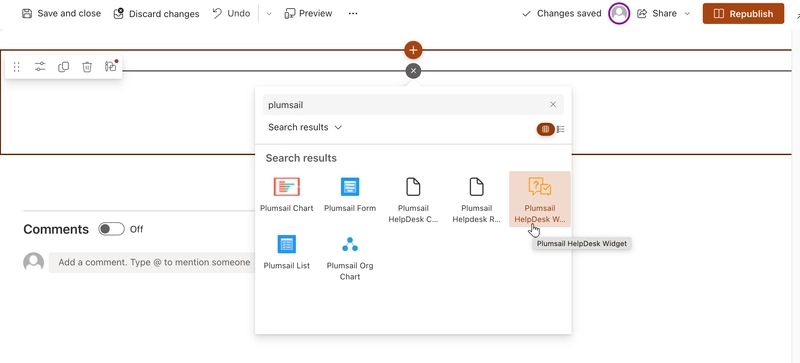
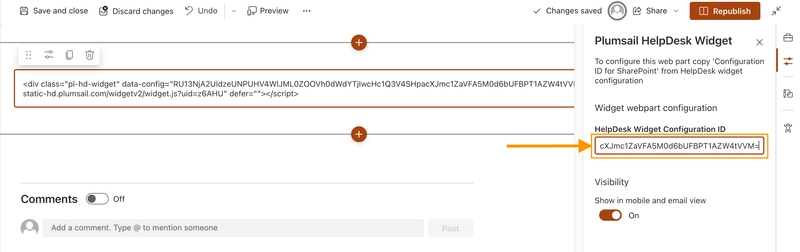
Once the widget is configured, the next step is to add it to your SharePoint page. This will make your Knowledge base visible to users.
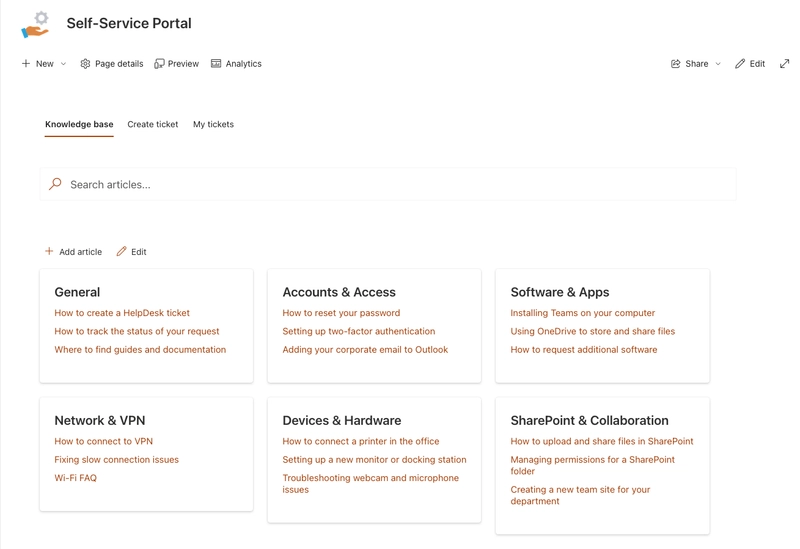
Keep in mind that the view with the editing options, as shown in the screenshot above, is available only to HelpDesk agents. In the next section, we’ll look at permissions for the Knowledge base widget and see how it appears for agents and end users on the SharePoint self-service portal.
The Knowledge base widget in HelpDesk SharePoint provides different experiences depending on the user’s role. There are two sides: the agents, who create and manage content, and the end users, who use the self-service portal to find answers and create tickets.
Agents are those who maintain your IT service desk and manage the content of your Knowledge base. They have full access to the HelpDesk site and can edit information both from within the HelpDesk SharePoint interface and directly from the widget.
They have access to:
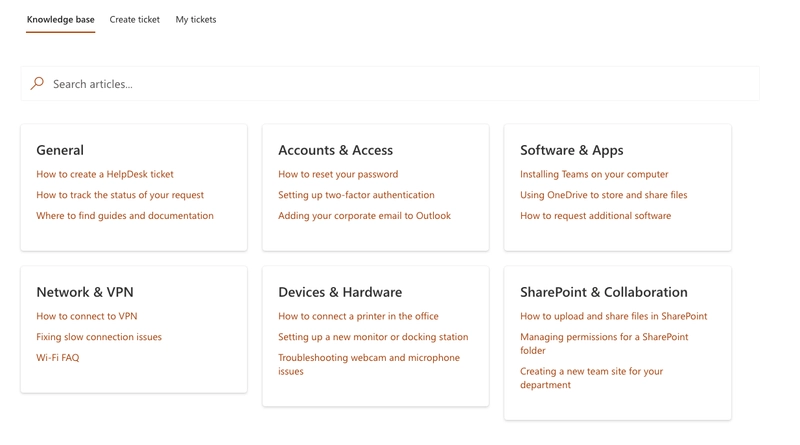
End users are employees or external stakeholders who has access to your SharePoint tenant. They see a simplified version of the SharePoint self-service portal. Their goal is to find answers quickly or contact the support team when needed.
In their view, users can:
A SharePoint self-service portal with Knowledge base brings your IT support to the next level. It helps users quickly find answers, reduces repetitive tickets, and makes the entire support process more efficient.
With the Knowledge base and ticket management available in one widget, your employees get everything they need in a single interface.
Ready to try it yourself? Plumsail HelpDesk comes with a 30-day free trial, so you can explore all the features and see how it works in your environment.
Need some help getting started? Book a free 15-minute call, and we’ll walk you through the basics.
Learn how to create a SharePoint HelpDesk ticketing system with native SharePoint tools or a ready-to-use powerful alternative with advanced features.