Add widget to SharePoint site
Note
If you are using Plumsail HelpDesk with version older than 2.1.42, please follow this link to learn about the HelpDesk Legacy Widget.
Add new widget configuration
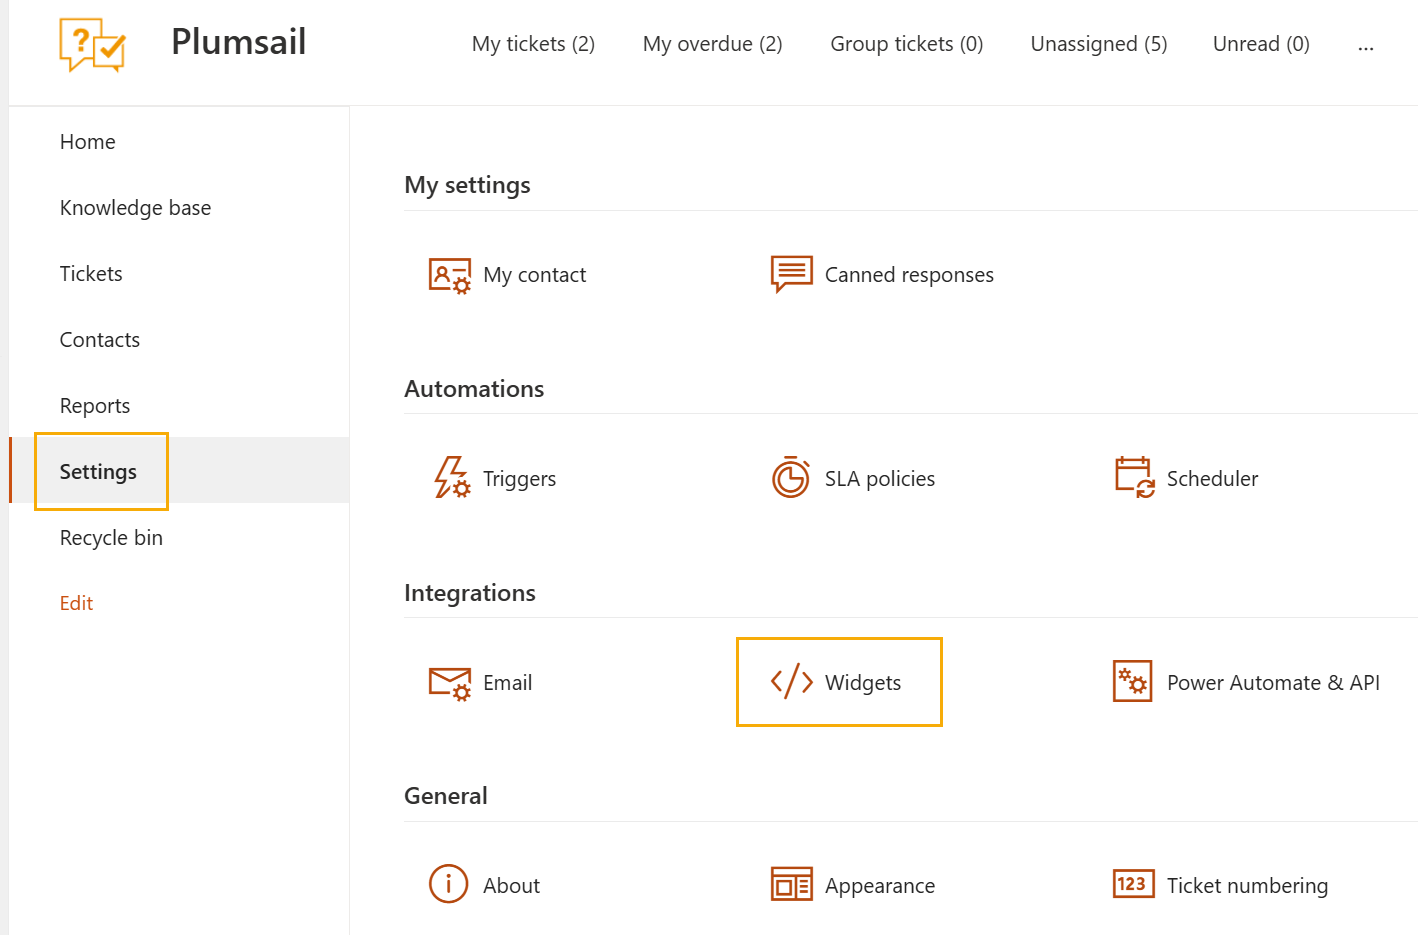
Open the HelpDesk site and navigate to the Settings tab using the left-hand navigation bar. Then click the Widgets button.
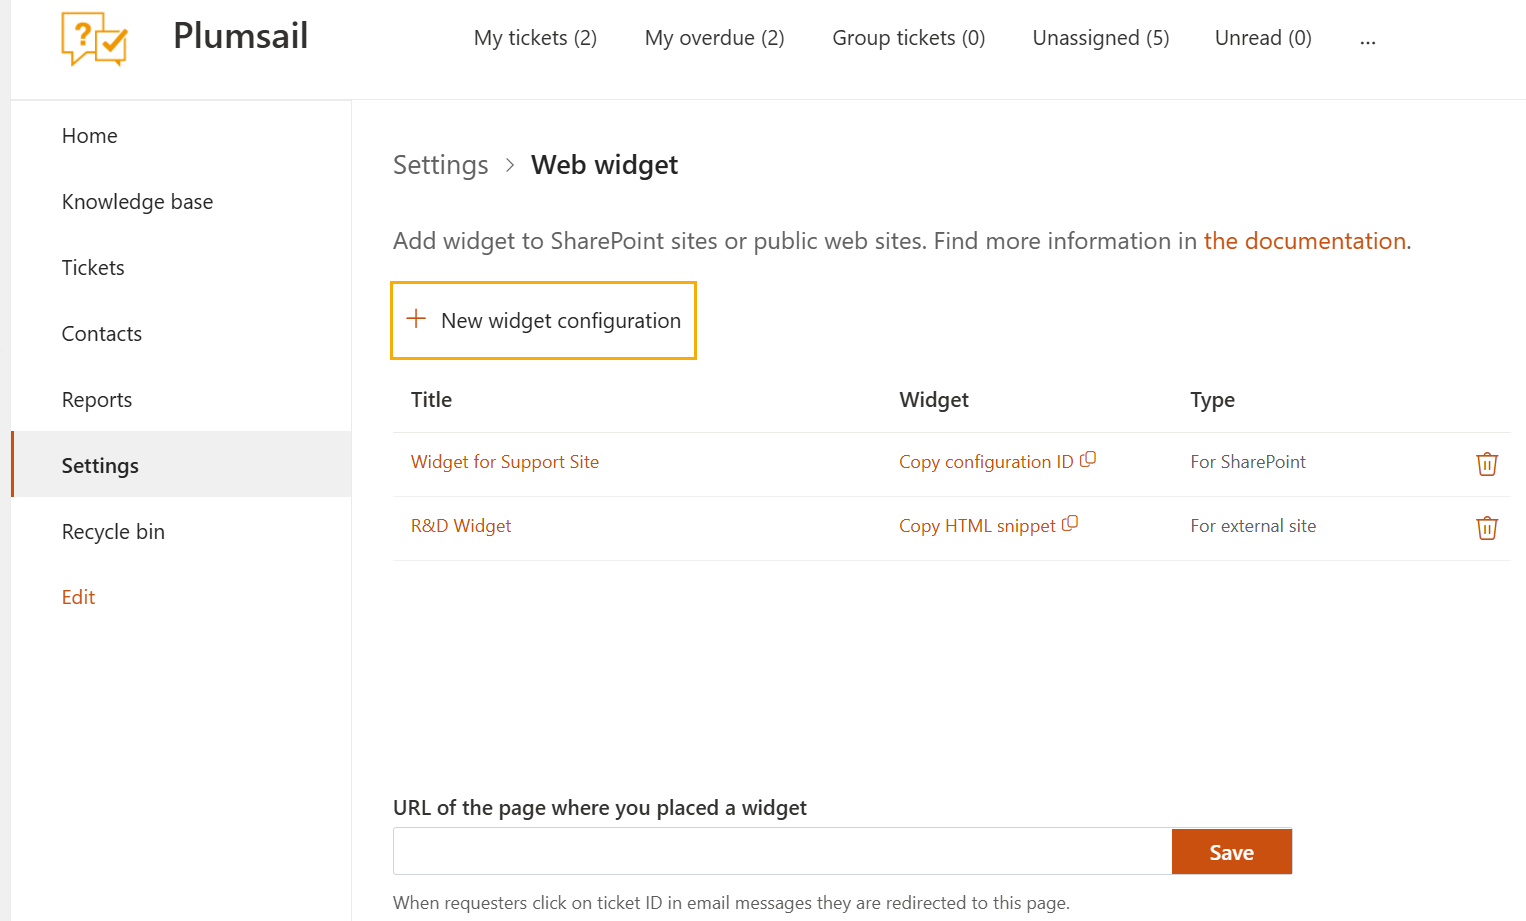
To create a new widget, click the New widget configuration button. You can also edit an existing configuration by clicking the widget’s name. Note that editing the widget configuration applies to every existing widget with this configuration.
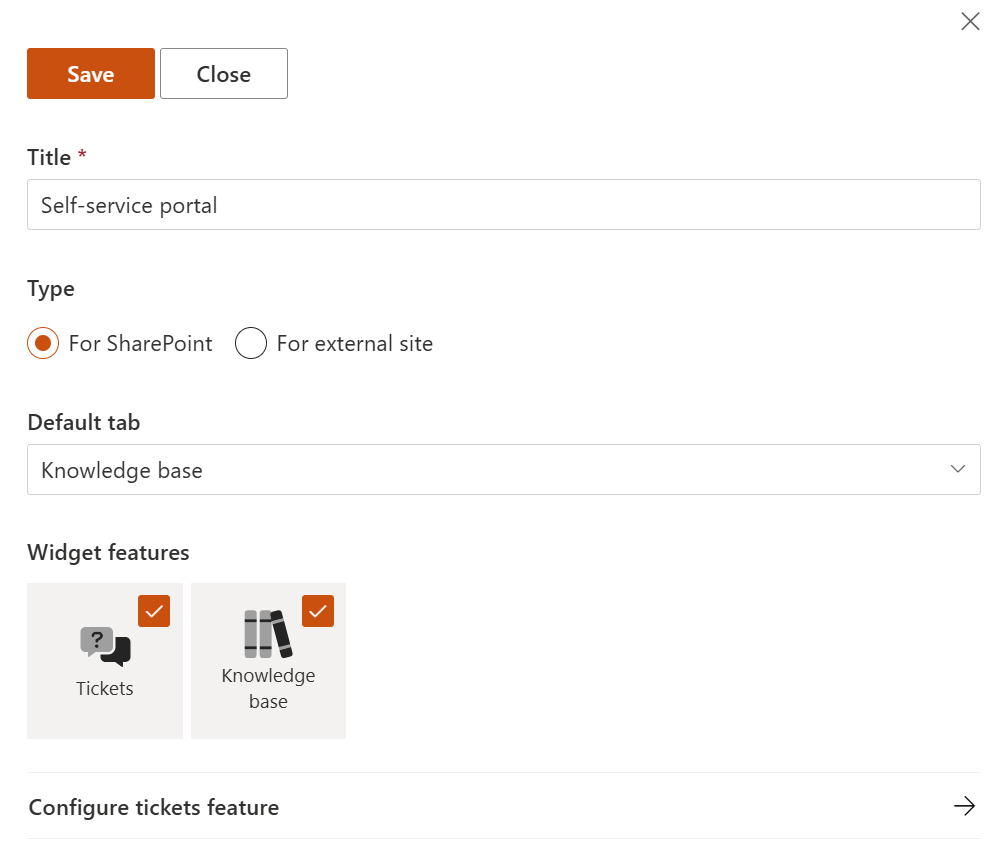
Provide a Title for the widget and choose For SharePoint as its Type.
Configure widget features
Next, choose which Widget features to include. The dropdown options for the Default tab will change based on your selections.
Hint
Change the default tab to Knowledge Base to encourage users to search for answers first before submitting any tickets.
Tickets feature
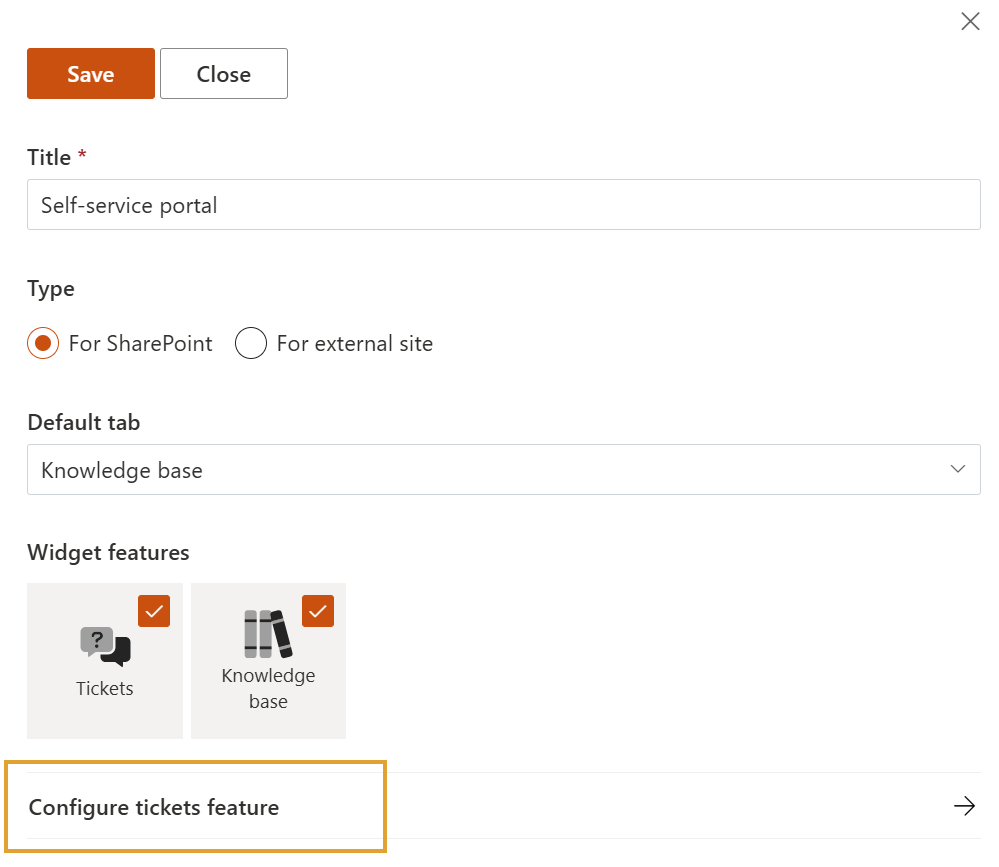
To set up your ticket form, click Configure tickets feature to open additional settings.
These are the tickets feature settings.
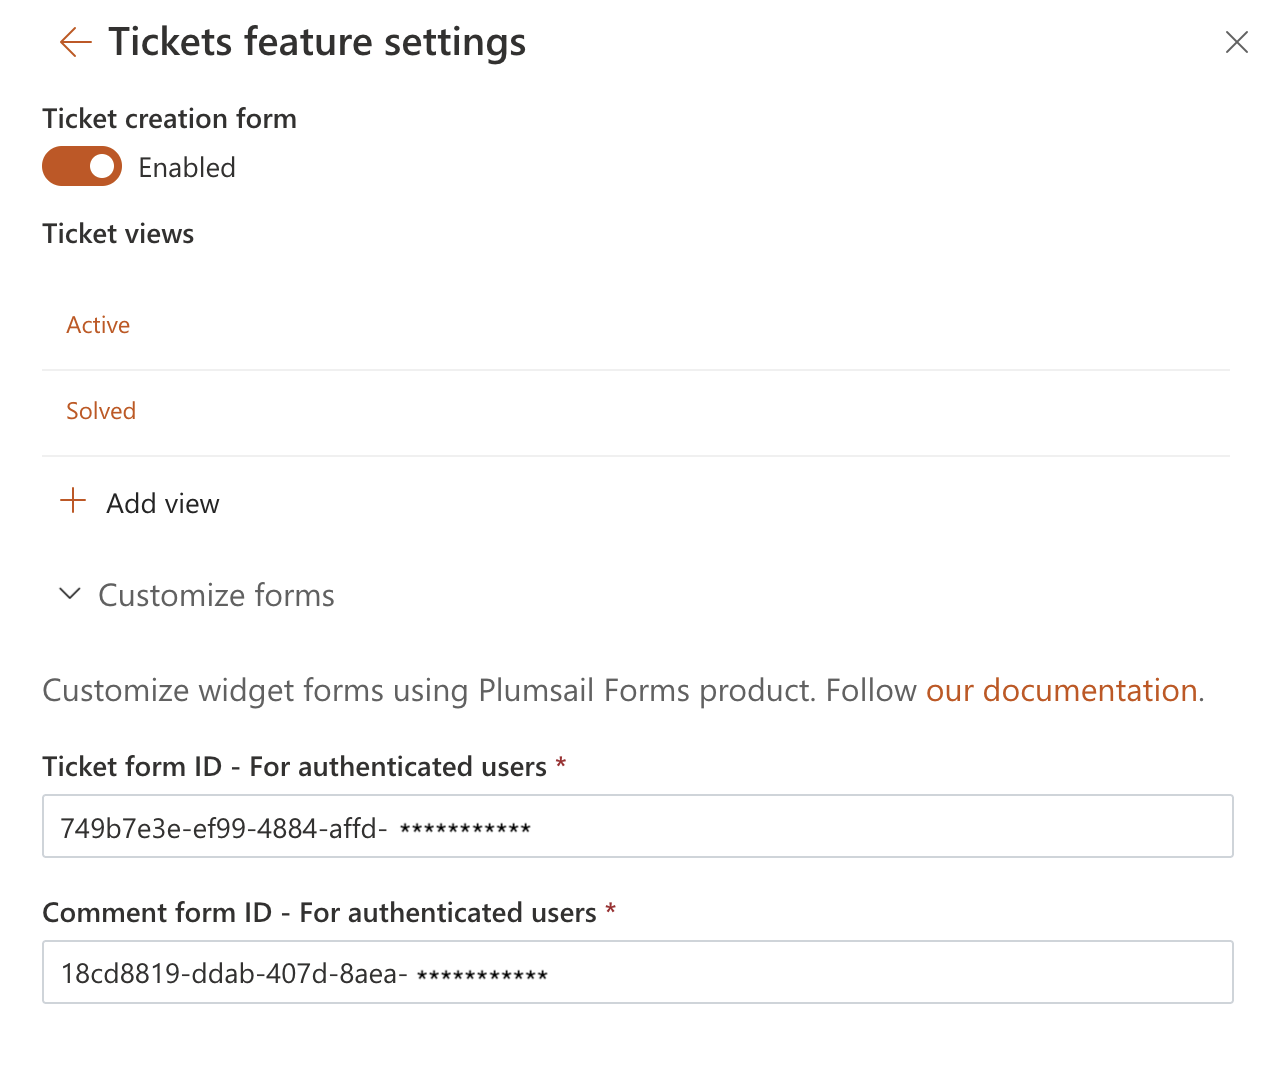
Ticket creation form. Turn it off if you don’t need to create new tickets in the widget. Requesters will only be able to see their existing tickets. You can place the ticket creation form on another page instead.
Ticket views. Categorize your tickets and choose which information your users see.
Parameter |
Description |
|---|---|
Display fields |
Select which fields to display by typing the name and then picking it from the list that appears. |
Order by |
Sort your ticket list by a field’s value, such as ‘Ticket ID’ or ‘Title’. By default, tickets are sorted from oldest to newest. |
Tickets per page |
Limit the results. |
Include private comments |
Limit which comments are visible. |
Include tickets in sub-folders |
Filter tickets based on which folder contains them (for example, hide archived tickets). |
Find more information about working with CAML queries and creating custom views in this article.
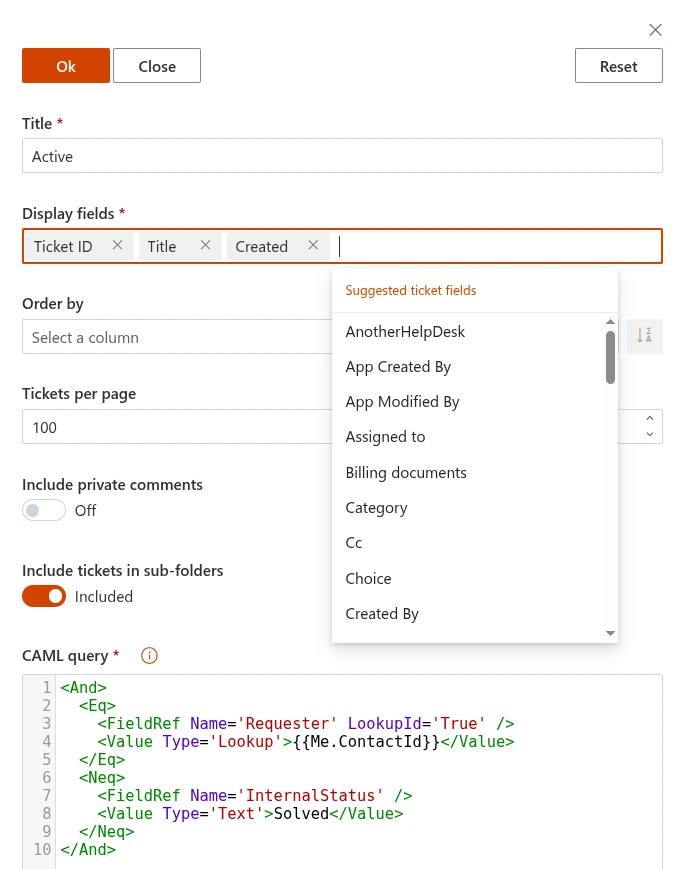
Note
Display fields are cached for 30 minutes for optimization purposes. You will need to clear browser cache to apply your changes immediately.
Customize forms. You can change the default widget forms using Plumsail Forms product. Follow our documentation.
Knowledge base feature
Activate the feature to boost efficiency by helping users help themselves from your self-service portal.
Create a knowledge base of common issues and troubleshooting steps to reduce the number of support tickets.
Follow these steps to add articles to the knowledge base:
Add a category - Create a category to organize your articles.
Add an article - Write and assign articles to the appropriate categories.
Manage access - Configure article visibility to make them available in the widget.
Add widget to modern SharePoint page
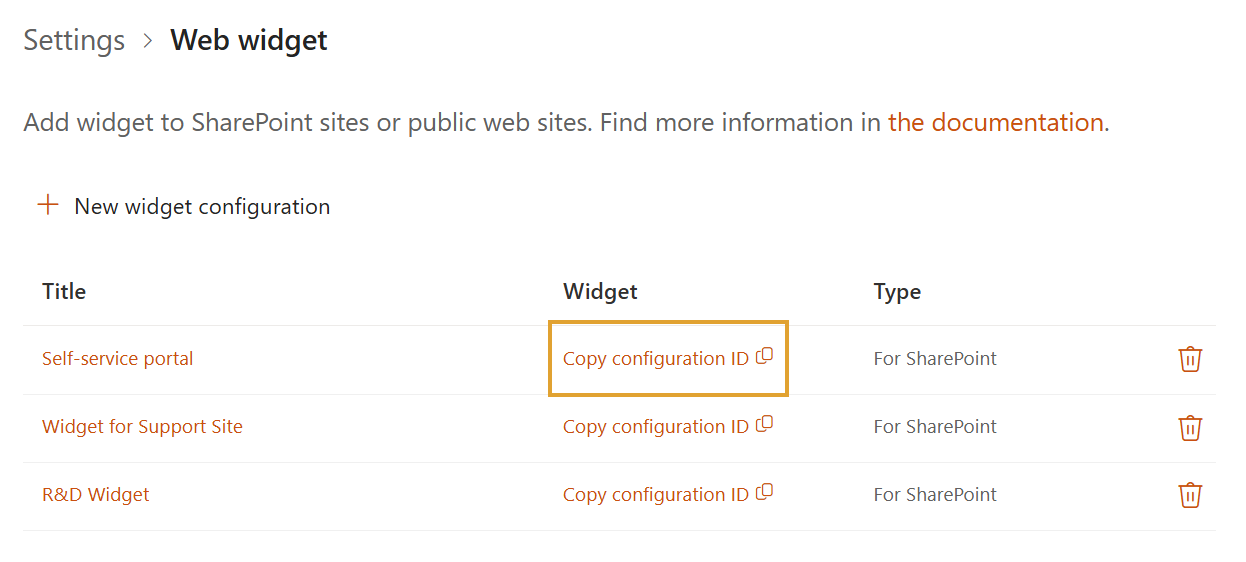
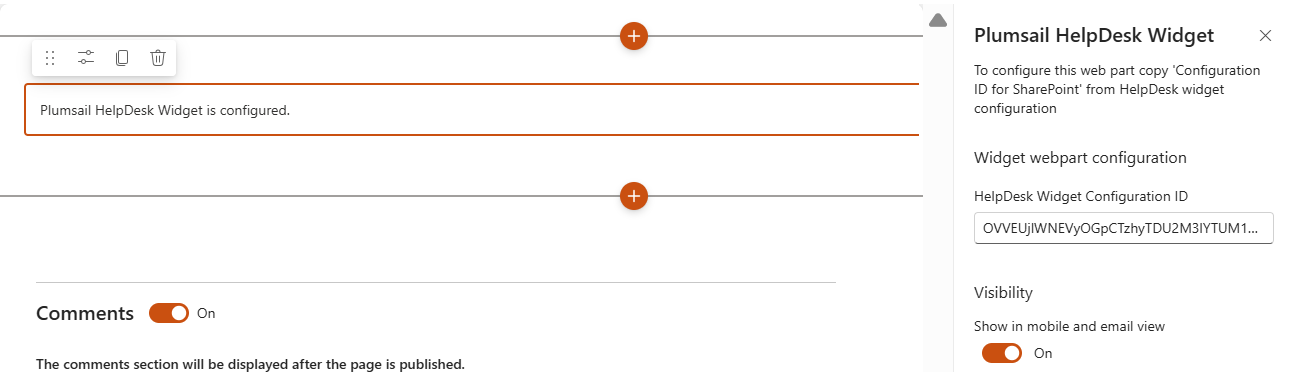
After saving the widget settings, a configuration ID for SharePoint will be generated — copy it for inserting into the web part on a page.
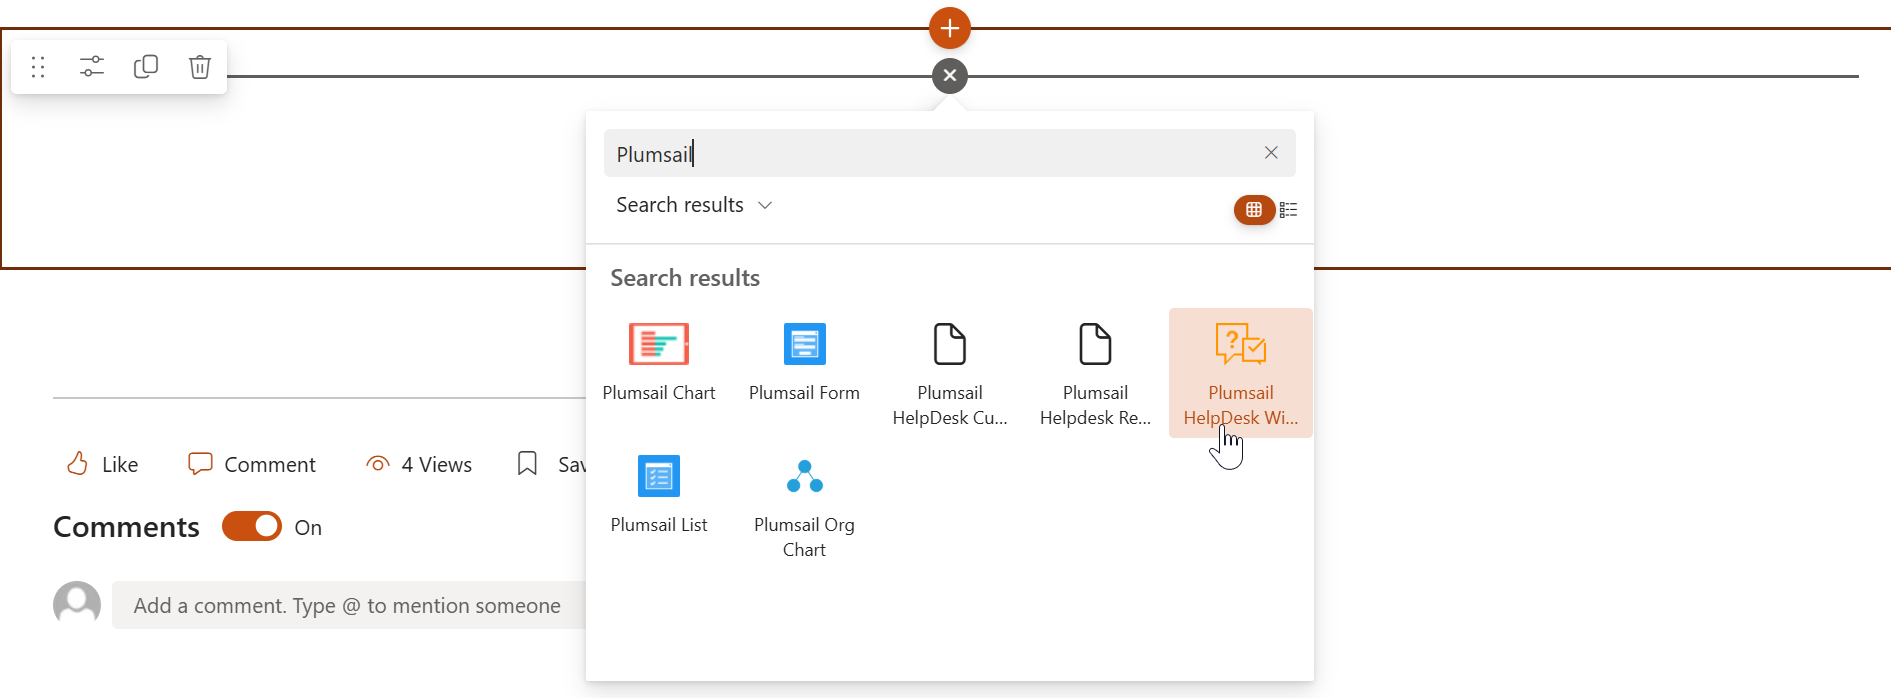
Navigate to a page where you’d like to place a widget.
Pick Plumsail HelpDesk Widget web part from the menu to add it to your page:
Once you added the web part you need to configure it. Just copy Configuration ID for SharePoint from the widget configuration form, open the widget settings and paste it to the corresponding web part property. Publish the page after that.
Use HelpDesk widget
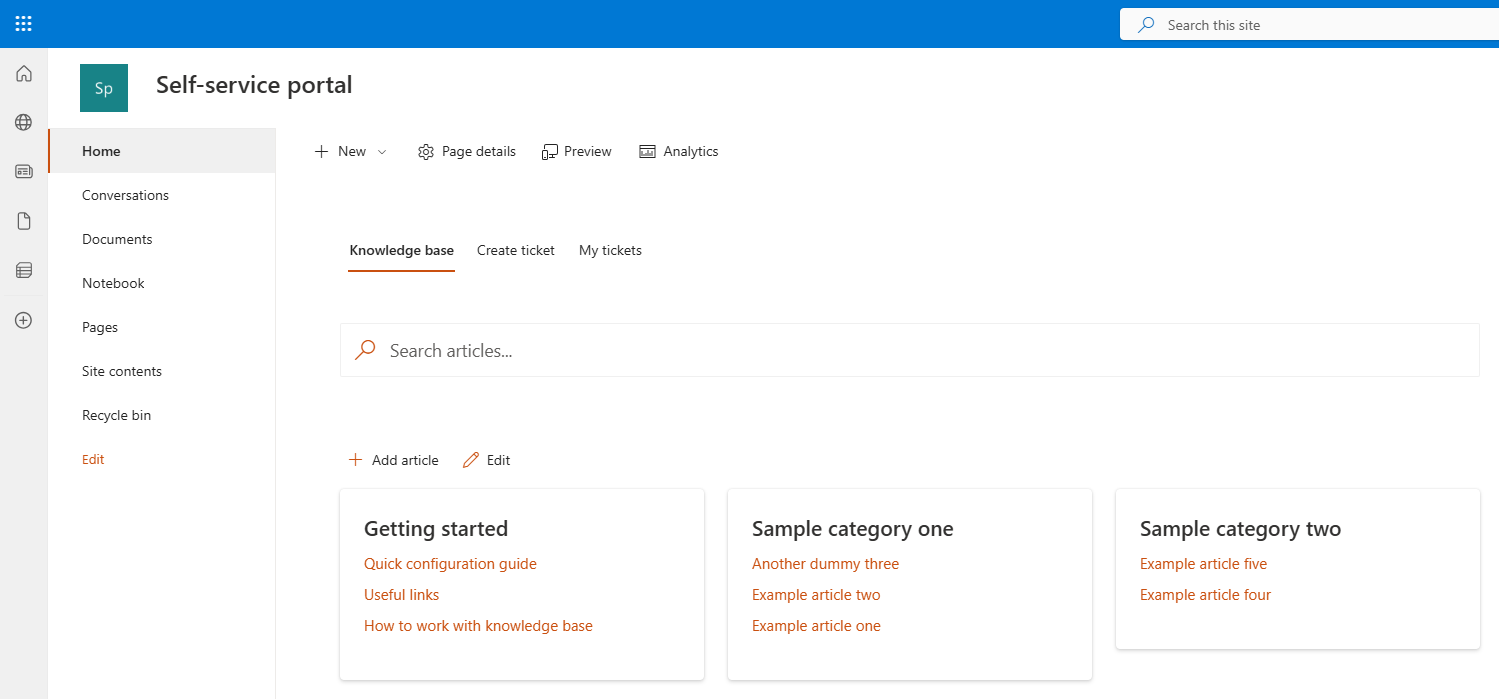
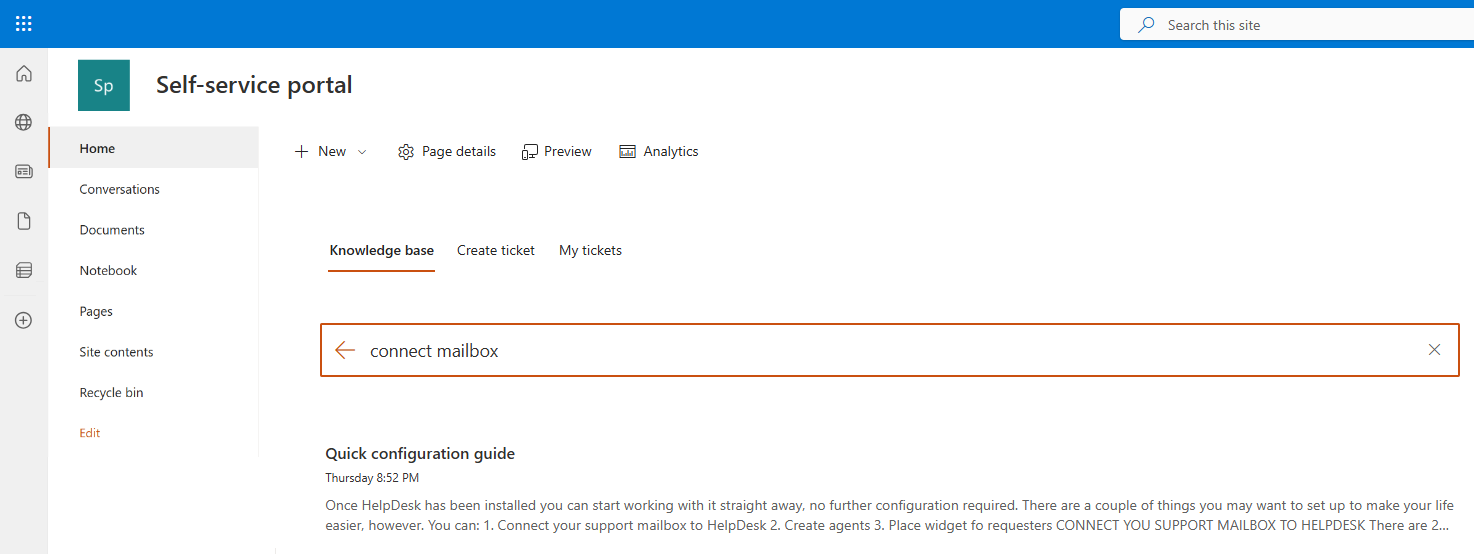
Your HelpDesk self-service portal is now ready to use. When a user opens the page with the widget, it displays the default tab. In our case it’s the Knowledge base.
They can search the knowledge base for a solution before creating a support ticket.
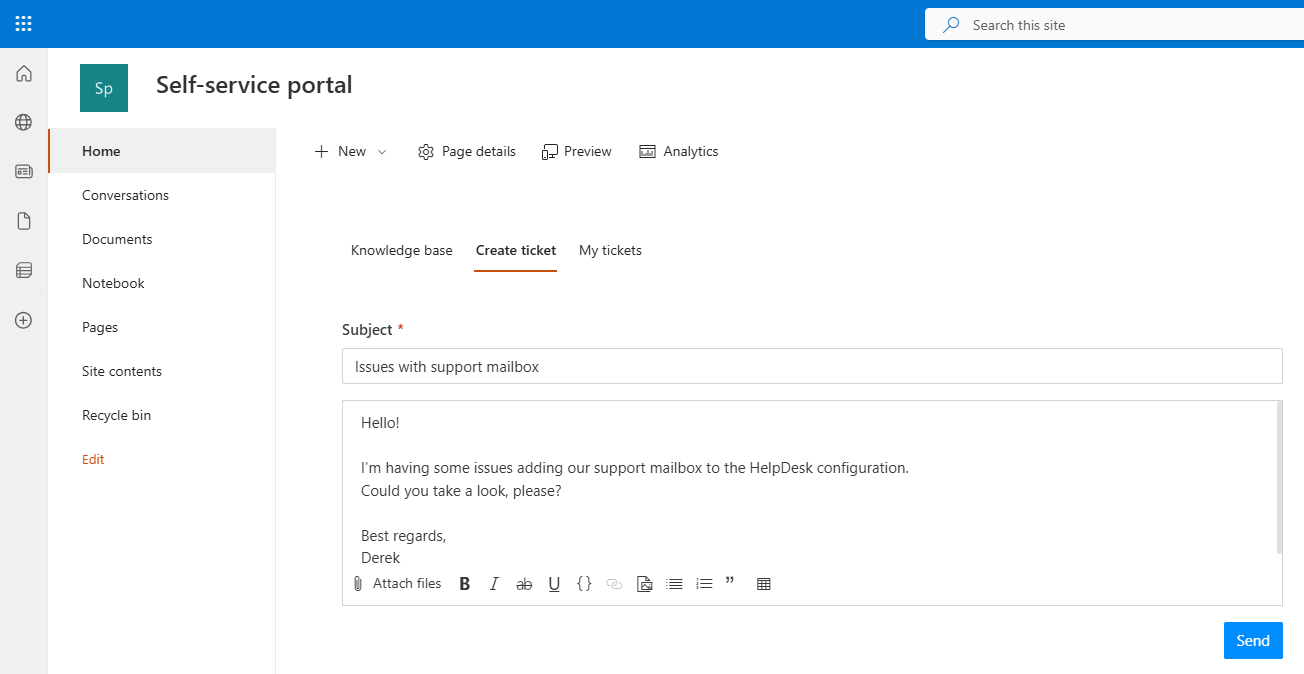
If no answers are found, they can submit a new ticket. For this, open the Create ticket tab, enter a subject, message, and optionally attach files.
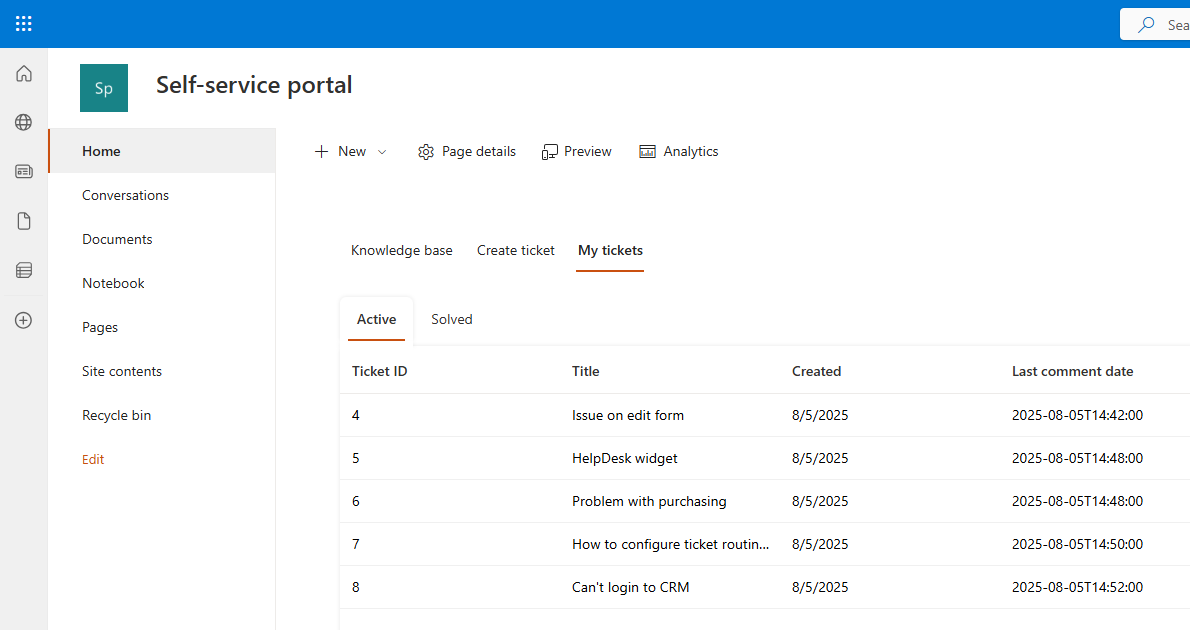
All tickets submitted by the current user appear in the My Tickets tab. Click any ticket to view its details.
Learn More: