
How to create a Microsoft Forms approval workflow
Learn how to create an efficient Microsoft Forms approval workflow using Power Automate and SharePoint. Step-by-step guide with use cases and best practices.
In this article, we'll explore how to set up an easily scalable SharePoint project management system with custom forms and a Power Automate approval workflow. We'll use a SharePoint list of expense reimbursement requests as an example, customized with Plumsail Forms for better user experience and more functions.
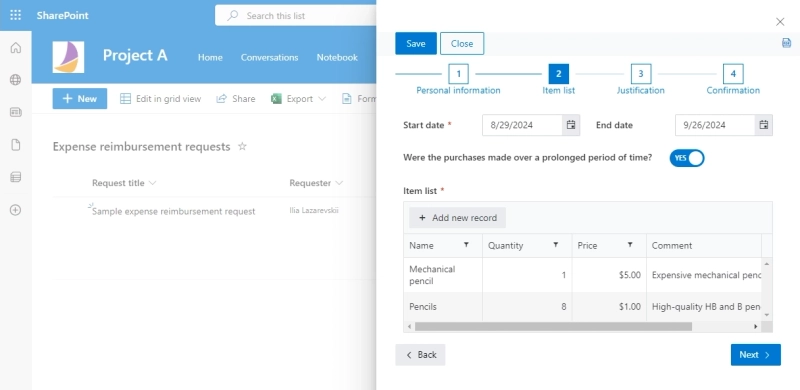
We'll also demonstrate how to set up one approval flow that can be triggered from multiple SharePoint sites using Encodian Trigr.
In this article:
The SharePoint setup for this example is fairly simple. I have a Communication Site for each project, and on each of those sites there's a list of expense reimbursement requests:

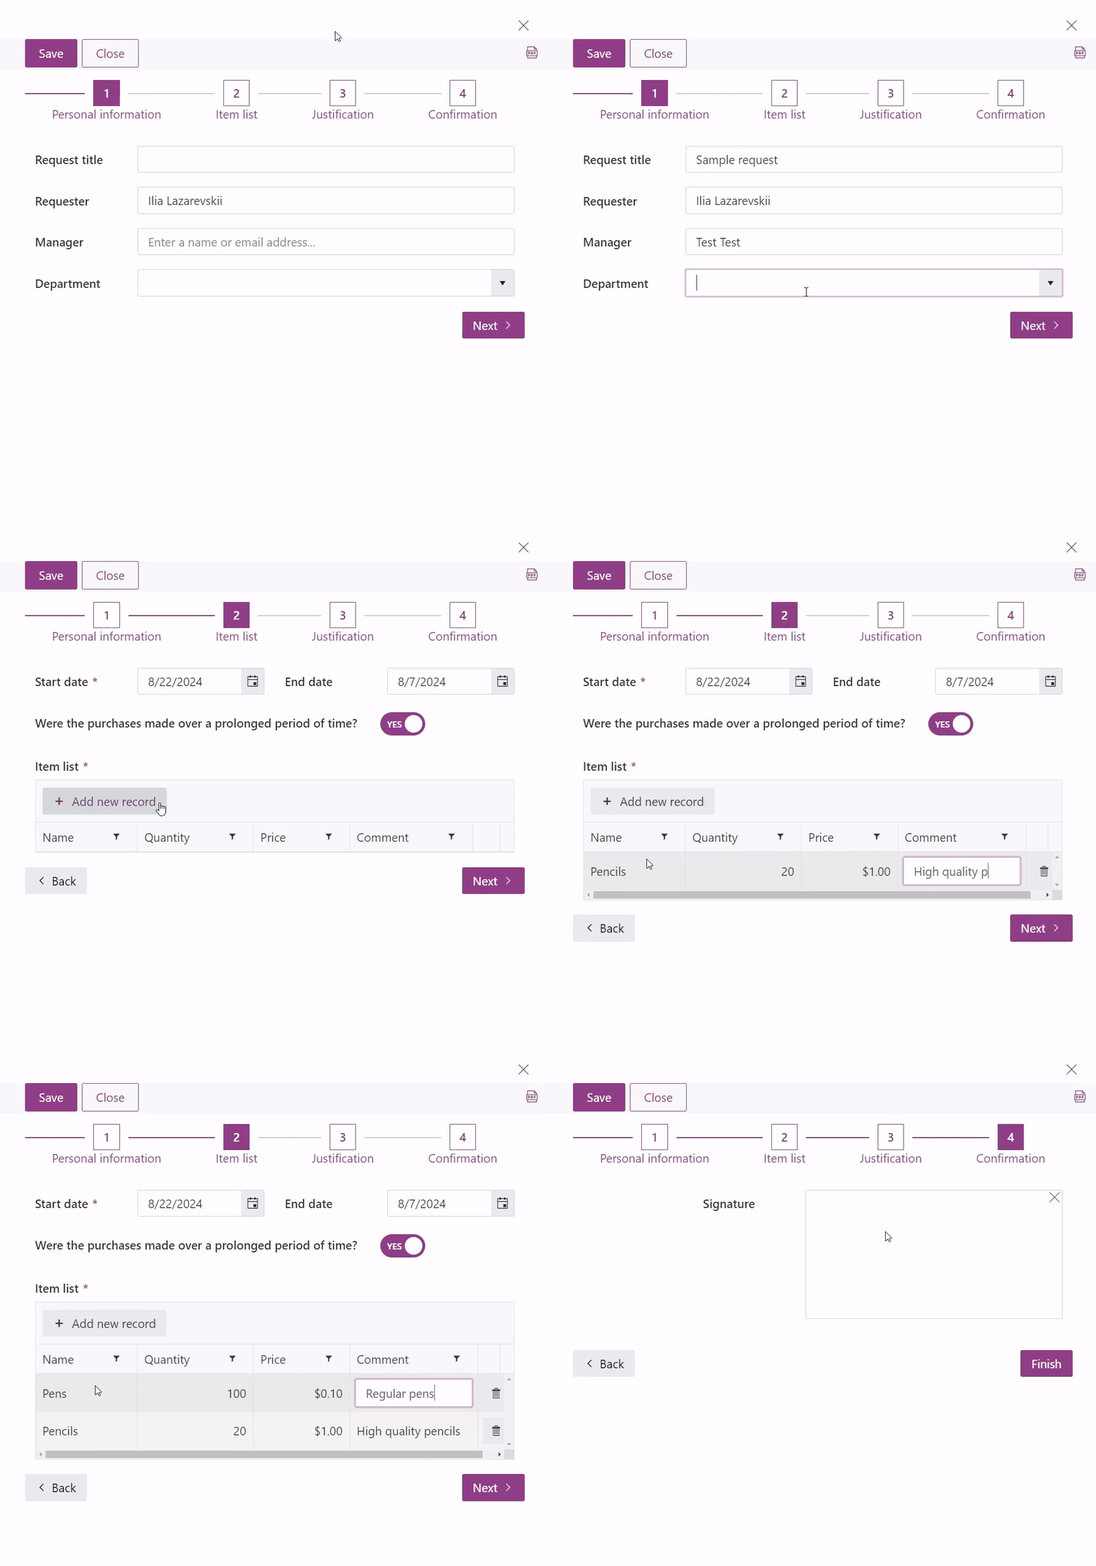
The default SharePoint forms don't support table signatures and table inputs, and they also don't have any customization. Let's use Plumsail forms for a better experience. We'll get this in the end:
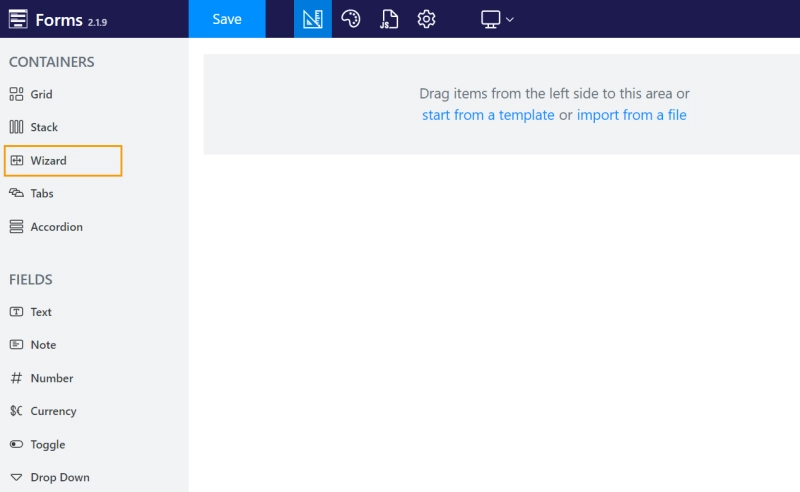
After following this guide for installing Plumsail Forms for SharePoint, it's time to start building your form. Just add a Wizard container and put every SharePoint field inside.
Here's how I grouped the fields:
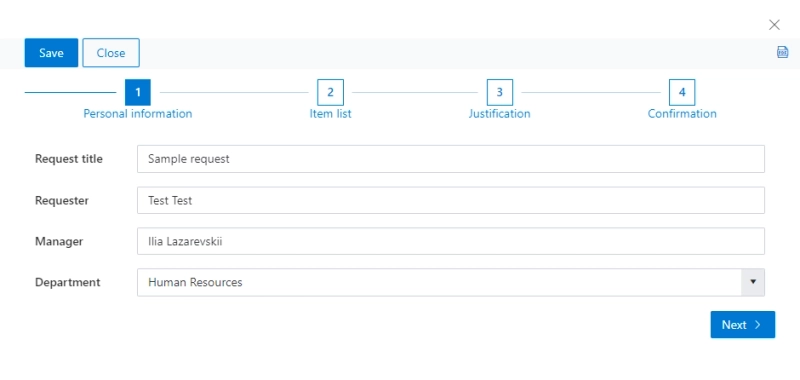
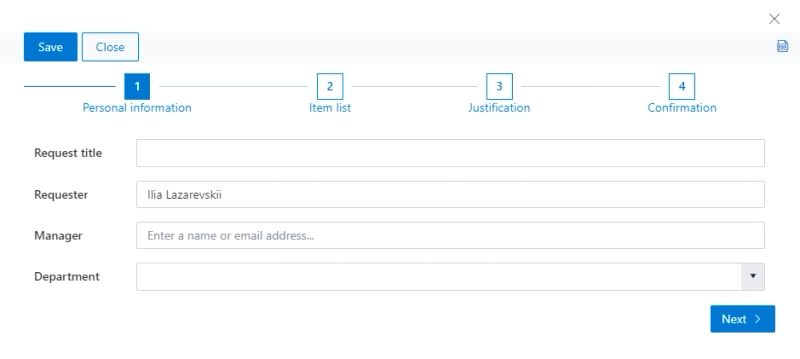
In the first stage of the form, the user has to provide some personal information. Note that Requester and Manager are Person fields, this will be useful for automation.
The Department field is the most interesting of the four. It's a Lookup, a dropdown that fetches its options from a different SharePoint site.
Let's say we need to track company expenses from all projects by department. The best way to achieve this is to create a list of all departments on the company's main site and reference it on our form. Add a Lookup control called Department to the form and configure it:
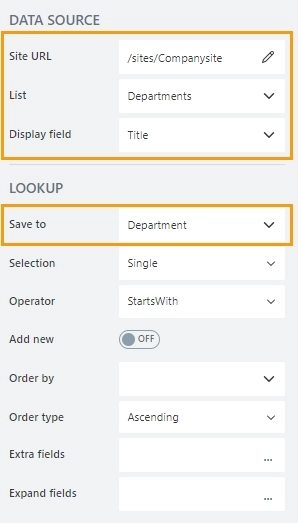
Simply choose the target site, target list, and which field to display in the dropdown. Don't forget to set up the Save to property, it should be a text field called Department.
Now we can pick any department from the list. Later we can use this information to calculate which department spends the most.

The second stage of the form looks like this:
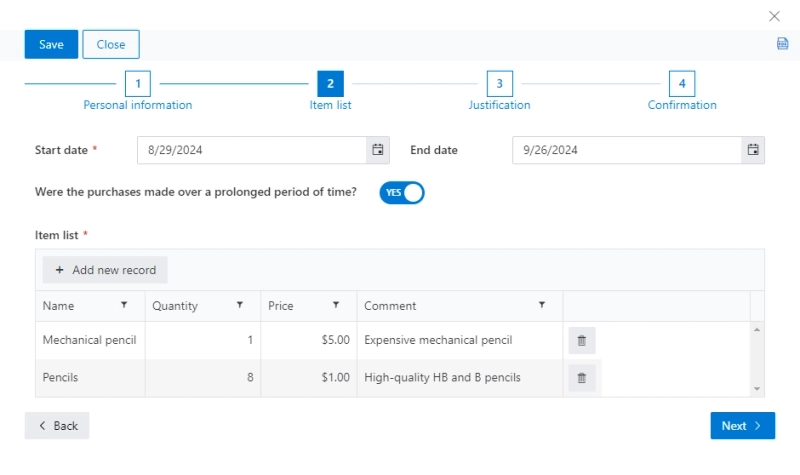
Here I added a DataTable control so the user can enter their expenses in a convenient table format. Other than that, it's just a couple of Date fields and a Toggle.
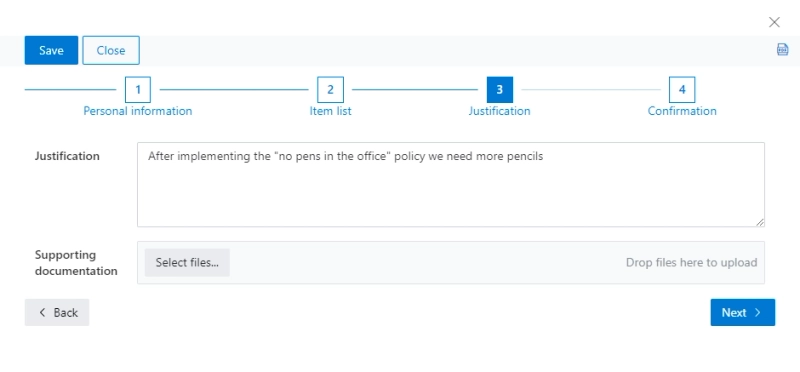
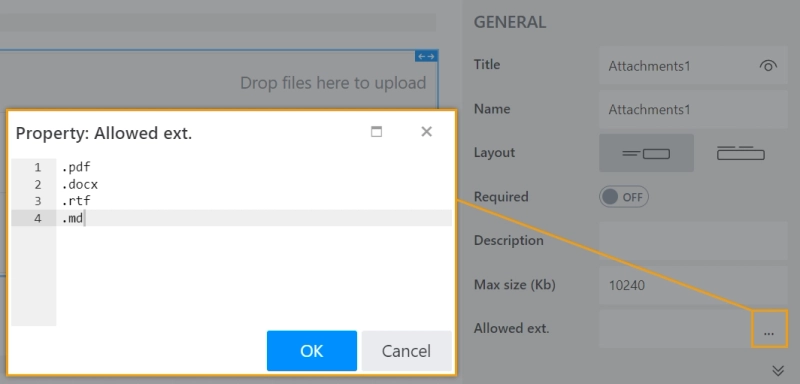
On the "Justification" step, there are just a couple of SharePoint fields: Justification itself and Attachments. The attachments can be anything – PDF, TXT, DOCX, and so on. If you'd like to, you can restrict this:
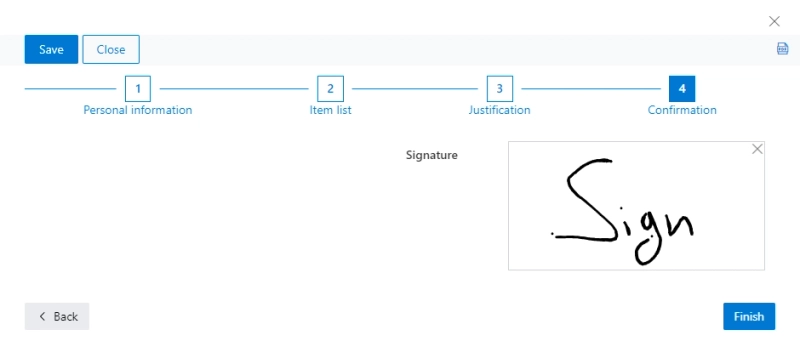
Finally, we can add a Signature field on the "Confirmation" stage of the form:
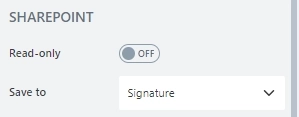
Don't forget to configure the Save to property. It should be a text field in your SharePoint list.
The purchases might happen in one day or during a period of time. Let's make the End date field optional. Add the following JavaScript code to your form:
fd.spRendered(() => {
    fd.field('IsProlonged').$on('change', (value) => {
        if (value) {
            fd.field('EndDate').hidden = false; // show field
            fd.field('StartDate').title = 'Start date';
       } else {
            fd.field('EndDate').hidden = true; // hide field
            fd.field('EndDate').value = null; // clear field
            fd.field('StartDate').title = 'Date';
       }
    });
});
This code is executed each time the IsProlonged toggle is clicked. If it's toggled off, we hide the EndDate field and change the name of the StartDate to just «Date»:

If the toggle is on, we do the opposite:

You can hide and show any field on the form based on any condition. Check this article on conditionally hiding fields with Plumsail Forms for all the ins and outs.
We can simplify everyone's lives by filling in some info for the user. For example, they don't have to manually type in their name each time, we can get that information from their Microsoft account.
We'll take advantage of the fact that the user must log into SharePoint to access the form, meaning that they will always be authenticated.
Add this code to the form to access their account data:
fd.spRendered(function() {
    fd.field('Requester').ready().then(function(field) {
        fd.field('Requester').value = _spPageContextInfo.userEmail;
    });
});
This code simply assigns the user's email to the Requester field as soon as the field loads up. Since Requester is a Person field, the user's name is fetched automatically:
In Plumsail, every field and control on the form can be pre-filled, even the most obscure ones like the DataTable and Lookup. If you'd like to know more about the possibilities, check out this article on pre-filling form fields from various sources. Make sure to replace fd.rendered( with fd.spRendered( in the code so it works on a SharePoint form.
Let's ensure that all inputs of our form are correct before submitting the request. For example, we should check that the Start date isn't in the future.
Add this code to your form:
fd.rendered(function() {
    fd.field('StartDate').addValidator({
        name: 'Confirm start date',
        error: "You can't reimburse future purchases",
        validate: function(value) {
            if (fd.field('StartDate').value !== value) {
                return false;
            }
            return true;
        }
    });
});
This code will check if the date is correct before submitting the form and display an error message if something's wrong. You can check all kinds of conditions for the form. For example, let's make sure that Requester and Manager aren't the same person:
fd.rendered(function() {
    fd.field('Requester').addValidator({
        name: 'Confirm manager and requester',
        error: "Manager and requester can't be the same person",
        validate: function(value) {
            if (fd.field('Manager').value == value) {
                return false;
            }
            return true;
        }
    });
});How do we know how much to reimburse if the user lists several items? Let's calculate the total price.
fd.spBeforeSave(function (data) {
    fd.field('Price').value = fd.control('ItemListTable').value.reduce((accumulator, currentValue) => accumulator + currentValue.Price * currentValue.Quantity, 0);
});
This code iterates through the DataTable items and multiplies the price of each one by its quantity. Then the sum of all totals is written into the Price SharePoint field. Working with arrays in JavaScript can be tricky, so here's a great page of documentation for the reduce() function.
We also need to process the items' names and additional comments, so add this code to the form as well:
fd.spBeforeSave(function (data) {
    let counter = 1;
    fd.field('Itemlist').value = fd.control('ItemListTable').value.reduce((accumulator, currentValue) => accumulator + counter++ + ". " + currentValue.Name + ". " + currentValue.Comment + " \n", "");
});
Now the user can enter their expenses into a table:

The form will automatically generate the total price and a neat list of items:

Since we don't want the user to manually fill in Price and Item list, let's hide these fields. A simple way to achieve this is to add this code to the form:
fd.spRendered(() => {
    fd.field('Itemlist').hidden = true;
    fd.field('Price').hidden = true;
});It took us some time to configure every little thing on the form, didn't it? The good news is that we don't have to do this again. Use Plumsail's Provisioning API to automatically deploy the same form to any SharePoint site.
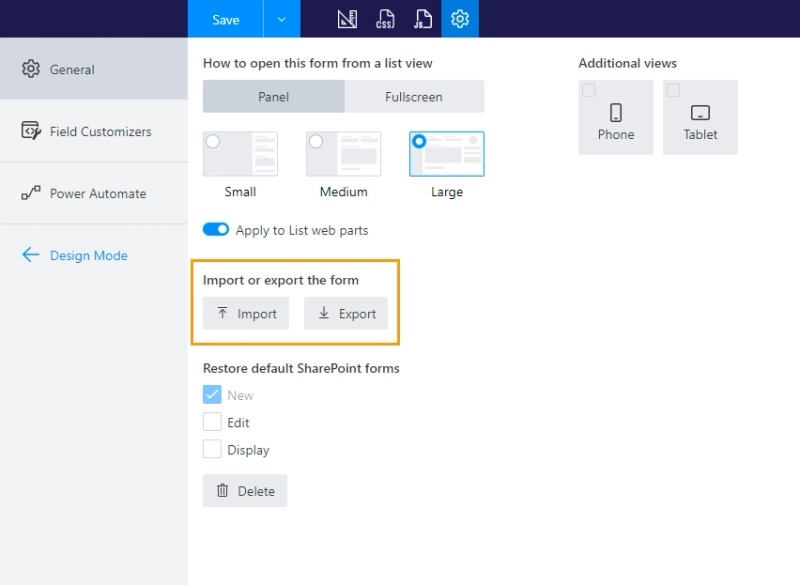
There is also a simpler way to add the same form to multiple SharePoint sites. Click Export in the settings of the form you've configured, then Import the downloaded JSON file to all the other sites. This is less ideal than using the API, but it gets the job done and doesn't require any coding experience.
Making a separate approval workflow for each site would be too much of a chore, we need a way to launch one flow for many SharePoint sites. Follow the instructions from this page detailing how to install and enable Trigr. You will need to add the app to your SharePoint, so make sure you have tenant admin privileges.
If you did everything right, a small Encodian icon should appear in your SharePoint lists when you select items:
![]()
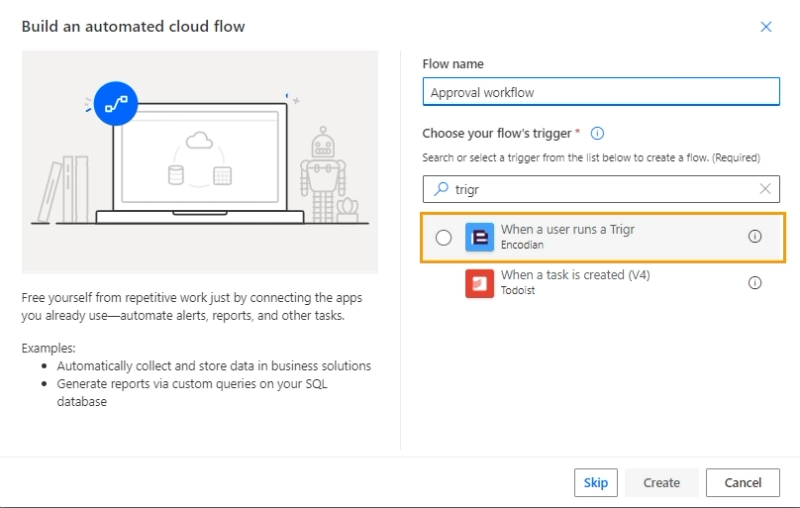
Open Power Automate and create a new Automated Cloud Flow. Use When a user runs a Trigr as the trigger:
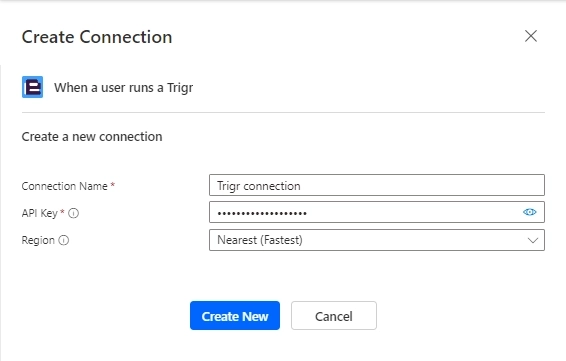
In the editor, add a new connection with your Trigr API key.
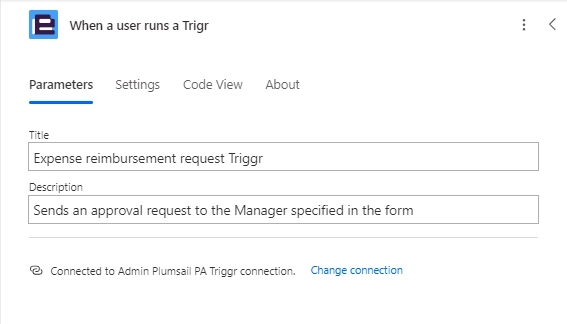
After the connection is configured, type the title and description of your Trigr into the action:
There might be several SharePoint items sent for approval, so we will need an Apply to each cycle.
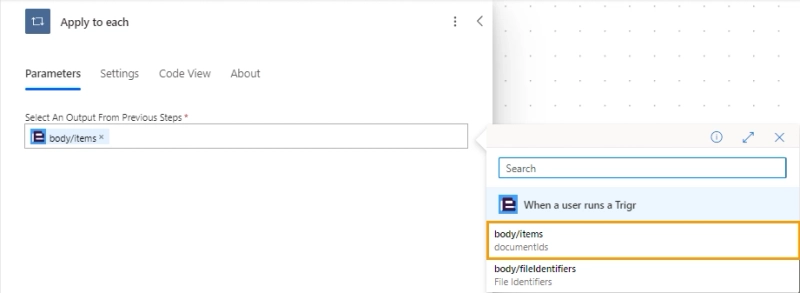
For each ItemID provided by Trigr, we need to fetch the correct item from SharePoint. Add a Get item action inside the cycle and configure it:
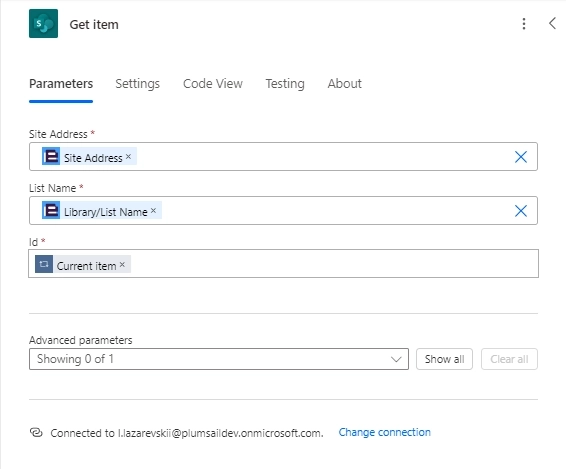
Use the site address and list name from the Trigr action, but the ID from the Apply to each cycle.
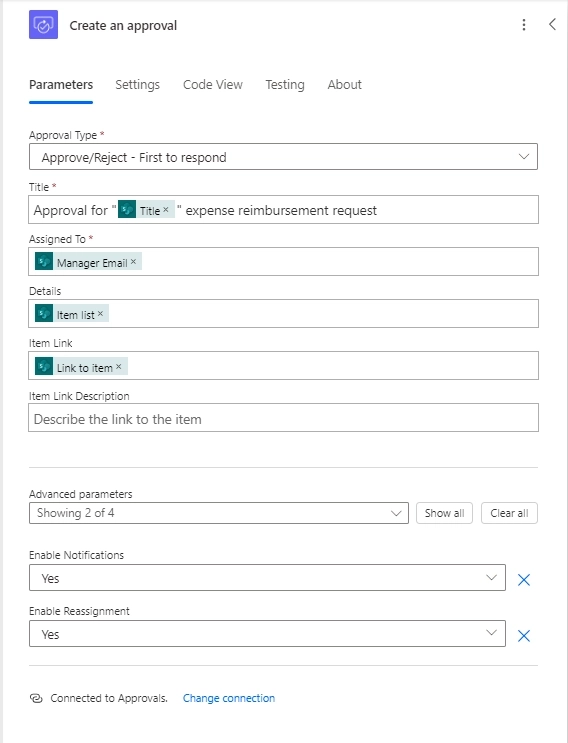
Last thing - add the Create approval action. You can put whatever you want here, and it will show up in the Approval Center. Most importantly, put the Manager from the form into the Assign to box:
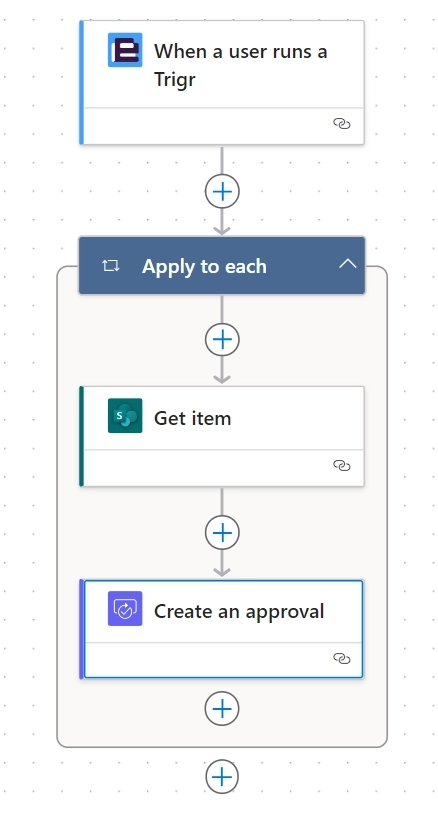
This is how the entire flow should look like:
Once the Flow is saved, its time to deploy the flow across your SharePoint.
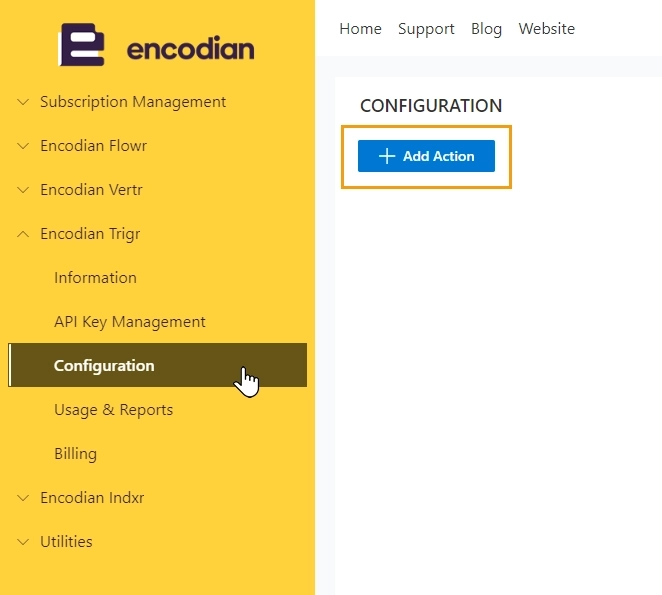
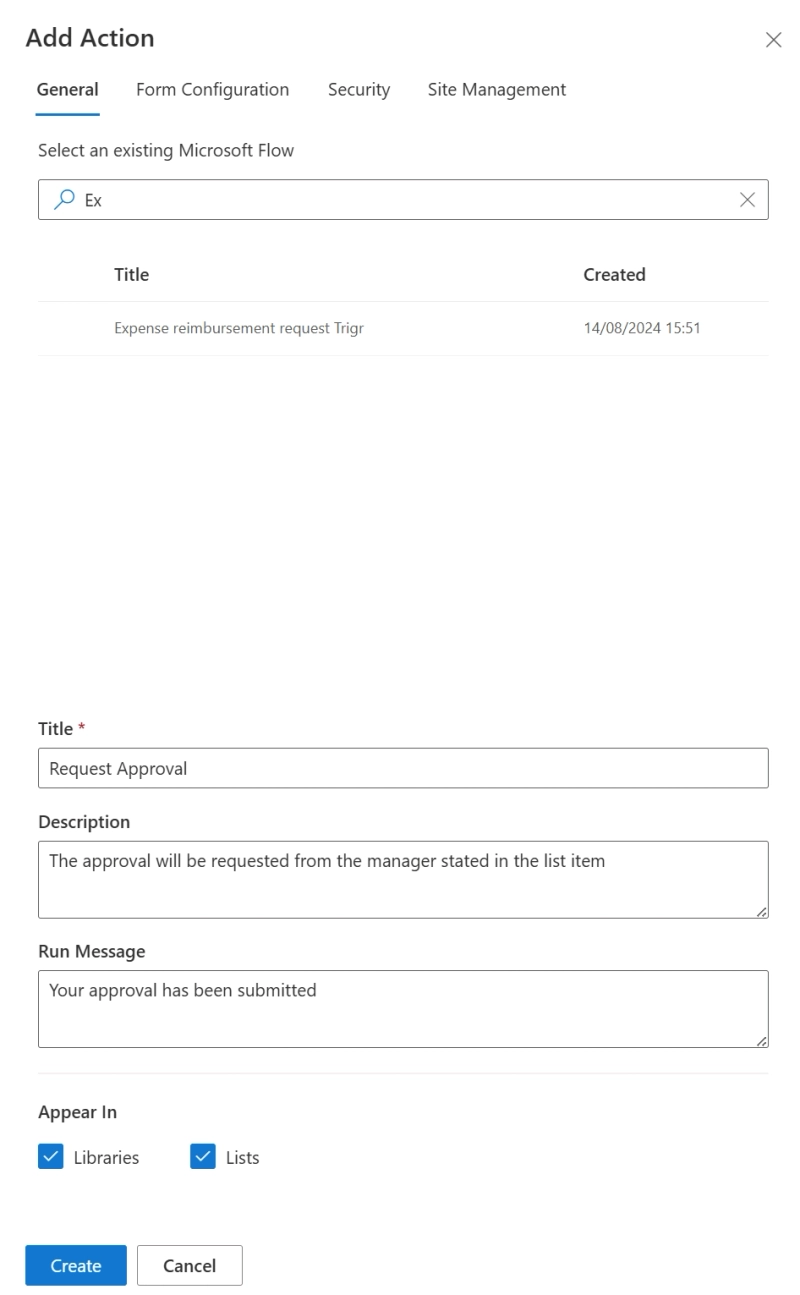
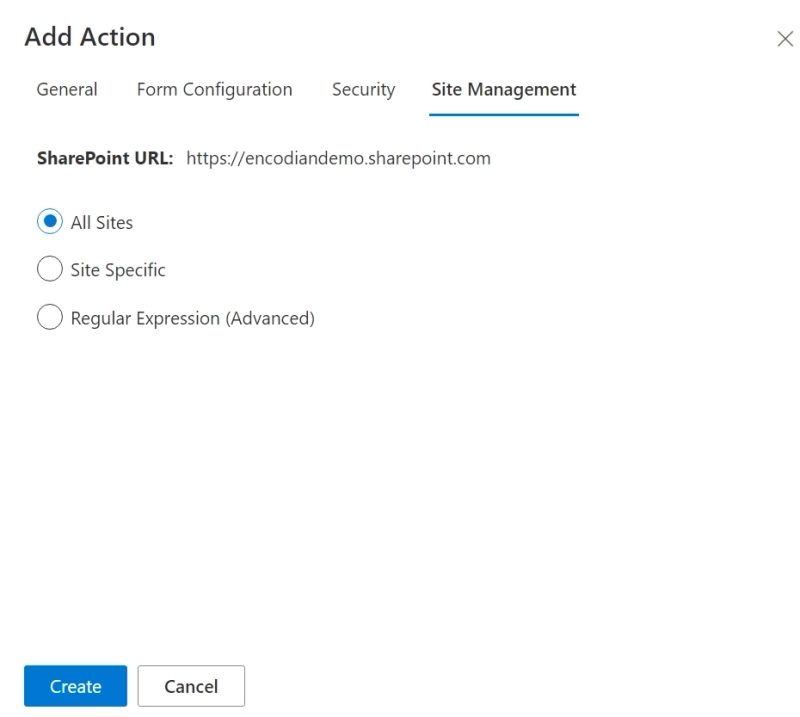
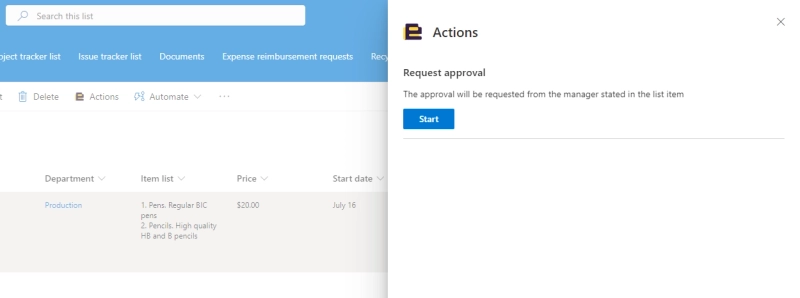
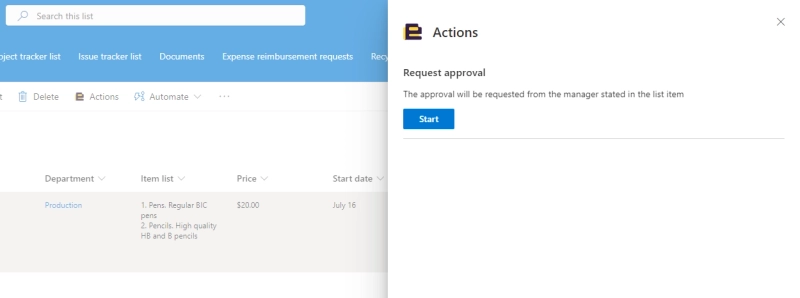
The best part is that you can launch the flow from any SharePoint site that has Trigr. To launch the flow, choose some items from the expense reimbursement list, click the Encodian icon and then Start:
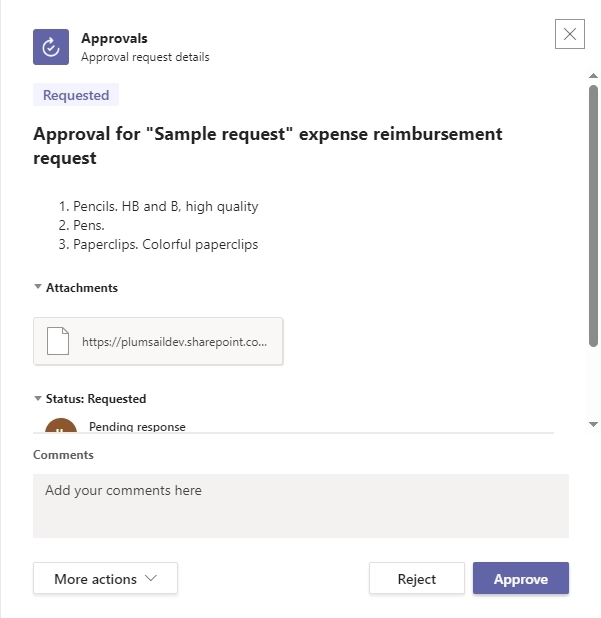
The manager will receive this approval request in Microsoft Approval Center:
The setup we've configured is versatile and easily replicated. The approval workflow can be launched from any list and the forms can be deployed automatically to any site. Sign up to Plumsail and follow this guide to improve your SharePoint forms. Set up Encodian Trigr to create better approval workflows.
Happy automation!