Power Automate offers a variety of tools for creating approval workflows, including a number of ways to trigger the flow. In this article, we'll focus on two scenarios:
Internal approval requests: when a SharePoint form is submitted, create a new list item and trigger the flow
Handling rejections with requested adjustments and resubmissions
In case the default SharePoint forms don't work for you (e.g., the form has to be filled in by someone outside of your organization), you can modify the setup to use Plumsail Public Forms. More on that later.
SharePoint list approval flow for internal requests
In this use case, both the requester and the approver are members of our organization. We can use a default SharePoint form to add an item to the purchase request list, but first, we need to set up said list.
Set up the SharePoint list for approval workflow
Navigate to the home page of your SharePoint site and create a new list. Add all the columns a purchase request should have, but skip on Requester and Approval status. We will enable item approvals separately in list settings and use the default Created By field to track the requester.
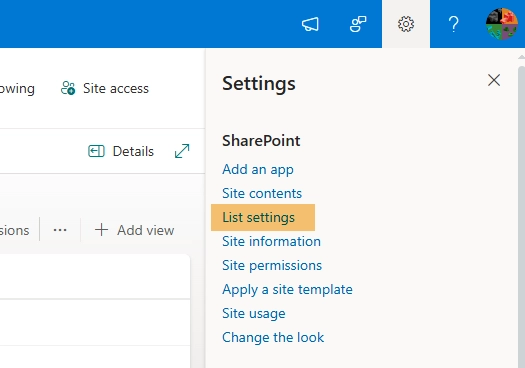
To enable item approvals, first open list settings.
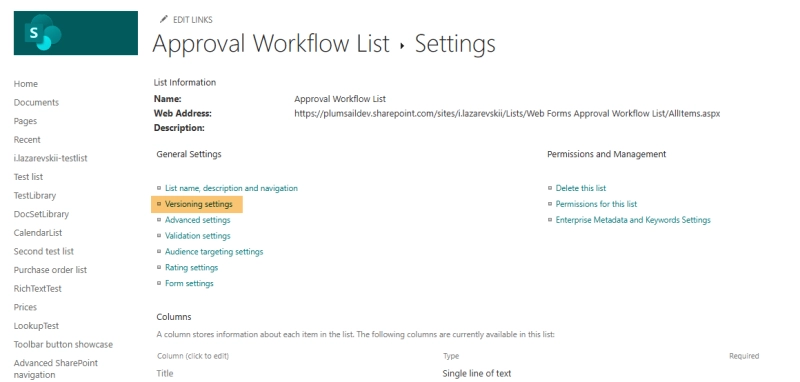
Then, versioning settings.
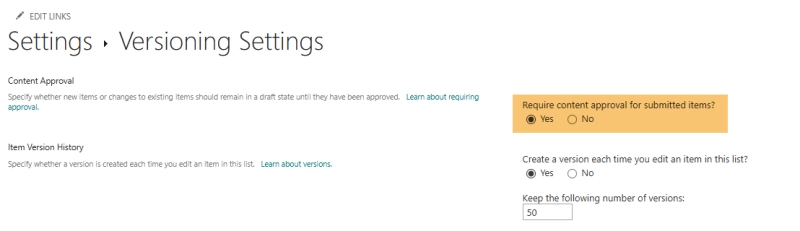
And finally, tick the Require content approval box.
That's it, the SharePoint list is all set.
Set up the Power Automate flow for SharePoint list approval
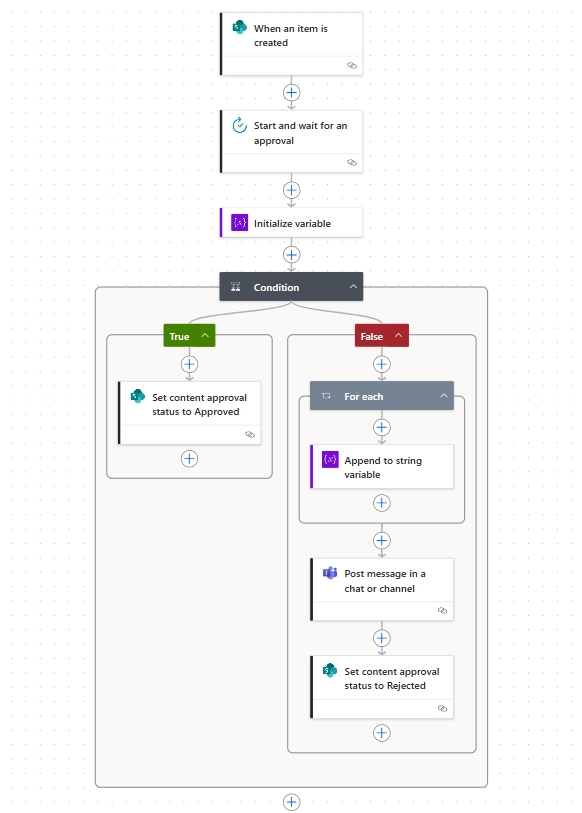
Here's what we will build by the end of this section:
This Power Automate flow will create a form approval request for each new item added to the list we've just configured, then send a message to the item's creator if the request was denied.
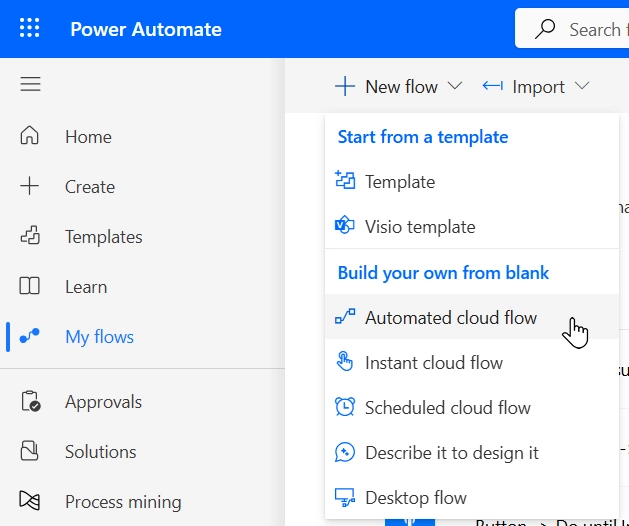
First things first, create a new Automated cloud flow.
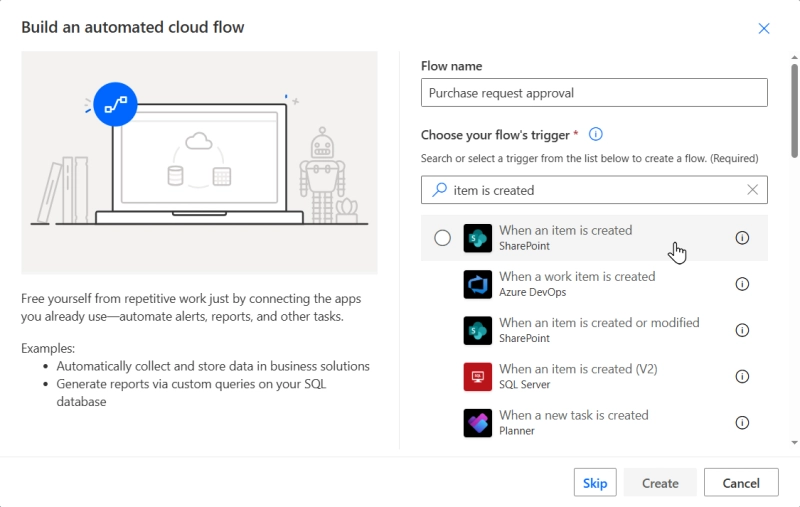
Choose a fitting name and pick When an item is created SharePoint action as the trigger:
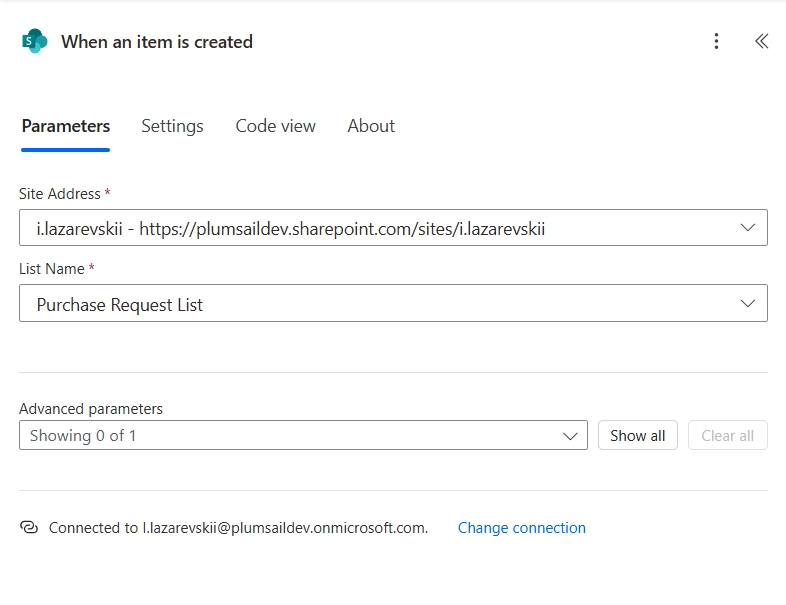
After the flow is created, you need to set up the trigger action. Simply enter the names of the SharePoint site and list. If you're doing this for the first time, you'll have to log in with your SharePoint account.
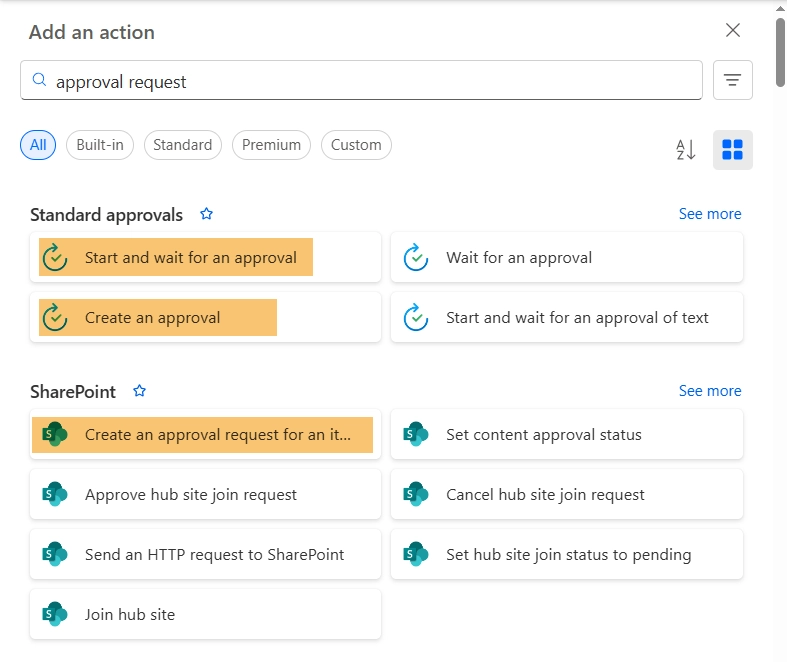
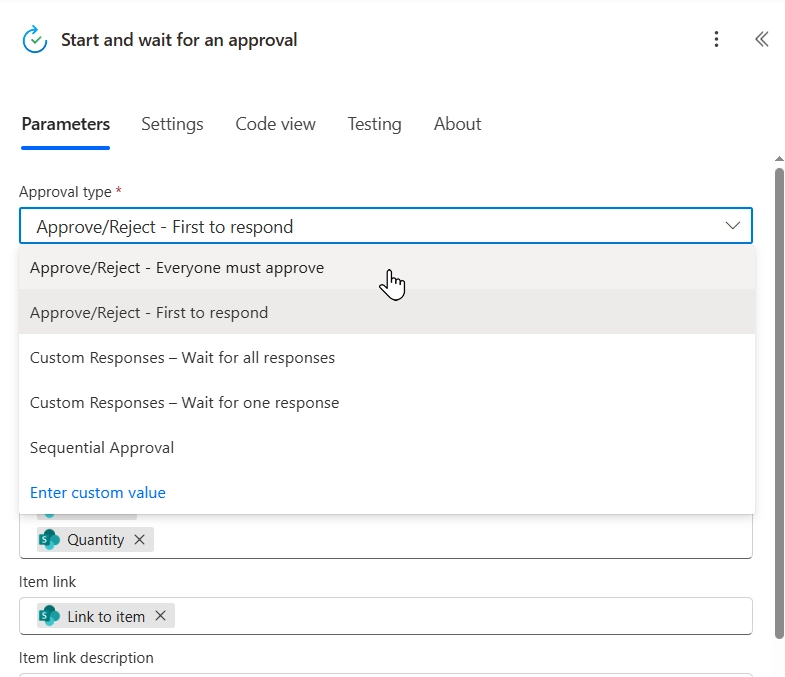
If you try to add a new action to the flow and put "approval request" into the search box, you will notice that an approval request can be created by three different actions:
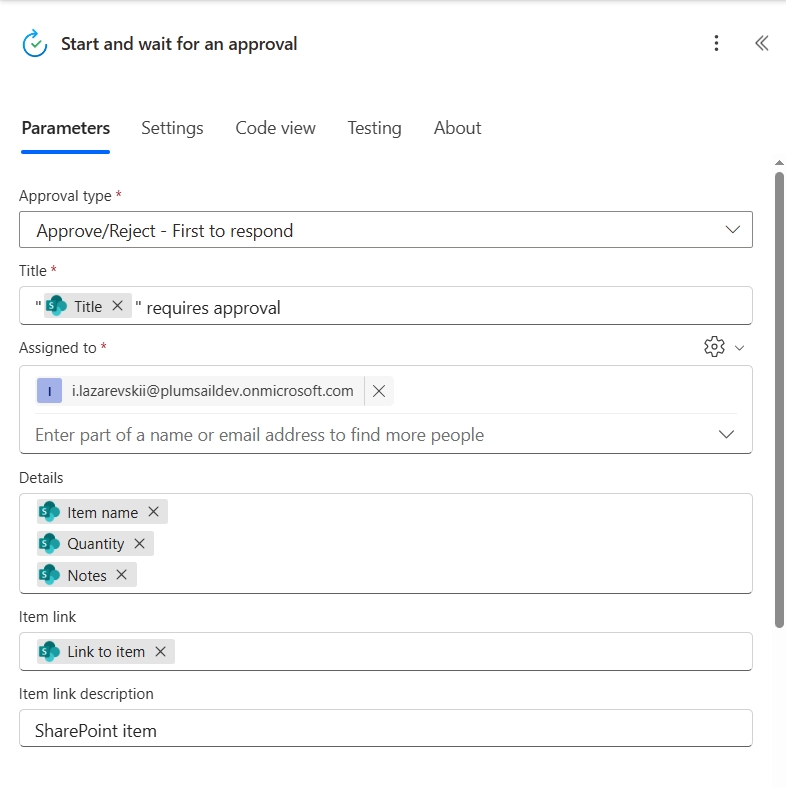
Unfortunately, Create an approval request for an item doesn't allow us to get the approval result in the same flow. We need to use one of the Standard approvals, and I chose Start and wait for an approval as the most convenient one.
The customization of this action is generally very intuitive, but pay attention to the Approval type and Assign to properties. In this example, Approval type should be First to respond.
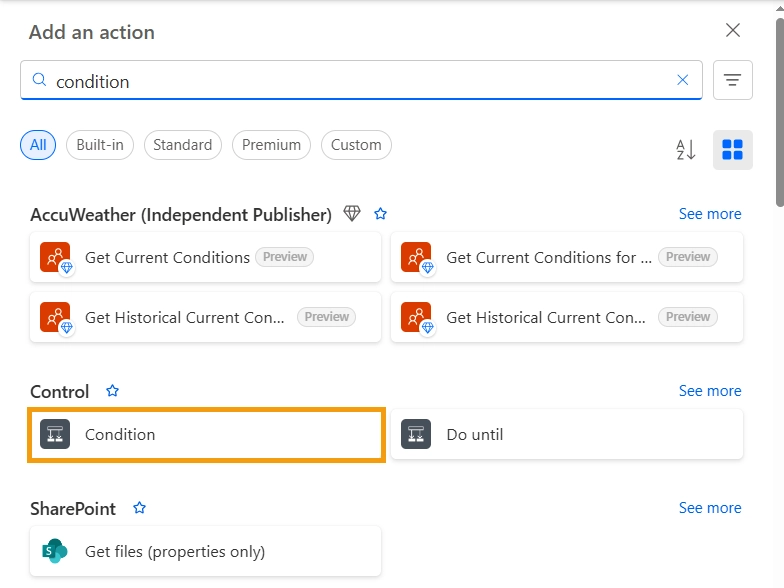
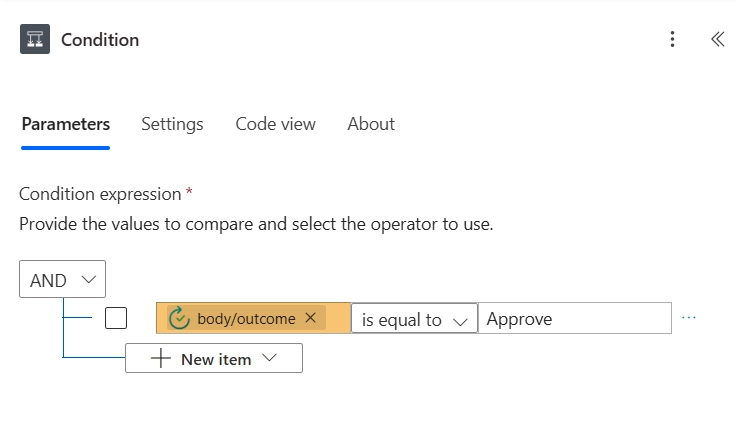
Now we need to change the flow behavior depending on the approval result. A Condition block is ideal for this:
Inside the Condition, simply check that the approval outcome is equal to "Approve". Note that the outcome is a string, so the word must be spelled exactly as in the screenshot.
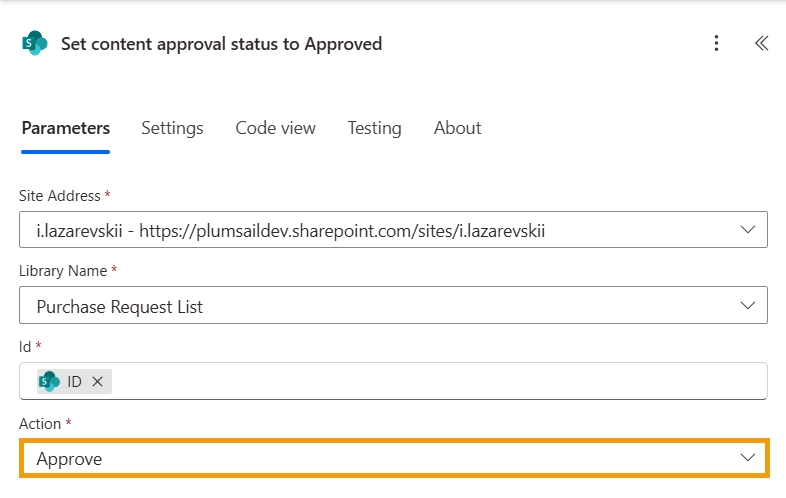
Add a Set content approval status to each branch of the condition. Use the item ID from the trigger action. For True, the Action property should be Approve. For false, it should be Reject.
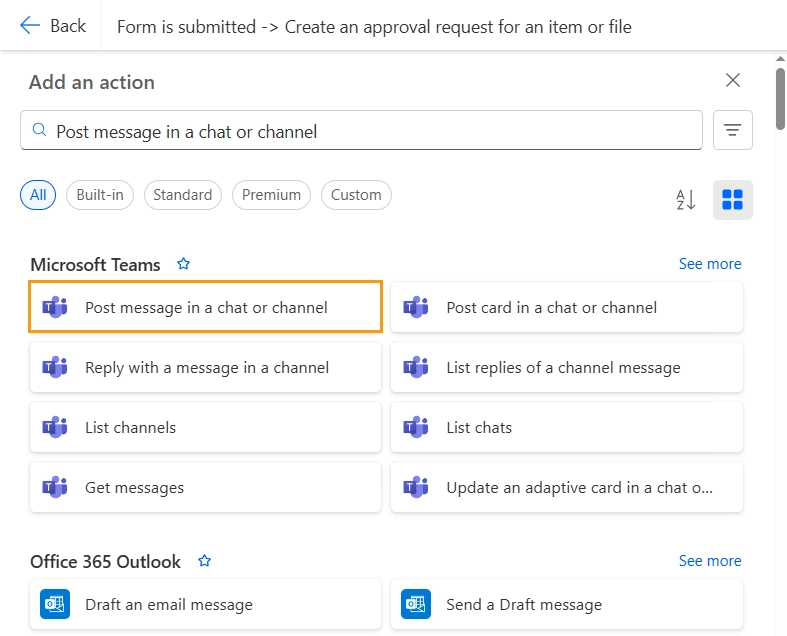
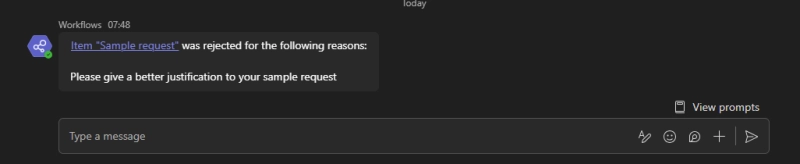
Now it's time to notify the item's creator that they need to change the item if it was rejected.
I'll use Microsoft Teams for this example, but you can do this via email, mobile notification, or even SMS.
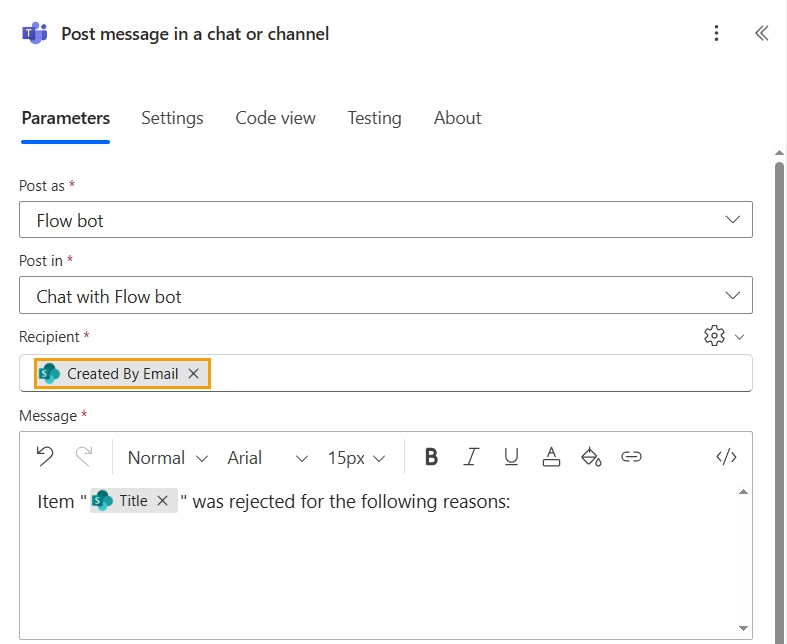
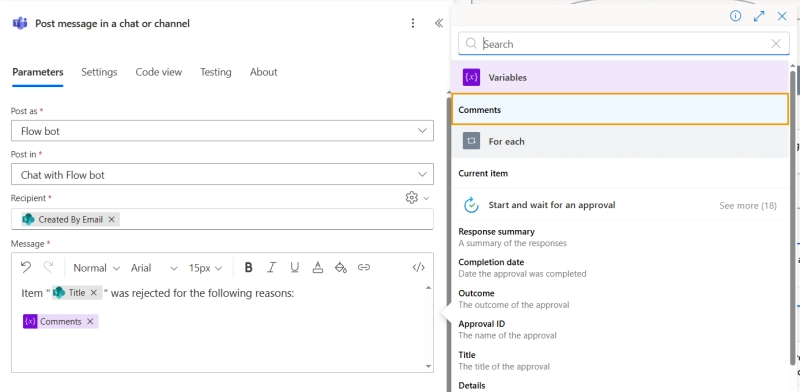
Pick Flow bot in the Post as dropdown, Chat with Flow bot in Post in, and the email of the person you want to be notified. I will use the item creator's email:
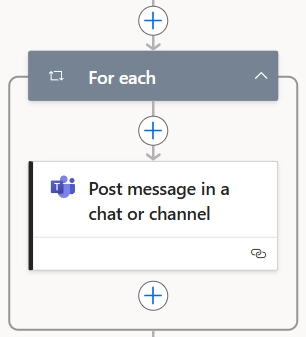
If you try to add the approver's comments to the body of the message, you will notice that the action gets automatically wrapped in a For each cycle. This is because there might be several approver comments, which means that they can't be processed in a single action.
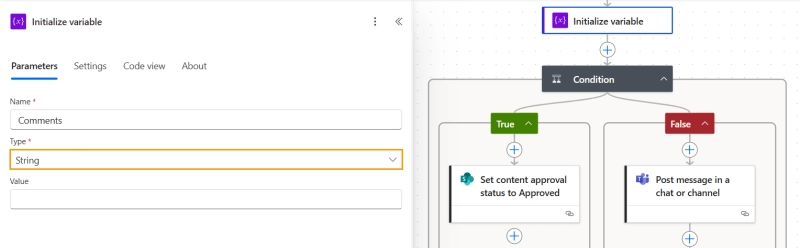
To fix this, we need to save all comments in a variable before inserting them into the message. Add an Initialize variable action before the condition block, making sure you choose String as its Type. You can put anything into the Name field, I'll use Comments:
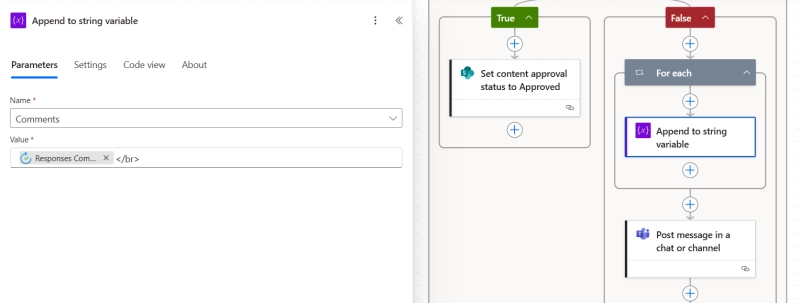
Add an Append to string variable action to the flow and pick the name of your variable from the Name dropdown. The Value should be Responses Comments from the approval action. Make sure to add </br> at the end, this way each next comment will start with a new line.
That's it, add the variable contents to the Teams message, and the flow is ready to go:
If you like instructions in video format better, feel free to follow along with this great video by Vlad Catrinescu.
Power Automate form approval for external requests with Plumsail Public Forms
If you need a workflow for external purchase requests, standard SharePoint forms won't do. Giving every requester access to your tenant is unsafe and impractical. Thankfully, Plumsail Forms allows external users to create new SharePoint items without exposing your tenant.
Set up the web form in Plumsail Forms
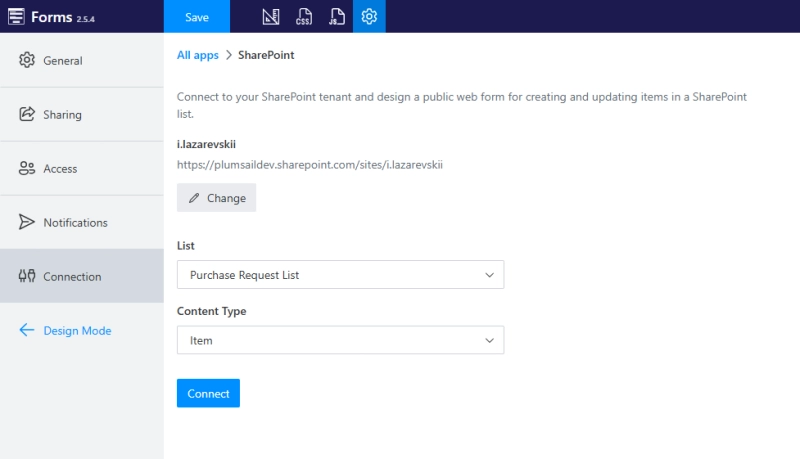
Go to plumsail.com to create a free account in the Plumsail Public Forms app. Create a new form and connect to your SharePoint list in Connection settings. Make sure to switch on the "Allow editing records" option.
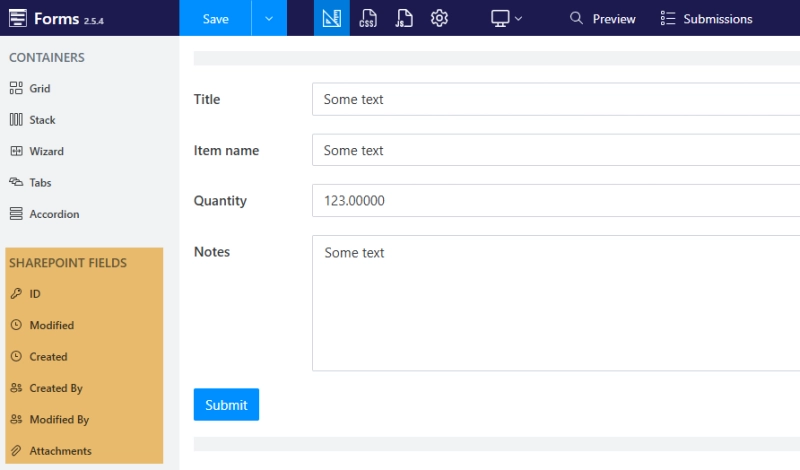
Now you can drag and drop the fields from the SharePoint list to your new form. Arrange them however you like and save the form.
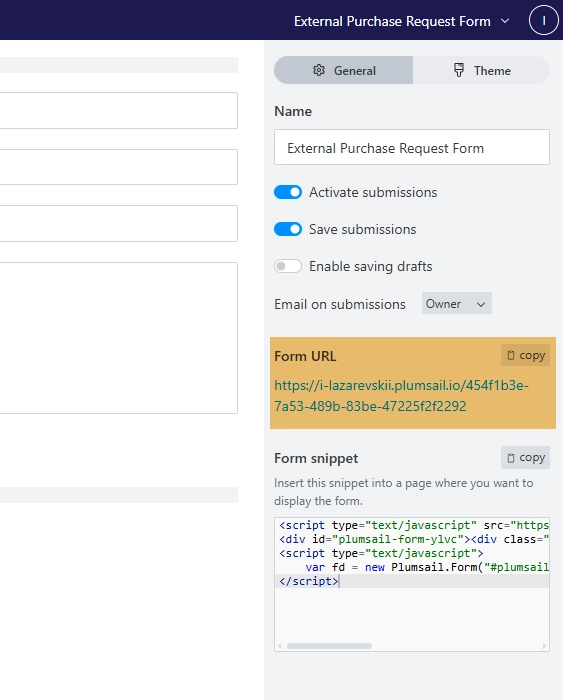
After a review, it will become accessible to anyone with the link:
Now that the form is set up, anything the user submits will automatically appear in SharePoint. The good news is that this will also trigger the flow we've already set up, so you don't have to make any adjustments to it.
Advanced approval workflows in Power Automate
Let's take a look at some more advanced use cases that can be implemented without much sweat.
Power Automate approval flow with multiple approvers
What if you need a SharePoint approval workflow with multiple approvers?
Don't fret, you can change how many of the reviewers need to approve the item in order for the request to come through. Go back to the flow and adjust the Approval type property of the Start and wait for an approval action:
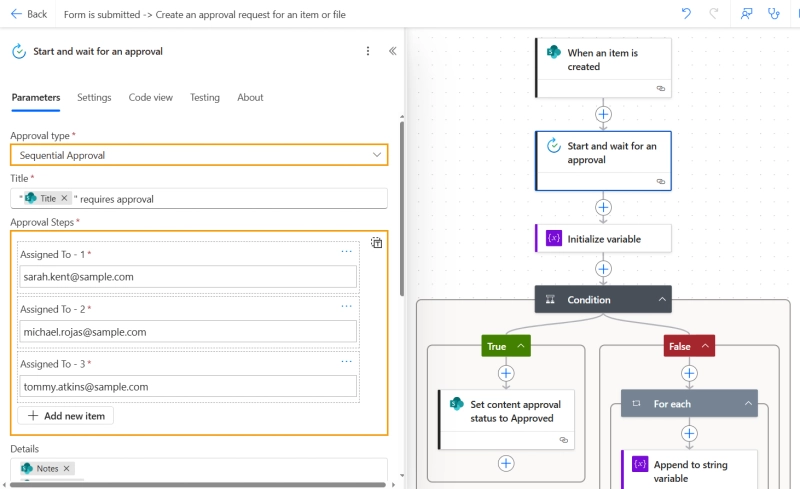
SharePoint list sequential approval workflow in Power Automate
In many cases, it's not enough to get the green light from just one approver. For example, some requests need to be pre-approved before being reviewed by higher management. For these cases, you can use sequential approvals.
You can modify the flow from the previous example by changing Approval Type to Sequential Approval in the Start and wait for an approval action. After that, enter the work email of each assignee into the list, starting with the one who should receive the request first.
Now, when a new item is added to the list and the flow triggers, an approval request will be sent to the first assignee. If the item gets approved, another request will be sent to the second one, and so on.
The body/outcome variable that we check inside the condition block will be true only if every assignee approves.
Handling rejections and resubmissions in approval workflows
The flows we've built so far will only trigger when an item is created. This means that if the item is rejected and later modified according to the feedback, Power Automate will not generate a second approval request for it. To fix this, we need to trigger the flow not only when an item is created, but also when it is changed.
Unfortunately, Power Automate doesn't allow a flow to have multiple triggers, unlike some alternatives (e.g., make.com). We can't use Item is created and Item is modified in the same flow.
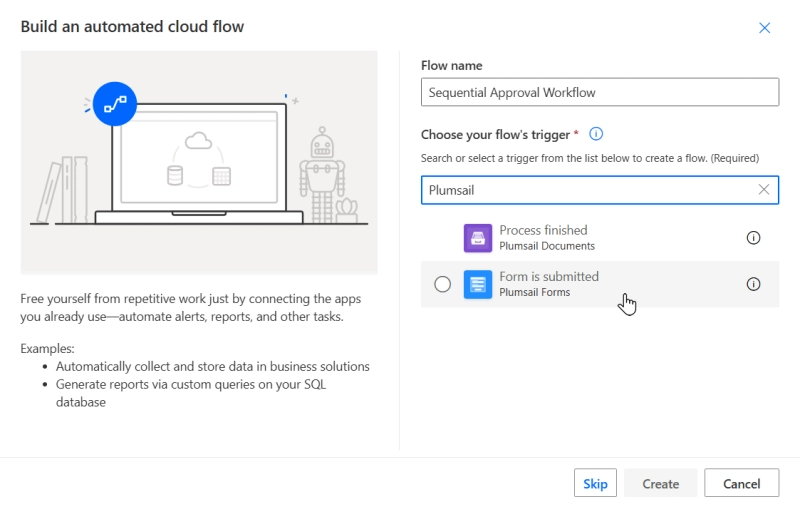
We will have to use the submission of the Plumsail form as a trigger, since this event is the same regardless of the item being modified or created. This way, any modification of the SharePoint list will trigger sequential approval requests.
Make a copy of the flow from the Set up the Power Automate flow section, but use the Plumsail Form is submitted trigger action when creating the flow:
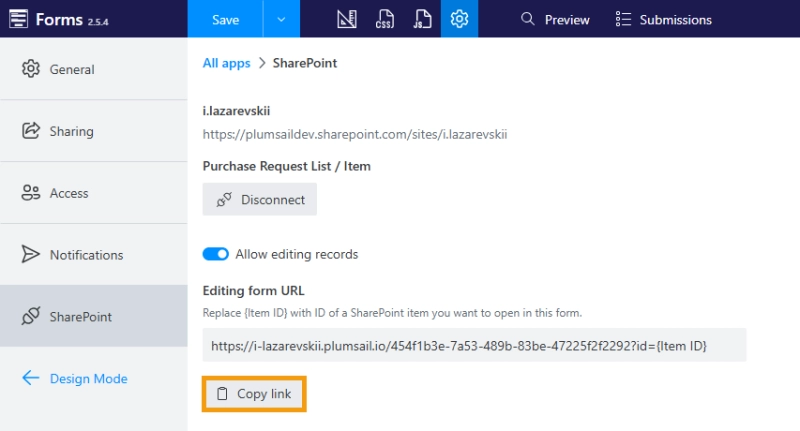
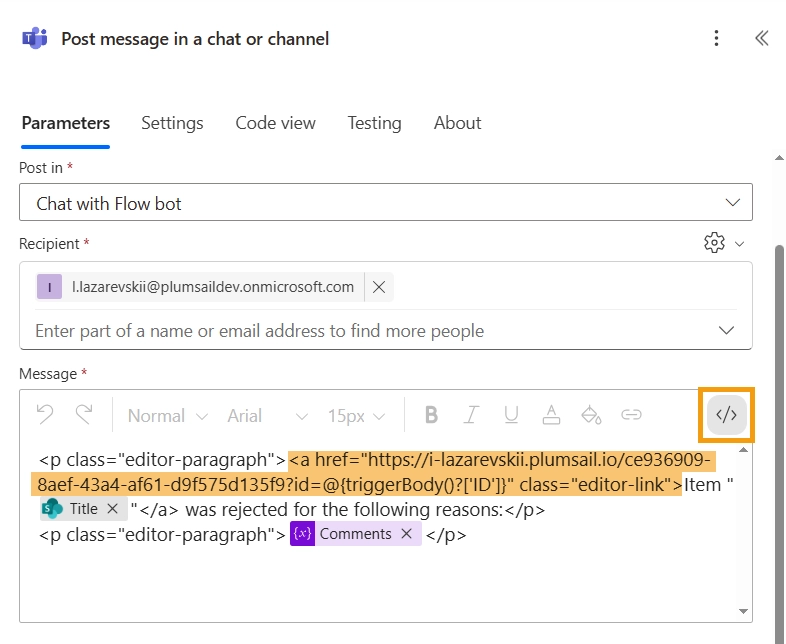
Once you get to configuring the Teams notification, add an item edit link found in the form settings of your Plumsail account to the message body.
You can simply replace the {itemID} with @{triggerBody()?['ID'] in the body of the link, or wrap the link in an tag if you're feeling fancy.
Finally, if you need to allow external users to create approval requests, like vendors or clients, then use Plumsail Public Forms instead of the default SharePoint forms.
Try Plumsail Forms for approval workflows
There's a lot more to Plumsail Forms than the SharePoint integration. For example, the app integrates with Airtable and Zapier.
Create new Azure DevOps work items from Microsoft Teams using Plumsail Forms and Power Automate
Follow this step-by-step guide to create Azure DevOps work items and handle attachments from a tab in Microsoft Teams using Plumsail Forms and Power Automate.
Ilia Lazarevskii
Customer Support Engineer
Forms
Jun 18, 2024
How to create a Microsoft Forms approval workflow
Learn how to create an efficient Microsoft Forms approval workflow using Power Automate and SharePoint. Step-by-step guide with use cases and best practices.