In this article, you will learn how to create tabbed forms in Power Apps for SharePoint, how to configure tabbed forms and which steps are required for SharePoint form tabs to work properly. We will also explore an alternative solution that simplifies the process and highlights its advantages.
In this article
What is a tabbed form?
A tabbed form, or a form with tabs is a form that is split into sections:
- Each tab, or section, has its own selection of fields or controls
- When tab's button is clicked, this tab is selected and other tabs are hidden
- This helps to structure a form, making sure only some parts are loaded
A tabbed form can be much easier to handle and complete, as it's logically split into sections, thus this functionality can be highly desirable.
How to create tabbed form in Power Apps
There are a few steps involved if you need to create tabbed form in Power Apps. In our example, we will focus on creating a tabbed form in Power Apps for SharePoint. We'll go into detail in each step necessary to get to the result. Steps are:
-
Step 1: Create and setup a SharePoint list
-
Step 2: Create form in Power Apps and add buttons
-
Step 3: Customize buttons functionality
-
Step 4: Show/hide fields on button click
Setup a SharePoint list
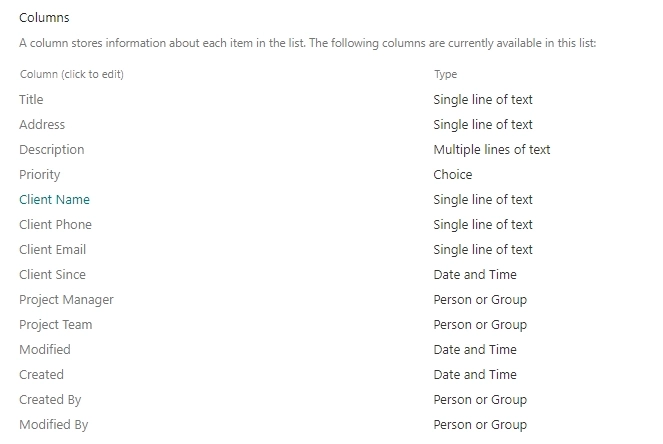
In the first step, we need to create a SharePoint list with all the required columns. In this case, we've created a Projects List with details related to the project, client and team that are responsible for the project:

This is the list I created and will use to create a tabbed form in Power Apps has the following columns:
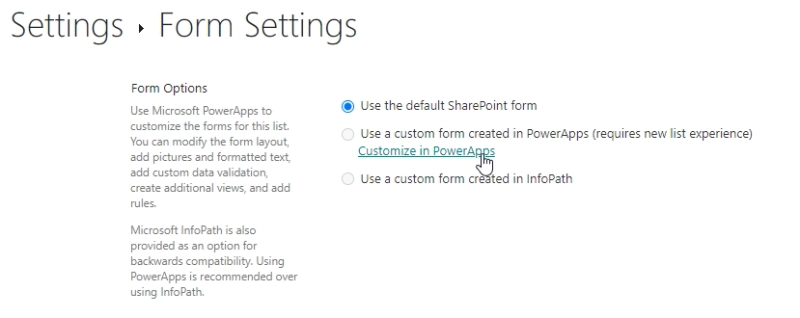
Then we need to click on Form Setting as shown below in the picture:
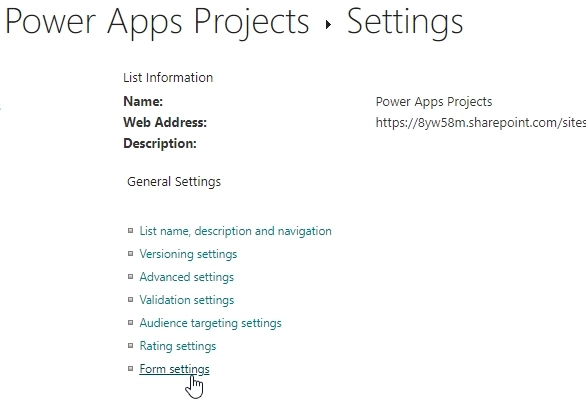
And Customize in Power Apps link:
Create form in Power Apps and add buttons
In the step 2 on the form in the Power Apps, we have to make sure that it has all the desired columns:
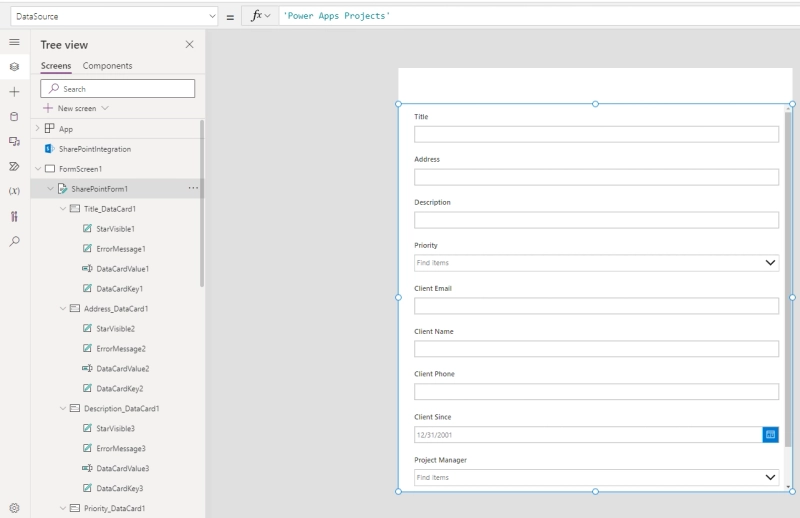
If something is missing, you can edit and add fields, as shown in the picture below. For that, we use the Edit fields option in Power Apps:

Then, add buttons to the top of the form, to switch between tabs. In this case, we've added Project, Client and Team:
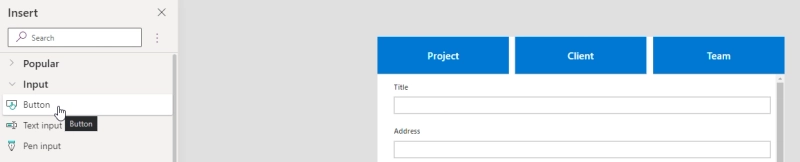
We'll use these buttons to show/hide fields, making them work as tabs.
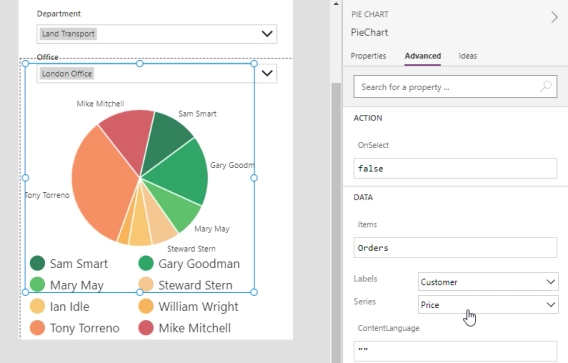
Customize buttons functionality
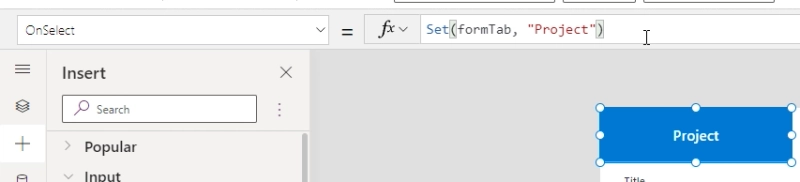
To add functionality to buttons, select each button, and customize their functions. For each button, customize the following functions to create tabbed forms in Power Apps:
OnSelect
Set(formTab, "Project")
Set(formTab, "Client")
Set(formTab, "Team")
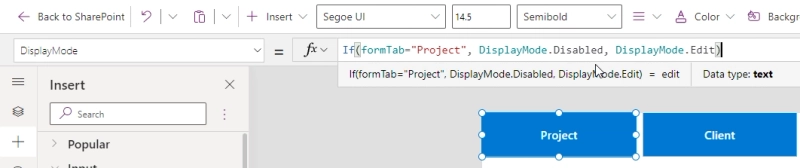
DisplayMode
If(formTab="Project", DisplayMode.Disabled, DisplayMode.Edit)
If(formTab="Client", DisplayMode.Disabled, DisplayMode.Edit)
If(formTab="Team", DisplayMode.Disabled, DisplayMode.Edit)
Show/hide fields on button click
The last step is to select all fields and other elements for each tab created in Power Apps, and customize their visibility function:
Visibility
If(formTab="Project", true, false)
If(formTab="Client", true, false)
If(formTab="Team", true, false)

This will ensure that the fields are only displayed when a tab is selected.
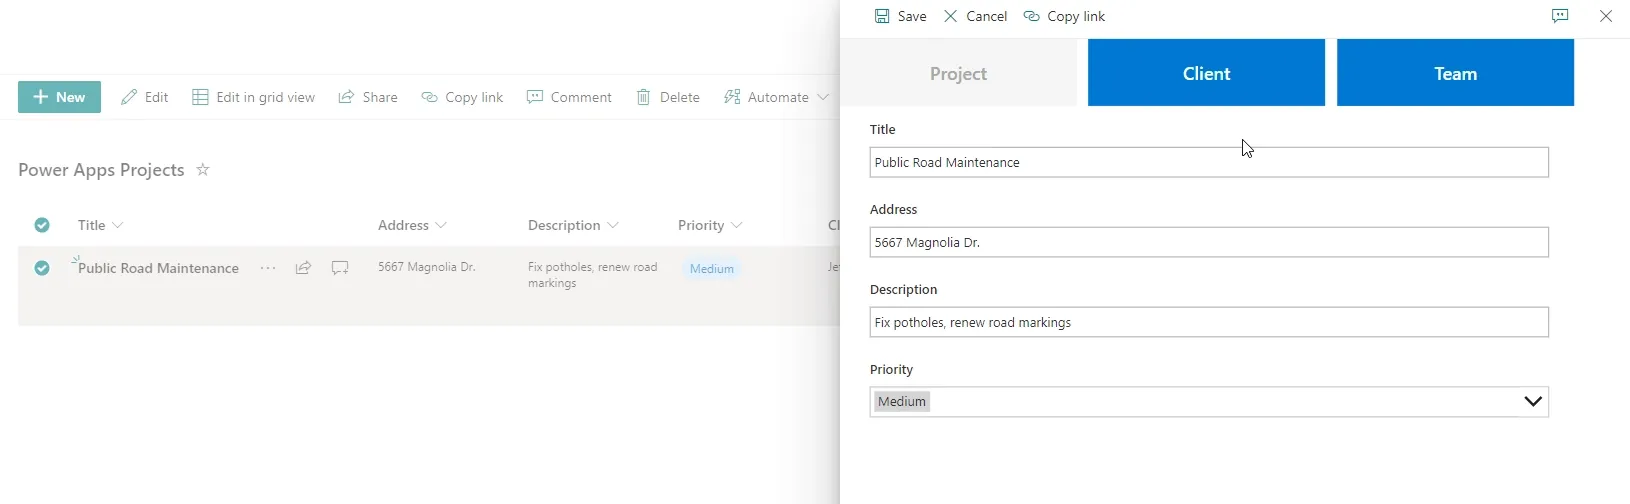
Example of tabbed form in Power Apps for SharePoint
Once you save and publish the form in Power Apps, it will be shown in SharePoint as displayed in the picture below:
Easier way to build a tabbed form in SharePoint
If you're looking for an alternative approach, don't want to write complicated formulas, deal with clunky UI, or if you want more control over your form, you can check out Plumsail Forms for SharePoint.
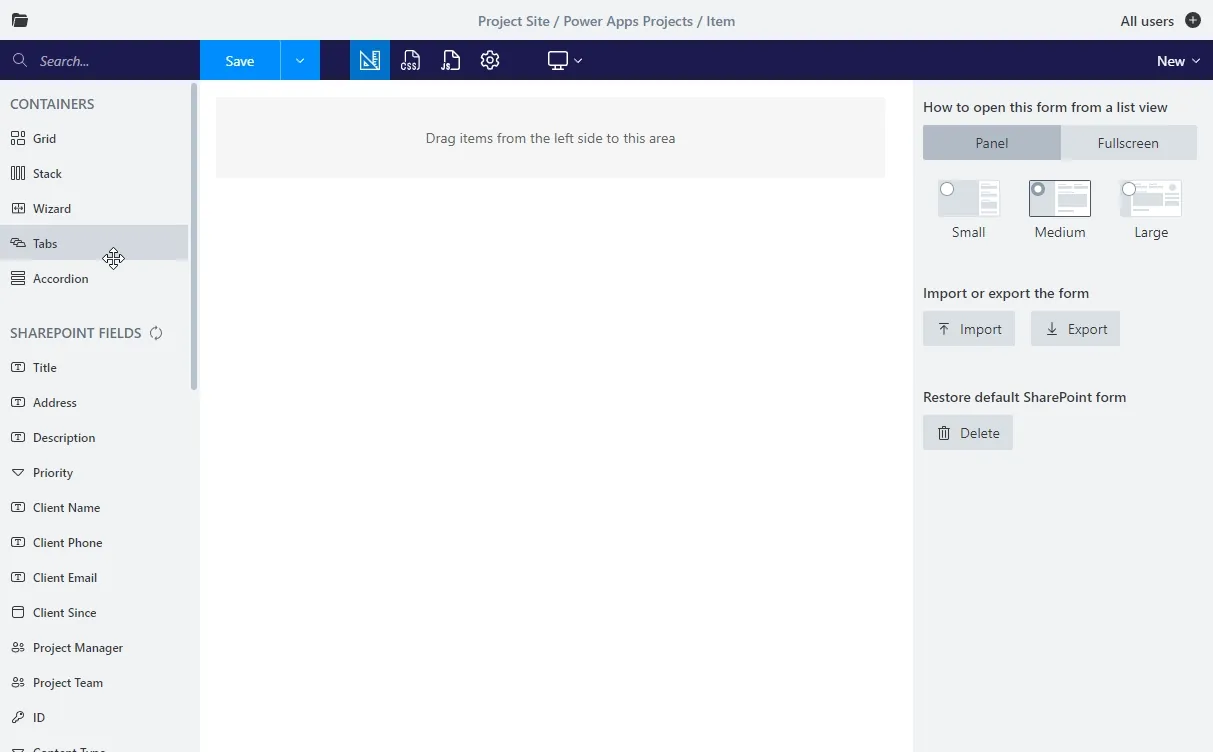
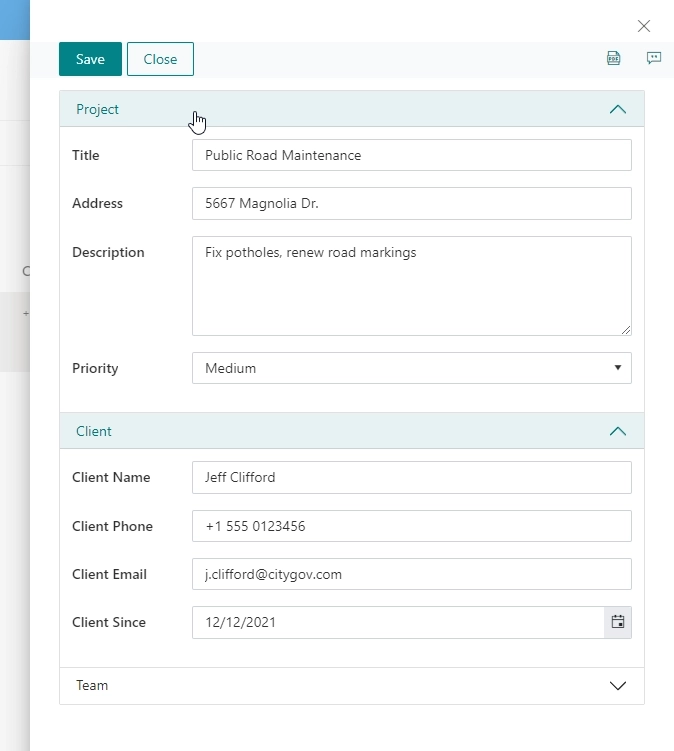
The same functionality can be achieved by simply opening form in an editor, dropping Tabs container, creating tabs and dropping fields into them:
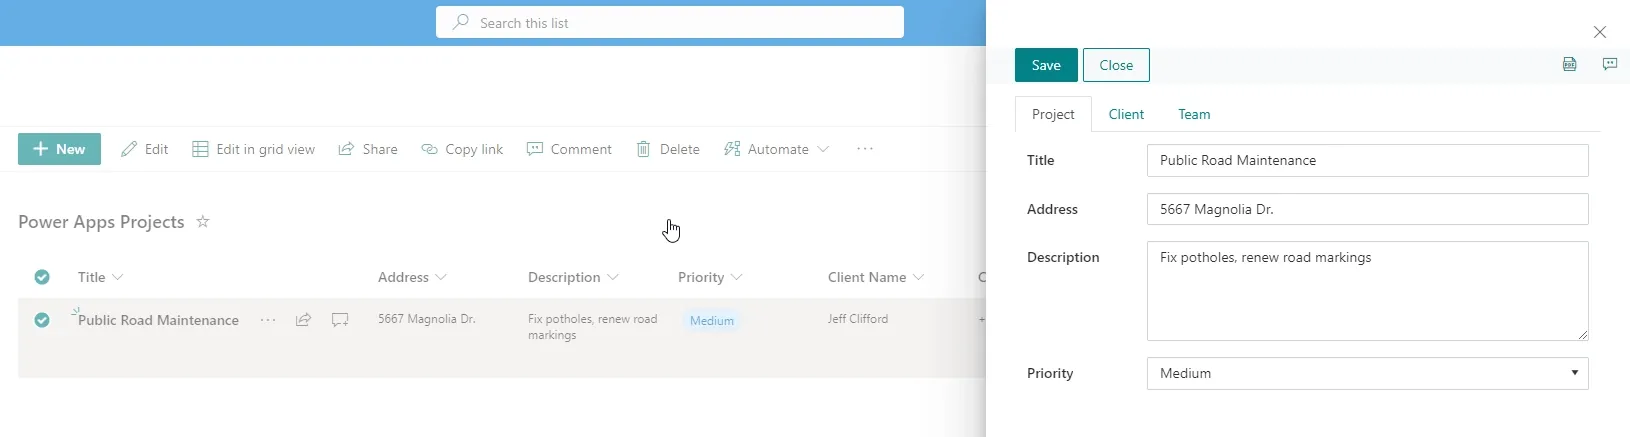
And the tabbed form in SharePoint looks the same, if not better:
Alternatively, you can utilize Accordion container where multiple sections can be opened at once:
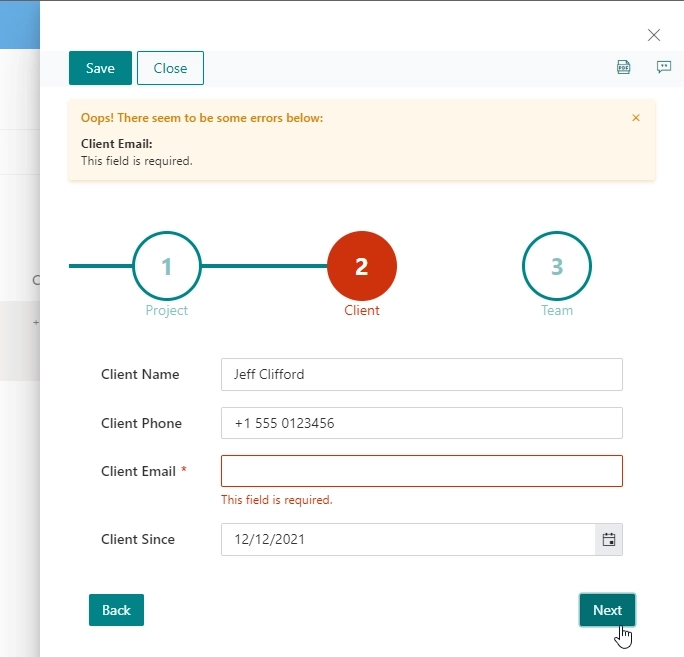
Or even a Wizard, where each step comes after previous one is complete, and you can make a logic sequence in which your form needs to be completed:
Try Microsoft Power Apps alternative for free
In this article we explained how to create tabbed form in Power Apps for SharePoint and presented Plumsail Forms for SharePoint as an alternative. The product is very easy to install and use.
Get started with the 30-day free trial for Plumsail Forms for SharePoint Online by following the installation instructions in our documentation, which includes a full video walkthrough.
If you're using SharePoint 2019 or Subscription Edition, follow the SharePoint On-Premises installation guide.