Documents
Feb 02, 2021
Create documents from a template and electronically sign them using signNow eSignature solution
Complete guide on how to merge custom data into a sales contract and electronically sign it using signNow

Using Plumsail Documents together with DocuSign enables you to generate a large number of documents like contracts, invoices, quotes, and others from a template and automatically send them to DocuSign for electronic signatures.
One template dynamically turns into a personalized document for each customer; you get it digitally signed with DocuSign and Plumsail Documents integration without any manual actions.
Sounds great, doesn’t it?
To use the Plumsail Documents and DocuSign integration, you need to have:
These are the steps for setting up the integration.
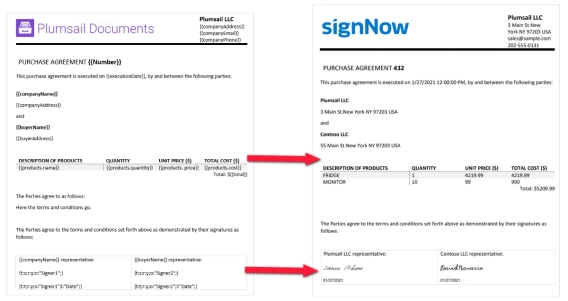
To set up the DocuSign integration in Plumsail Documents, you need to create and configure a new document generation process. You can do it from the Processes section in your Plumsail account.
At the first step, work out the document template. You can use our Shareholder agreement template we have added to premade templates inside the processes:
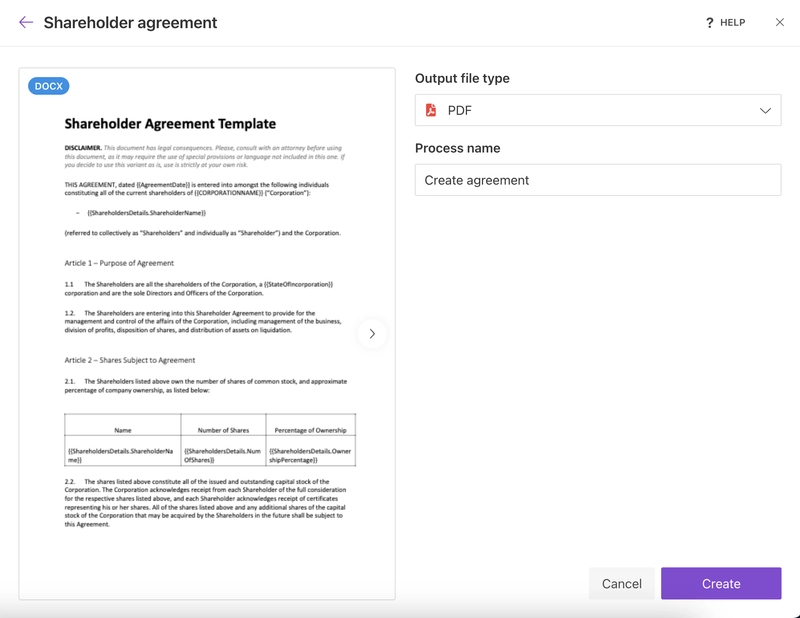
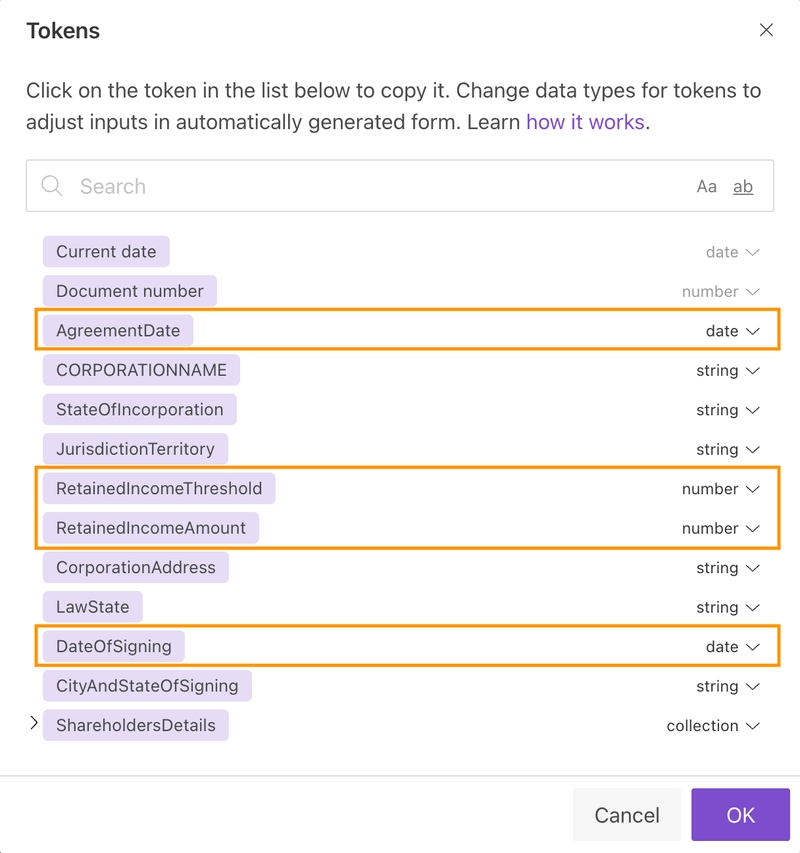
You see tokens embraced by curly brackets in it. They will dynamically transform into real values each run of the process. Get acquainted with how the Plumsail Documents templating engine works from the documentation.
You can also customize the token types depending on the values you plan to use. In the form, date fields allow users to select a date from a calendar, while quantity and amount fields accept only numeric values.
To define the location of signatures, initials, the date of signing, and other fields, insert special tags into the document template. They will ease the process of signing as your recipients won’t need to search for the signature right place and drag fields manually.
\s1\ will appear as a signature field for the first signer.
\i1\ will define the location of initials.
\n1\ and \d1\ will automatically set the name and date stamps.
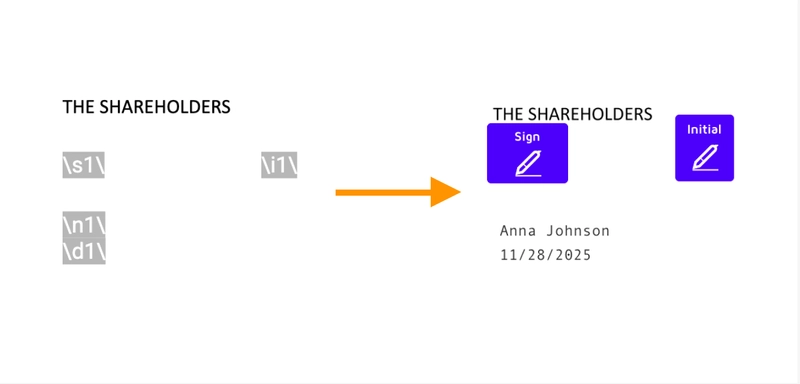
It’s a common practice to change the font color of the signature tags to white or the background color. Thus, they will be invisible to document viewers. Find detailed information on DocuSign tags in our documentation.
After you have customized all the settings of the document template, add a DocuSign delivery to send sales contracts for eSignatures.
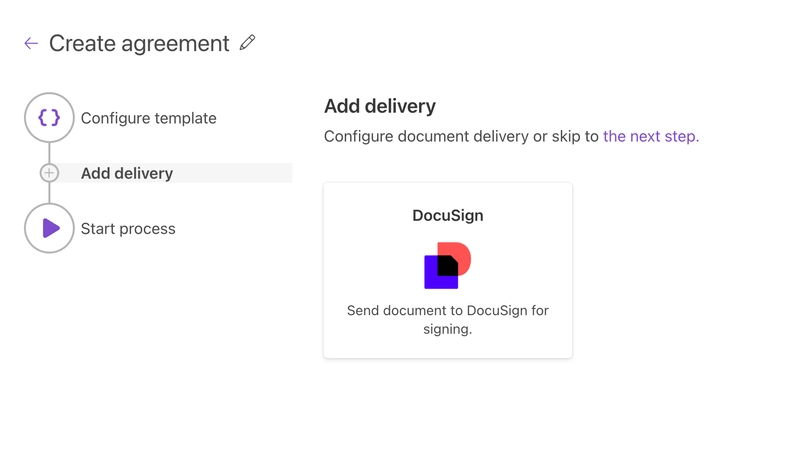
Connect to your DocuSign account from the Plumsail account, and you’ll be able to customize the DocuSign settings.
Fill in the email subject and message. Use tokens from the template to make it personalized. For example, we inserted {{ShareholdersDetails.ShareholderName}}, {{CORPORATIONNAME}} and {{AgreementDate}} tokens and they will transform to the real name of the customer and the contract number dynamically every time.
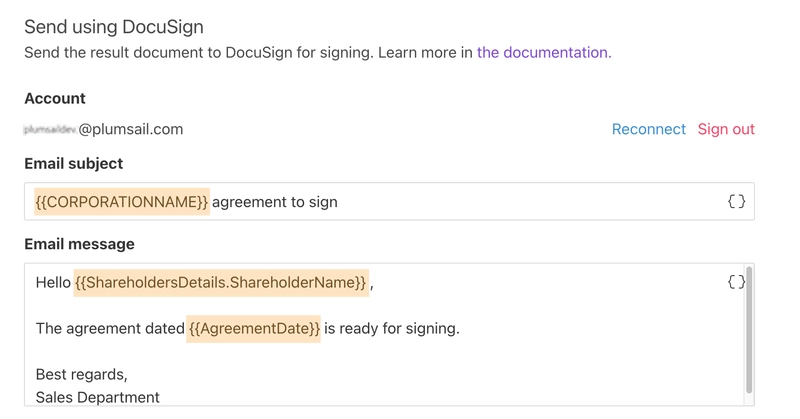
You don’t have to personalize the message manually.
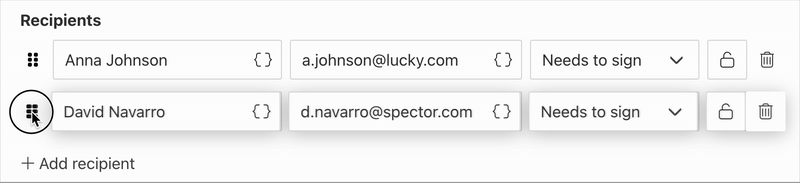
Add recipients. Add as many recipients as you need. In this example, we added just two — from the vendor company and the customer side. We assigned their roles — Needs to sign. There are other options you can select.

Use advanced settings to enable Sequential signing, to Set expiration period and reminders.
We enabled Sequential signing that means the strict order in which recipients should sign the document. To change the order, you can drag and drop recipients like this:
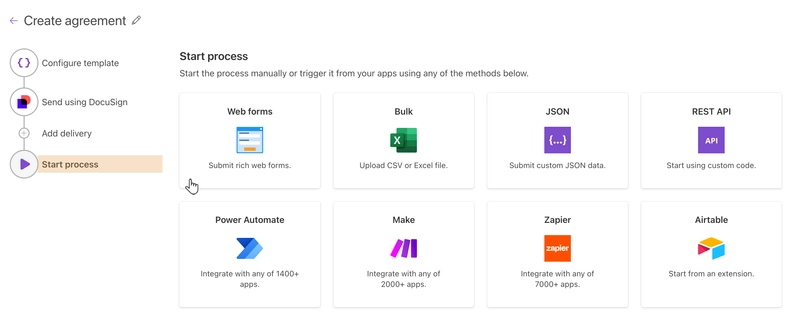
The last thing to do is to start the process. There are plenty of ways to do that — manually, from a web form, Power Automate, Zapier, or REST API.
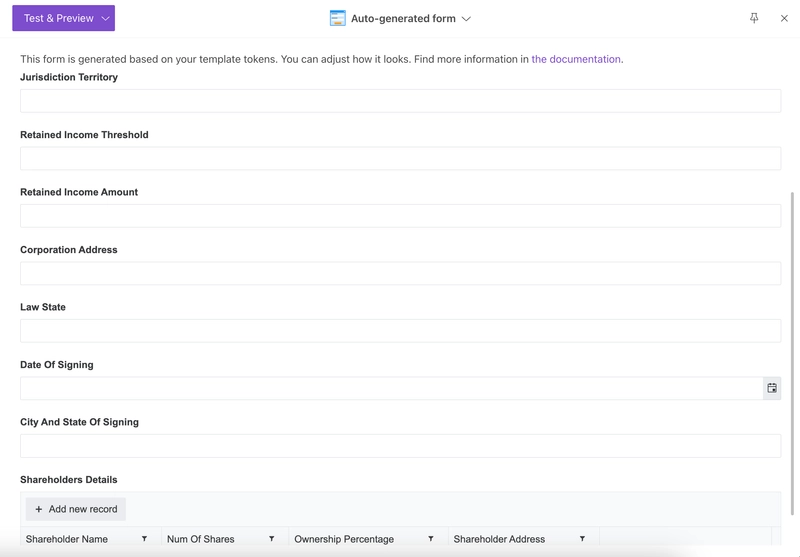
We’ll start the process using an auto-generated web form as the trigger.:
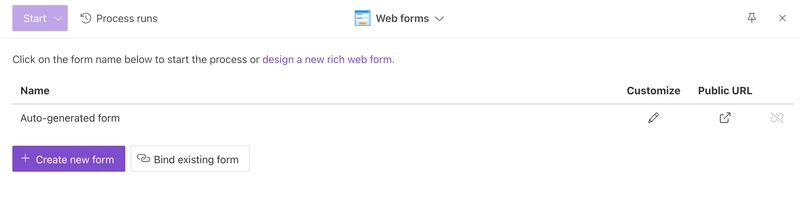
To follow the same, just select Web forms as the starting point:
You’ll see an auto-generated web form. If you click on the form name, you will start the process.
Thus, this bound form will trigger the process. The submission data will populate the contract template; the process will send the result to DocuSign to collect e-signatures.
Please, find more details on how to generate PDF shareholder agreements from Plumsail Forms and send for signing to DocuSign in the how-to guide.
Plumsail Documents and DocuSign integration is easy to set up. Start using paperless and time-saving solutions right now.
Sign up for Plumsail Documents to get a 30-day trial free of charge.
Plumsail team is always ready to guide you — just drop us a line to support@plumsail.com.
Complete guide on how to merge custom data into a sales contract and electronically sign it using signNow
Merge data from your favorite web services such as CRM, public web forms, and more into custom documents and send to Dropbox Sign (formerly HelloSign) for signing.
New e-signature integration in Plumsail Documents.