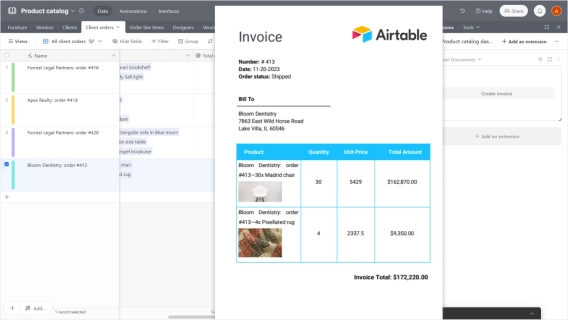
Airtable extension for seamless document creation
Introducing a Plumsail Documents extension for Airtable. Create documents from Airtable records with just one click.
Are you frustrated that Airtable Page Designer lacks functionality for document creation in Interfaces, and third-party extensions for Airtable document creation don't function there, as no extensions work in Interfaces?
Give us Page Designer features in Interface.
I have discovered that automating a PDF into an attachment field is not possible from page designer at the moment. I was curious if anyone has found a way to view their page designer block in an interface? If not I will have to go back to the "data" side of the base and move it over to an attachment field and then go back into the interface.
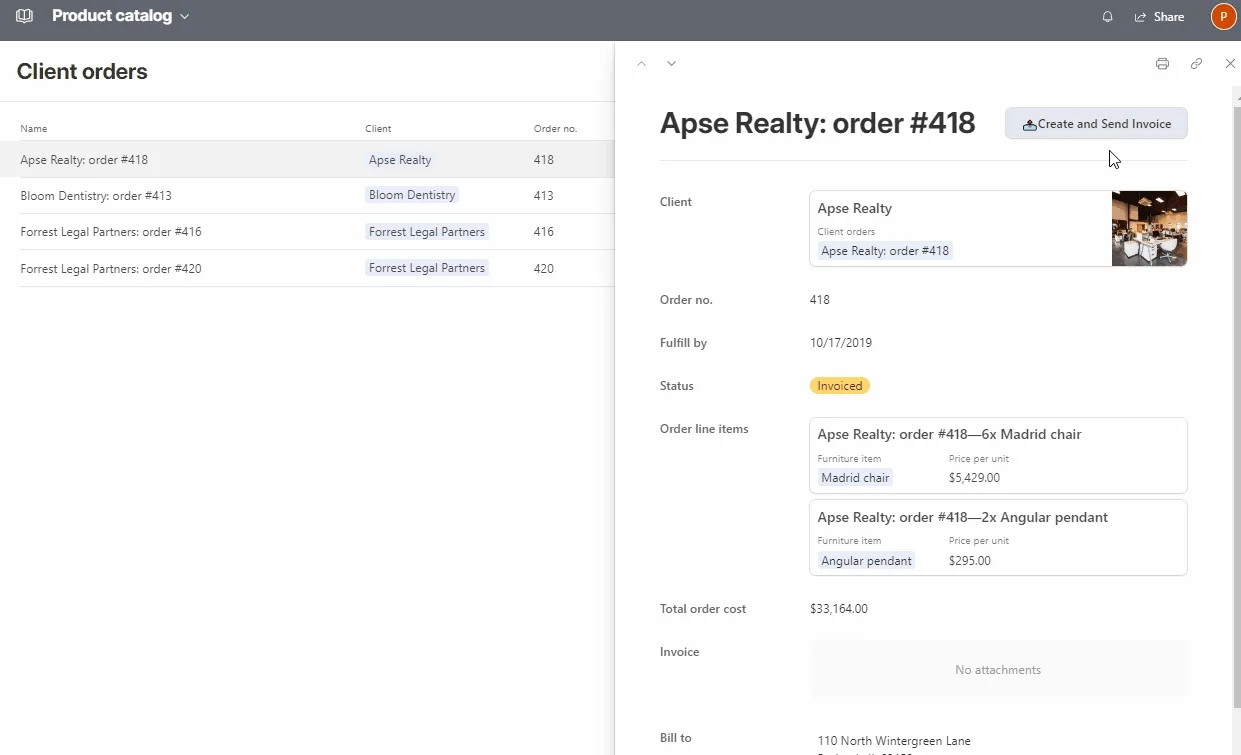
Plumsail Documents has got you covered! With its new feature, you can create a button in Airtable Interfaces that initiates an automation, running a script to trigger the document generation process. And in a matter of seconds, you get a nicely looking PDF attached to the record.
Let's quickly view the steps.
To use the Plumsail Documents extension for Airtable, you need a Plumsail account. If you don't have one yet, start with a free 30-day trial.
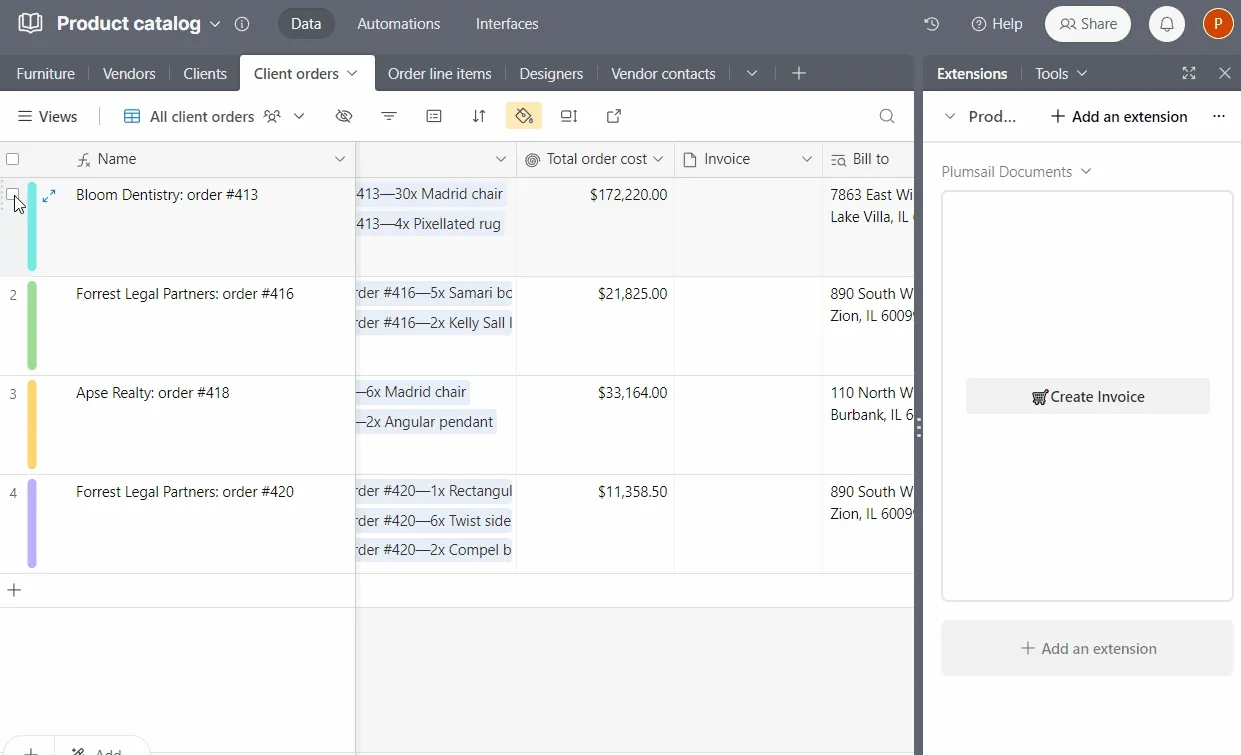
Once you have it, you'll be able to create document generation processes inside the Plumsail account and configure buttons in the Airtable database to launch them. We won't delve into much detail on how to configure such a button in the database; please check the corresponding article.
As a result of this step, you'll have a document creation button in the Airtable database. This button in the database is a prerequisite for a similar one in the linked interface.
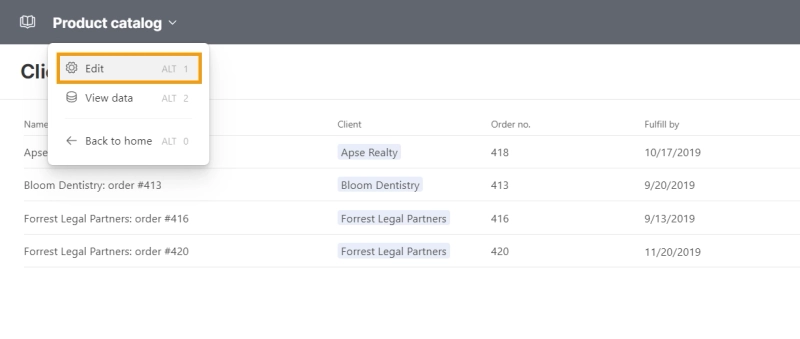
Now, let's proceed to the Interface. Airtable Interfaces don't allow the addition of extensions. Instead, we'll create a button that initiates an automation, running a script to trigger the document generation process.
Enter Edit mode and open one of the records.
Next, add a button and give it a name.
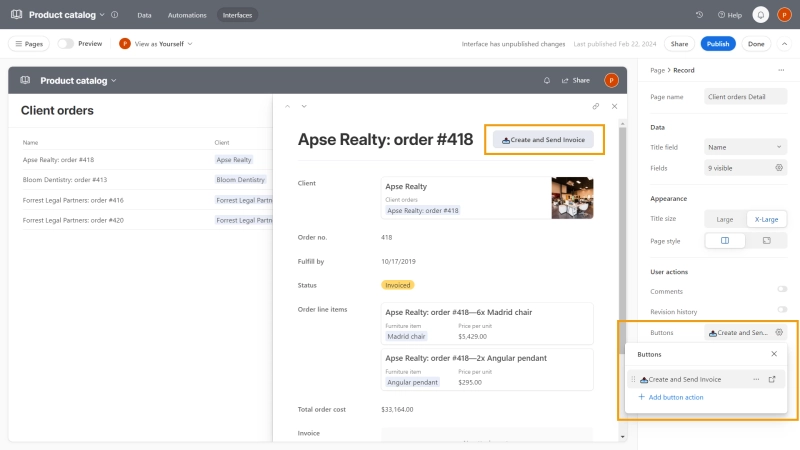
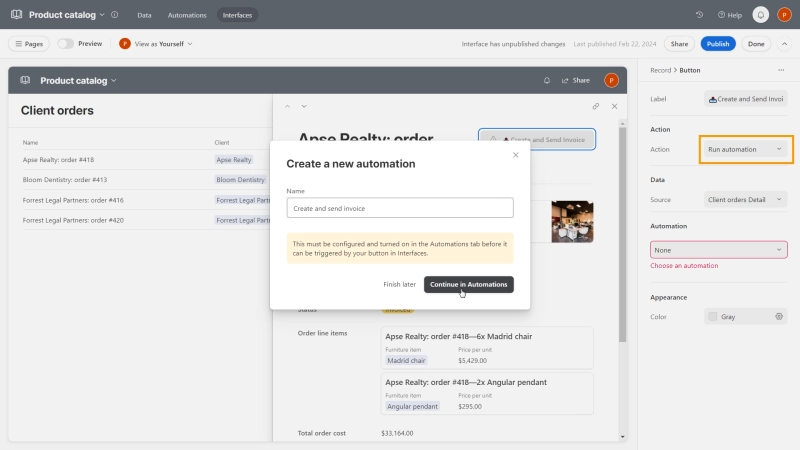
For the action, choose to run an automation, create a new one, name it, and then click 'Continue in Automations'.
The trigger is already set to 'When a button is clicked.' Now, we need to add an action to run the script.
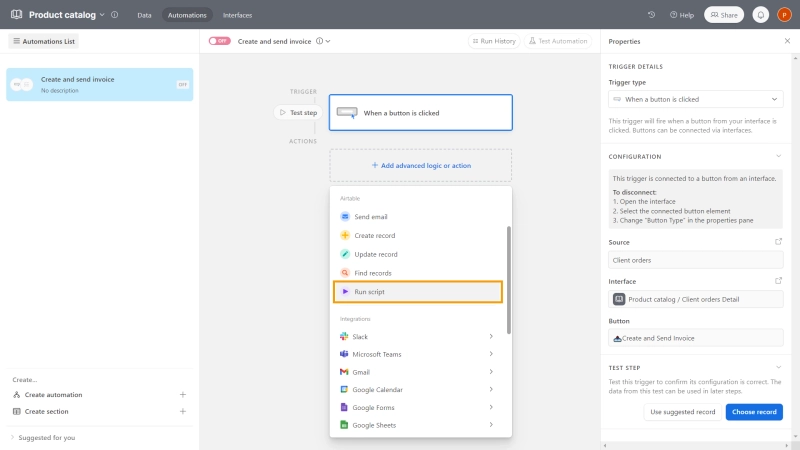
No need to manually type anything.
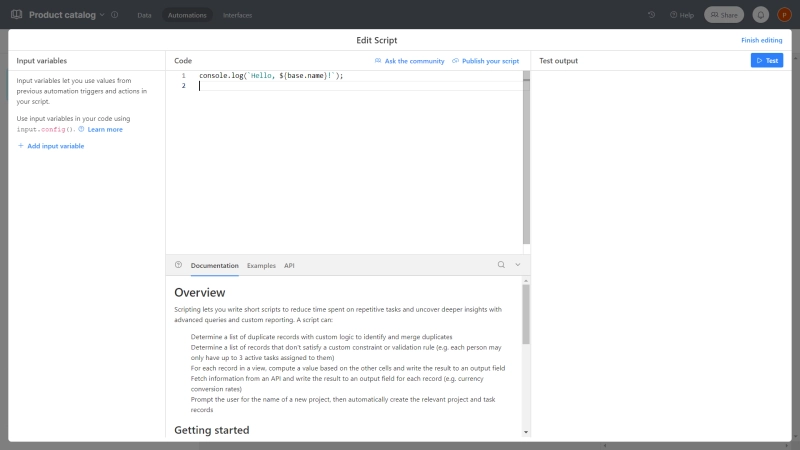
Return to the database, and in the button's advanced settings, find the option to generate a script.
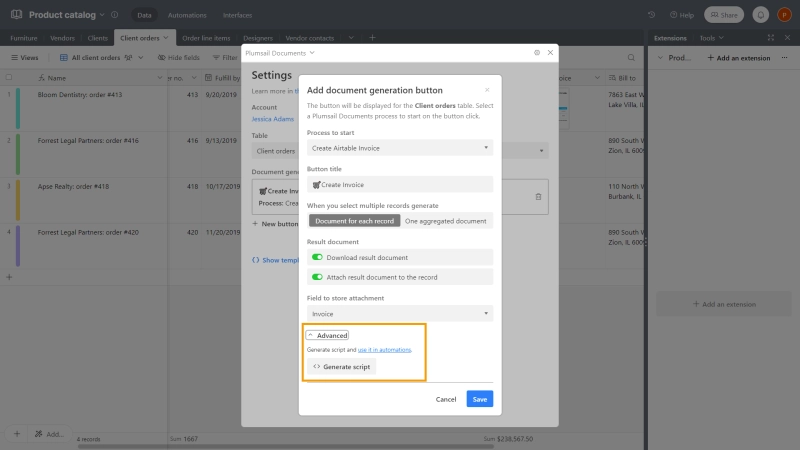
It's generated and ready to go. Launching this script will initiate the document generation process – the same one used in the database. It attaches the created document to the record, essentially mimicking the button settings. If you ever make changes to the button setup, simply generate the script again and paste it into the automation.
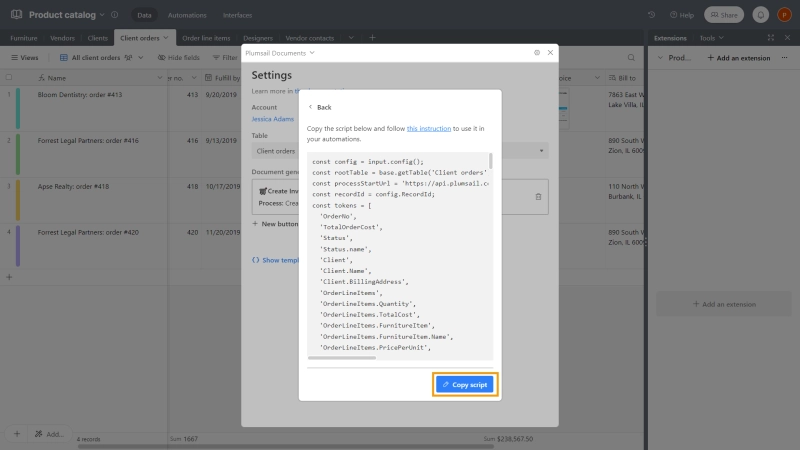
The script is added to the automation. Additionally, we need to create an input parameter named 'RecordID' and select 'Airtable record ID' as the value.
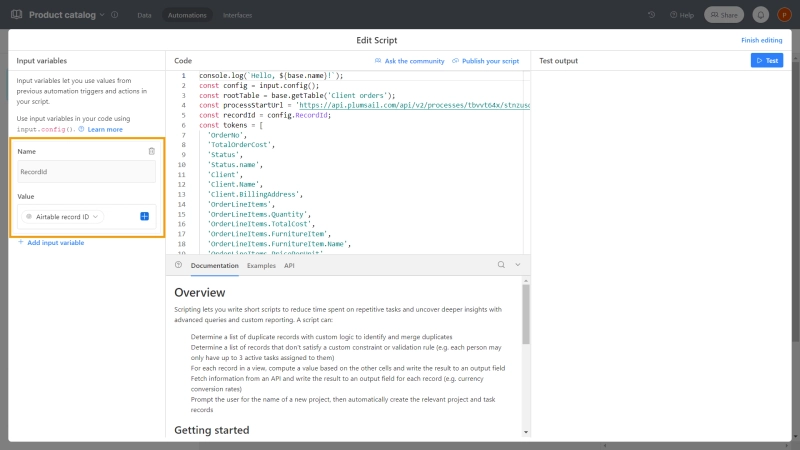
Now, everything is set, and you can test the automation. Finish the editing, and remember to turn on the automation.
Head back to the Interface and make sure to publish the changes.
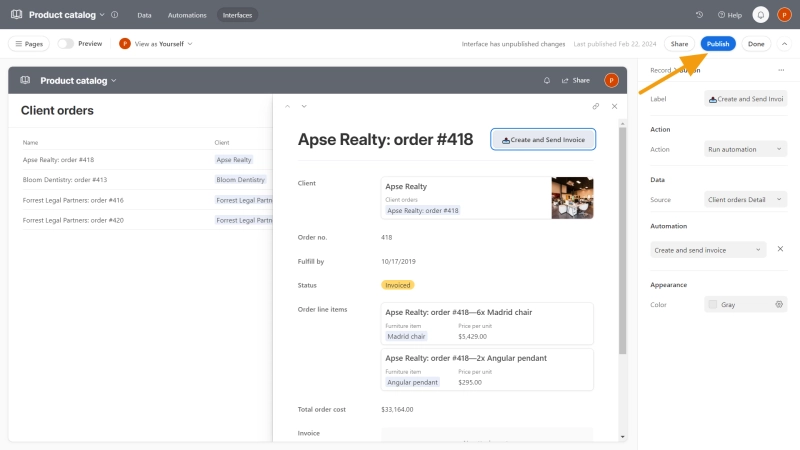
Now, let's see how the button functions. There it is—an invoice is generated and attached to the record.
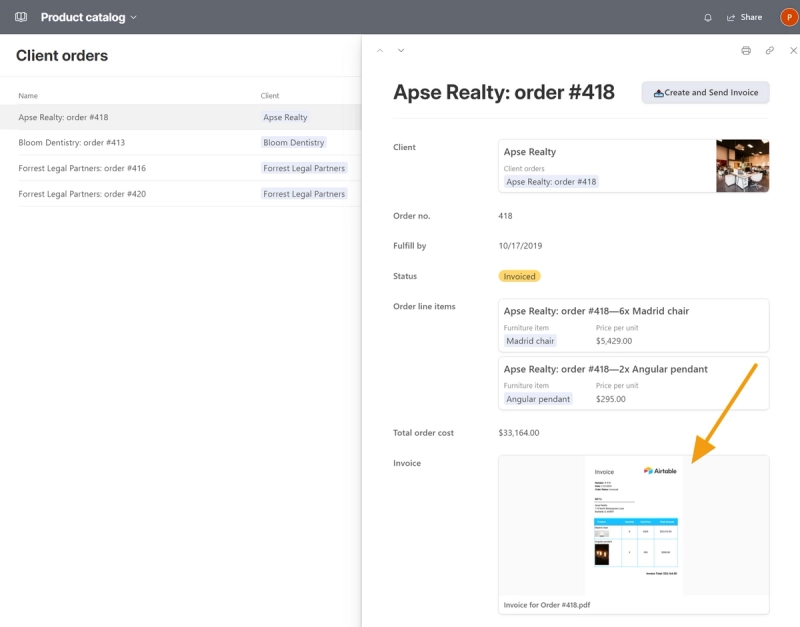
Additionallly, you can choose to download it, send by email, or store it in the cloud.
Find the detailed article on How to Create document from template using Interfaces and Automations in Airtable with a description of all the steps, including setting up the process inside the Plumsail account and adding the button in the database.
Plumsail Documents provides you with a new level of flexibility in Airtable document creation:
All this and more are available in a free trial.
Start a free 30-day trial to test all the features. If you have any questions or face challenges, we would be happy to assist. Just drop a comment on the post in the Plumsail community.