
How to schedule workflow
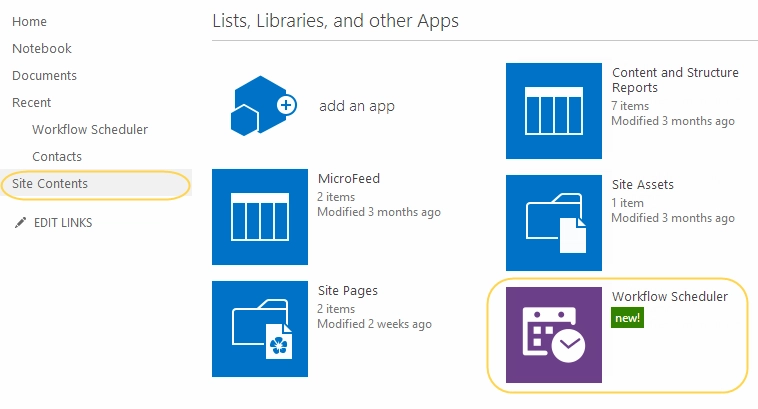
To open Workflow Scheduler for SharePoint Online (Microsoft 365) navigate to Site Contents and open Workflow Scheduler app:
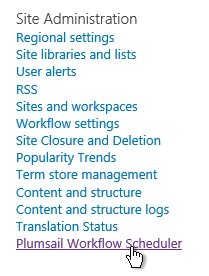
To open Workflow Scheduler for SharePoint 2013 / 2016 / 2019 / SE navigate to Site settings:

Then click on Plumsail Workflow Schedulerin the Site Administration section:
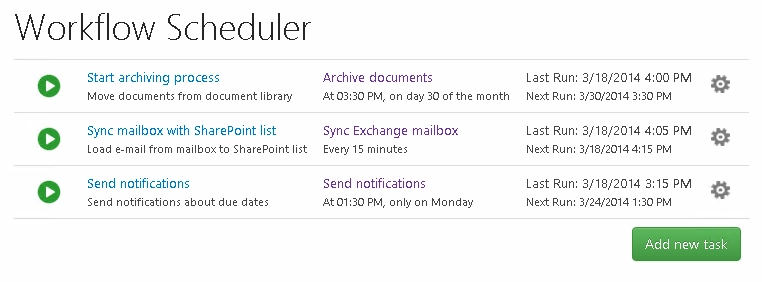
You will see the list of scheduling tasks. To add new task click Add new task:
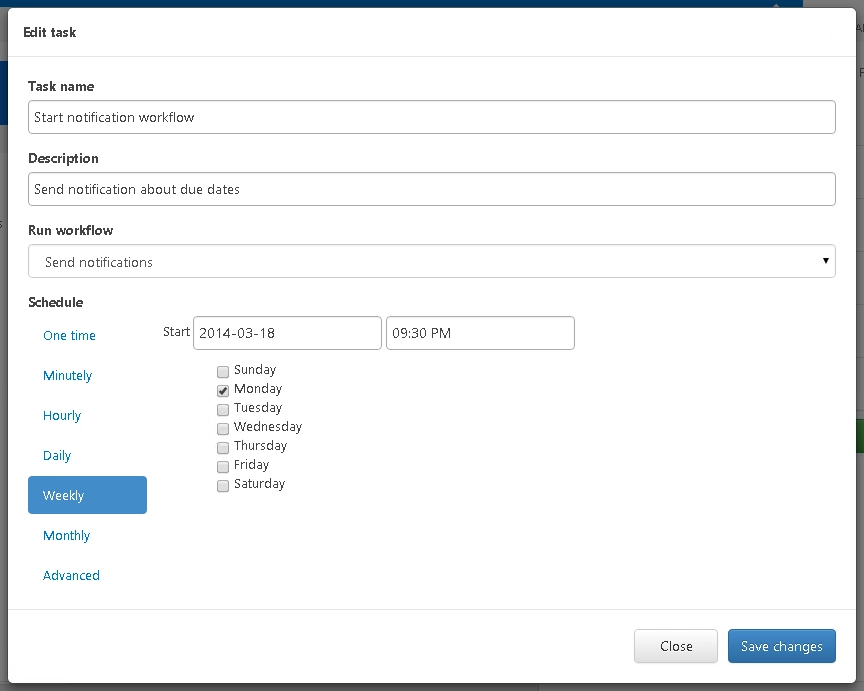
Then fill the task name, choose the workflow from the list of workflows and specify schedule:
For advanced scenarios you can use advanced type of schedule. To understand how to work with advanced schedule read how to create advanced schedule using cron syntax.