How to share SharePoint site with external users in Power Automate
In this article, we will demonstrate how to create a Modern SharePoint site and share it with external users with help of Power Automate (Microsoft Flow). This approach works in SharePoint Online (Office 365).
Let us imagine the following use case: we create a new project site and need to provide access to customers (external users) to it.
We will use Create Modern SharePoint Site and Invite External User to SharePoint actions from the Plumsail Actions connector.
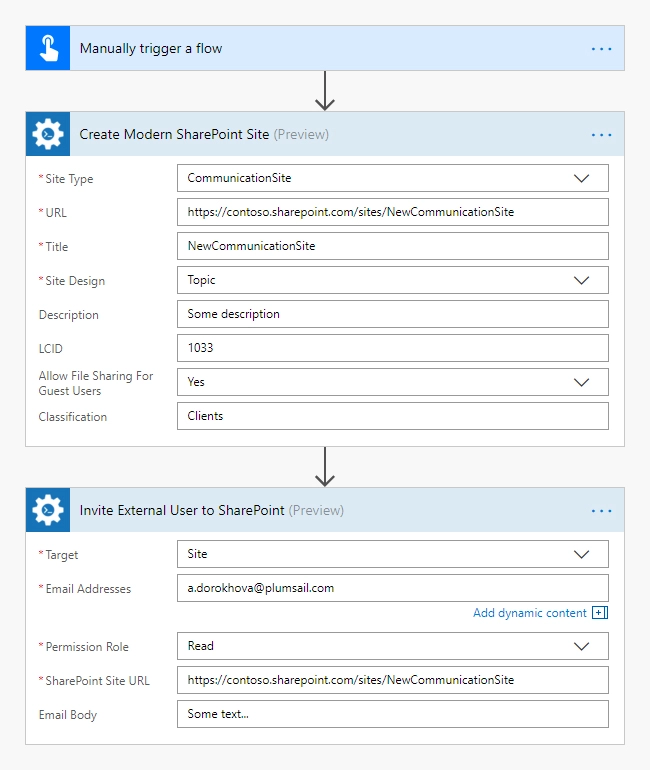
This is how our complete flow will look like:
Share a SharePoint site
Below, we will guide you step by step through creating the flow.
Trigger a flow
You can actually pick any trigger. For example, you can start Flow on an item creation in a SharePoint list. We use Manually trigger a flow trigger here to simplify the Flow.
First use of Plumsail Actions
Adding the Plumsail action for the first time, you’ll be asked for a Connection name, API Key, and Data center location.
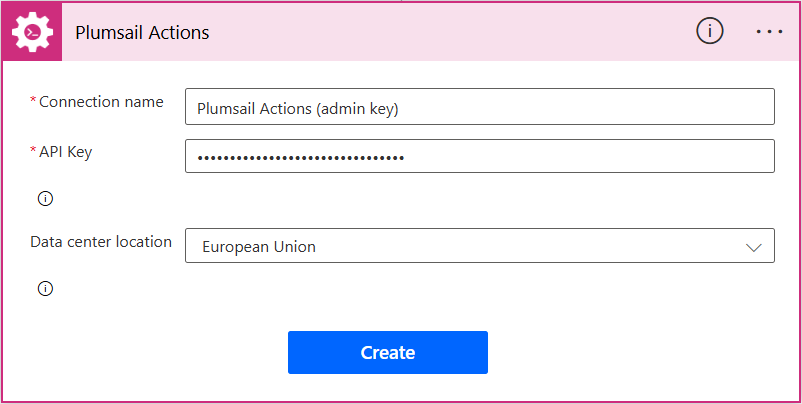
You can type any name for the connection, for example Plumsail Actions (admin key). Next create an API key on your Plumsail account page, copy, and paste it to the API Key field. Ensure that the selected data center location matches one of your account.
Create Modern SharePoint Site
As we want to focus on communicating a message to a wide audience, we choose the Communication site type for our new site. We choose Topic template to customized the home page, set up locale identifier (LCID) as 1033 (English language) and allow file sharing for guest users.
Invite External Users to SharePoint
We specify the target of the operation as a Site, enter the URL of the newly created site and set up the permission role as Read. We added an email manually to the email addresses field, but you can get information about email addresses dynamically and specify multiple emails using semicolon as delimiter.
That is all, the flow is configured.
You may also use an alternative approach, where you can add external user to a SharePoint group that has access to the site instead of adding users directly to the site:
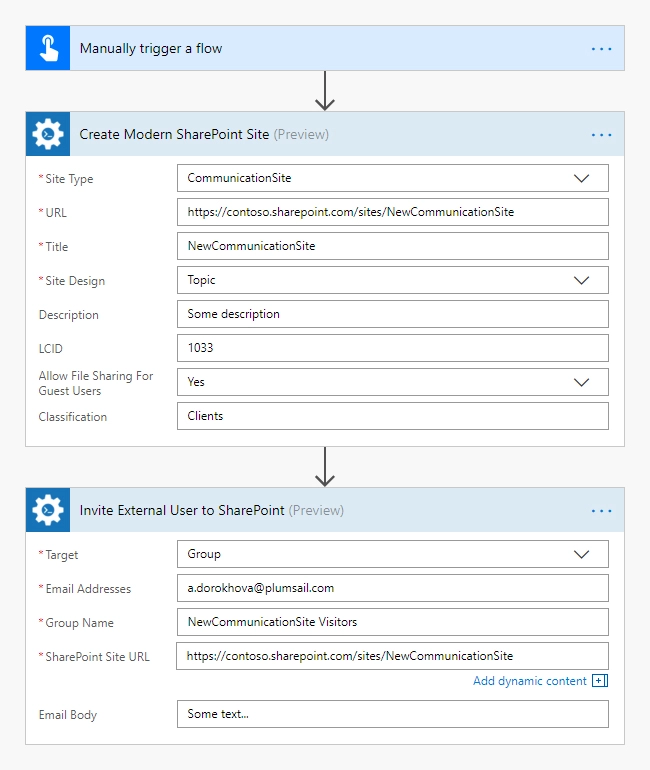
On the last step shown in the screenshot above, we add the uses into an automatically created Visitors group that has Read permissions level.
Conclusion
That is it. These few simple steps can help you to ease communication with your clients.
Hint
You may also be interested in this article explaining how to share SharePoint documents with external users in Power Automate (Microsoft Flow) and Azure Logic Apps.