Forms
Last updated: Jun 10, 2025
How to create tabbed forms in Power Apps
Learn how to create tabbed forms in Power Apps for SharePoint with step-by-step instructions. An alternative solution is explained as well.

In this Power Apps tutorial, you'll find out how to use Power Apps platform to customize different layouts for SharePoint New, Edit and View modes within the same form, how you can personalize these forms, and how to open the correct layout based on the form mode.
In this article
A New SharePoint list form is a customizable form used to input new items into a SharePoint list. It lets you fill in data in a consistent and organized way. You can customize it to include different fields and rules to fit your needs. There are also Edit and View mode forms to edit and view existing list item.
A New form in Power Apps is a customizable form used to create new records in a data source, such as SharePoint, SQL, or Excel.
To edit the SharePoint form in Power Apps, open your SharePoint list, go to the "Integrate" menu, select "Power Apps," and choose "Customize forms." This opens the form in PowerApps, where you can make changes. Save and publish when you're done. Further in the article, we'll look at how to set different SharePoint form modes (New, Edit, View) using Power Apps.
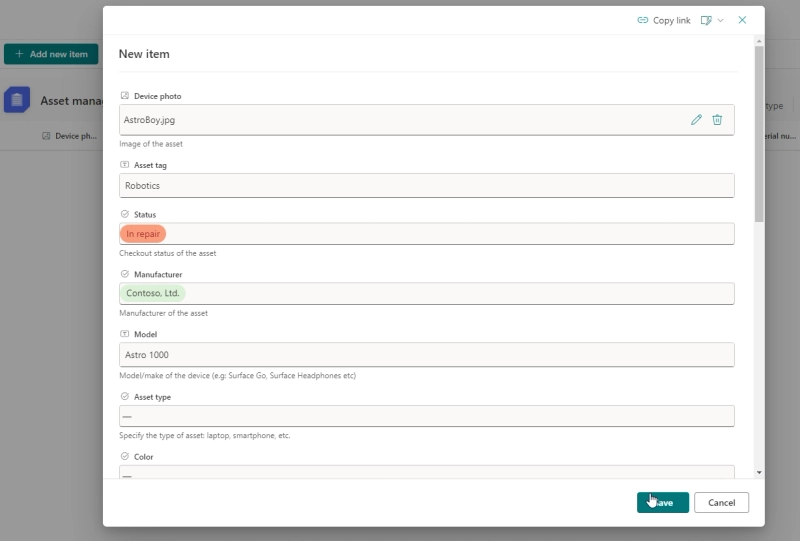
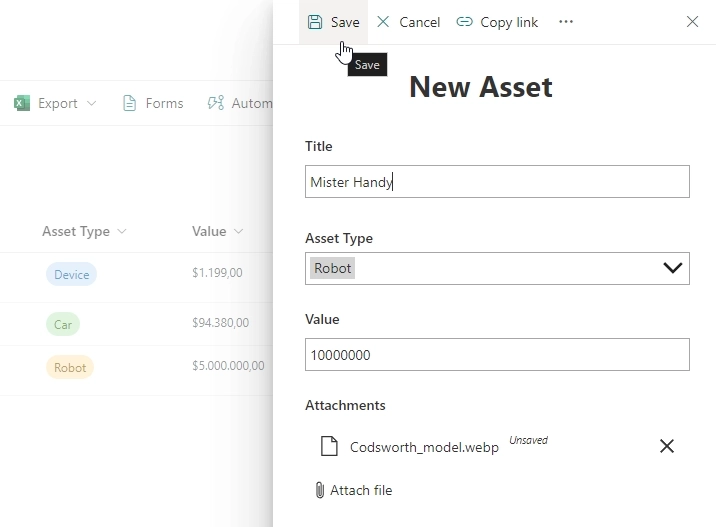
First of all, you need to create a SharePoint List with all the required columns. In this case, we've created an Asset list, which will contain various assets that your office or company might have:
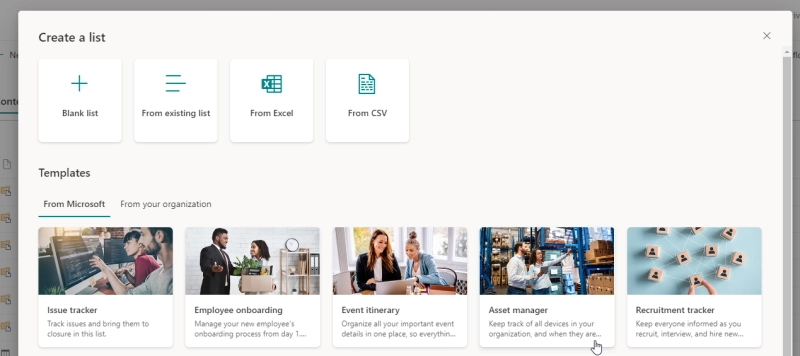
For this, you can create your own list like we did, or use Asset manager template from Microsoft:
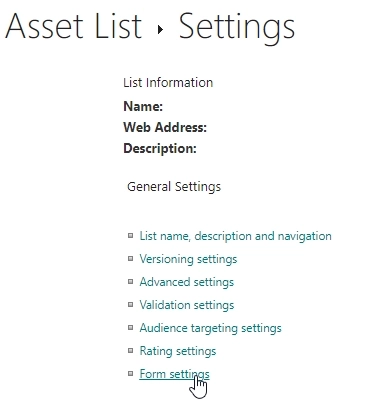
Then, you need to go to List Settings and click on the Form Settings:
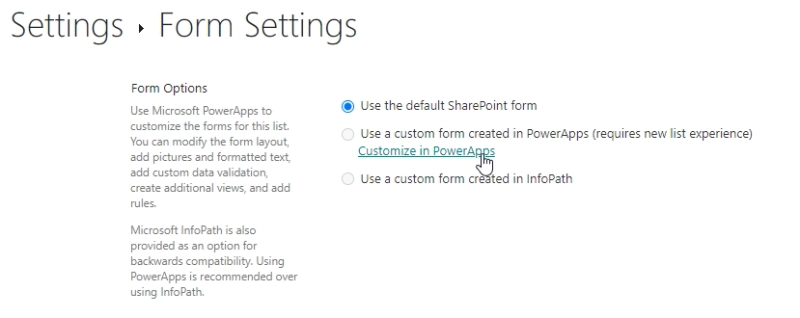
And customize the form in Power Apps:
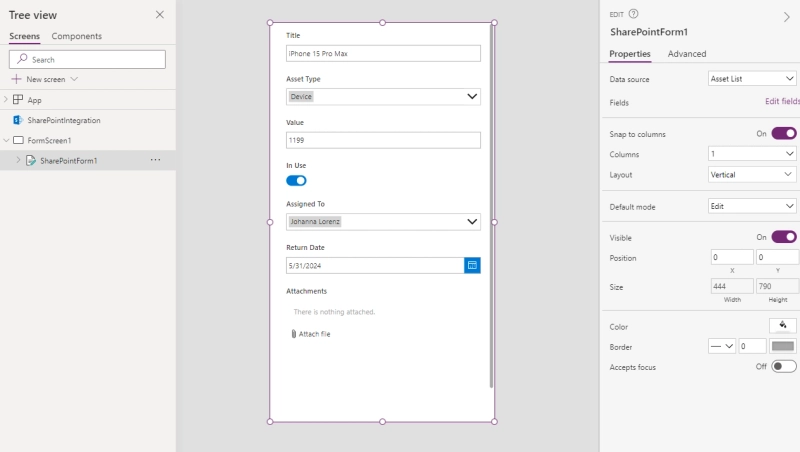
This will automatically create one form with all the fields, which can be used for New, Edit and View modes:
This means that the same form will open when user creates an item, or when an item is opened for viewing or editing. This can work in some cases, but presents a limitation, for example, not all fields might be necessary on new form and will only clutter it, or users might need to see additional info when an item is opened in view mode.
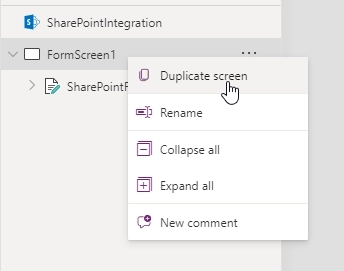
In order to customize forms for different modes, first, I duplicate default screen twice:
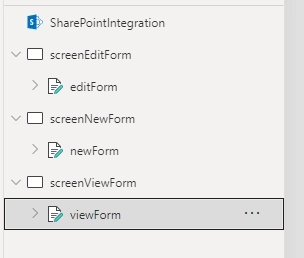
Then I rename each screen to screenNewForm, screenEditForm and screenViewForm, plus rename each form to newForm, editForm, viewForm:
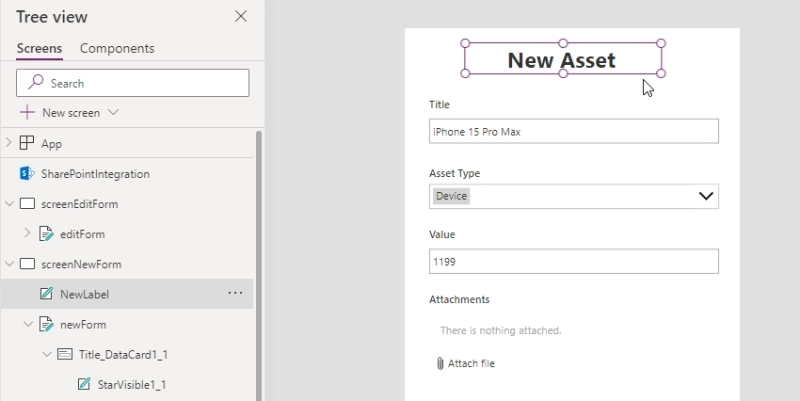
Now, we can customize each form, for example, we can remove In Use, Assigned To and Return Date fields from the New asset form, as this will only be necessary when an asset is already in the system and ready to be assigned:
To open correct layouts, update the formulas in SharePointIntegration control > Advanced section, select OnEdit and update the formula to:
EditForm(editForm);Navigate(screenEditForm)
We'll do the same for OnView & OnNew, but change form name and screen name to match the mode.
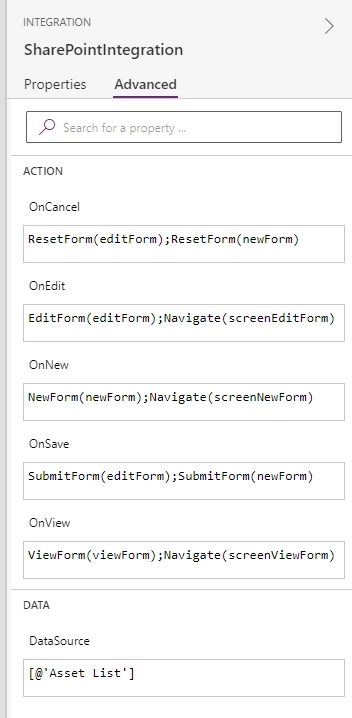
Finally, update both OnSave and OnCancel to include both edit and new form:
ResetForm(editForm);ResetForm(newForm)
SubmitForm(newForm);SubmitForm(editForm)
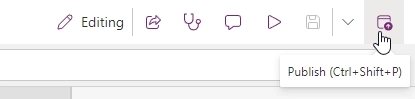
Save and publish the form:
This will allow users to open correct forms in SharePoint where each one is customized according to your needs:
If you liked this approach, but would like to do even more with Power App forms, for example, add Gallery for selecting items on the form, check out an article by Matthew Devaney, where he has a similar, but slightly different, approach.

Forms are the most important skill you can master on your journey to becoming a master Power Apps maker. A single form in Power Apps can be used to create a new record, edit an existing record or view a record depending on its mode.
If you're looking for an alternative approach, don't want to write complicated formulas, deal with clunky UI, or if you want more control over your form, you can check out Plumsail Forms for SharePoint.
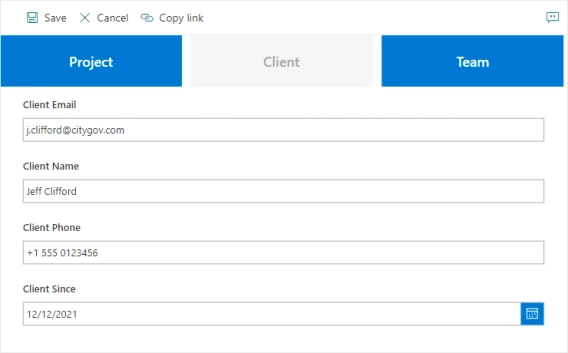
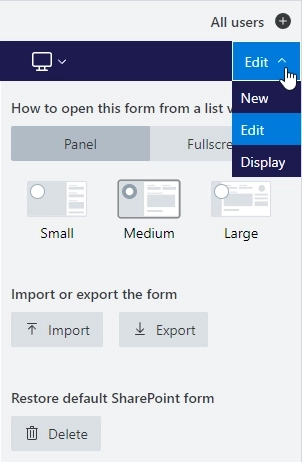
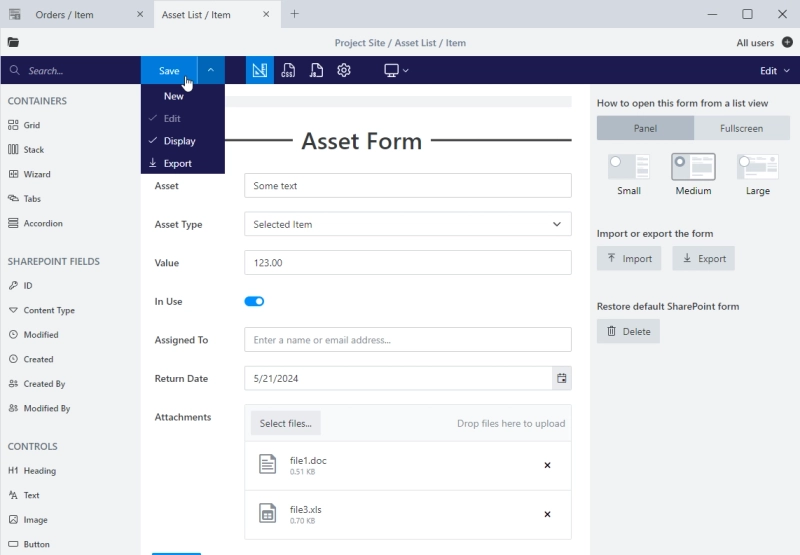
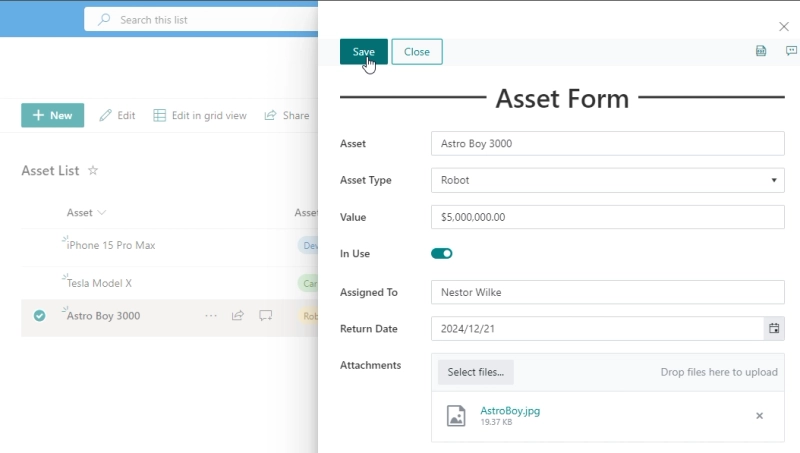
Same functionality can be achieved by simply opening form in an editor where you can select which form you want to customize: New, Edit or Display, and they correlate directly to the SharePoint form modes:
You can save all three at once, or customize them individually right out of the box:
Moreover, you'll find out that you can customize forms for different devices when form is opened in a browser, such as tablets or phones:
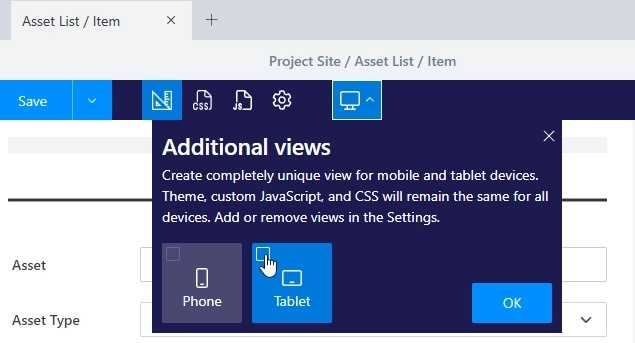
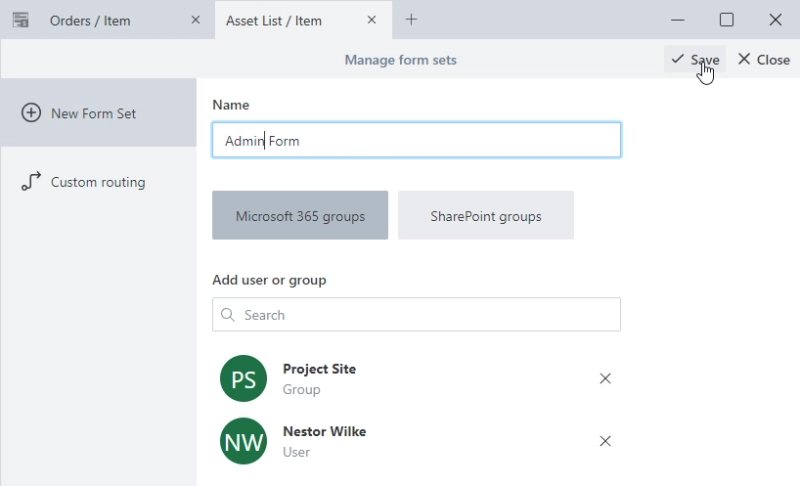
And even create unique forms for individual users, or user groups in Microsoft 365 or SharePoint, or any other conditions with our Form Sets:
Here's how the form will appear in SharePoint after spending less than 1 minute in editor, the panel is fully supported:
These are only the tip of the iceberg, many more features are available out the box, ready for you to use. For more information, checkout our article Best alternative to Power Apps for Microsoft SharePoint forms.

This is what Power apps should be. User friendly. Power features.
The product is very easy to install and use, get started with 30 days free trial of Plumsail Forms for SharePoint Online by following the installation instruction in our documentation, which includes a full video walkthrough.
If you're using SharePoint 2019 or Subscription Edition, follow the SharePoint On-Premises installation guide.
Learn how to create tabbed forms in Power Apps for SharePoint with step-by-step instructions. An alternative solution is explained as well.
Comparison of Power Apps and Plumsail Forms for SharePoint: features, advanced elements, and price.
What’s this Modern UI all about?