Forms
Jan 04, 2018
Convert Public web form to PDF and send for approval (MS Power Automate)
How to use MS Power Automate flow to convert Public web form to PDF and send for approval

You might need a Microsoft Forms approval workflow whenever a business decision requires a second pair of eyes. Whether an employee submits a project or a reimbursement form, Microsoft Forms and Power Automate can turn an awkward heap of back-and-forth emails into a single "Approve" button in Microsoft Teams.
In this article, I'll explain how to set up a simple Microsoft Power Automate approval workflow with Microsoft Forms and SharePoint.
In this article:
There are many reasons why you'd need to build a Power Automate flow for Microsoft Forms approval requests. You may need to process purchase order requests, project submissions, reimbursement requests, and so on.
Regardless of your use case, you likely need to save the form submissions to SharePoint to access them later and send an approval request to the person responsible.
MS Forms doesn't have built-in workflow functionality, so we'll have to use Power Automate for all these actions.
In this article, I'll implement an example Microsoft Forms approval workflow for purchase order requests following these steps:
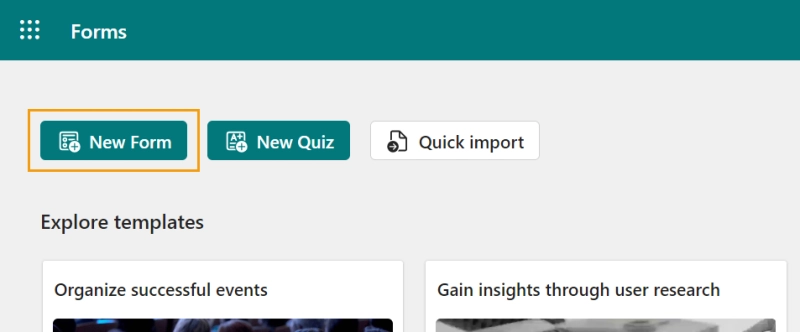
Navigate to the Microsoft Forms home page and create a new form called "Purchase order request":
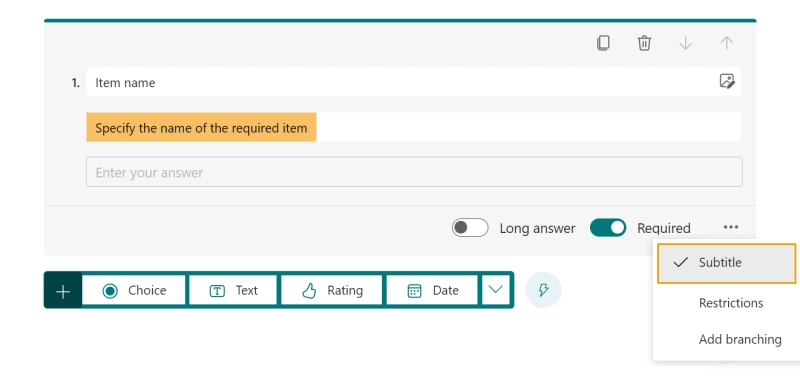
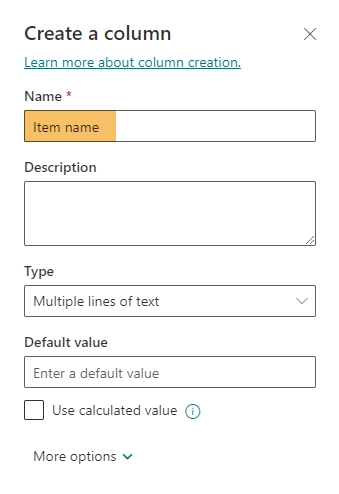
Item name - a simple Text field.

The name alone might not be intuitive, so I've added a "Specify the name of the required item" subtitle.
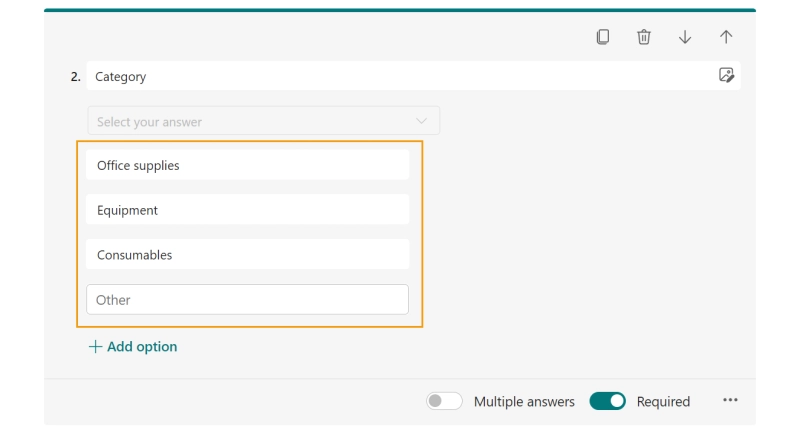
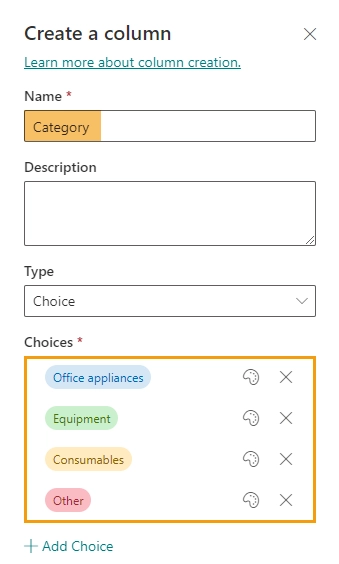
Category - a Choice field. The choice options could be, for example, "Office appliances", "Equipment", "Consumables", and "Other".
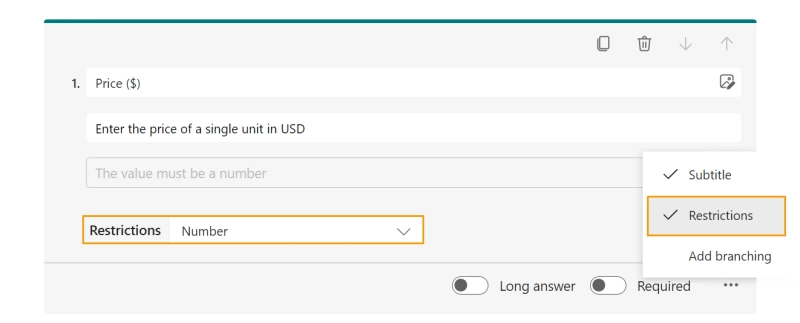
Price ($) - a Text field that only accepts numbers. Microsoft Forms don't support currency fields, so we'll have to add a subtitle: "Enter the price of a single unit in USD".
Quantity - another Text field with a restriction to numbers.
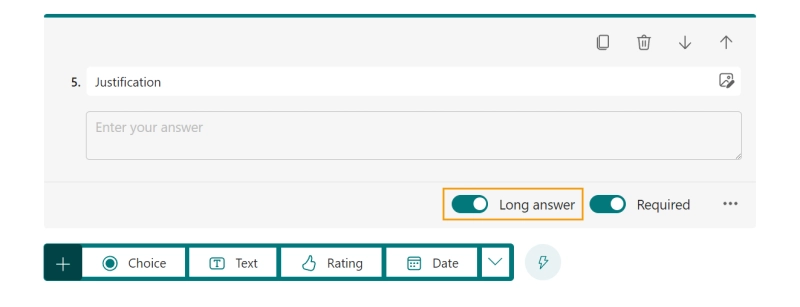
Justification - a Text field with long answer:
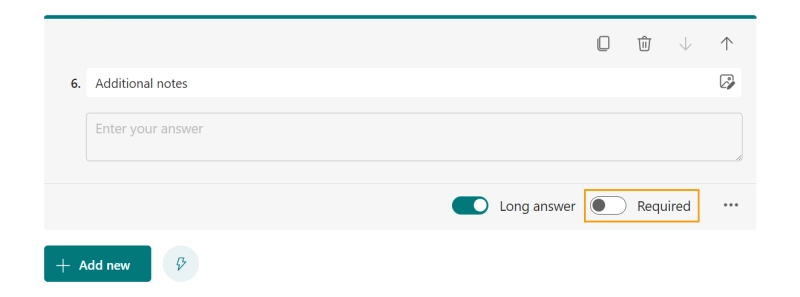
Additional notes - same as Justification, a Text field with a long answer.
All fields should be required, except for Additional notes:
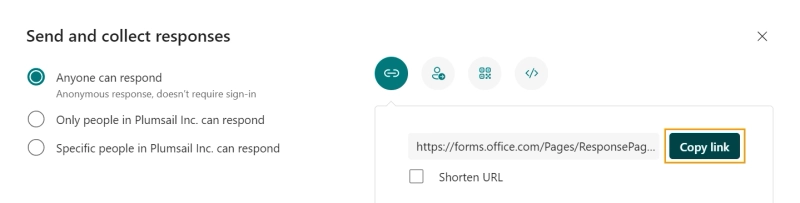
That's it, the form is good to go. You can get the public link for it here:

Here you can get a QR code for your form, an HTML embed, an invitation card, or a direct link. If you need the form to collect the email of the respondent, change the default value of the radio button group on the left. My method of choice is sharing the form with anyone via a link, so I'll copy it by pressing the button:
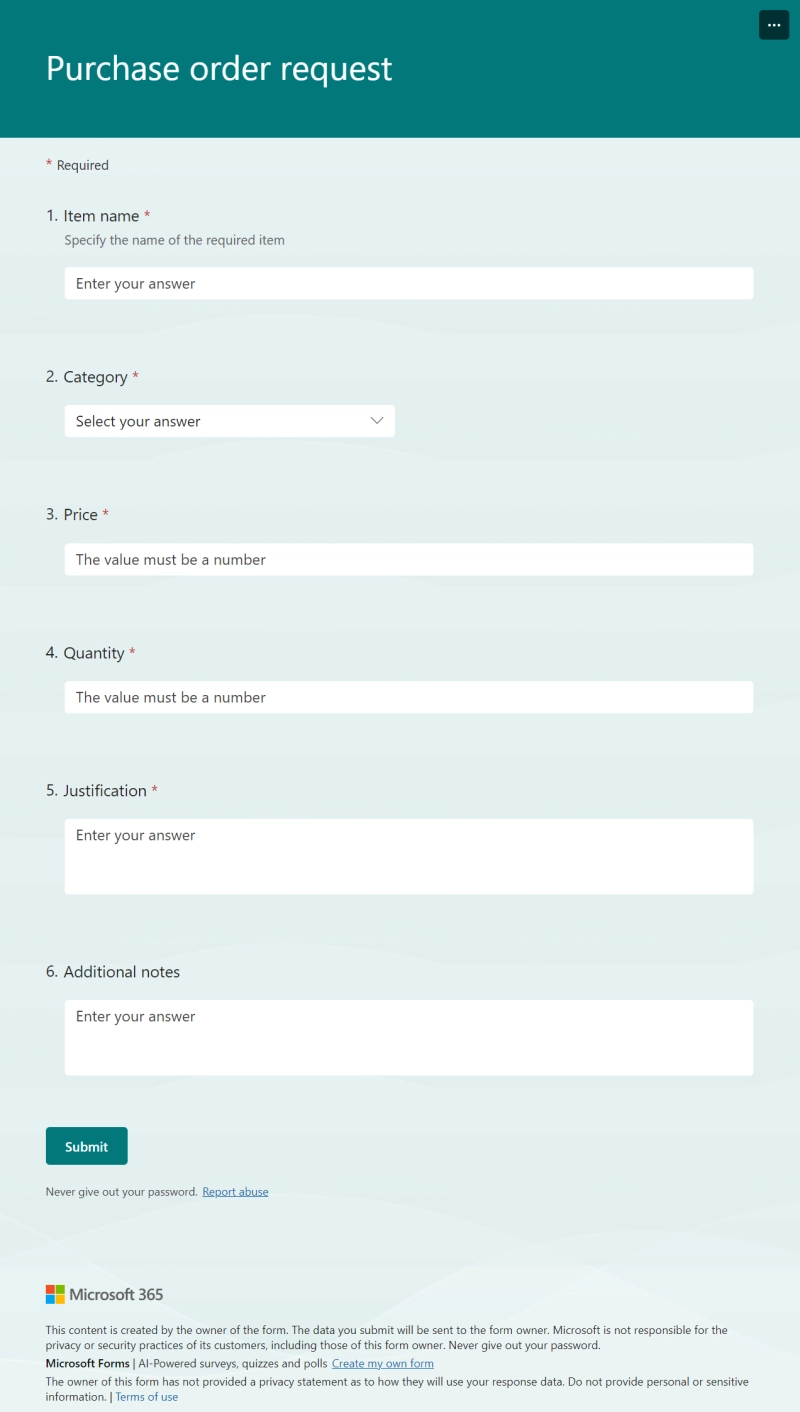
This is what the form should look like for a respondent:
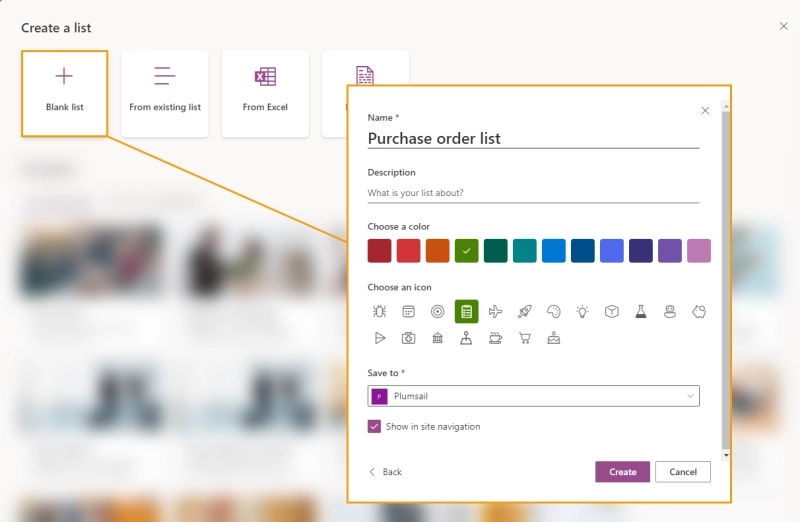
We'll use a SharePoint list to store the approval requests. Create a new empty list in SharePoint Online.
We'll need to add 7 columns to the list:
Item name - a single line of text. Click Add column and pick the Text type.
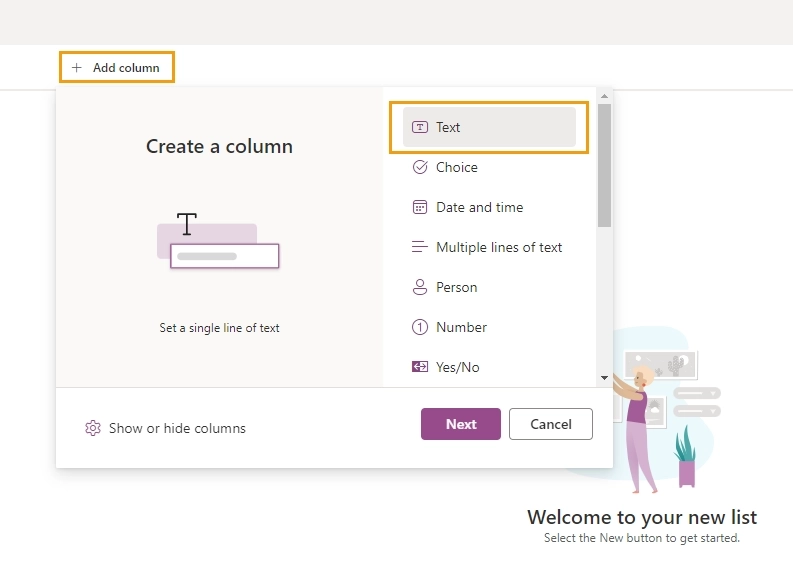
Enter "Item name" into the Name field, and it's good to go.
Category - a Choice.
Make sure that the choices are the same as in the form.
Price - a Currency column. The currency is set to USD by default.
Quantity - a Number column.
Justification - a Multiple lines of text column.
Additional notes - another Multiple lines of text column.
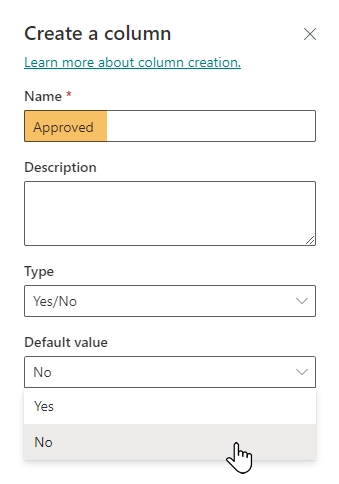
Approved - a special Yes/No column that holds the approval status. It should be "No" by default.
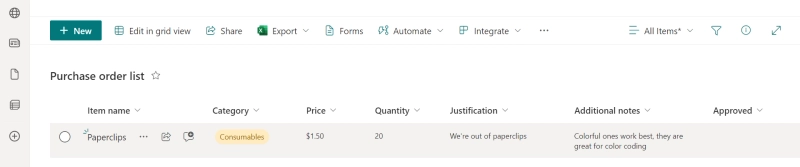
In the end, you should get a list that looks like this:
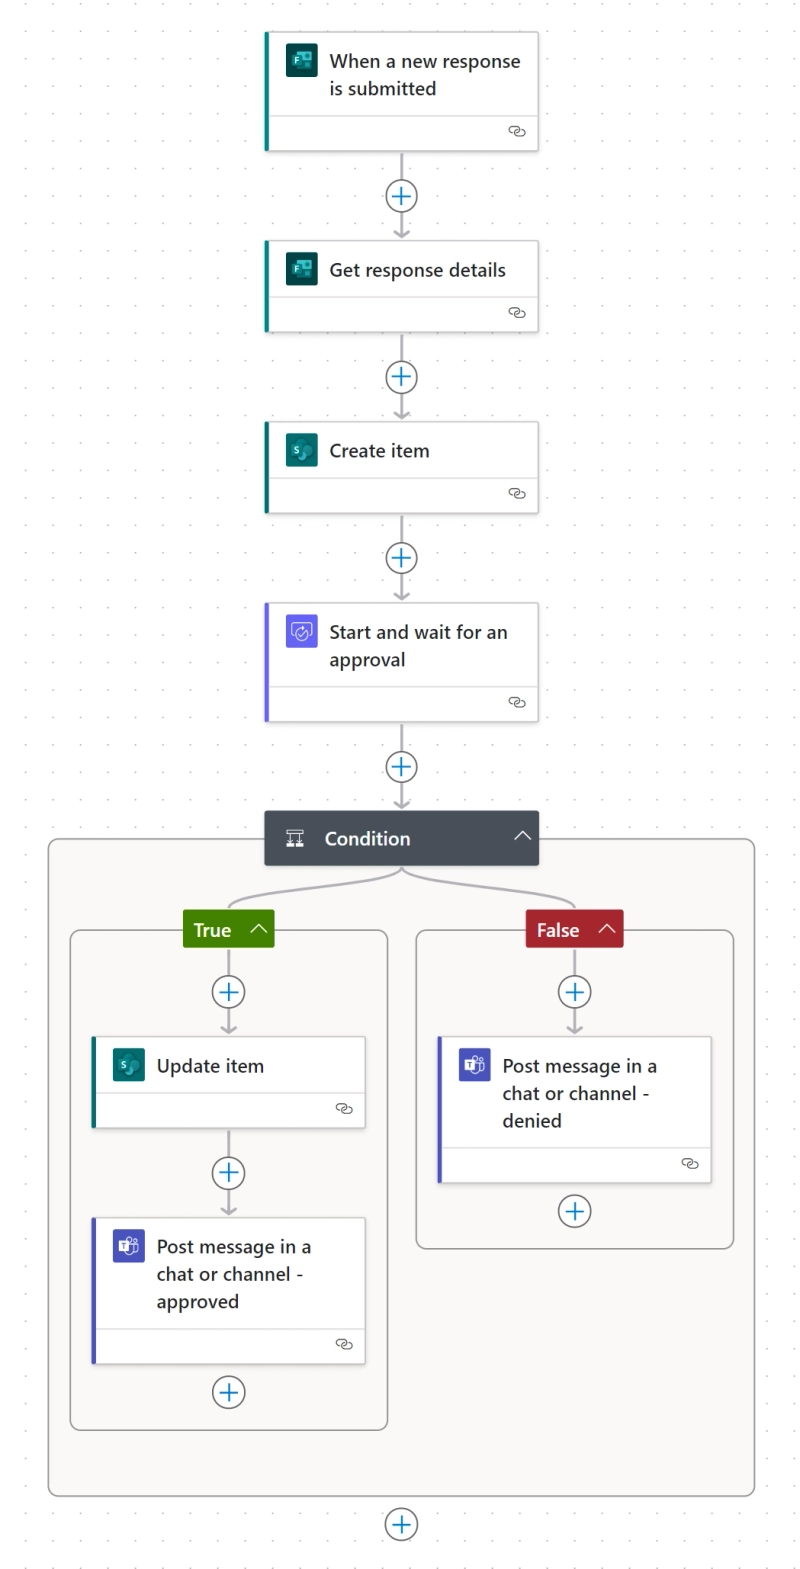
As I already mentioned, Microsoft Forms don't have workflows. We need to create an approval workflow in Power Automate, and this is how it's going to look at the end:
Michael Pickett made a great video explaining how to build a very similar Power Automate flow. If you ever get stuck while building the flow, watching his guide might help you understand what goes where.
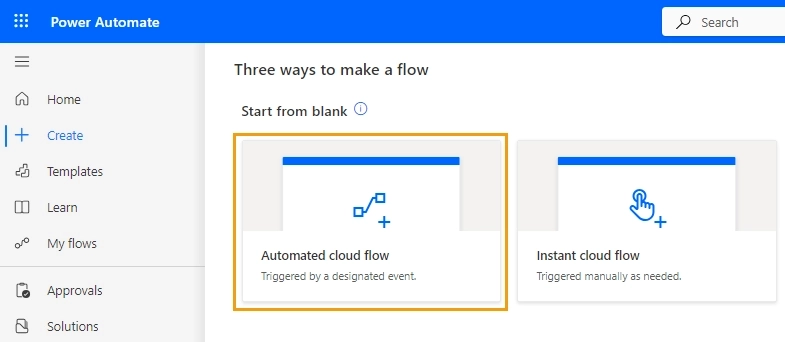
To start, navigate to the Power Automate create page and create a new Automated cloud flow.
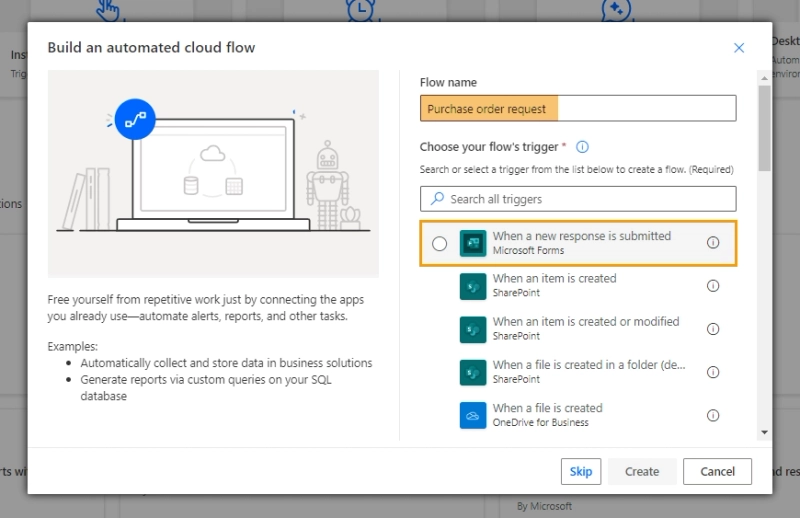
Choose a good name for the flow and pick the "When a new response is submitted" trigger out of the list.
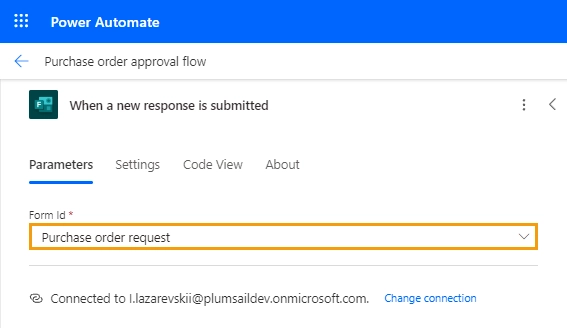
Pick the form you've created in the trigger settings:
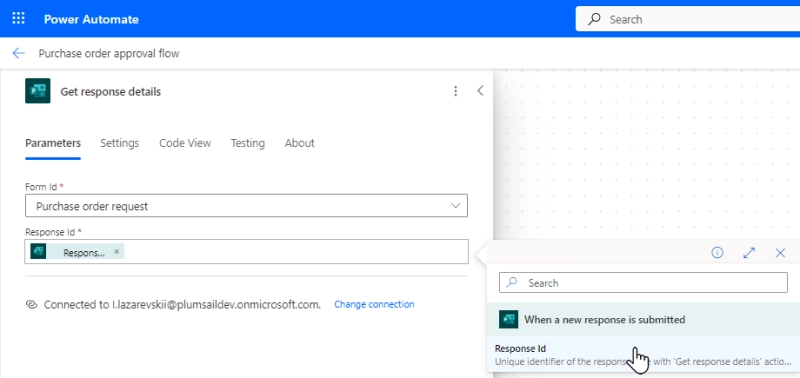
The form submission isn't fetched automatically, we need a separate action for that. Add a Get response details action for Microsoft Forms to your flow. Choose the form and response ID from the trigger.
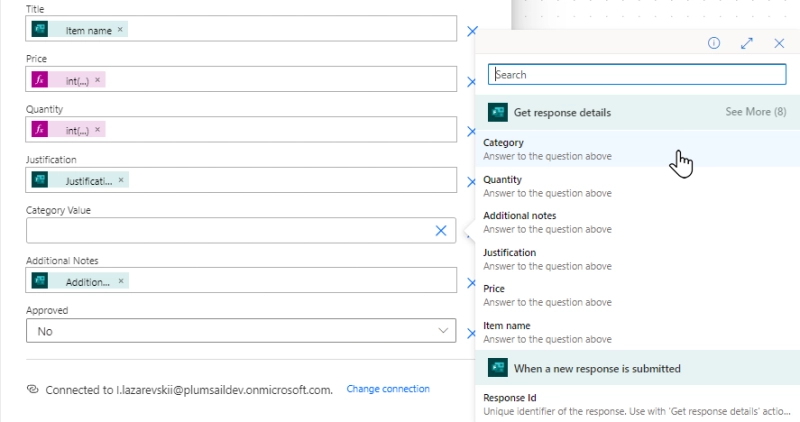
Now it's time to save the submission to our list. Add a Create SharePoint item action to the flow and fill in all the text fields. Set Approved to No, we'll change it later.
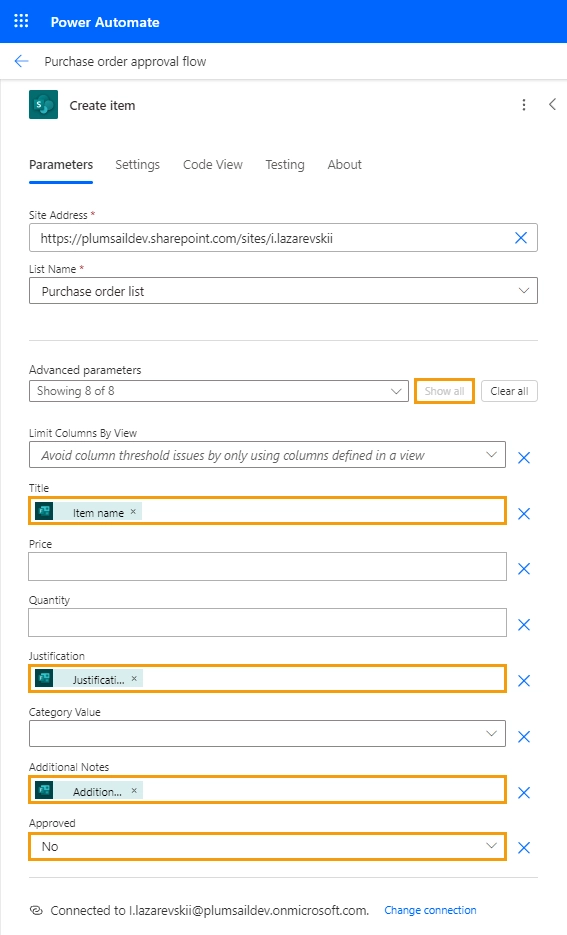
The Price value in the form submission will be in text format, so we need to convert it to an integer. Add a formula into the Price field, put the int() function inside, and insert the Price into the brackets like this:
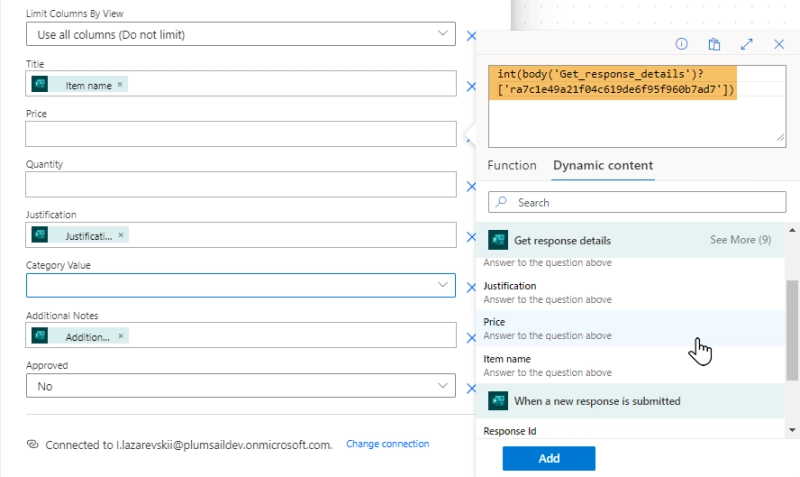
Do the same thing for the Quantity field, and we're almost done with this action.
Time to configure the Category field. You'll notice that Power Automate pulls dropdown options from SharePoint, go ahead and disregard that. Choose to enter custom value.
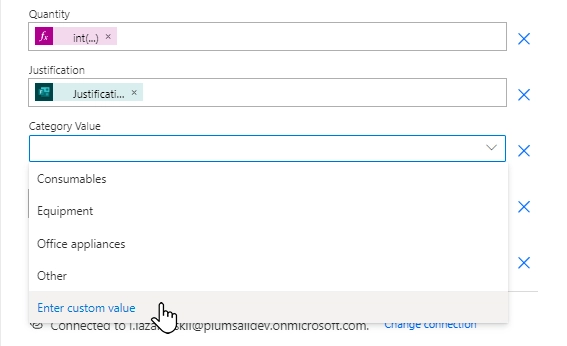
Now you can put anything in this field, and Category from the form submission seems like a solid pick.
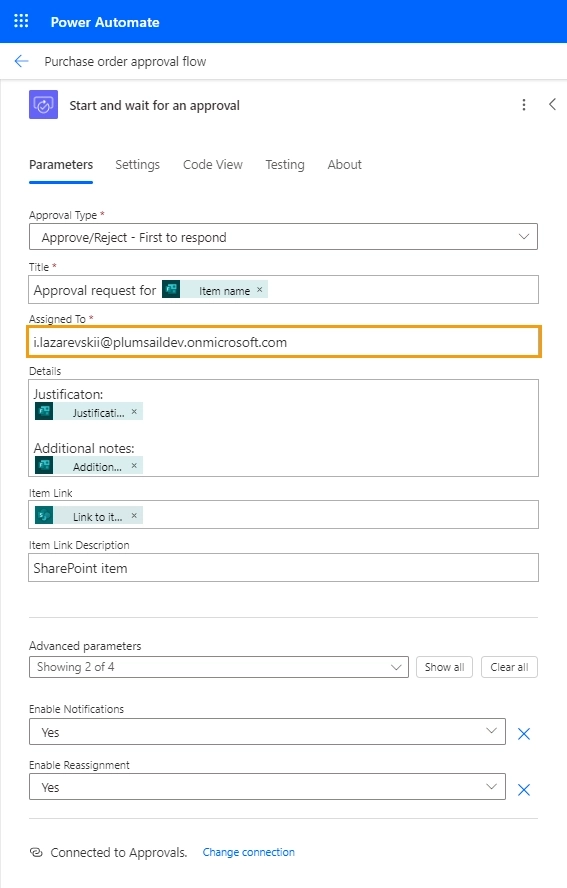
The SharePoint item is created, now we need to ask for approval. Add a Start and wait for an approval action to the flow.
This action is not the same as Create an approval since it delays resuming the flow until the approval is resolved. This is exactly what we need.
Most fields should be pretty intuitive to fill out. I decided to insert Item name, Justification, and Additional comments into the request to make it more informative. Make sure to set the Assign to parameter to the email of the approver.
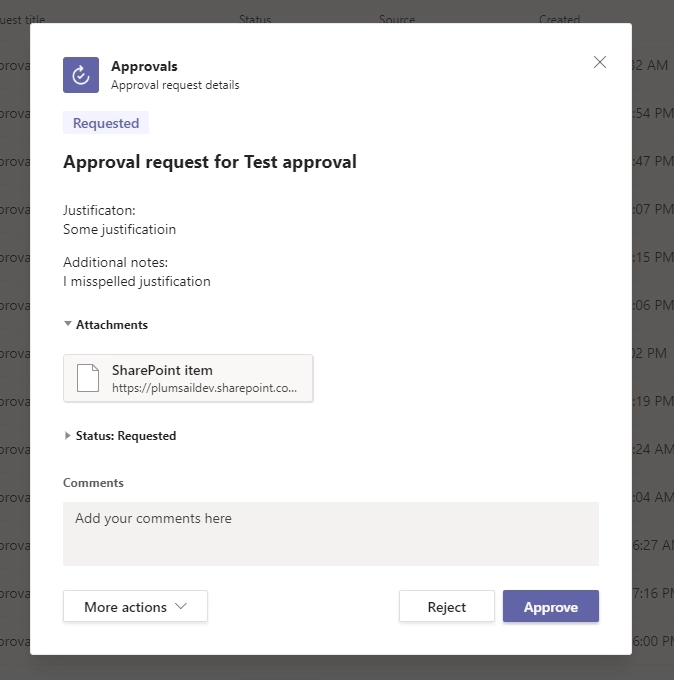
And this is the resulting approval request I received in Microsoft Teams:
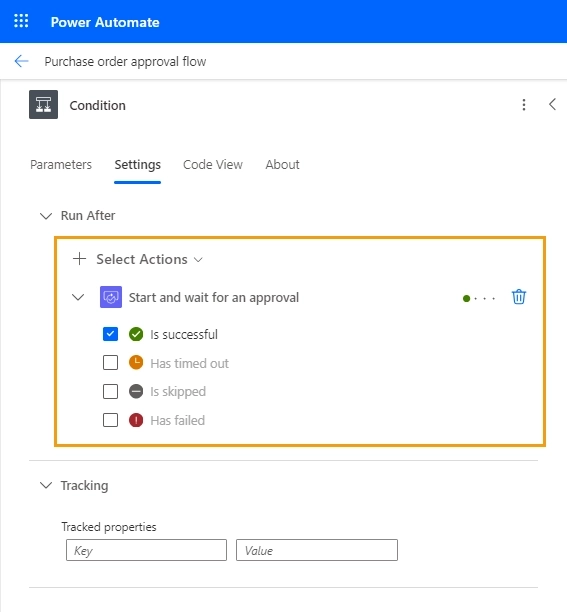
After requesting the approval we need to modify the list item and notify the user, but only if the request was approved. Add a Condition to the flow and configure it like on the screenshot:
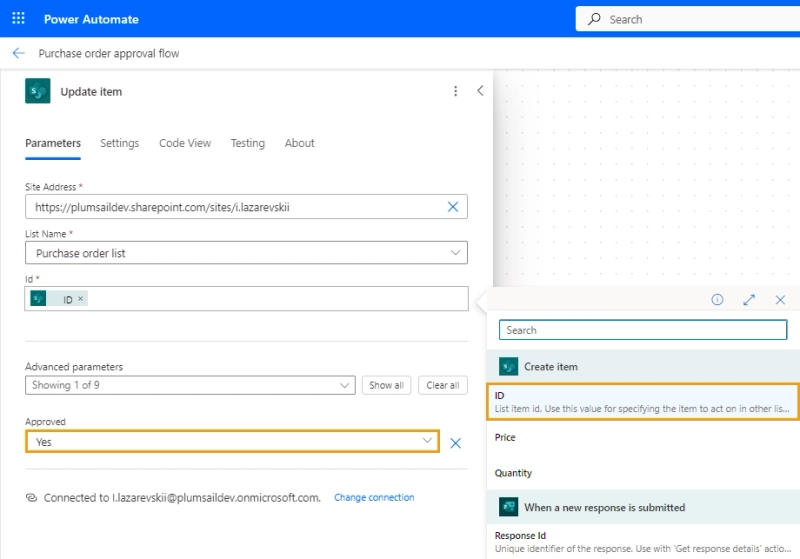
Add an Update item action to the flow to set the item's approval to Yes. Enter Site Address, List Name, and the ID of the item created earlier.
Add a Post message in a chat or channel action, confiture Post as and Post in to your liking, and enter the respondent's email into the Recipient field.
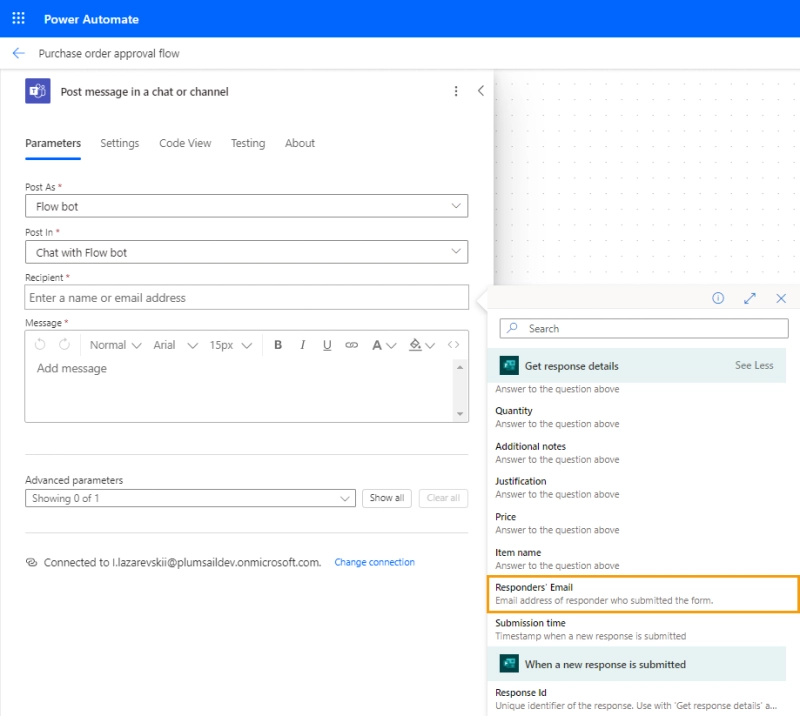
If the respondent isn't authorized, this action will fail and the message will not be sent. This is fine for my use case since the Post message action is the last in the flow. You can check if Respondent's Email is not empty with a condition if you need to avoid the error message.
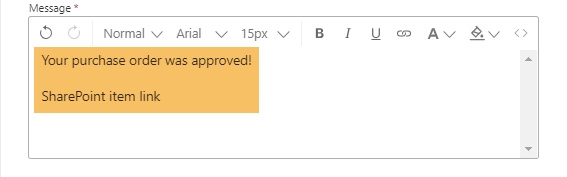
We're almost done, just fill in the message body. Here's mine:
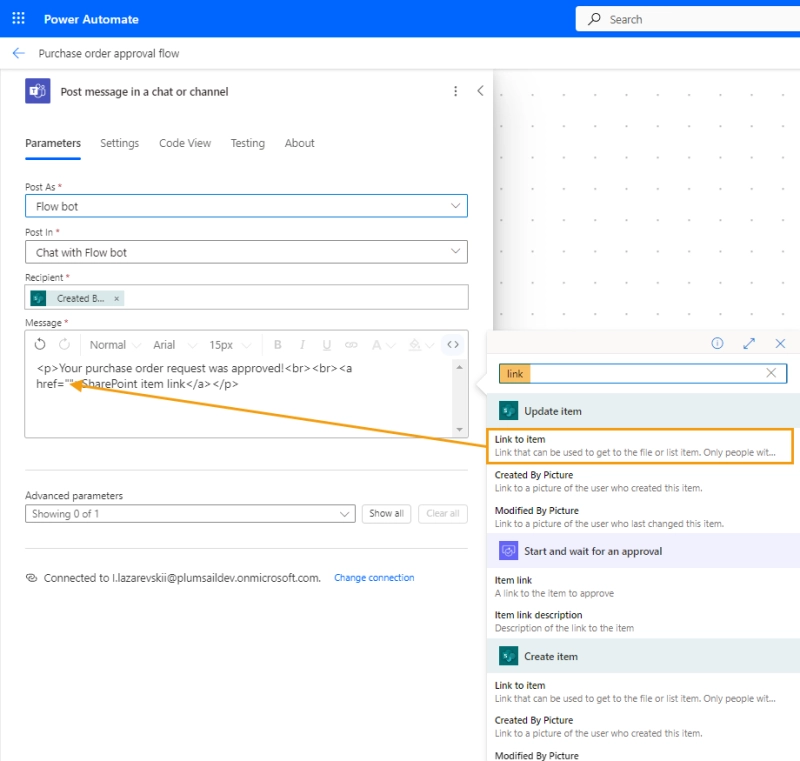
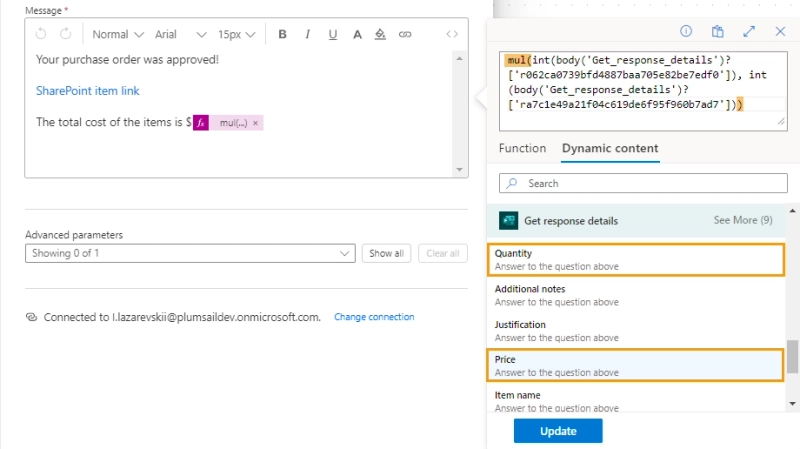
To make the SharePoint item link clickable, open the Code view of the Message parameter by pressing the angle bracket icon in the top-right corner of the text field. Replace SharePoint item link with <a href="">SharePoint item link</a> and insert the Link to item into the parenthesis:
For convenience, we can also add the total cost of the required items to the message. Add a formula to the messaged body for multiplication. Inside, put the mul() function that takes in Price and Quantity. Note each parameter has to be inside an int() function for mul() to work.
Finally, the resulting message in Teams looks like this:
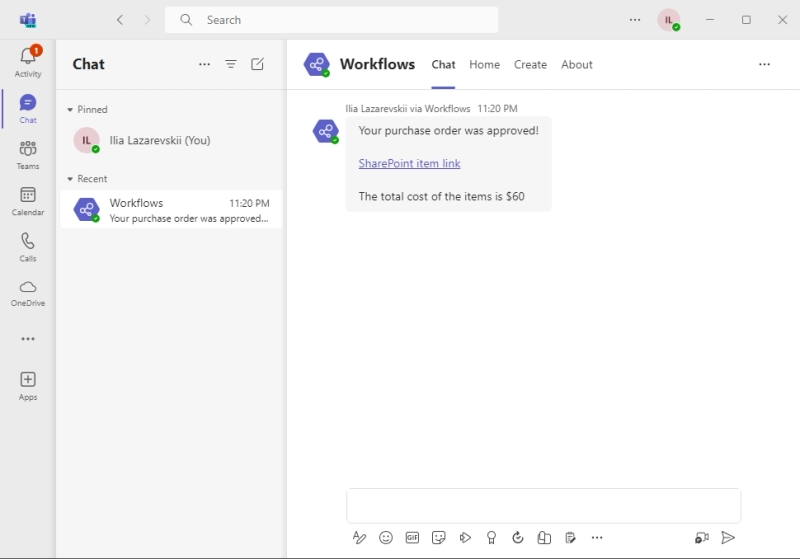
Isn't this beauty well worth all the work?
The example we've built in this article is simple and functional, but there's a lot of room for improvement. Here's a list of all the cool things you could do to go above and beyond with your Microsoft Forms approval workflow:
Have you noticed that we've used text fields for Price and Quantity in our form? That's because, unlike many similar solutions, Microsoft Forms doesn't have specialized fields for currencies, numbers, masked text, and many other types of input.
Using a specialized solution would allow for restricting data inputs to satisfy your criteria. For example, a phone number probably shouldn't be 20 characters long, which is not easy to check in Microsoft Forms.
A third-party app would also allow for simplifying your Power Automate flows since you won't have to convert values from string to number and face related errors.
If a user needed to request approval of multiple items at the same time, in Microsoft Forms they would have to submit several forms. This is not the peak of convenience, and it would be much more efficient to request approval for several items at a time.
A common solution is to create a table on the form with predefined columns so that the user can create new rows and fill them in:
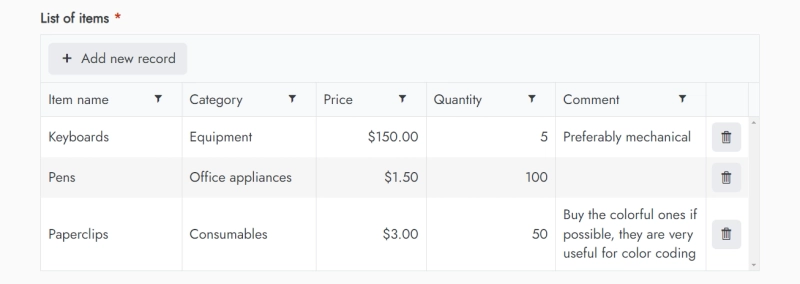
Sadly, MS Forms don't have this functionality, you need a third-party app. But if you need to handle purchase orders or expense reimbursements, consider this approach.
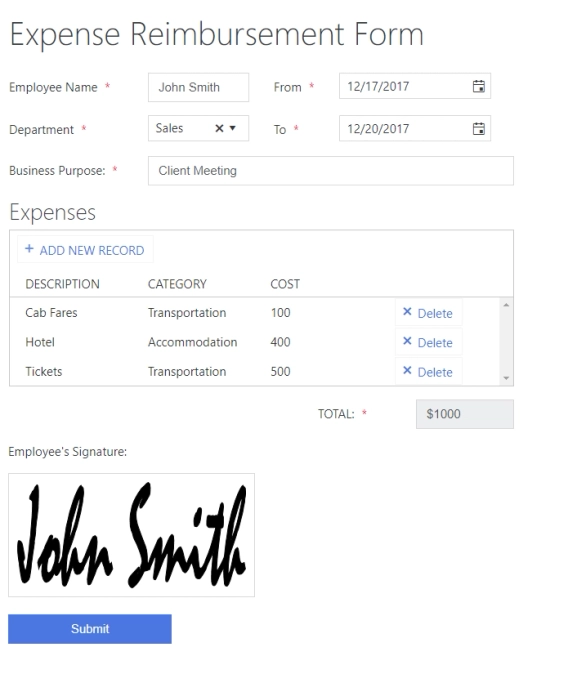
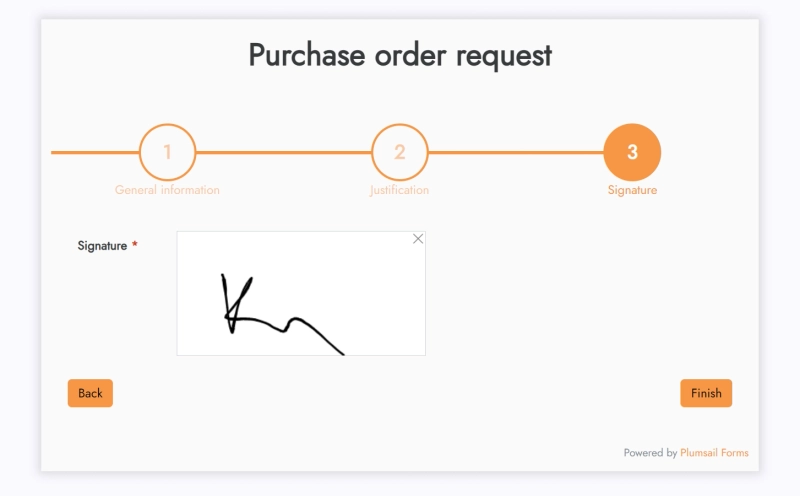
Signatures are commonly used in approval workflows for security and authenticity. They are easy enough to implement on paper, but not in Microsoft Forms.
Some third-party apps like Plumsail Forms offer a special field where the respondent can sign:
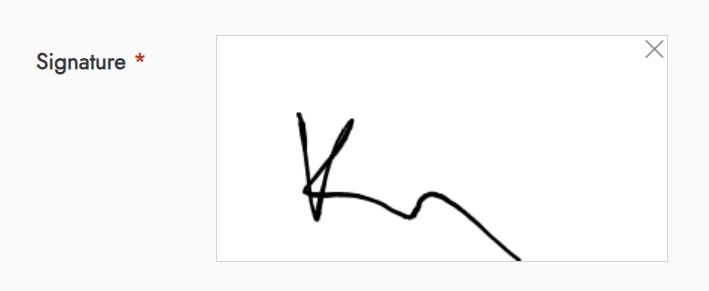
The signature can then be stored in a SharePoint column.
MS Forms do support attachments, but handling them in Power Automate can be challenging, while Plumsail Forms offers a special action to download form attachments.
Not to mention that attachments from Microsoft Forms are stored in your Microsoft 365 account and can only be uploaded by people from your organization.
If you need to check that the input of your form is correct, Microsoft Forms might not be the best solution for you.
For example, checking that a purchase date for expense reimbursement is in the past two months is pretty much impossible with Microsoft Forms. Most third-party solutions like Plumsail Forms offer much more customization in form behavior and validation
Some requests might not require approval. Do you really need to review every request for a $10 pencil sharpener for the office?
You can add a condition to your Power Automate flow to check if the request is worth attention based on criteria like the total cost of the item or the category.
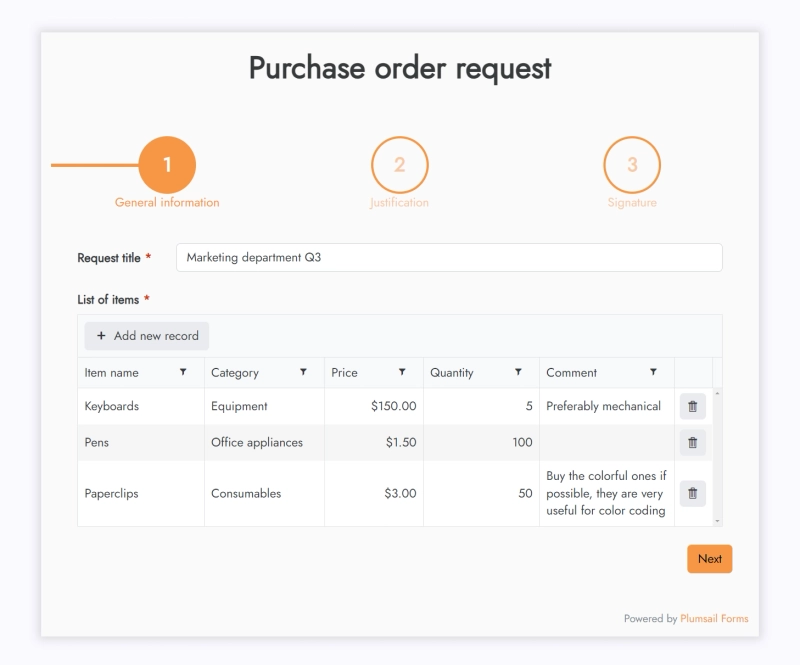
Below is how the form could look if we utilized the best practices.
First of all, I made it multi-step to keep things simple and not overwhelm the respondent. The first step allows for inputting multiple items in a table format, and each item has its own Comment field.
Notice how each price in the table has a dollar sign in front of it. It's appended automatically because the Price column has Currency as its type.
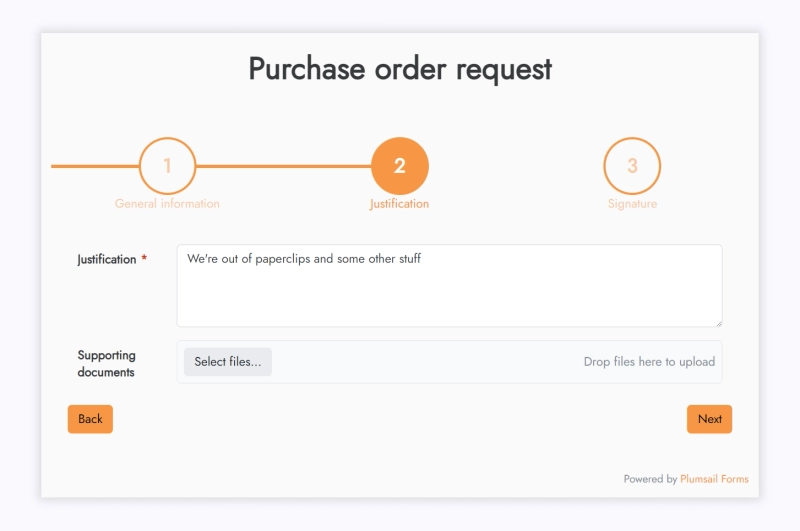
The second step is for justification, where the respondent can explain their reasoning in text and upload any supporting documentation. This is especially useful for expense reimbursements since receipts can be uploaded here.
The last step is requiring the signature of the respondent for authenticity. The signature will then be stored in a SharePoint column.
There is no built-in workflow functionality, but Microsoft Forms can be easily integrated with Power Automate.
No, but Microsoft Forms allows for automation. You can build a custom approval workflow with Power Automate.
Microsoft Forms has a file upload field. The files are stored in your Microsoft 365 account, and only people from your organization can make uploads.
No. The only option to make a field only accept numbers is to create a text field with a restriction to numeric values.
No, you need to use a third-party solution like Plumsail Forms to collect signatures.
Although Microsoft Forms doesn't have an in-built workflow feature, with Power Automate you can customize its behavior into oblivion. There are some limitations with no simple workarounds. But for a lot of tasks, Microsoft Forms and Power Automate are more than enough.
Here are all the links you need to get started:
Want something more flexible and custom than the good old MS Forms? Create a free Plumsail account and follow this guide to build your first form.
Happy automation!
How to use MS Power Automate flow to convert Public web form to PDF and send for approval
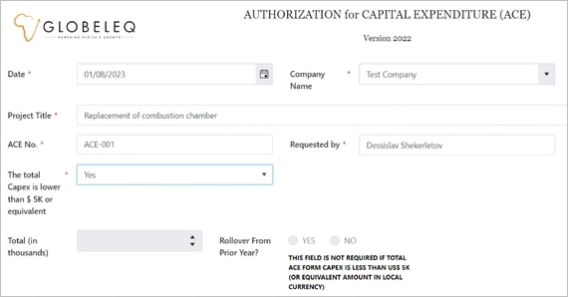
Discover real case of structuring CAPEX project requests with SharePoint forms, and ensuring that the process is compliant with the company’s standards and rules.