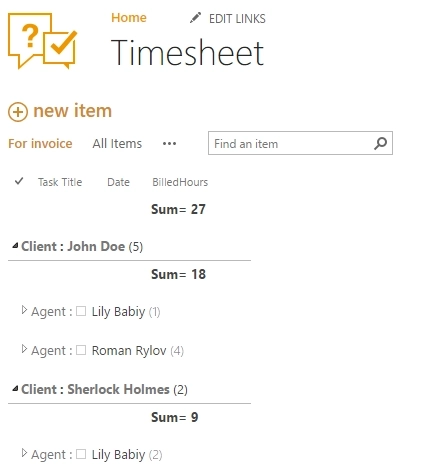
Knowing how much time was spent on solving some cases is a great help for improving your customer service. And it goes without saying that if profitability is on the top of your priorities, tracking time is a must. So, in this tip, I will show you how can you configure time tracking in the tickets in Plumsail HelpDesk for SharePoint 2013/2016 and Microsoft 365. We will configure the view like on the screenshot below where billed hours will be counted for each agent, client, and task. Let’s get to the hearts of the matter!
First of all, let’s make some preparations for our case. We need to create a custom column called Billed hours, for example. If you don’t know how to create a new column, check this article. This column will be filled by an agent during closing the ticket.
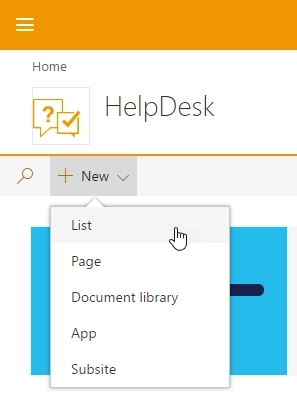
After you have succeeded in a creation of a column, we need to create a separate list. SharePoint list is sort of container where you put data and where you can filter it with views. Creating a list is quite easy — just click Settings and then choose Site Contents. Then click ‘List’ in the drop-down menu under ‘New’ button.
Type a name for the list and click Create. For our case, I created Timesheet list with the following structure:
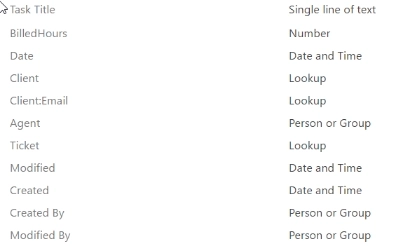
We will use Timesheet list later in the workflow which we are going to create next. In this article, you can find more details about how to create a new workflow and start it from the trigger.
Here I will shortly describe the use of new workflow. This workflow will create an item when the ticket is closed and column Billable Hours filled with the value which is greater than 0.

After saving a workflow, let’s get back to HelpDesk site and create a trigger which will start the workflow. Navigate to Settings in the navbar and choose Triggers tab. Here we will create a new item. New trigger will be fired when a ticket has been changed and its status is changed to ‘Solved’. To perform this, we use syntax like this:
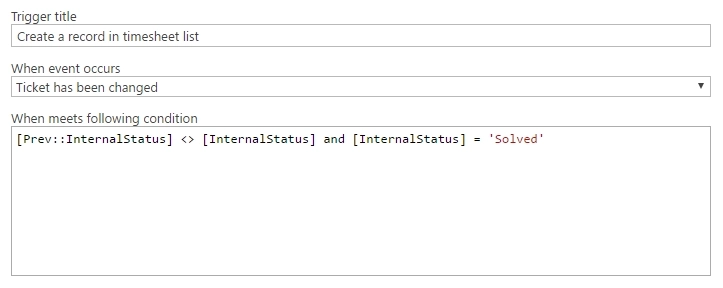
The most simple part of creating a trigger — choosing what action should be performed. In our case we select ‘Start workflow’ in the drop-down menu and then specify which workflow we’d like to start.

Now we move back to Timesheet list. We will add another dimension to Timesheet with creating the view. This view will help us to find right data for invoice. Just click ‘Create view’, choose a view type and select columns you would like to display. More about views here.
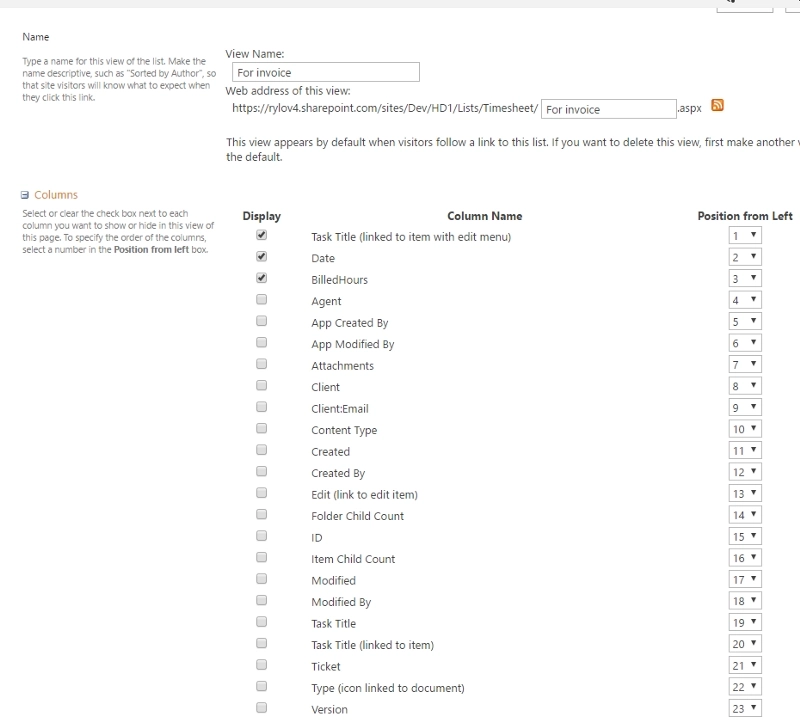
As we’d like to know the sum of billed hours, we select totals to show.

And here it is! Comfortable and easy way to count every hour spent on the ticket. After it, you can run the workflow which will generate PDF file and send invoices to the clients. Click here to know how to generate PDF document using workflow in SharePoint 2013 and Microsoft 365.