Documents
Nov 21, 2023
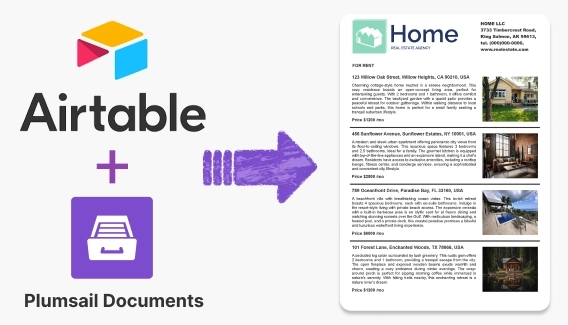
Airtable extension for seamless document creation
Introducing a Plumsail Documents extension for Airtable. Create documents from Airtable records with just one click.

I kept seeing questions in the Airtable Community about how to generate an Excel file from an Airtable record — things like invoices, purchase orders, or structured reports. So I decided to write this guide and show how you can automate Excel creation from Airtable with just a few clicks.
In this article, I'll walk you through how to:
.xlsx file back to the record — without using external tools like Make or ZapierHere are just a few real questions that inspired this guide:
Are there ways to export on-screen data for the applicable record or child records to a PDF or XLSX from interface designer?
Is there a way to export an interface, configured as a "List" view to an excel file?
I need to rig up a button that can export a row of data and download it as en Excel file to a local computer.
Let's dive in — by the end of this guide, you'll have a working Airtable to Excel report or invoice, generated with one click, directly from your records.
Further in the article:
In projects where Airtable is used to manage client transactions, there's often a need to generate a structured Excel file — for example, to create an invoice, purchase order, or Airtable to Excel report from a single record. Instead of copying data manually or exporting everything at once, it's much more efficient to automate Excel creation from Airtable directly from within the base.
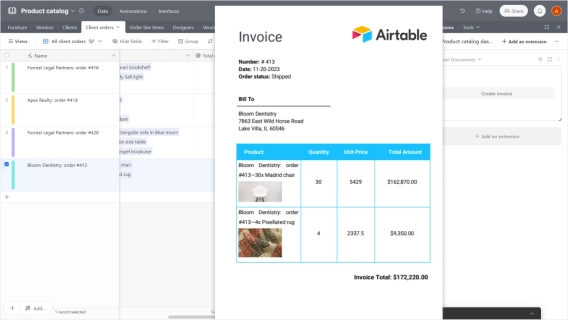
To solve this, I set up a way to generate an Excel file from an Airtable record using a button. This button fills out an Excel template and attaches the result back to the same record — all in a single click.
Here's what the Airtable table looks like for this use case. Each record includes:
Client nameContact personBilling addressSales repList of servicesTotal amountCompany logoCreation dateDocuments — an attachment field where the final file is stored
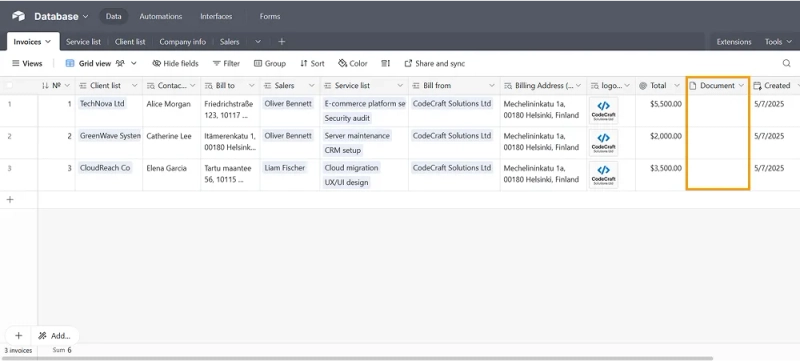
Only selected fields are used to populate the Excel template with Airtable data. The rest stay in the record but don't clutter the final document.
Using Plumsail Documents, it's possible to create Excel from Airtable automation that works entirely inside the Airtable interface. Once configured, the workflow allows anyone on the team to generate an Airtable to Excel invoice, purchase order, or other document without leaving the base.
The next section walks through how the automation is set up — step by step.
To automate Excel creation from Airtable, the first step is to add the Plumsail Documents extension to the base. This makes it possible to use an Airtable button to trigger Excel export and generate documents on demand — no need for external automation platforms.
Here's how the setup starts:
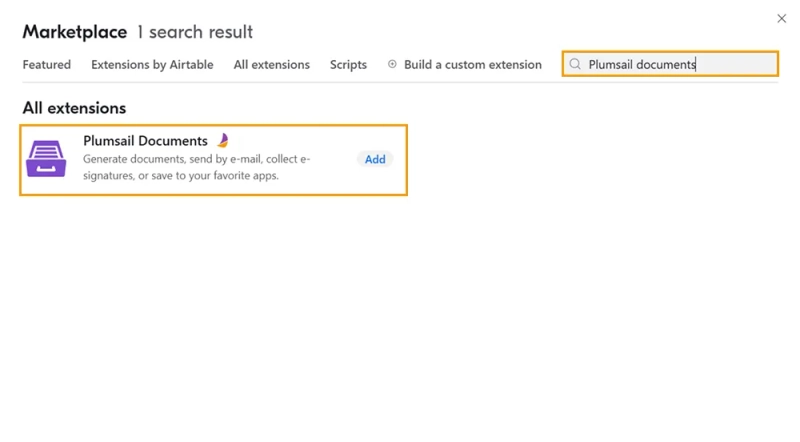
When prompted, log into a Plumsail Documents account. For new users, there's a free 30-day trial available — no credit card required.
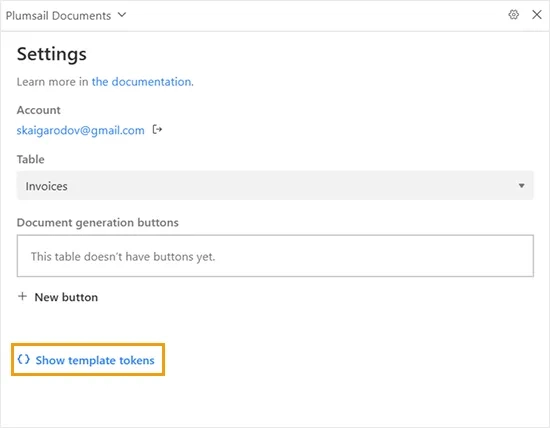
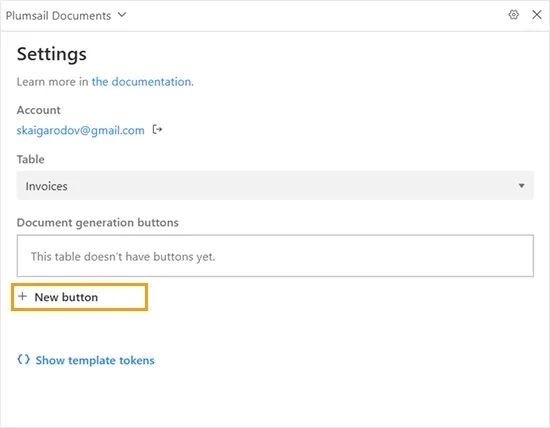
After connecting the account, Airtable shows a prompt to create a document generation button. But since the Excel process hasn't been set up yet, it makes sense to skip this and prepare the template first.
Before building the Excel template, it's helpful to preview the tokens that will be used to populate it with Airtable data. These tokens represent each field in the table and can be inserted into the document later.
Click the Show template tokens link in the extension panel.
This opens a list of all tokens generated from your Airtable fields.
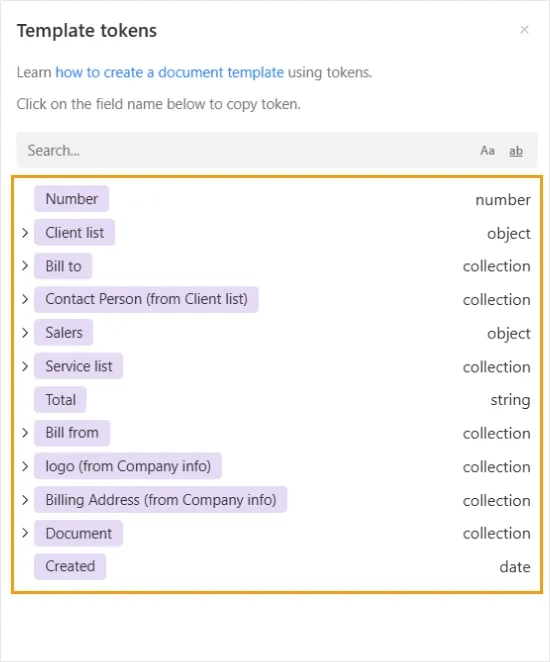
You don't need to copy them right now — just keep this panel open. In the next step, we'll use these tokens to build the actual Excel file.
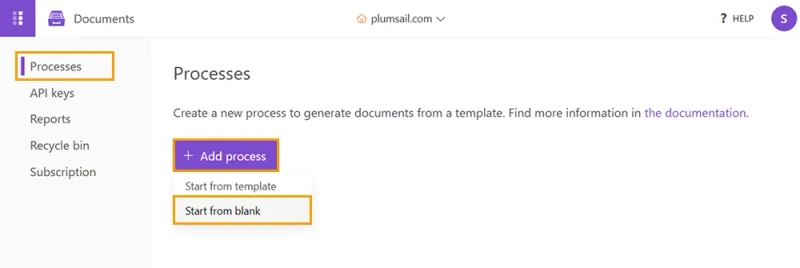
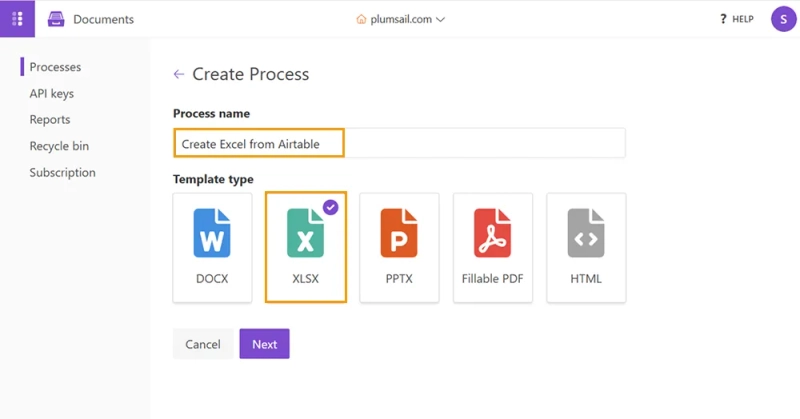
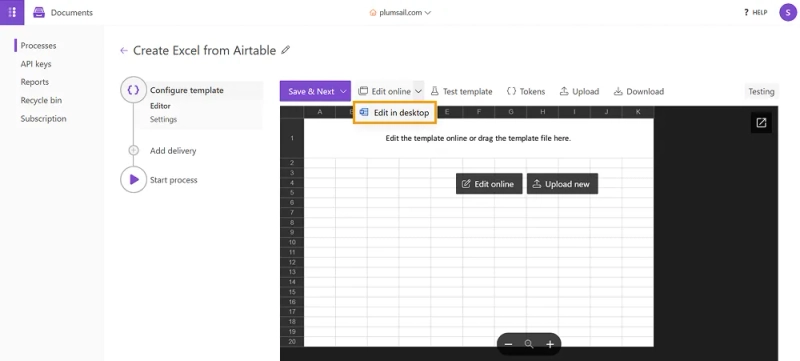
After installing the extension and copying the field tokens, it's time to create the document generation process in Plumsail Documents. This process will be responsible for turning Airtable records into formatted Excel files using a custom template.
The goal here is to create Excel from Airtable automation that pulls data from each record, populates an Excel template with Airtable data, and generates a file that looks clean and professional.
Now go back to the list of template tokens in the Plumsail extension. These tokens represent your Airtable fields — and will be replaced with actual values when the Excel file is generated.
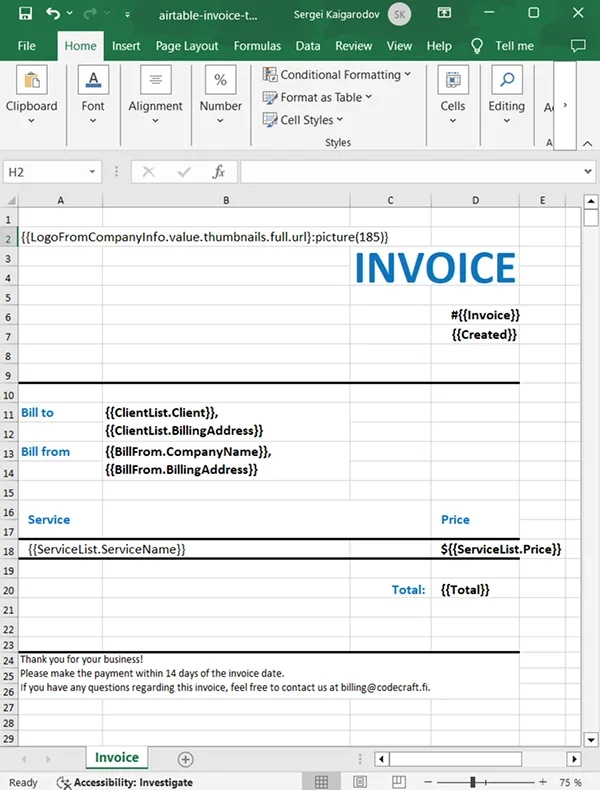
In the Excel template start placing these tokens into the cells where you'd like the data to appear. For example:
{{BillFrom.CompanyName}} — sender company name{{ClientList.Client}} — client or recipient name{{ClientList.BillingAddress}} — client's address{{ServiceList.ServiceName}} — name of each service line item{{ServiceList.Price}} — price per item{{Invoice}} — invoice number or ID{{Created}} — creation date{{Total}} — total invoice amount
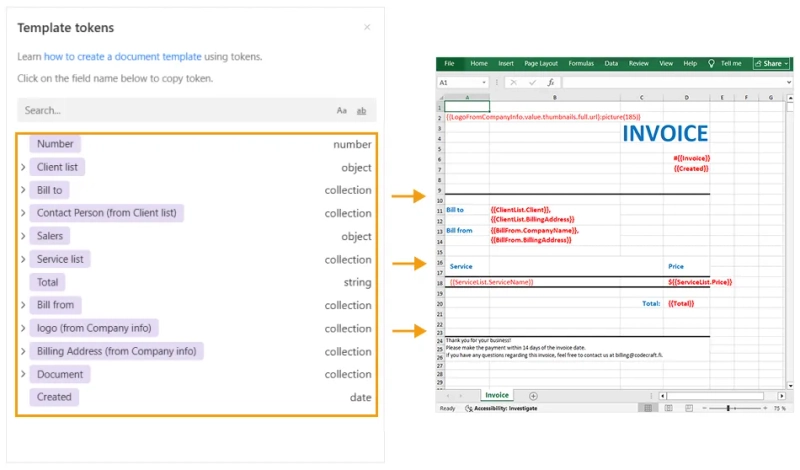
To insert a token, simply click on it in the list inside the Plumsail extension — it will be copied to your clipboard automatically. Then paste it into the appropriate place in your Excel file.
To include an image, such as a logo stored in an attachment field, use a token with the :picture formatter. For example:
{{LogoFromCompanyInfo.value.thumbnails.full.url}:picture(185)}This tells Plumsail to download the image from the Airtable attachment, insert it into the Excel file, and resize it to 185 pixels width.
Learn more about the :picture formatter in the Plumsail Documents documentation.
Once all tokens are in place and the layout is styled, your template is ready to generate a polished Airtable to Excel invoice, purchase order, or report.
With the document generation process ready, the next step is to connect it to the Airtable base using a button. This button will allow users to generate an Excel file from an Airtable record with a single click.
To begin, open the Plumsail Documents extension inside Airtable and click + New button.
In the Add document generation button screen, the following settings are configured:
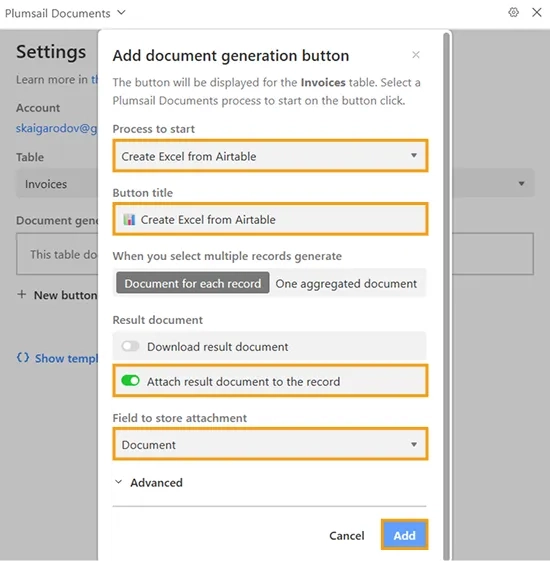
Click Add to finish setup.
Once the button is created, a confirmation screen appears showing:
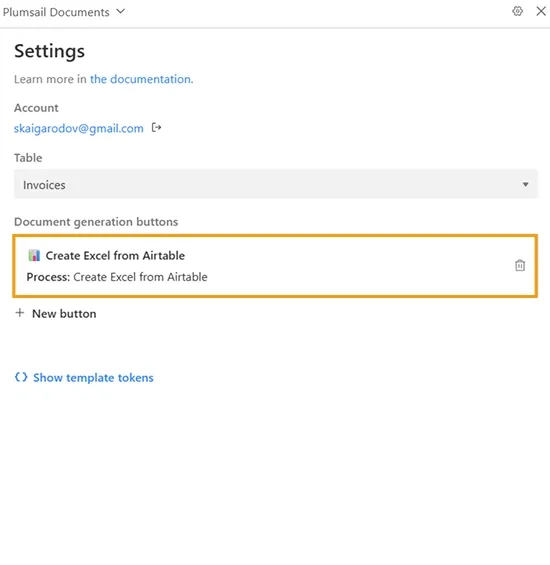
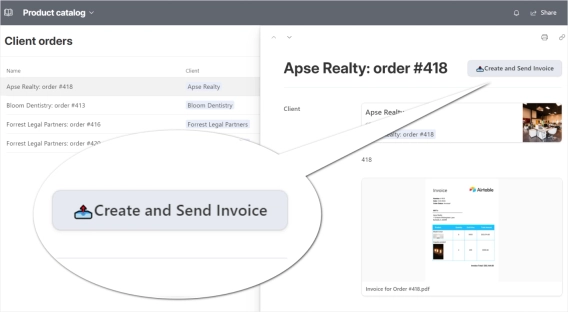
At this point, the base includes a fully configured Airtable button to trigger Excel export. When pressed, it runs the connected Plumsail process and attaches the resulting .xlsx file directly to the record.
To see the full configuration process — including creating the document process, editing the Excel template, and setting up the button in Airtable — watch this short video tutorial:
Once everything is set up, generating a document takes just one click. From the Airtable interface, it's now possible to generate an Excel file from any record using the button added earlier.
To test the setup:
Behind the scenes, the following steps happen automatically:
.xlsx file is generated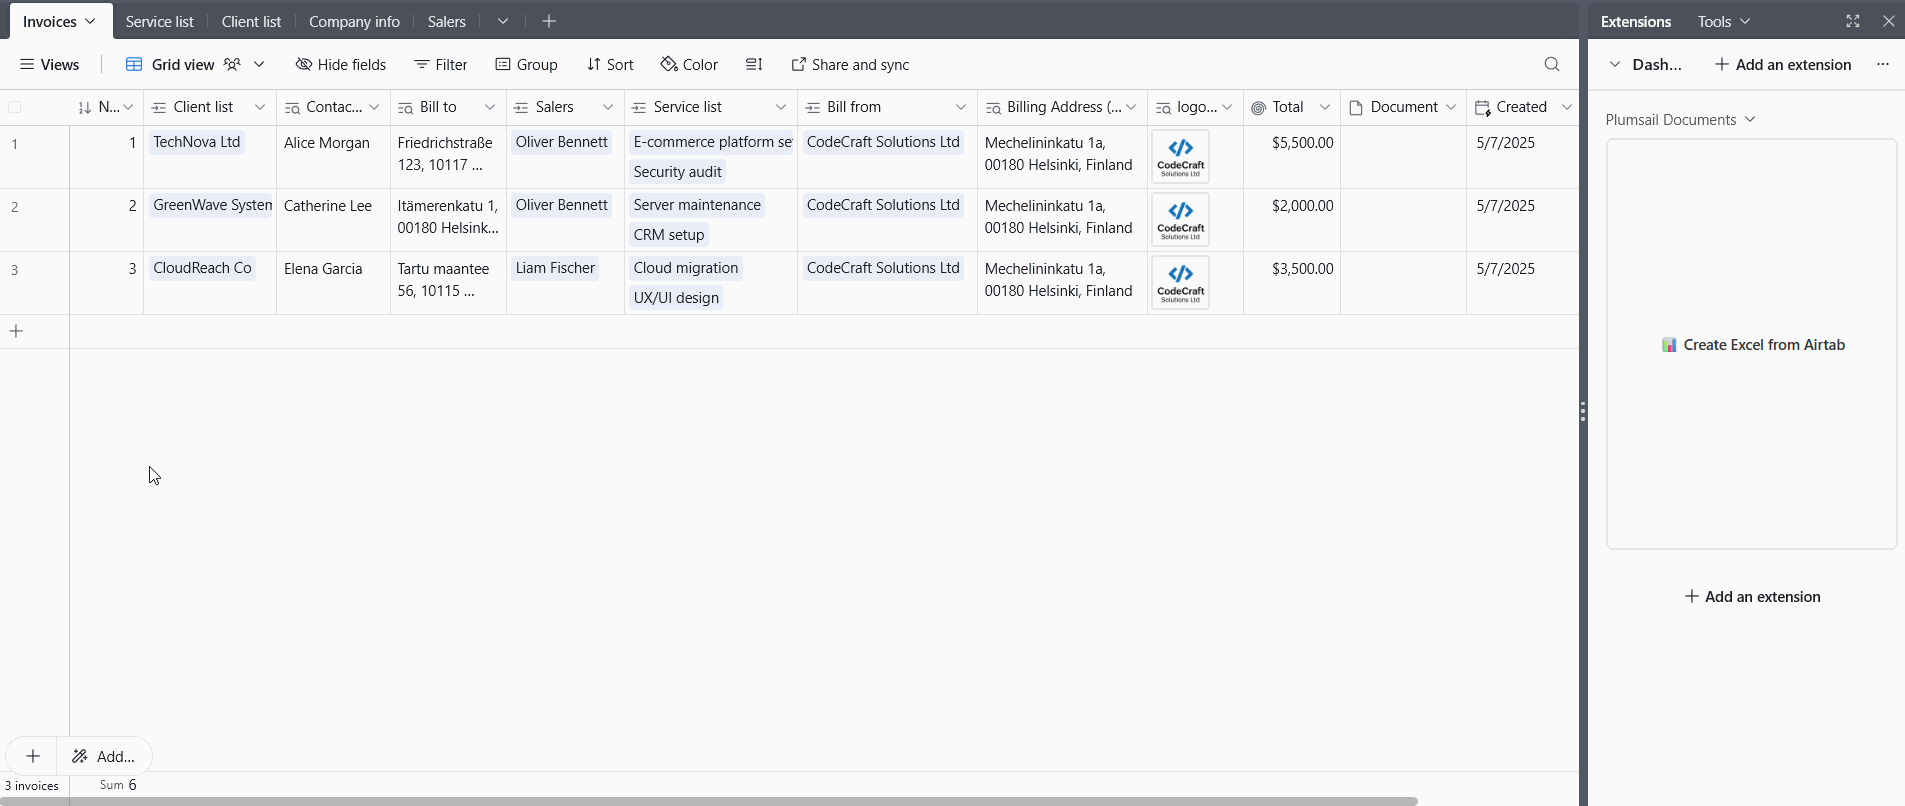
This approach removes the need for copy-pasting or manual exports. Whether it's an Airtable to Excel invoice, purchase order, or report, the entire process is handled with a single button press.
It's a fast, repeatable way to generate structured Excel documents from Airtable — and the setup stays entirely within the Airtable environment.
Plumsail Documents lets you create Excel files directly from Airtable without using external automation platforms.
Here's what the integration supports:
This setup simplifies document generation and keeps everything within your Airtable workspace.
Plumsail Documents offers a native extension for Airtable that lets you generate Excel files from records using your own templates. You can create documents with one click, attach them to records, and even export to PDF, DOCX, or HTML if needed.
Start your free 30-day trial, add the extension to your Airtable base, and see how it works with your data.
Introducing a Plumsail Documents extension for Airtable. Create documents from Airtable records with just one click.
Plumsail Documents extension for Airtable got new feature for document creation and management in Airtable Interfaces and Automations.
Discover how to create and generate PDFs from Airtable records, including images, using Plumsail Documents. Follow our step-by-step guide.