Documents
Jul 22
How to use SharePoint images in Power Automate
Learn to retrieve SharePoint images and use them with Plumsail Documents to generate branded Word and PDF reports automatically.

In this article, we'll see how to use Smartsheet document management to automatically create documents with Power Automate when a new row is added to a sheet. This enhances your workflow by utilizing Smartsheet's document generator capabilities. Our example will cover Word and PDF formats, but the approach will also work well for other formats such as Excel sheets, PowerPoint presentations, and fillable PDF forms.
In this article:
Before we dive in to explore the approach, let's quickly touch on the built-in feature for document creation within Smartsheet and see why it doesn't cover most cases.
It would be great to be able to author documents completely within the document builder without needing to create a fillable PDF first - this would make it a significantly better tool to use for creating project reports.
Can Document Builder be automated so that after a form is filled out the document is automatically created and sent to the person who filled out the form?
We have operations teams performing tasks where they also take pictures via the mobile app. Our sheet then automatically creates a PDF to share with the client. However, we have to download the pictures separately and attach them. This slows up the process significantly. Either be able to attach the pictures directly or allow the form submitter to post a hyperlink to Box or OneDrive so we can provide that link in the PDF.
To address these challenges, we offer a flexible solution by combining Power Automate and Plumsail Documents for Smartsheet document automation. Smartsheet provides the data, Power Automate handles integration, and Plumsail Documents generates documents from templates.
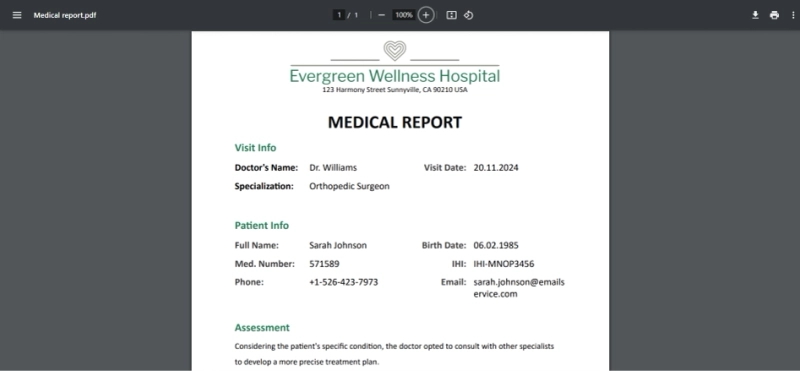
We will demonstrate this solution by guiding you through the creation of a PDF medical report following a patient's clinic visit. The necessary components for this process include:
This document automation process initiates automatically with the addition of a new row in the Smartsheet table, ensuring that every clinic visit is promptly documented. Let's dive into the setup!
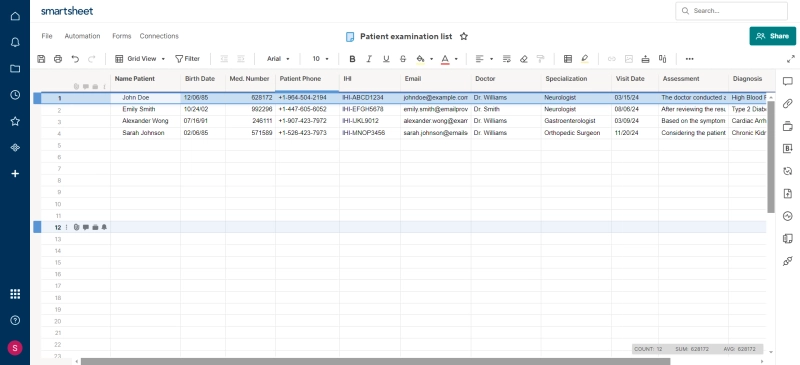
The first thing we'll do is take a closer look at our sheet in Smartsheet. We have a table with visit records. Each record contains information about the patient, the doctor who conducted the examination, and the results.
To enter data into the Smartsheet table and run our trigger, we will use a web form.
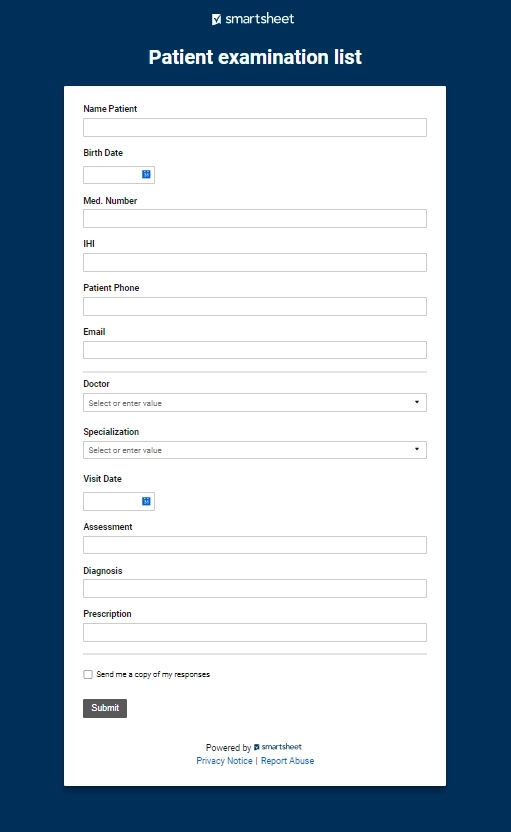
This form was created automatically using the form builder in Smartsheet. Keep in mind, the builder comes with certain limitations:
Therefore, we recommend using a third-party application if Smartsheet forms don't meet your needs.
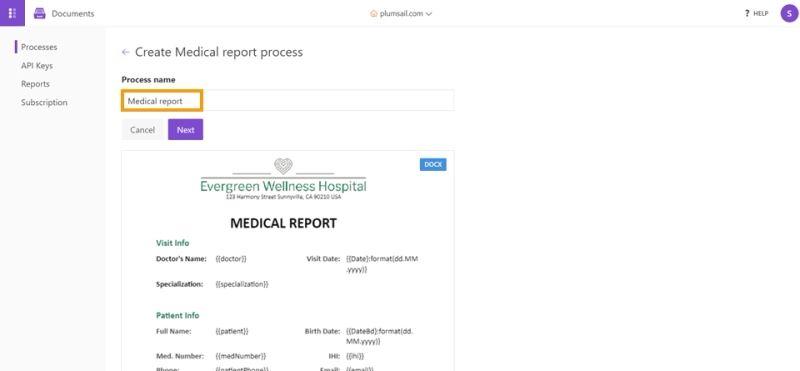
The next step involves configuring our document creation with Plumsail Documents. First, we select a ready-to-use free Medical report template from the templates page and click Use this template. This action directs us to the process creation area within the Plumsail Documents app. At this point, we need to give our process a name and then click Next.
We then customize the template to fit our needs exactly, making sure it includes specific data from Smartsheet. Our template has special {{placeholders}} marked by double curly brackets, showing where we'll put Smartsheet data. By editing documents online and adding these placeholders, also called tokens, you can turn your documents into templates. These {{tokens}} replace where you'd usually copy and paste data. Basically, the template engine understands anything in the curly {{ }} brackets as spots for the data you choose. After checking our template, we click Save and Next.

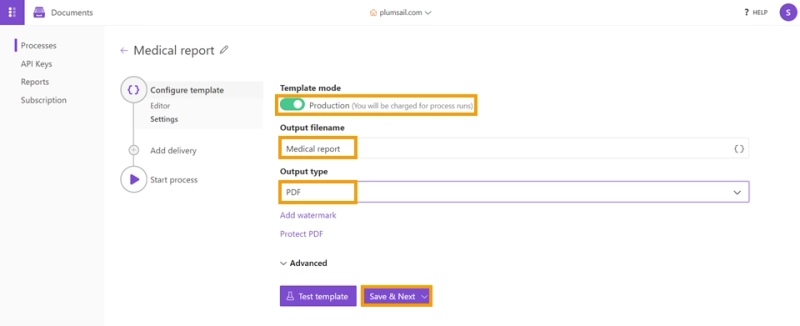
We move on to setting up the outgoing file. Switch the button to Production mode. Specify the name of the generated file and select the PDF format. Additionally, you can protect PDF by watermark and other restrictions. Click Save and Next.
You can read more about configuring the output file in the Plumsail Documents section Configure output file format and other settings.
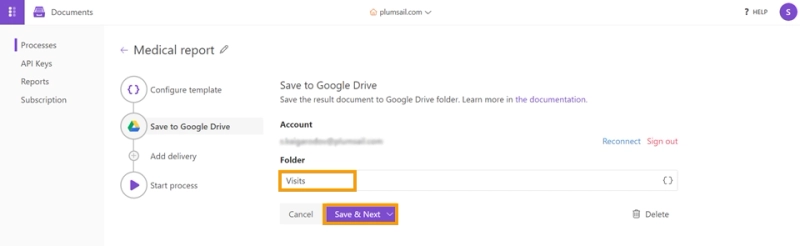
In the next step, we need to specify the delivery method for the generated file. We indicate that we want to save the received file in Google Drive. You can also send the resulting document by email or to e-signature solutions, and it's possible to add more than one delivery method—simply add as many as you need. Let's move on to the Start process setting.
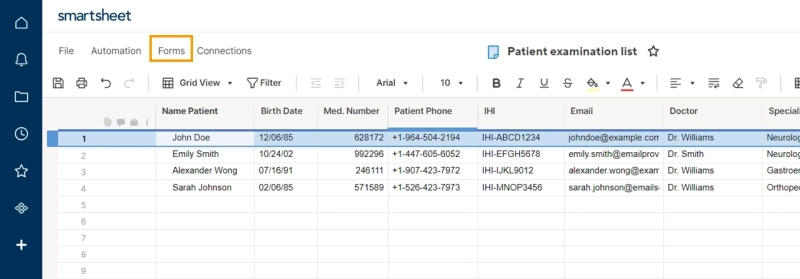
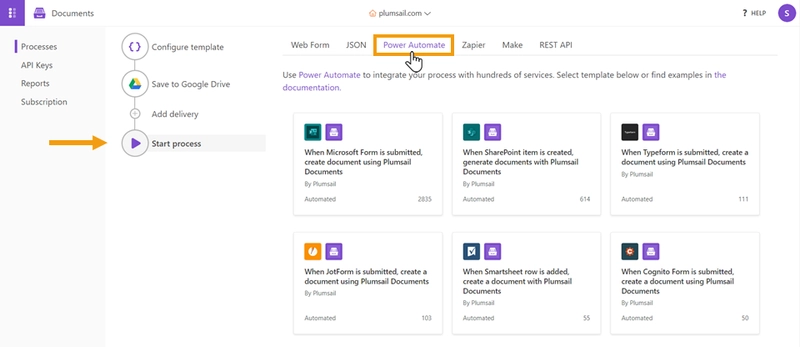
In the Power Automate tab, you can find ready-made flow templates. However, we'll build one from scratch because it requires additional steps to address the limitations of the Smartsheet trigger output.
The final step is to create and configure a flow in Power Automate. We create a new flow, setting the trigger action in Smartsheet to When a new row is created.
As I previously mentioned, the trigger has a well-known limitation: it doesn't provide data for certain columns from the newly added row. What we get instead is just an array. This requires us to decode the array for further use in our workflow and to correctly match the resulting data with our document template.
I have a Smartsheet sheet which is populated using a Smartsheet form. When the form is submitted it creates a new row in the Smartsheet and inserts the relevant form data into the corresponding Smartsheet columns. I now want to use the data from that row in a flow in Power Automate. I am using the "When a new row is created" trigger but I am struggling to then access/use the data in the columns of that new row.
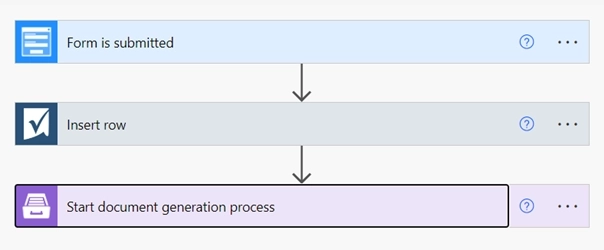
The final flow will look like this:
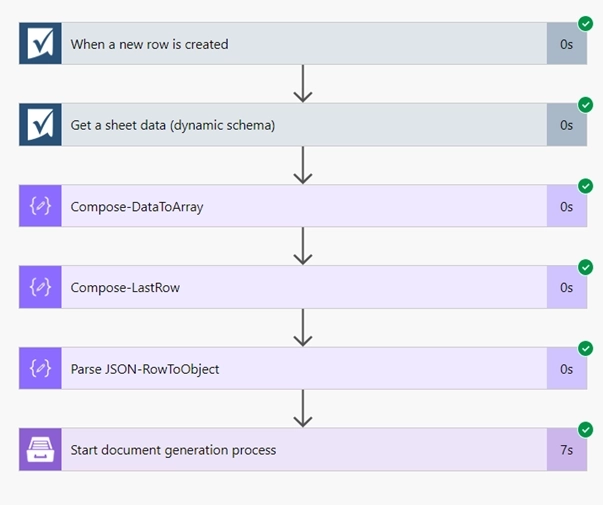
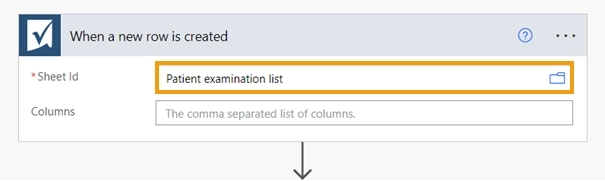
The first step is to configure the trigger When a new row is created. In the Sheet Id field, select the data sheet into which the data from the Smartsheet form will be filled.
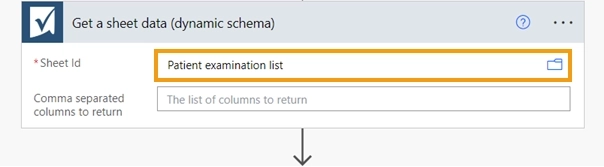
Add Smartsheet action Get a sheet data (dynamic schema) and select the table from the trigger.
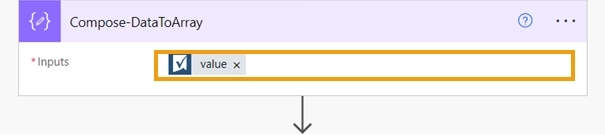
Now we need to process the received response from the previous step. Using the Compose action, we convert the received data into an array. This is necessary for easier manipulation and extraction of the specific row data you need.
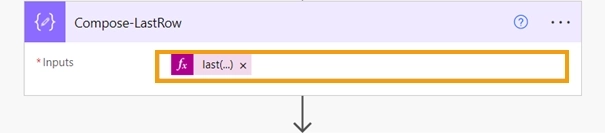
From the Compose-DataToArray action, we need to extract the last row added to our table using the Compose-LastRow action. In the Inputs field we indicate the function: @{last(outputs('Compose-DataToArray'))}. This row corresponds to the data from the latest form submission.
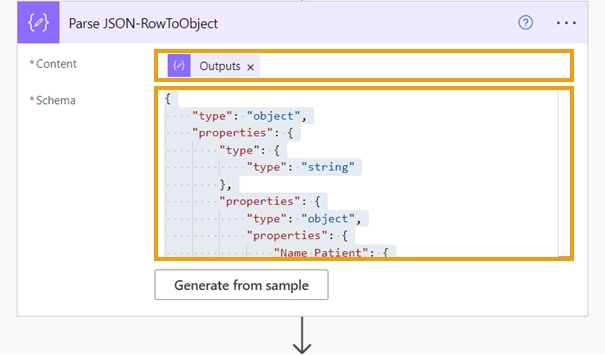
Let's take the output from the last step, called Compose-LastRow, and break it down using the Parse action. To do this effectively, we require a structured format or schema. We'll first execute a trial of the process to get this output. Then, copy this output so we can create a schema. You'll see a Generate from sample button; click on it. Next, paste the output you copied from the Compose-LastRow action into the provided space and click the done button. By doing this, the data from the last row is transformed into a structured JSON object.
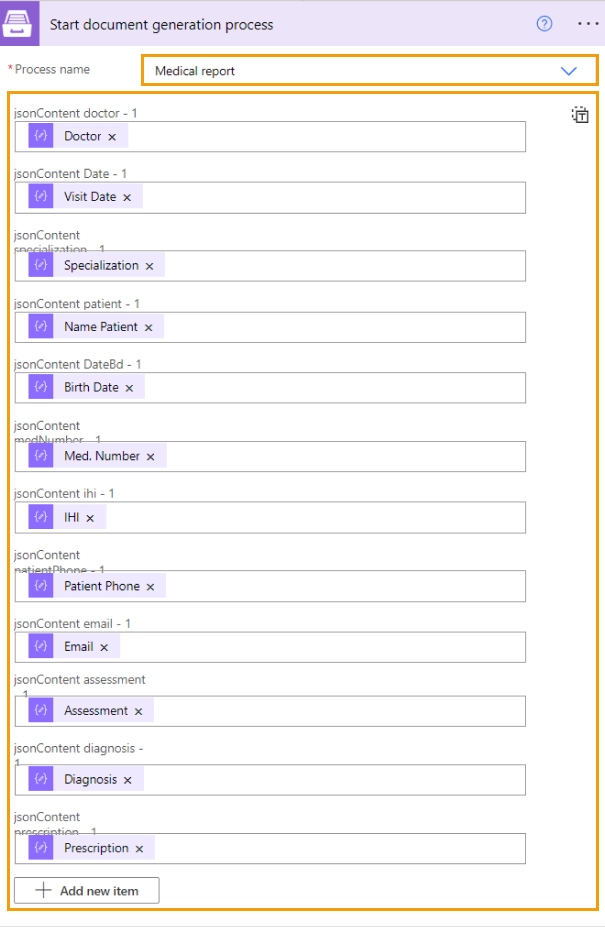
Our last action will be Start document generation process. Select the process name in Plumsail Documents, and then merge the fields from the template with the values obtained from the 'Parse JSON-RowToObject' action.
Now, every time a completed Smartsheet form is submitted, our When a new row is created trigger will fire. The data from the form will be moved into a Smartsheet and then extracted and sent to Plumsail Documents. The data from the last added row will fill the template and we will receive an automatically generated PDF document from Smartsheet.
In this article, you learned how to create medical reports for patient visits from a Smartsheet encounter table using Power Automate and the Smartsheet When a new row is created trigger. We utilized a Word template in Plumsail Documents to bypass the limitations of Smartsheet's document builder, highlighted at the beginning of the article. With Plumsail Documents, you can:
Which once again proves the effectiveness of using integrations to overcome the limitations of built-in Smartsheet tools.
For instance, by adopting Plumsail Forms, we could streamline the process, addressing the issue with Smartsheet forms' data transfer format only in 3 actions.
Moreover, this approach expands our capabilities, enabling:
In summary, the use of applications in conjunction with connectors such as Power Automate, Zapier, or Make significantly enhances the ability to generate documents from Smartsheet data.
Register an account and get a free trial for one month.
If you have any questions or comments about the material, feel free to leave them in our community portal.
Start generating documents right now!
Learn to retrieve SharePoint images and use them with Plumsail Documents to generate branded Word and PDF reports automatically.
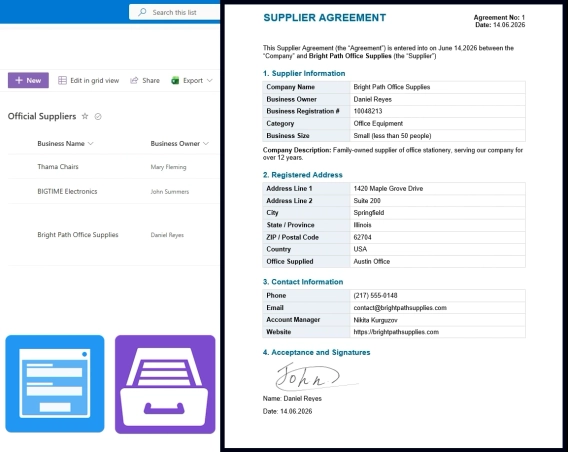
Build a supplier onboarding form that saves straight to SharePoint — no vendor login, attachments support, conditional field visibility, e-signatures, and automatic contract generation.
Learn how Oil-Royalties used Plumsail Documents with Jotform, Make, and Dropbox Sign to automate agreement generation and deliver pre-filled e-sign agreements.