
How to collect patient data securely with HIPAA-compliant web forms
Transform your patient intake, health assessments, vaccination and other types of healthcare forms with Plumsail Public Forms
We can all agree that online banking is not only convenient, time-saving, and efficient but it also enhances security measures to safeguard personal and financial information. Completing an electronic bank account opening application takes just a few minutes and can be done virtually from anywhere – all you need is a reliable internet connection.
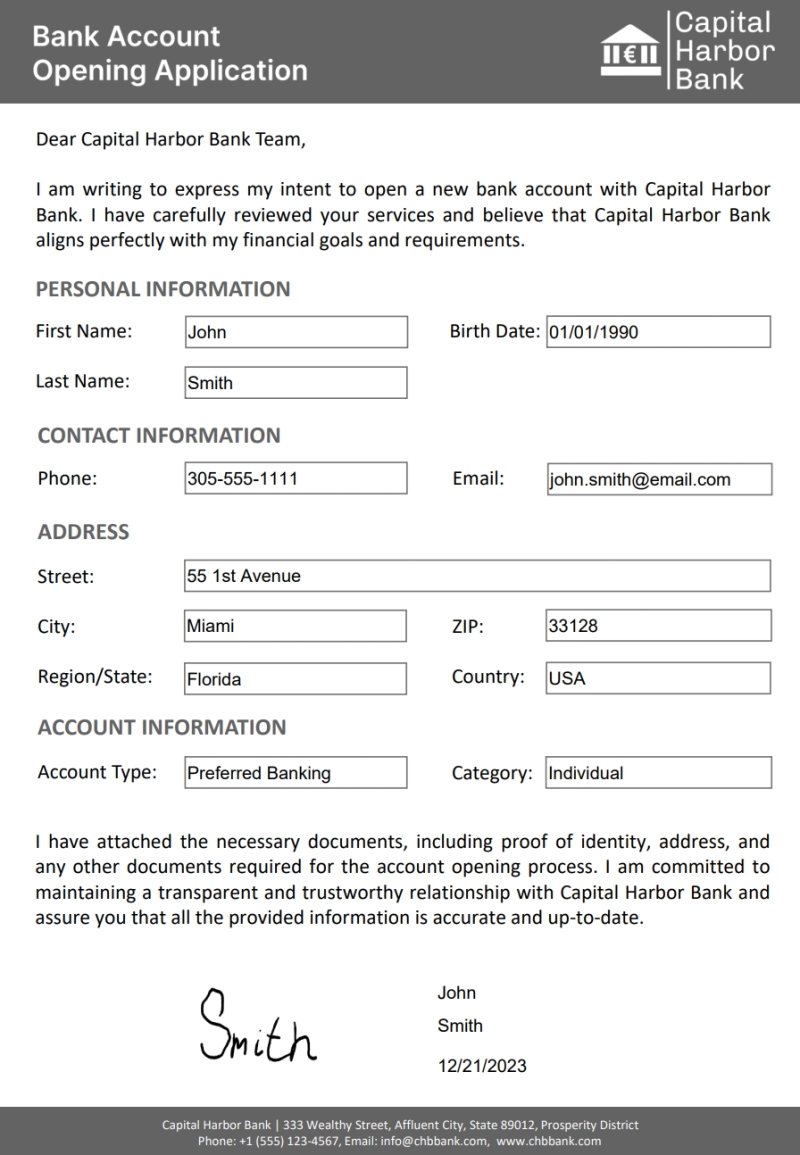
Now, let's explore how you can automate this process using Plumsail Forms and Documents. Imagine a potential customer filling out a new bank account opening form online, clicking Submit, and instantly, the form is emailed to the bank manager for review. The final document will look like this:
If you haven't created a Plumsail account yet, sign up now! You can begin with a free Scooter Plan for Public Web Forms and enjoy a free 30-day trial for Documents.
In this article, we are delving into a more advanced process that helps transfer handwritten signatures from a form template to a fillable PDF document, where the signature is placed within an image field.
We will start by setting up a process in Plumsail Documents, click on Add Process, and choose Start from template. Navigate to the Accounting & Tax tab to locate a fillable PDF template, titled "Bank account opening application". Let's give a name to the process 'New Bank Account Opening Application'. Click Next to proceed to the editing section.
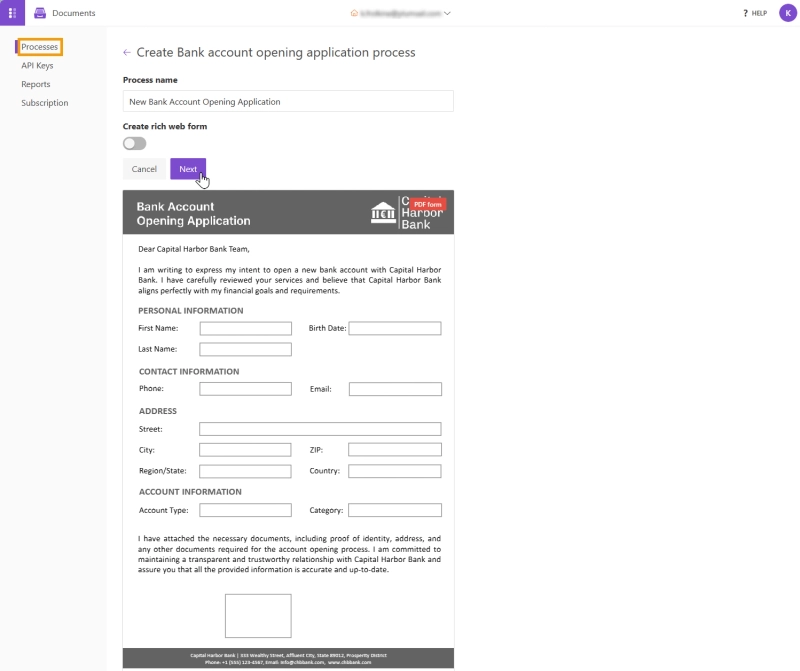
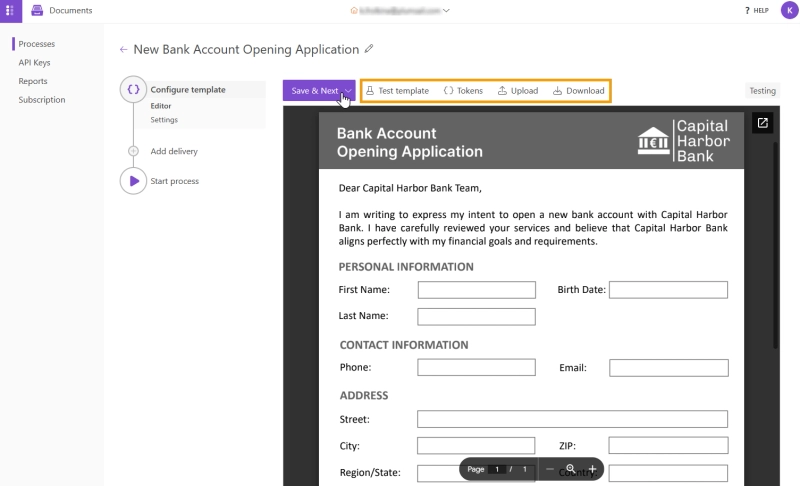
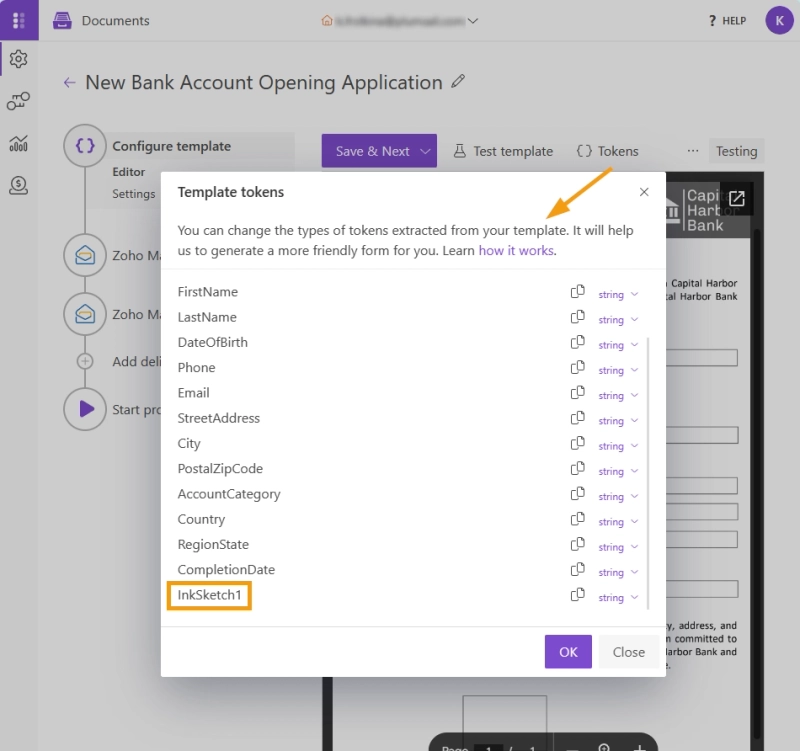
In the Editing step, you can test, download, or upload a different template, and adjust tokens. Tokens are field names within the PDF document, automatically populated with data from the submitted form. Our account opening application contains the following field names (tokens): First Name, Last Name, Birth Date, Phone, Email, etc. You can learn more about creating and editing a fillable PDF document in this article. We are going to use the PDF template as is, and lets's proceed to the next step, Settings.
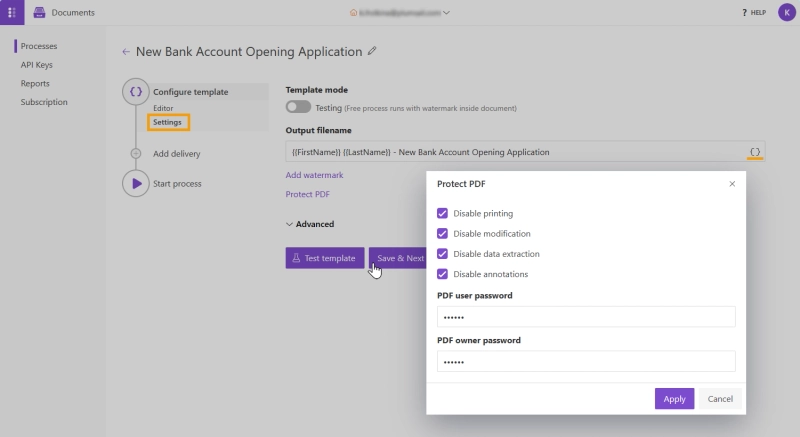
In the Settings step, you can choose the template mode. If you are in the initial setup phase, keep it in Testing mode. Once you're ready to launch, switch to Production.
In the Output filename, enter 'New Bank Account Opening Application', and you can add tokens from the document template, such as {{FirstName}} {{LastName}}, to make the filename dynamic. This ensures custom data is applied each time, making it easier to locate and organize the application documents.
Additionally, you can add a watermark and protect the PDF file with a password. Given the sensitive nature of account opening form information, we'll set a password. Click Save and Next.
The next step in the process is to Add delivery. We need to ensure that the Bank Manager receives bank application forms as PDF files via email automatically. For email delivery there are several options: Gmail, Outlook, Zoho Mail and any other email provider through an SMTP server connection. We'll go with Zoho Mail. Once you select the email agent, log into your account, and click Save & Next.
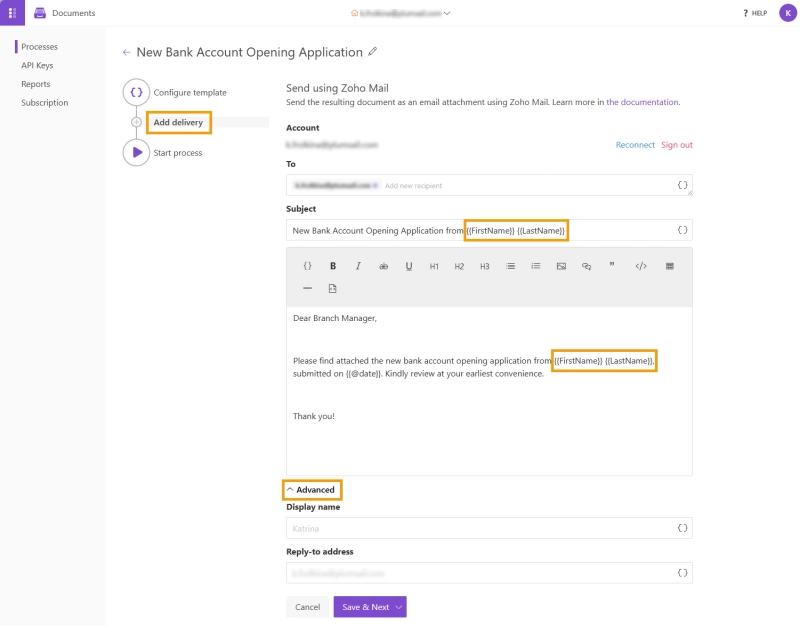
Now, let's customize the subject line, body of the email, and add recipient email addresses. All these fields can be populated with {{tokens}}, allowing dynamic changes based on the information submitted in the application. Here's how our template looks.
In the advanced settings you can customize the Display name and Reply-to address. Click Save & Next.
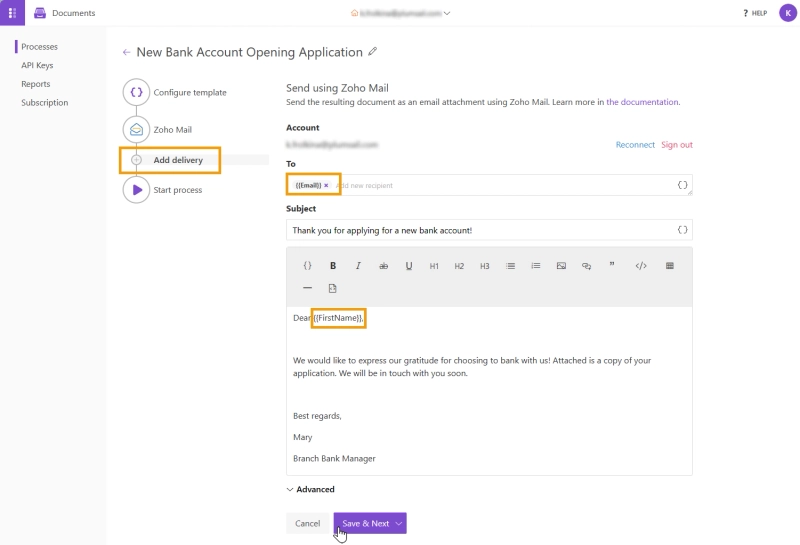
We can also add another email delivery, so new customers get their copies of the account opening form. It can look like this:
After successfully configuring the deliveries, proceed to the last step, Start Process. The system creates an auto-generated form based on the PDF template configured at the start of the process, making it simple and practical. You can customize it or create a new form. However, we will connect a sample bank account application form template available from Plumsail Forms. Learn how to do this in the next step.

Below is the Bank Account Opening Form we are going to use. Simply click on Use this template. Alternatively you can go back to plumsail.com, choose Public Web Forms, and click Templates where you will be able to find this form template and many others.
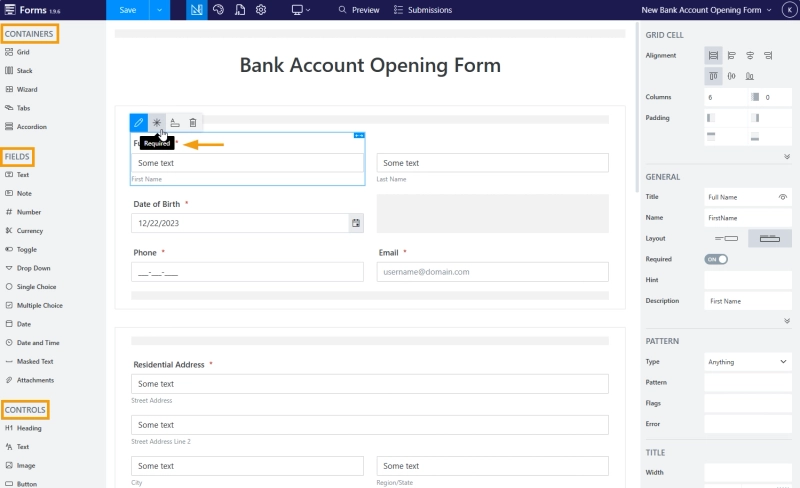
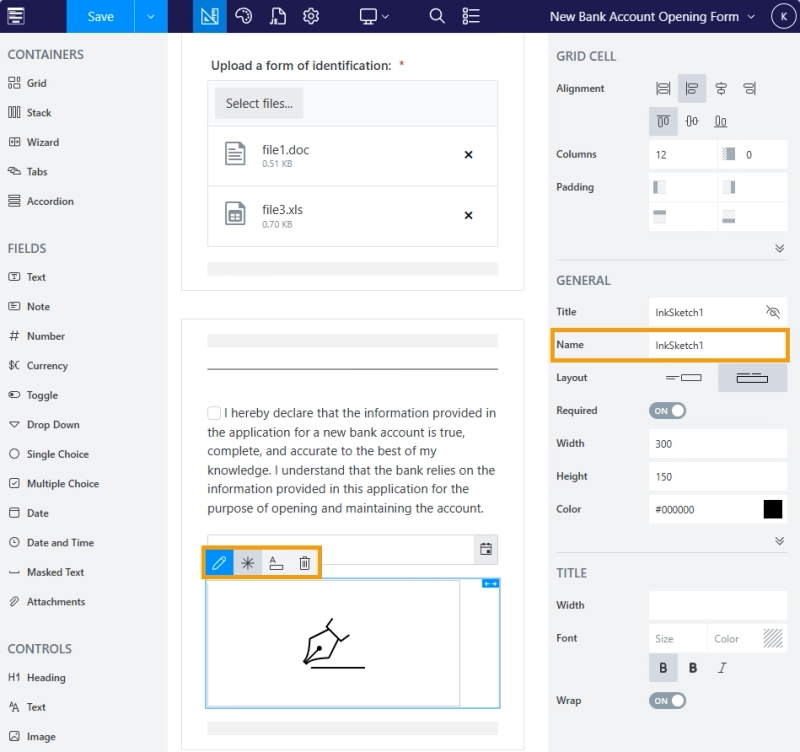
The sample bank application form is ready to use with most of the required fields already set up. However, you can customize it to match a credit card or a personal loan application requirements. You also have the flexibility to add fields such as TAX ID number, employment information, gross annual income, etc. Simply drag and drop Fields and Controls from the left side panel. You can also redesign the look of the template by utilizing different Containers. For instance, you can enhance the design by adding tabs or a grid.
As all the fields are necessary for opening a new bank account, we'll mark them all as required. This ensures that the form is submitted only when all the information is provided.
The form, on its own, will efficiently handle submissions. In the account settings, you can configure notifications for each form submission and enable submission storage for a specified number of days or indefinitely. However, if you wish to include an automatic email or other delivery of a PDF account opening form, this is where the Documents process comes into play.
Let's double check that the field names in the form correspond accurately to the tokens in the Documents PDF template, ensuring the correct placement of data in the final document.
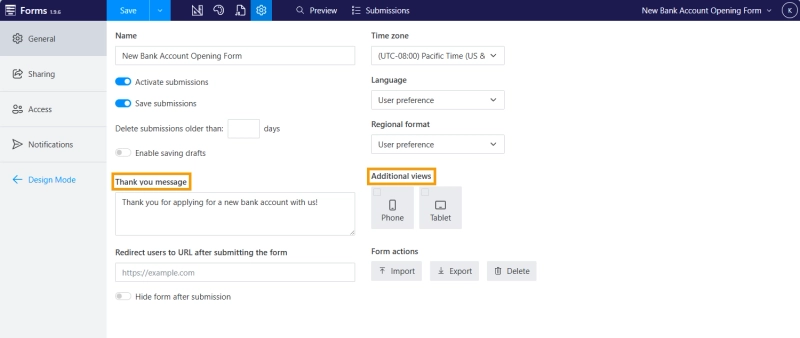
After you finish customizing the form according to your requirements, click on Preview to ensure everything looks good. Adjust settings such as saving submissions, language, or notifications as needed. Additionally, design the form to be responsive on various devices, including desktops, phones, and tablets. Once satisfied, click Save.
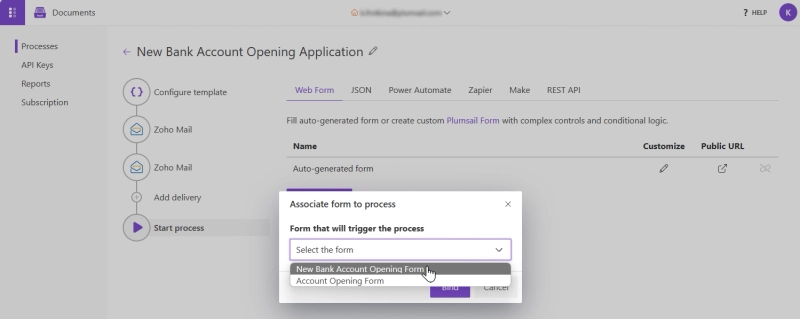
Let's return to our Documents process to connect it with this sample bank account application form. Click Bind existing form and a window will pop up with all the forms saved in your Plumsail Forms account. Choose the 'New Bank Account Opening Form' and click Bind. You're all set!

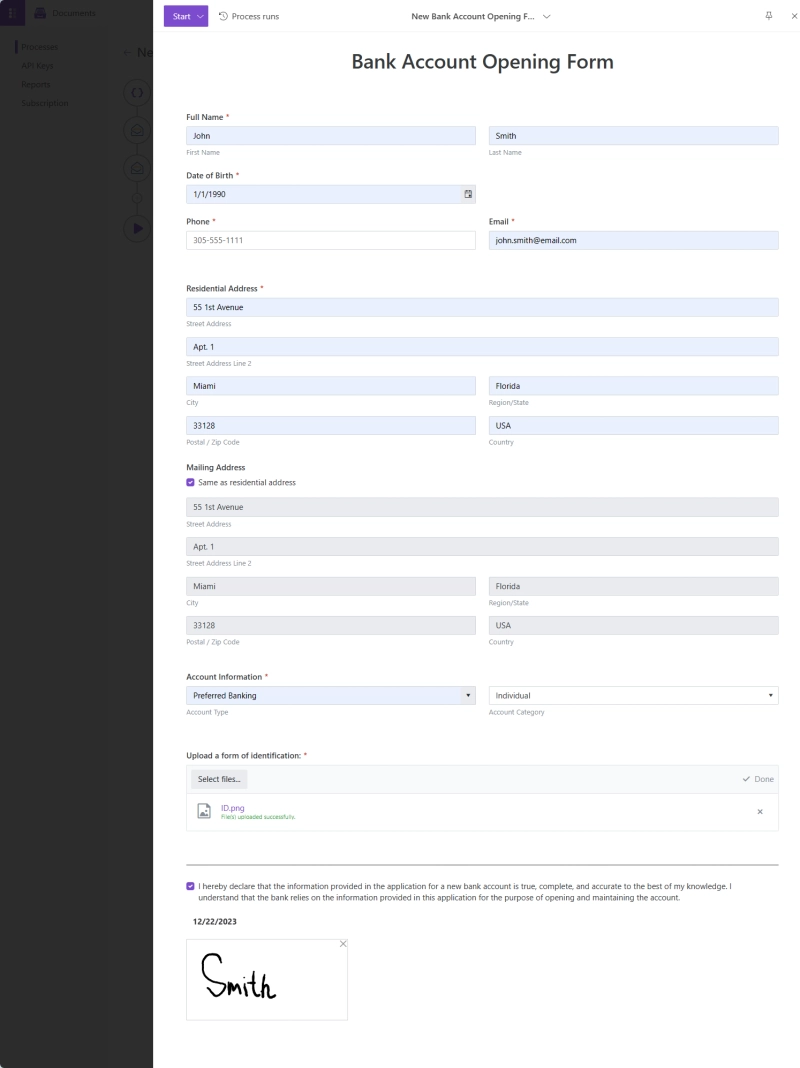
Now, let's test the PDF generation process by clicking on the form and filling it out, which, in turn, will trigger an automated document generation process.
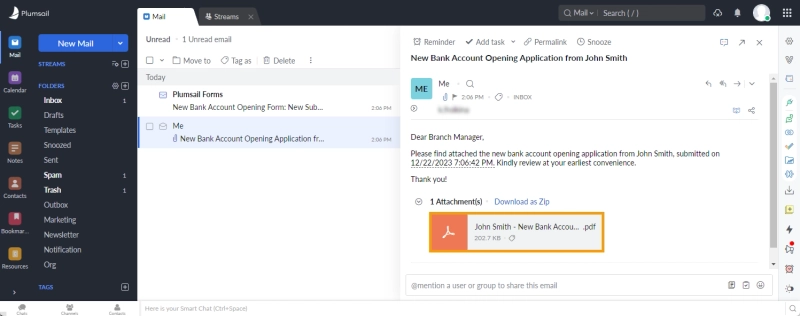
Let's check our inbox. The email with a PDF file attached has been delivered, displaying all the information collected in the application form. Additionally, we received an email from Plumsail Forms notifying us of a new form submission. If you wish, you can disable this feature within the form settings.
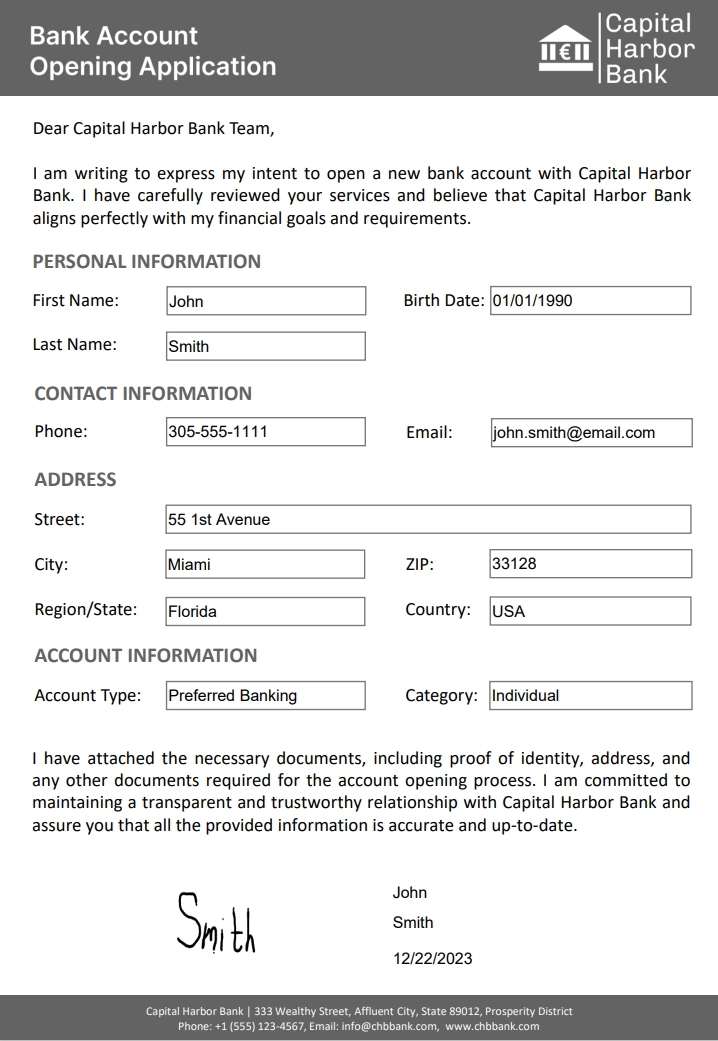
Bank account opening application PDF form is completed, signed and ready for the manager's review:
After confirming that all the steps work well, activate Production mode in the Document Process and proceed to share the form's URL or embed it on your website. You're all set!
Storing application supporting documents, like a copy of a passport or ID, is crucial for a bank to maintain client records, prevent fraud, and ensure compliance with regulatory requirements. So, as an additional step you can use Plumsail Forms trigger and actions to create a simple Power Automate flow to store the attachments submitted with the bank account opening applications to a OneDrive folder. Alternatively, you have the option to store attachments in a SharePoint library, Dropbox, Google Drive, etc. This step can help you optimize storage in your Plumsail Forms account and maintain all the records for future reference.
It's important to highlight that attachments are automatically saved with each form submission in your Plumsail Account. You have the flexibility to enable or disable this feature at any time.
Here's the full flow:
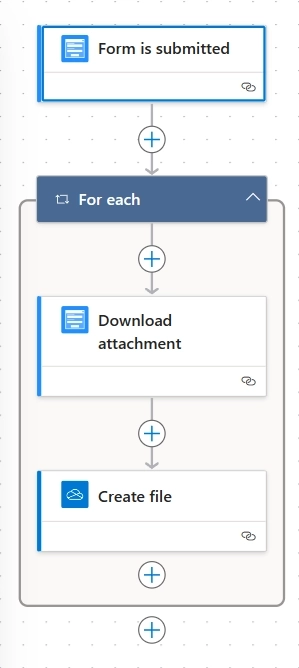
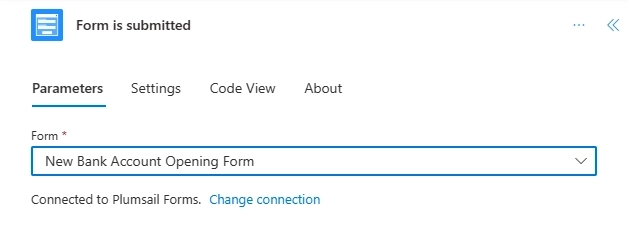
First, let's navigate to Power Automate and create an automated cloud flow. In the pop-up dialog, in the Choose your flow’s trigger field, search for Plumsail Forms and select the Form is submitted trigger. Proceed by choosing the specific form, in this case, 'New Bank Account Opening Form', which we've been working with. It's worth noting that this trigger, along with three distinct Power Automate actions, is included with your Plumsail Forms account. Find more information here.
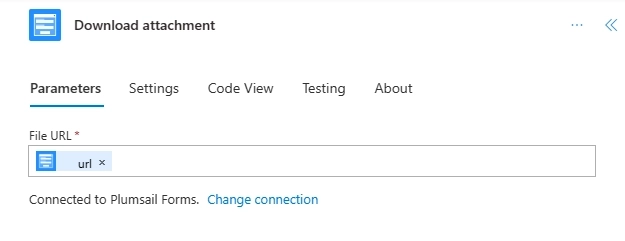
Next, add a Plumsail action Download attachment, and for the File URL select dynamic content 'url' available from the trigger.
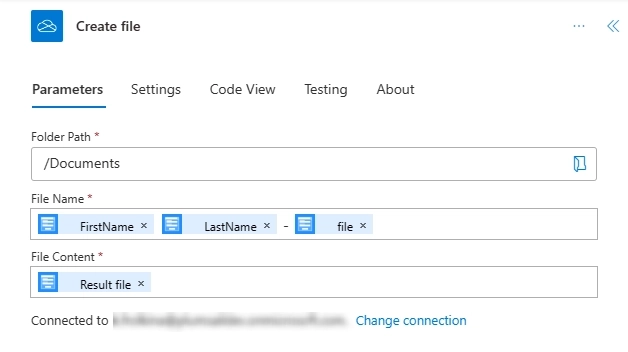
The final step is to save the attachment to a OneDrive folder. Locate the OneDrive action Create file and specify the folder where the attachment files should be stored.
In the File Name, include 'FirstName', 'LastName' and 'file' for easy identification. For the File content, select the 'Result file' from the preceding Plumsail action Download attachment.
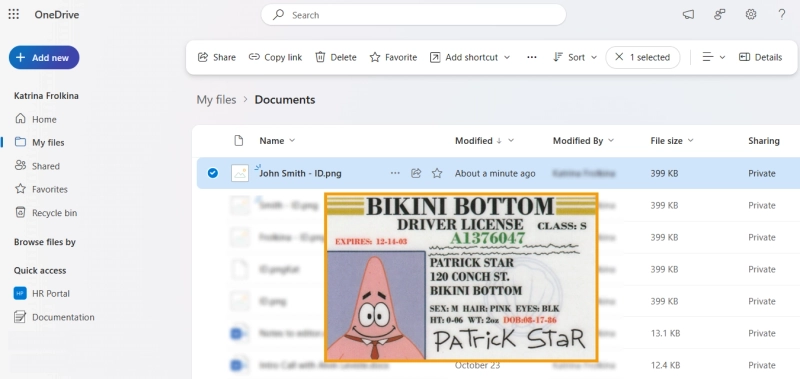
Let's test this flow by completing the form and attaching a file. Afterwards, check the specified OneDrive folder, and as you can see the attached file is successfully saved.
You can effortlessly create an automated bank account application process on your own or set up a similar process using this logic with the help of Plumsail Forms and Documents. For a more in-depth understanding, delve into our blog, community, and dedicated documentation for both Forms and Documents.
If you have any questions or require assistance, reach out to our support team or schedule an intro call. We provide help and guidance to beginners and experienced users alike.