
Remote Employee onboarding with Microsoft Teams and SharePoint HelpDesk
A couple of trick to facilitate the remote employee onboarding with the help of MS Teams and HelpDesk for SharePoint
Between 2019 and 2021 the number of people primarily working from home tripled according to U.S. Census Bureau. As of 2023 12.7% of full-time employees work from home and additional 28.2% have a hybrid working arrangement. By 2025, 32.6 million Americans will work remotely according to Upwork.
In this article we will describe how SharePoint Online could be a great solution to collaborate with a remote team and will describe how to create employment documents from the SharePoint list item with the help of Plumsail Documents in Power Automate. This can help you better adapt to upcoming changes.

In addition, we also encourage you to explore the principles of document creation for remote employees by watching the video featured on our YouTube channel.
Let’s assume you have a list on the SharePoint team site with all the employees. If not, create one. When you hire a new remote employee, add a new item to this list. It will contain information about a newcomer.
Here is our sample Employees list:

These are list columns we added:

This step is optional. You can use a standard SharePoint form. However, if you want nice looking and user-friendly form, take a look.
With the help of Plumsail SharePoint Forms, we have adjusted forms. Now when adding a new item, or editing the current one, or just opening to view the info, Personal, Employment or Documents attached information, you can find it in the separate tabs.
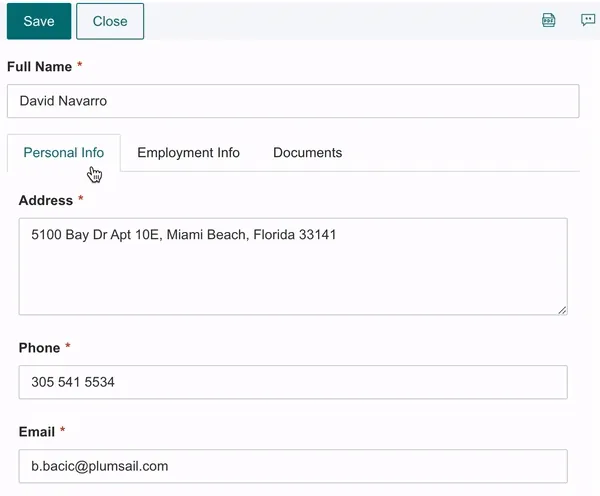
Plumsail Forms for SharePoint allow customizing forms for any SharePoint list or library. Learn more in the documentation.
The following two steps are:
Processes are an easy way to automate the creation of documents from templates.
First, we create a new process. For that, we log in to the Plumsail account.
Let’s call our process Employment contracts.
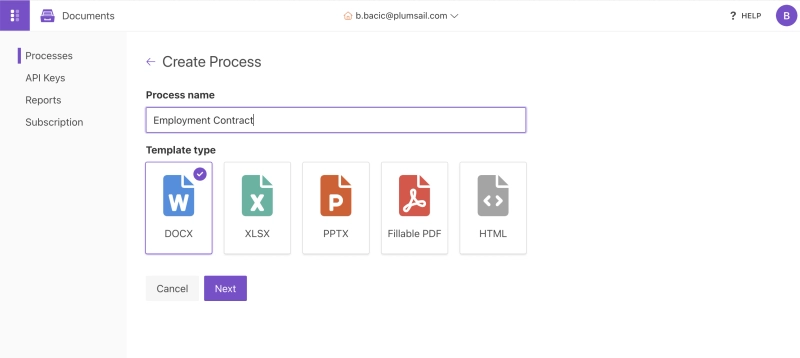
We can upload an employment contract template in a DOCX format. The DOCX template has tokens. They will be replaced by data from the SharePoint list item.

Here is our sample hiring contract template for download. Use it for testing, customizing. Or create your own template — place tokens in employment contracts you use in your company. Check out the documentation on how DOCX templates work for more information.
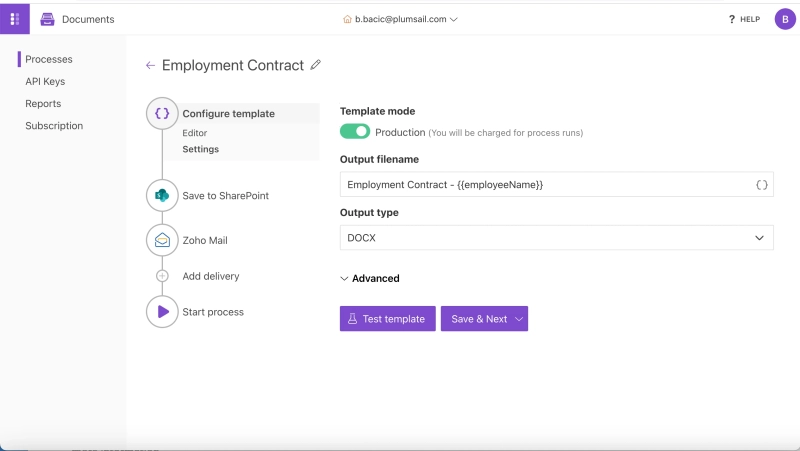
On the next step Configure template, we define the result agreement name and its type.
Use tokens to make the result file name precise and recognizable. For instance, we assigned the following name Employment agreement {{employeeName}}. It will turn out the Employment agreement Jessica Adams in our sample case.
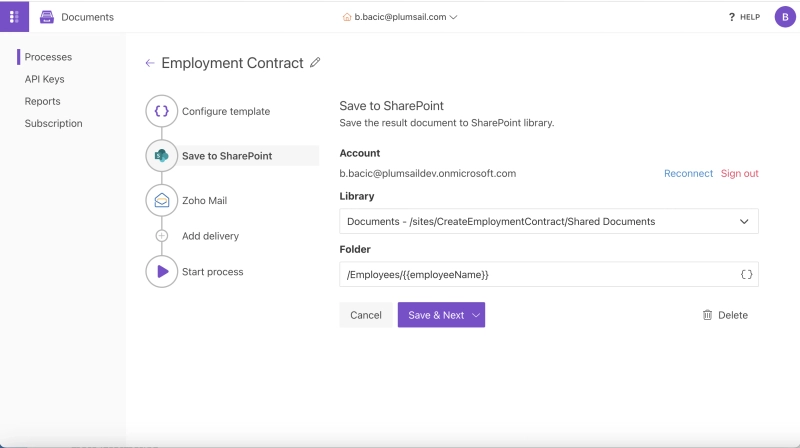
The next step is setting deliveries. The process saves the result file depending on its delivery settings. We suggest adding SharePoint delivery to store the result working contract in the SharePoint document library.
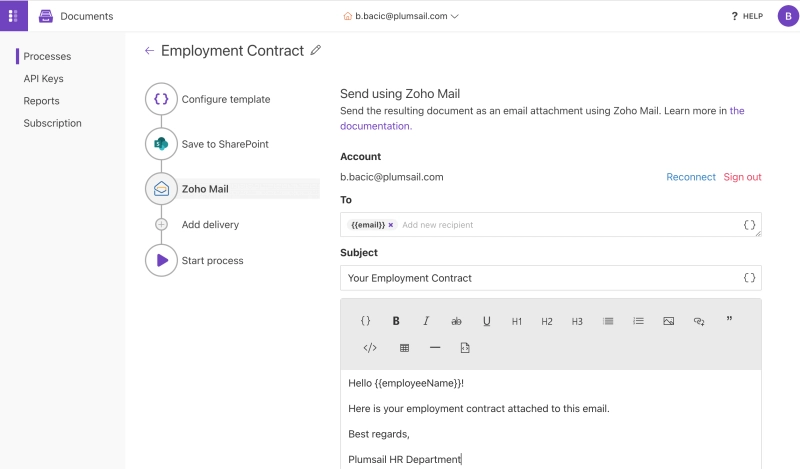
Another delivery option for your Employment contract which we can add in this instance is to be automatically sent via email. In here different options are offered such as Gmail, Outlook, Zoho and others. In this case we used Zoho email delivery.
You can start a process manually, but we suggest configure a Power Automate Flow to start it on a selected SharePoint list item.
For example, we have hired a new IT Specialist David Navarro; we need to create an employment agreement for him. For that, we select him in the Employees list and start our Flow “Create Employment Contract”:

Below is a picture of the complete Flow:
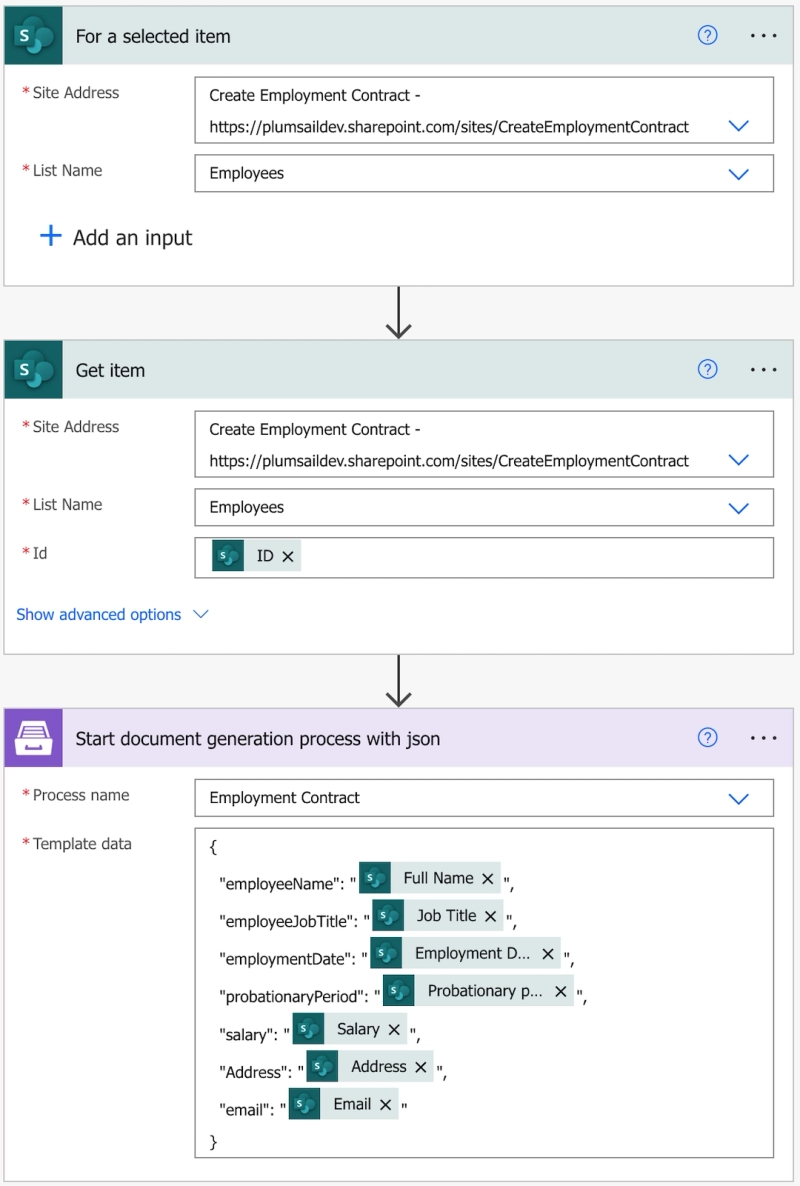
We trigger the Flow with a SharePoint connector trigger — For a selected item. It allows us to start the Flow for any item in the SharePoint list.
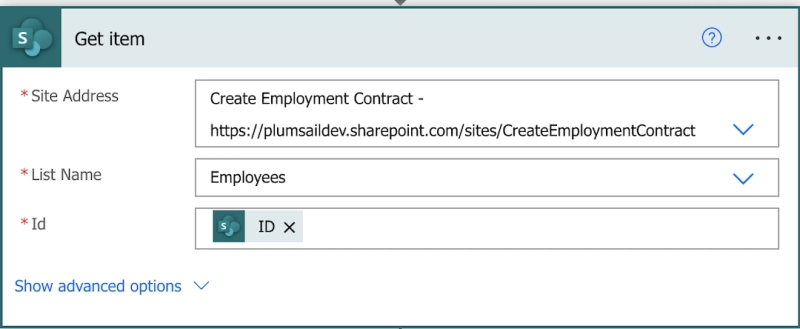
This action from the SharePoint connector retrieves the information about the selected employee. The outputs are dynamic and present all the list columns like Full Name, Position, Salary — all we added for our needs. We’ll use these outputs in the next step.
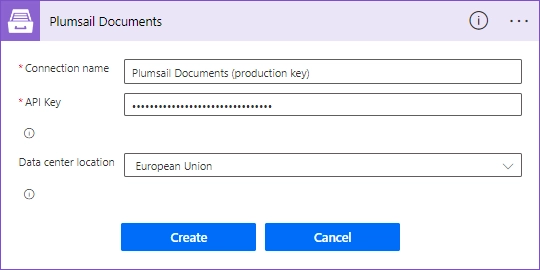
This action is from the Plumsail Documents connector. It starts our Process of creating employment contracts from a DOCX template.
Using the action for the first time, you need to create a connection. Type any name for the connection name — for example, Plumsail Documents (production key). Then create an API key in your Plumsail Account. Copy and paste it to the API key field. Ensure that the selected data center location matches one of your account and click Create.
Start document generation process action has two parameters:
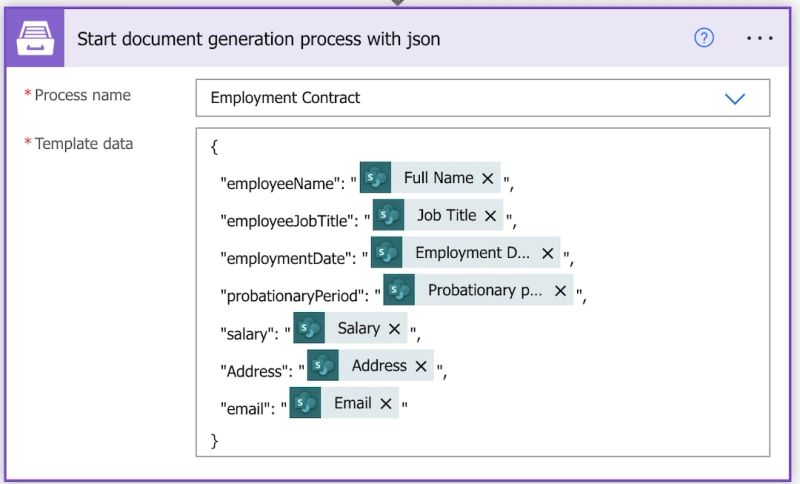
This object contains information from our SharePoint item. We selected the dynamic content from the output of SharePoint — Get item action.
This is how the outcome looks like:
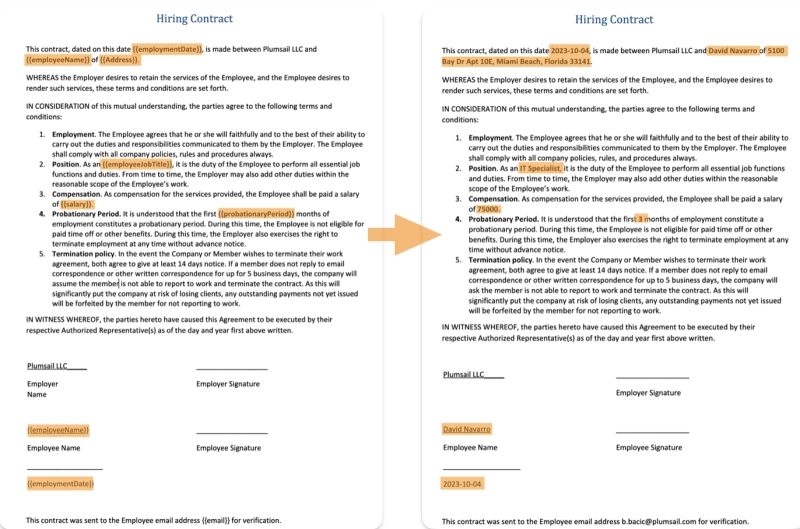
You can use this approach to create any document based on SharePoint list data.
We have other useful stuff for optimizing documents flow for remote teams:
Sign up and get a 30-day trial for free if you don’t have Plumsail Documents yet.