Plumsail Documents enables you automatically populate PDF forms with your data. Also, you can prevent PDF form from onward editing and flatten PDF fields.
We'll review two scenarios of how you can fill in and flatten PDF forms with Plumsail Documents and Power Automate.
Fill in and flatten PDF using Fill in PDF form action
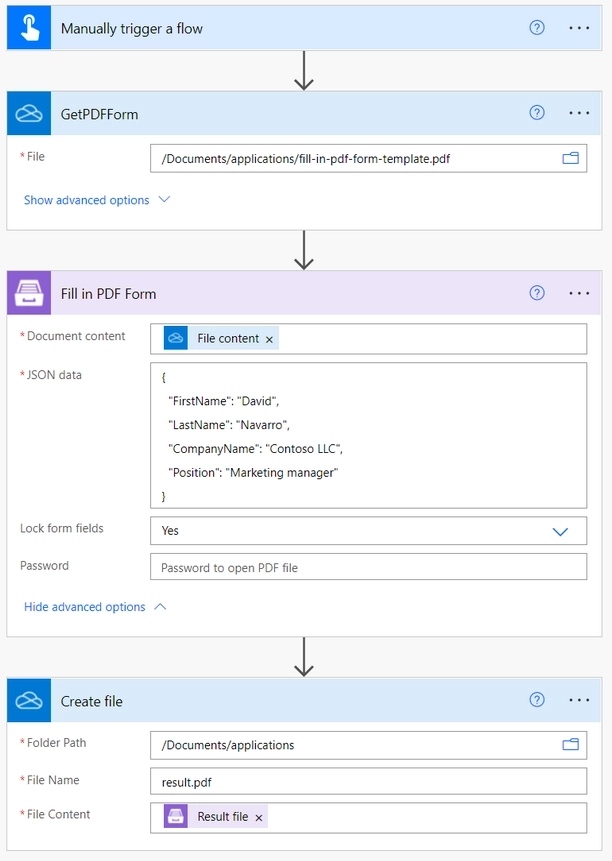
For example, we store a PDF form in One Drive folder. The goal is to upload it, fill and then close the PDF form to prevent further editing .
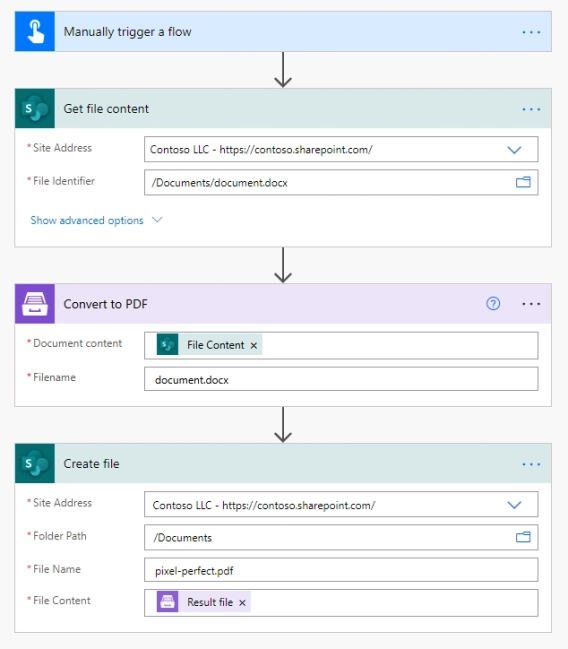
I created a simple flow to show how this works. GetPDFForm action is a OneDrive action Get file content. It uploads the source PDF Form.

You can retrieve the source PDF file from any repository. I used the OneDrive folder but it could be a SharePoint folder, DropBox, Google Drive, etc.
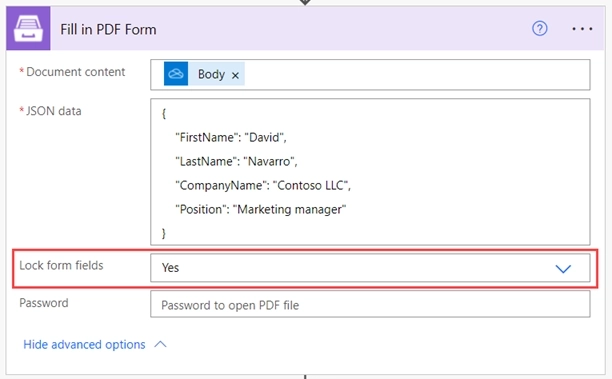
Then I added a Fill in PDF Form action from the Plumsail Documents connector for Power Automate.
It has 2 mandatory fields: “Document content” and “JSON data”. I select the uploaded PDF form as a dynamic content of the previous GetPDFForm action and insert some test JSON data to fill the PDF.
To prevent further editing I set the option “Lock form fields” to “Yes”. It’ll “merge” the existing form into result pdf file and it won’t be possible to edit it again.
Finally, I create a result PDF file in a OneDrive folder. This is the whole flow:
Fill in and flatten PDF using Start document generation action
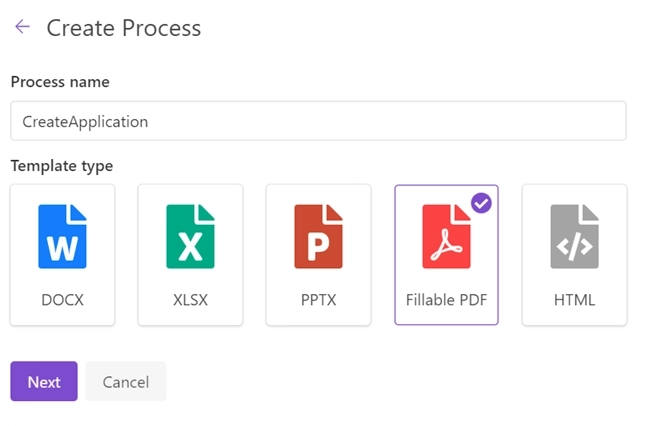
Another possible scenario is using Processes and Start document generation action in Power Automate.
Firstly, we create a process:
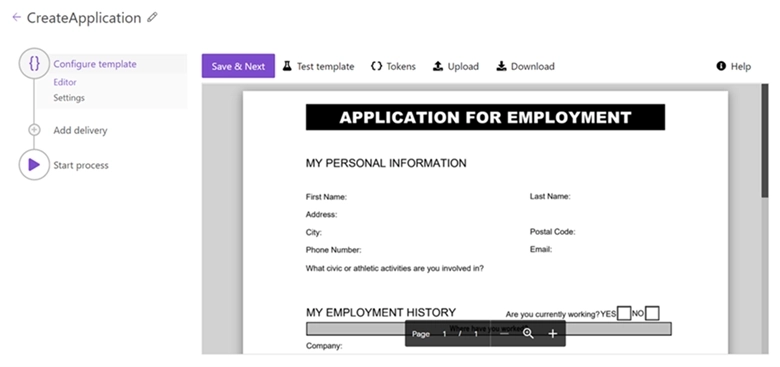
Then I upload the source PDF to the embedded editor:
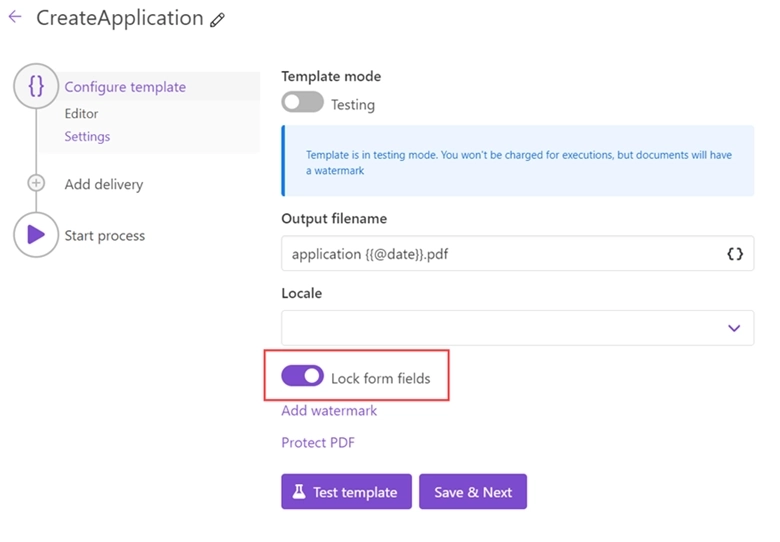
Then I move to the Settings step. There are some options like “Output filename” and “Locale”. Also, I can activate “Lock form fields ” to prevent further editing of the result PDF. It’s the same “Lock form fields” option that was discussed in the first part of the article.
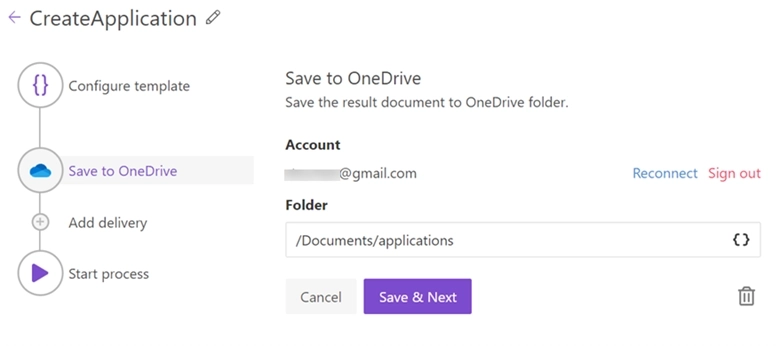
Then I go to the “Delivery” step, connect to OneDrive and select a folder:
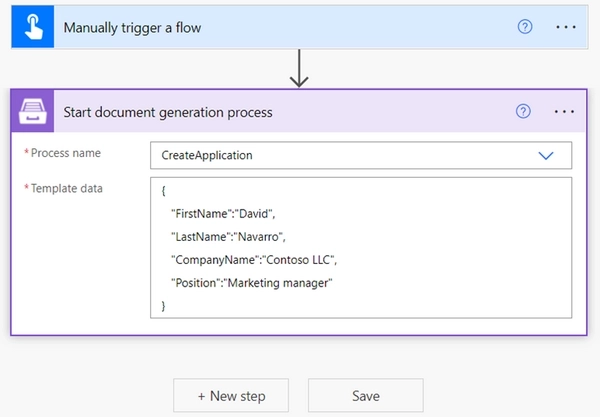
Creating of the process is done. We’ll start it in Power Automate with Start document generation process action.
The whole flow looks like this:
Getting started
Start a free 30-day Documents trial on our website to try these features.
If you have any questions, contact us at support@plumsail.com