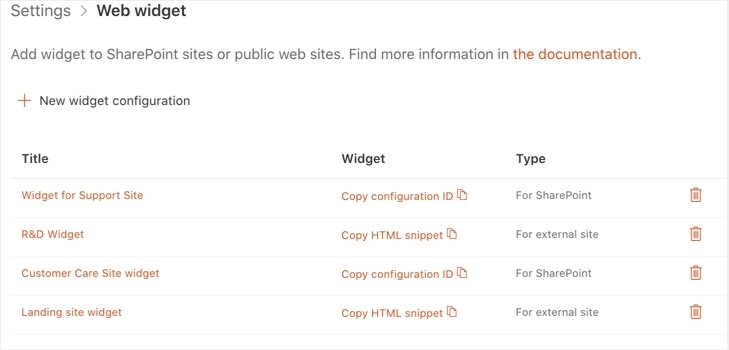
The Microsoft 365 ticketing system by Plumsail offers your customers a handy way to create, view, and reply to their help desk requests with the web widgets. The widget can be placed on either a SharePoint site or on external sites. You can also create multiple widgets for different categories of your requesters.
Add new widget view
The recent update of the Plusail HelpDesk has brought a feature to create new views for the widget. You can filter your user’s tickets and group those under tabs. Your customers will be able to navigate their tickets with tabs set for different categories, tags, statuses, and any other ticket properties and their combinations.
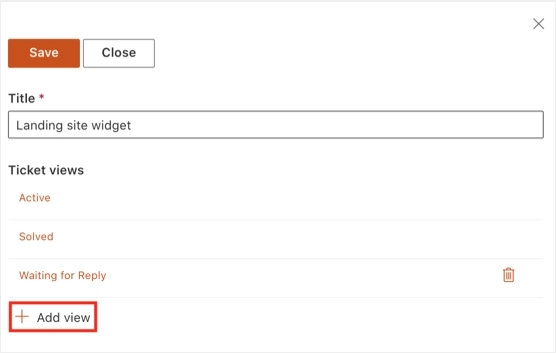
There are two settings to set up for every widget view:
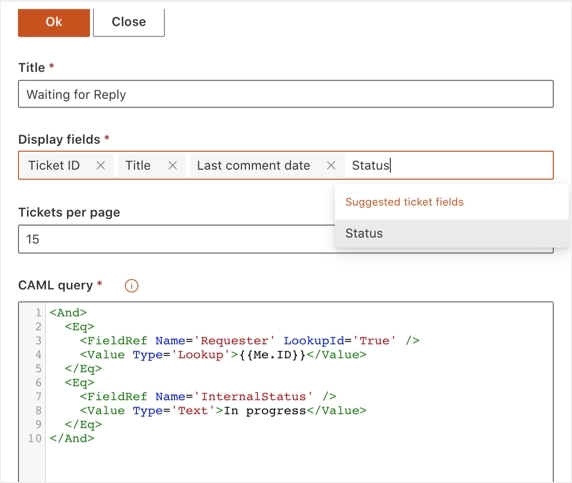
- You can choose the ticket fields to be displayed;
- You can tune the CAML query to filter the tickets for the current view. This example with return the tickets that have been replied to by the Support agent.
CAML query explained
On the example above, we use two conditions to filter the customer’s tickets.
- First, we filter the tickets for the current user as a requester with the help of
{{Me.ID}} token:
<Eq>
    <FieldRef Name=’Requester’ LookupId=’True’ />
    <Value Type=’Lookup’>{{Me.ID}}</Value>
</Eq>
- Second, we filter all the tickets with the status “In progress”. This usually means that the ticket has been replied to by a Support agent and is waiting for the customer reaction:
<Eq>
    <FieldRef Name='InternalStatus' />
    <Value Type='Text'>In progress</Value>
</Eq>
- Finally, we use
<And> …</And> group to combine both conditions.
A new tab for the view
Now the customers will have a separate tab for the tickets that require their attention:

Install Microsoft 365 HelpDesk
If you are not yet a user of Plumsail HelpDesk, please feel free to take full advantage of a one month trial period. Download the installation wizard and follow a simple guide.
If you have any questions at all, please don’t hesitate to contact us. Please, post a topic in our Community, or drop us a message to support@plumsail.com.