Convert Word to PDF using Power Automate

Step 1. Get Word file content
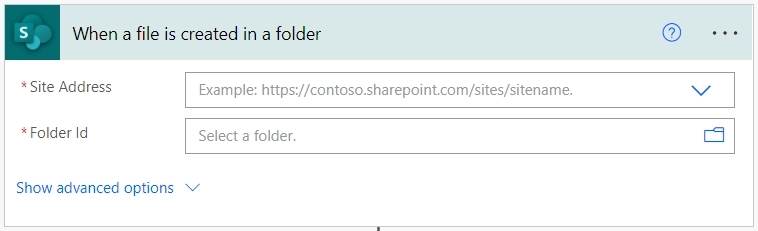
We'll convert new Word files in the SharePoint folder to PDF format automatically. We set the trigger When a file is created in a folder from the SharePoint connector:

Step 2. Convert Word to PDF
Now we can add an action from the Plumsail Documents connector to convert all freshly added DOCX'es to PDF. Once you added the action Conver DOCX to PDF from the Plumsail Documents connector, you will be asked for the connection name and access key:

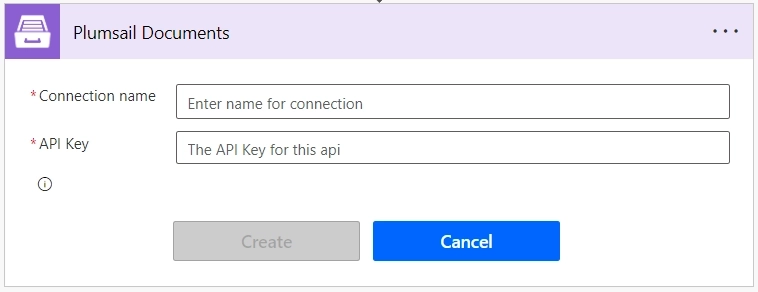
Type any name for the connection name. Then create a free Plumsail account.
In the API section, create a new API key, then copy and paste it to create a connection in Power Automate flow. Now you can set the action Convert Word to PDF. Just insert File content from the dynamic output of the trigger:


That's it. All that's left now is to create a file to store the result of the PDF conversion.
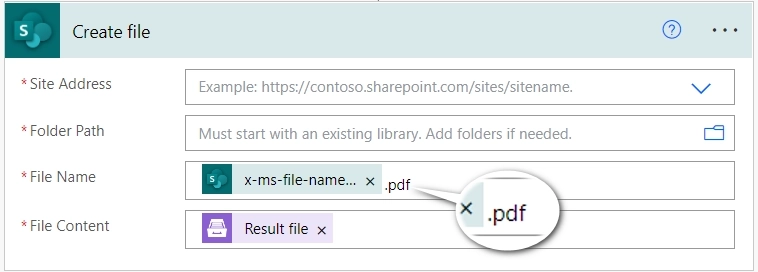
Step 3. Store PDF file
We'll save the PDF document into another SharePoint library folder. Do not forget to specify an extension as PDF:

The Plumsail Documents connector provides more actions for converting other Microsoft Office formats to PDF. You can convert Excel sheets, and PowerPoint presentations to PDF as well.
What people say about Plumsail Documents