Forms
May 07, 2018
Provision modern forms for SharePoint Online programmatically (Office365)
Provision modern forms for SharePoint Online programmatically (Office365)

Are you a Sharegate user? If so, I would love to show you our modern and responsive forms for Office365 and how you can use Sharegate to migrate them.

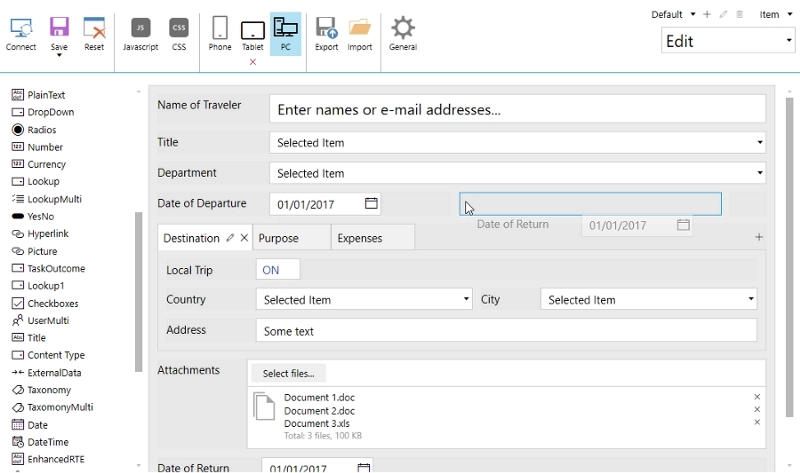
Plumsail Forms product allows you to design complex custom forms for SharePoint Online Modern UI with tabs, accordions, custom controls, rich JavaScript API, mobile layouts, automatic redirection for groups and much, much more. You can find out more about Plumsail Forms for SharePoint here.
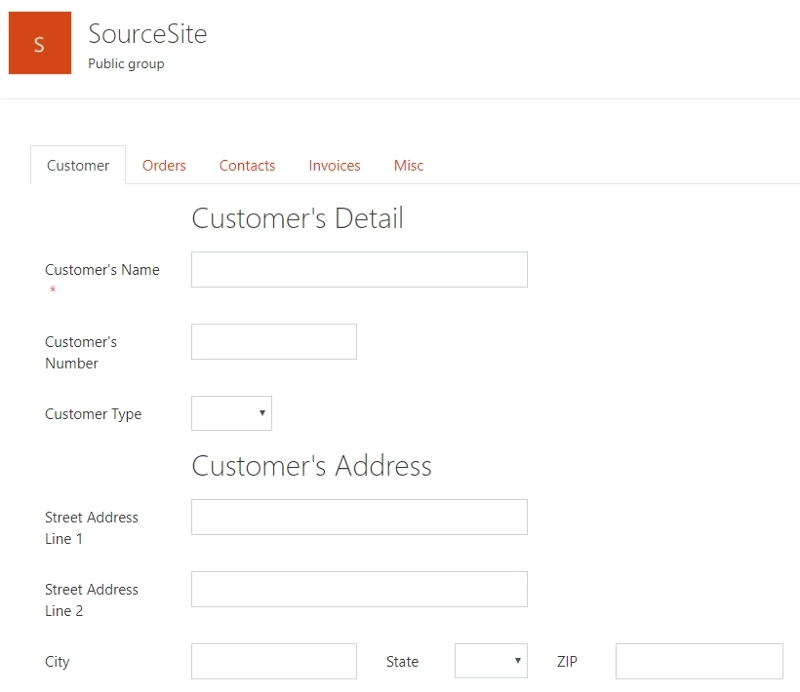
Here I have an example form on my Source Site:
Now, let’s say I want to have the same list available to me on another site. Before I can actually copy Structure to my Destination Site, I need to create it and make sure that it has Plumsail Forms Installed. I should also activate Custom scripting capabilities on it.
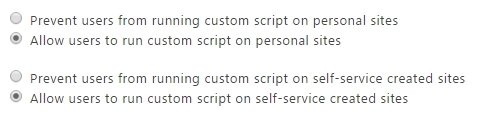
If you are using SP Online Team Site you will need to use Powershell in order to enable scripts. The following command can be used for Team Sites, and for other sites, to instantly enable custom scripts. First, connect to SharePoint:
$adminUPN="<the full email address of a SharePoint Online global administrator account, example: jdoe@contosotoycompany.onmicrosoft.com>"

$orgName="<name of your Microsoft 365 organization, example: contosotoycompany>"

$userCredential = Get-Credential -UserName $adminUPN -Message "Type the password."

Connect-SPOService -Url https://$orgName-admin.sharepoint.com -Credential $userCredential
Then, after establishing a connection, run this command:
Set-SPOsite <group site URL> -DenyAddAndCustomizePages 0This will instantly enable custom scripts and ensure that important web parts can be copied to the site. After all this preparation, we can use Sharegate’s Migration tool. Open Sharegate, go to Migration and select Copy Structure.
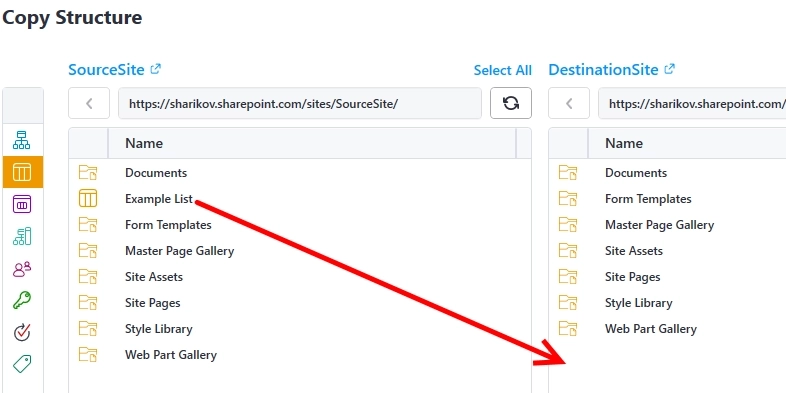
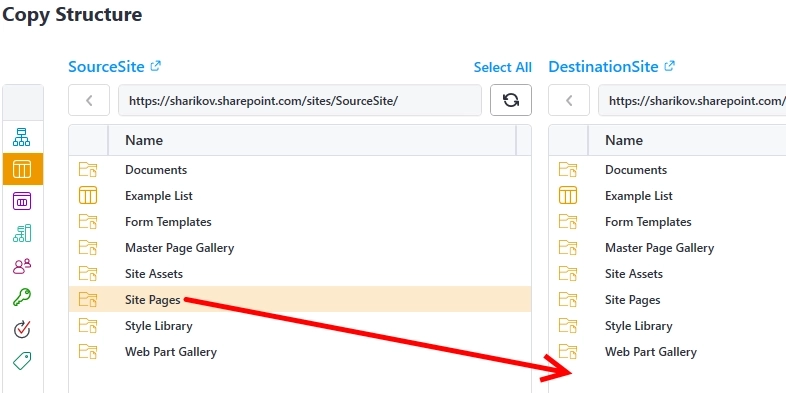
You will need to select Source and Destination sites. Choose the site with the forms as your source and the site you’ve prepared as a destination site. Now, you will need to copy lists that contain custom forms:
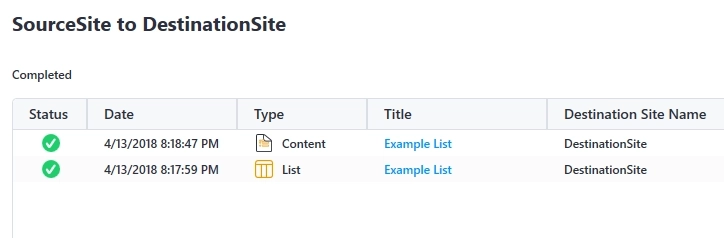
Wait for the process to finish and make sure there are no errors. If you get an error saying that custom web part cannot be created, please, make sure you’ve enabled the scripts on the Destination Site.
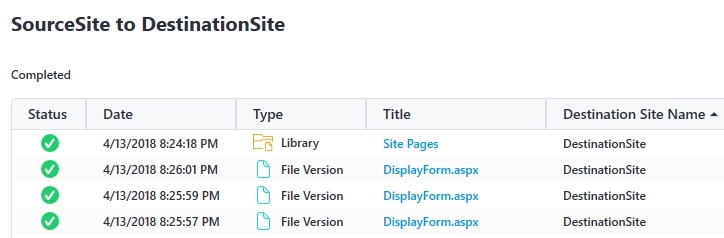
Next, after copying the lists, you need to copy the Site Pages as well. The forms are actually stored in Site Pages, so there will be more files there. Just copy the whole folder, it might take awhile depending on the amount of custom forms you have.
After the pages have been successfully copied, you should be able to open the lists we’ve just copied, use these forms straight away when creating new items or changing existing ones. You should also be able to connect to these lists via the designer and load these forms, be able to alter and save them.
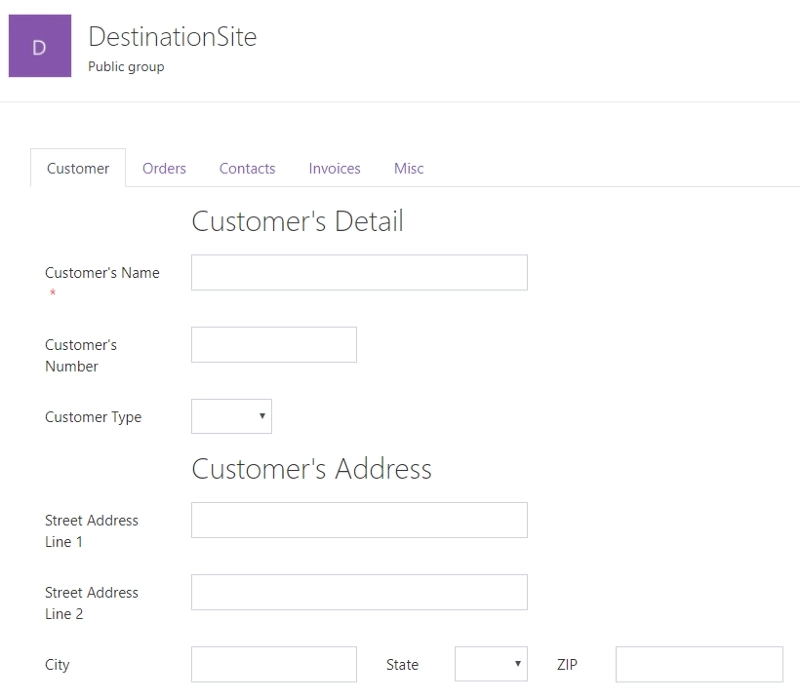
The only limitation that wouldn’t work is automatic group redirection — because groups would be different on the new site. Custom routing should still work though. Here we can see our form in Destination Site already:
This is it — the process is very simple and intuitive. If you liked the article, we recommend to check out our site, for Plumsail Forms and a selection of other products built to work with SharePoint and Microsoft Flow.
Provision modern forms for SharePoint Online programmatically (Office365)
Design and modify On-Premises forms on modern pages
What’s this Modern UI all about?