Forms
Last updated: May 31, 2024
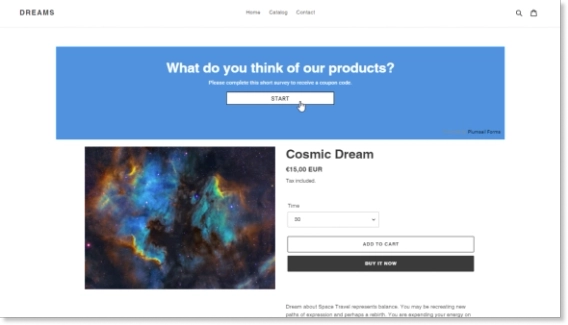
Embed Plumsail form into your Shopify store
Embed Plumsail form into your Shopify store to attract more customers and increase your customer engagement.

QuickBooks is a comprehensive app that helps businesses streamline various accounting tasks. With Make and Plumsail Forms, you can take it even a step further.
Imagine a new lead fills out a contact form on your website. This data is then automatically turned into a new customer in QuickBooks, and an estimate or an invoice is created, initiating the sales process. So, instead of manually entering data from physical forms, emails, or spreadsheets into QuickBooks, you get a less-than-30-second workflow that sends online form data directly to QuickBooks.
In this post, I'll share steps for connecting Plumsail web forms to QuickBooks using Make integration. Specifically, you will learn how to create a new contact and an estimate in QuickBooks from a public web form.
In this article:
You can design a form from scratch or start with one of the Plumsail's ready-made templates.
For this example, I've designed a simple Request an Estimate form:
With Plumsail Forms, you have the flexibility to design a form as simple or as complex as you need. You can add your logo, customize the styling to perfectly match your branding, and much more. Share your Plumsail form by a direct link in an email or embed it directly into your website.
You can follow the instructions below or start with the Create customer in QuickBooks from Plumsail form submission template.
Log in to your Make account and create a new scenario.
If you don't have a Make account yet, start a free 2-month Pro trial.
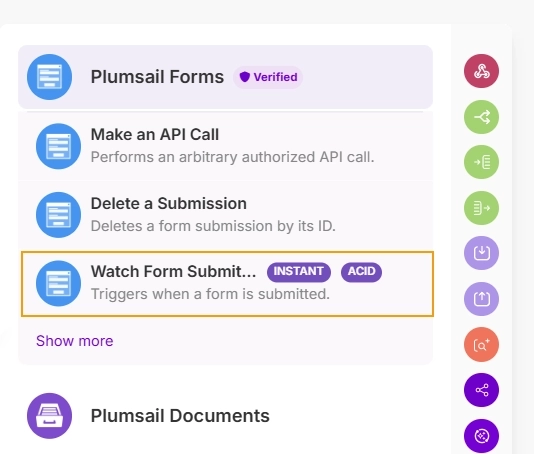
Search for Plumsail and select the Plumsail Forms - Watch Form Submitted module:
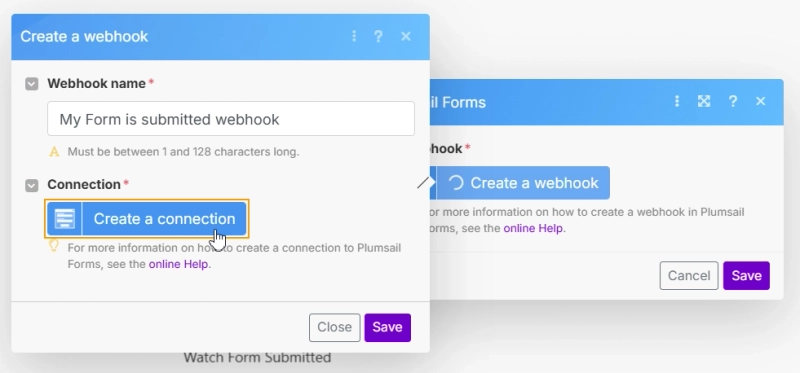
Click Create a webhook. Give your webhook a name and then create a connection to your Plumsail account:
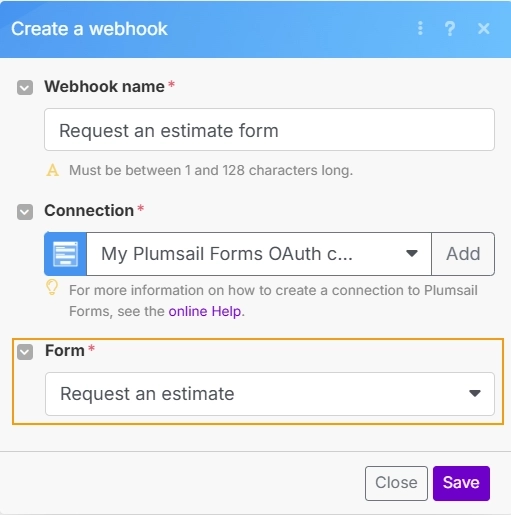
Once you create a connection, you will see a dropdown with all your Plumsail forms. Select the form you want to use for this scenario and save:
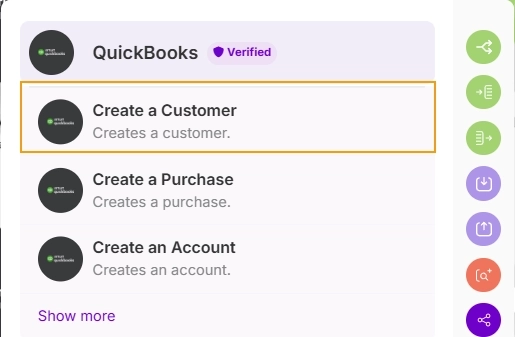
Add a QuickBooks – Create a Customer module:
Tip: If you don't want to create duplicate customer records in QuickBooks, you can first use the QuickBooks – Search for Customers module to check if the customer already exists. Then, use the Router module to either create a new customer or update the existing one. Start with Create or update customer in QuickBooks from Plumsail form submission template.
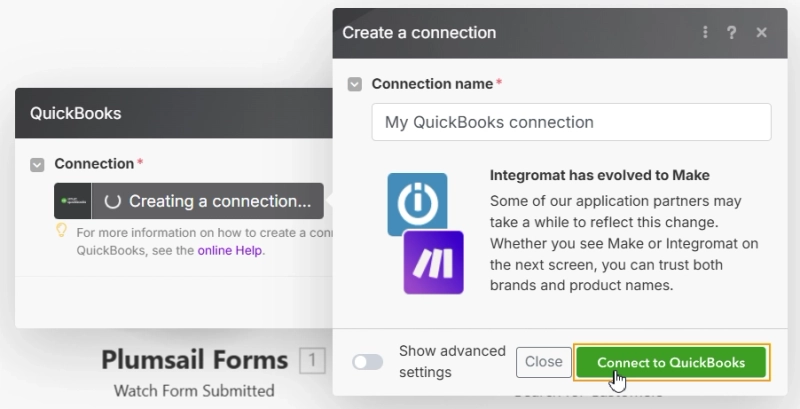
Select a connection to your QuickBooks account or create a new one:
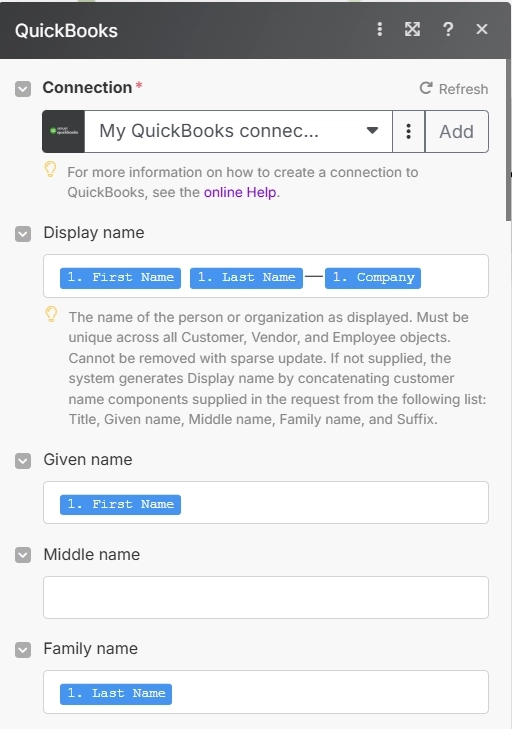
In the Create a Customer module, map the fields from your Plumsail form to the corresponding fields in QuickBooks.
The Display name is a required field, and it must be unique. You can use the email address or a combination of fields to create a unique display name:
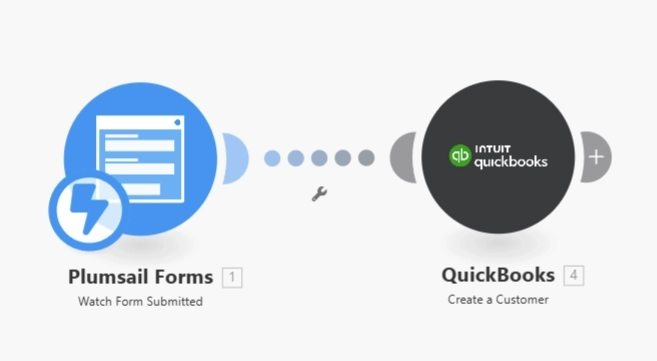
We're done! This is the scenario I created in Make to automatically create a customer in QuickBooks after the form submission:
Save and run the scenario. Now, every time someone submits the form, a new customer will be created in QuickBooks.
This is a new contact automatically created in my QuickBooks account with the data from the online form:

After creating a customer, you can also create an estimate in QuickBooks using Make.
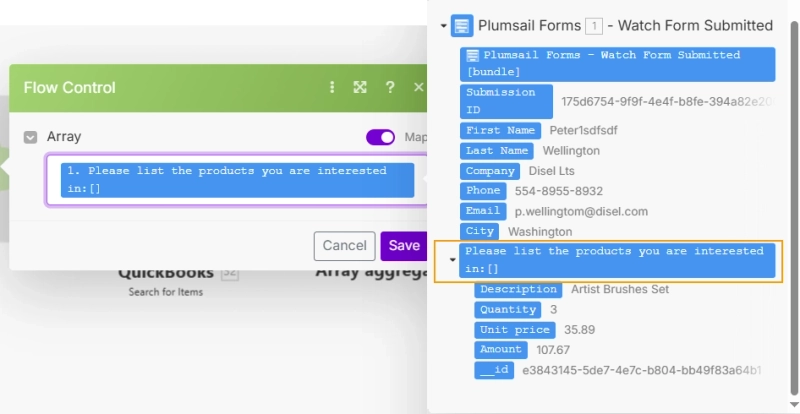
On my form, the lead selects the products they are interested in using a Data Table control. Therefore, we need to read these repeated lines and then create an estimate in QuickBooks with the selected products.
You can either design a new scenario from scratch or use with the Create customer and estimate in QuickBooks from Plumsail form submission template.
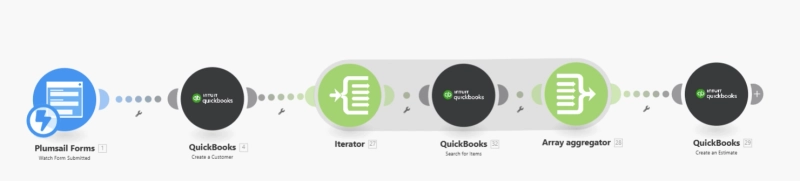
Add the Flow Control – Iterator module. It will iterate through the repeated lines in the Data Table control.
Select the name of the Data Table control from the Watch Form Submitted module in the Array field:
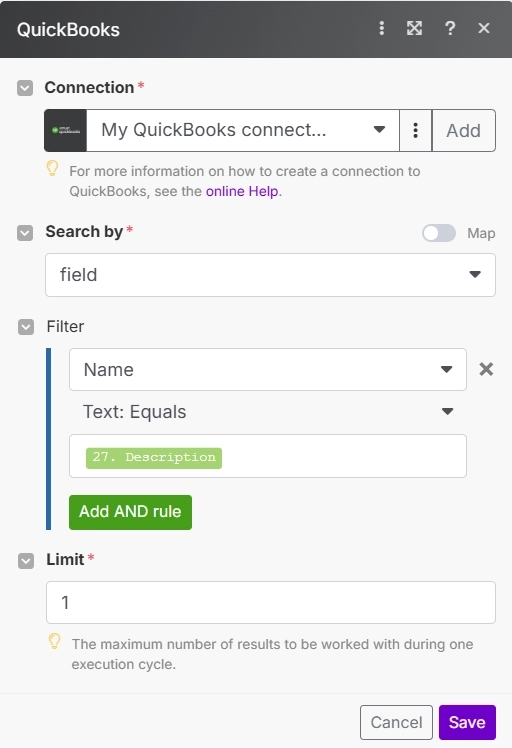
Add the QuickBooks – Search for Items module to find the products in QuickBooks.
We need this step to get the product ID and its price in QuickBooks and then use it in the next step.
In Search by, select Field. In the Filter section, select Name to be Text: Equals to the product name selected in the Data Table control.
This is how the module should be set up:
Tip: You can export the list of items from QuickBooks and use it as a source for a choice column in the Data Table control. This way, you can ensure that the products listed are available in QuickBooks.
Add the Flow Control – Array Aggregator module. It will aggregate the results from the previous steps into an array that can be used to create an estimate in QuickBooks.
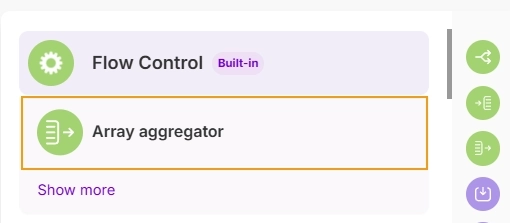
We will get back to this module later to map the fields.
Add the QuickBooks Create an Estimate module.
And go back to the Array Aggregator module.
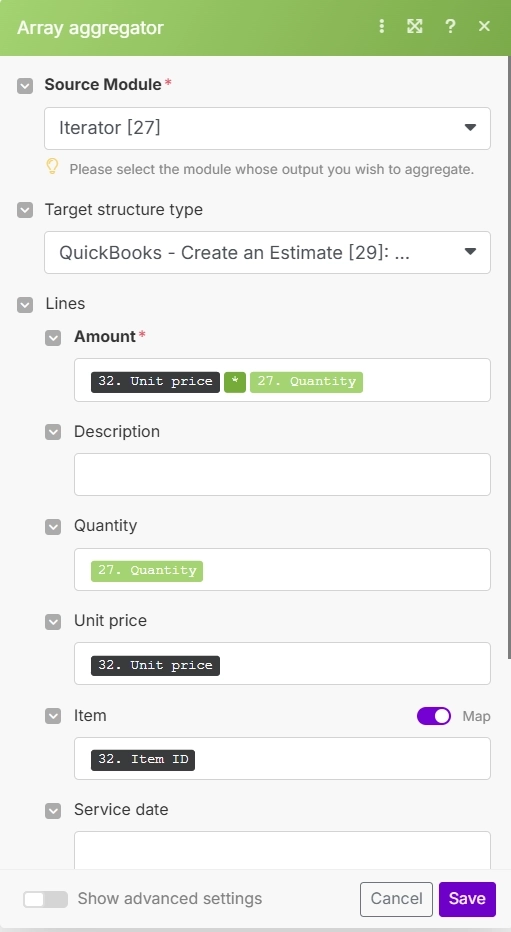
In the Source Module field, select the Iterator.
And in Target structure type field select Lines that are under QuickBooks Create an Estimate:

You will then see the fields required to create an estimate in QuickBooks.
In the Amount field, add quantity from the Data Table control and multiply it by the price from QuickBooks – Search for Items module.
In the Quantity field, select the quantity from the Data Table control.
In the Item ID and Unit price field, select the data from the QuickBooks – Search for Items module.
So the final Array Aggregator module should look like this:
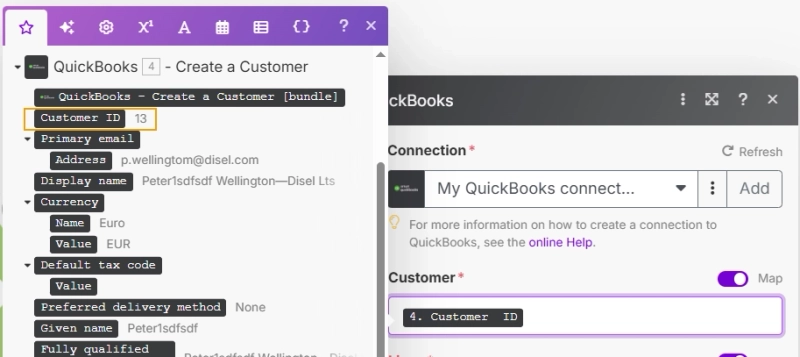
Go to the QuickBooks Create an Estimate module.
In the Customer field, select the Customer ID found in the previous step:
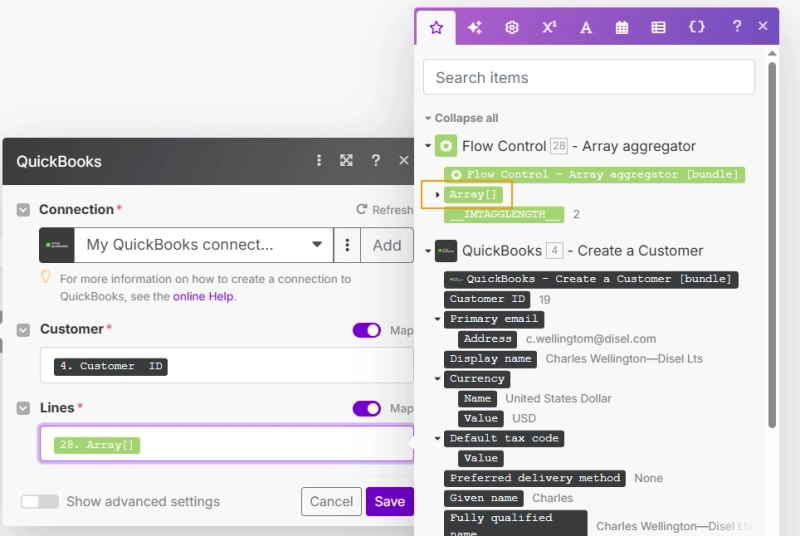
The final step! In the Lines field, select the output from the Array Aggregator module:
This is the final scenario that creates a new customer and an estimate in QuickBooks:
Save the scenario and run it. Now, every time a lead submits the form, a new customer will be created in QuickBooks, and an estimate will be generated based on the products selected in the form.
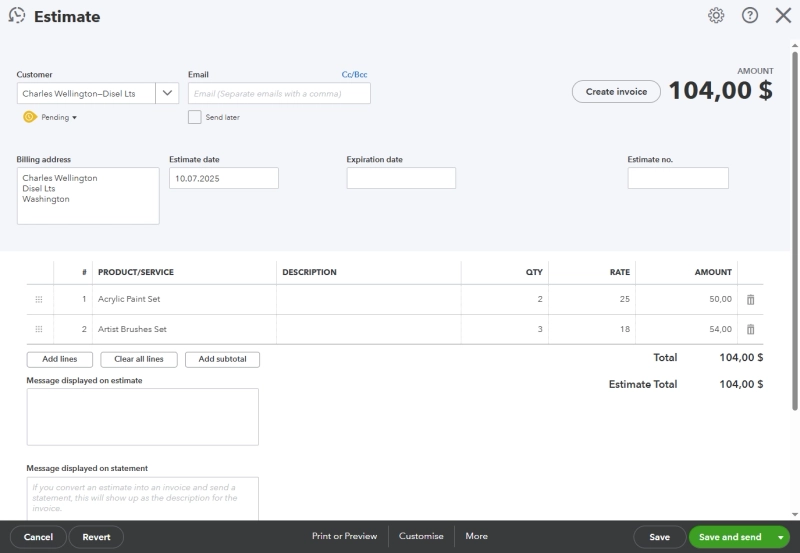
This is the new estimate created in QuickBooks with the data from the online Plumsail form submission:
Tip: Add the QuickBooks – Send an Estimate module at the end of the scenario to send the estimate to the customer.
Plumsail public forms, along with Make automation, can do even more than just creating an estimate or a customer.
For instance, following the instructions from this post, you can automate creating an invoice in QuickBooks. Simply use the QuickBooks – Create an Invoice module and map the fields accordingly. This is ideal for immediate sales where an estimate isn't needed.
Try it all your self today for free! Start designing an online form for QuickBooks with Plumsail Forms and create an automated workflows with Make to streamline expense reporting, time tracking, bill management, and more.
Embed Plumsail form into your Shopify store to attract more customers and increase your customer engagement.
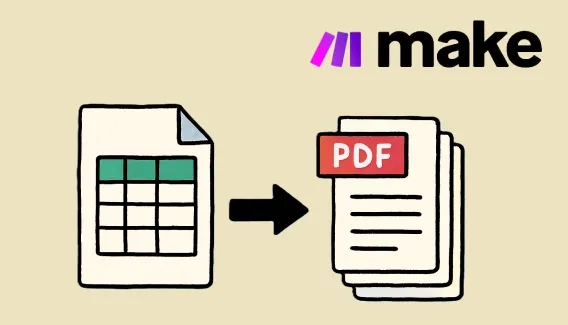
Generate one PDF from a single row or multiple PDFs from a list of rows in Google Sheets using Make.
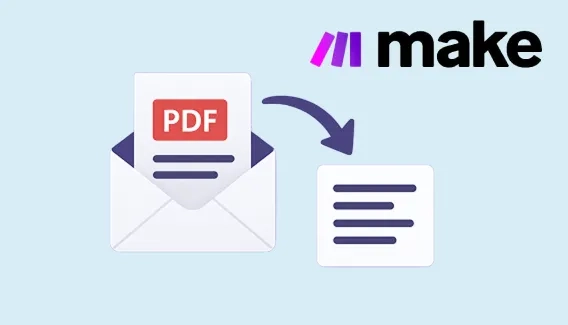
Learn how to extract text from PDF files and automate your workflows in Make using Plumsail Documents