Forms
Mar 22, 2018
Providing unique forms for different user groups (SharePoint Online / Modern UI)
Providing unique forms for different user groups (SharePoint Online / Modern UI)

In this article, I will demonstrate how to create unique SharePoint forms for different Azure Active Directory groups and navigate users to a proper form automatically with the help of Plumsail Forms and Microsoft Graph API. The described solution works perfectly for both types of groups, Security and Microsoft 365.
Please, note that the Azure AD groups are now also available for selection in the editor out of the box, but this article can be helpful to retrieve user profile properties with Graph API.

First, you must ensure that you’re using the designer of the version 1.7.1 or higher and the app package of the version 1.0.8.0 or higher in the App Catalog. You can download the latest version of the package from your Plumsail Account whereas the desktop application is updated automatically. You just need to restart the application and confirm that you want to upgrade.
Let’s say we have a ticketing system and have two types of users: regular users who leave requests and agents who process the requests. For agents, we’ll create a separate Azure AD security group — ‘HelpDesk Agents’. Then, we’ll design a very basic form for regular users with just necessary fields for describing requests, providing additional information, and checking the status. For agents, we’ll have a separate Form Set with extended forms for assigning requests, changing their statuses and storing internal communication. The basic form will open by default while for agents, we’ll implement custom routing based on Azure AD group for opening the extended form.
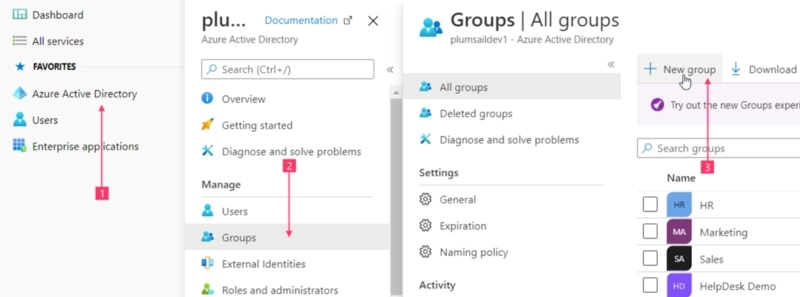
First, let’s create an Azure AD security group and add agents into it. Navigate to Microsoft 365 admin center, expand the left side bar, and click Azure Active Directory in the Admin centers list. Next, go to Azure Active Directory → Groups → New group:
Finally, add members into it. Find more information on creating groups and managing memberships in Azure Active Directory documentation.
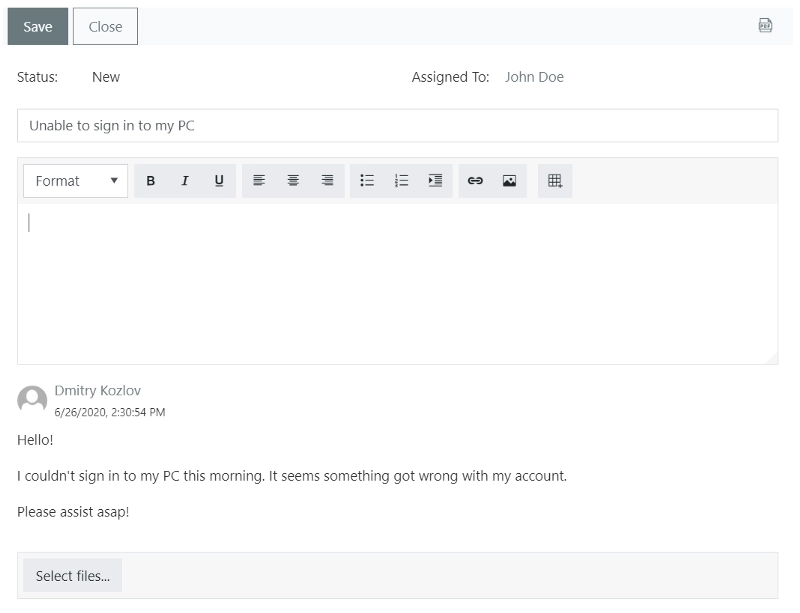
The next step is creating forms for regular users and agents. A default Form Set contains basic forms for regular users:
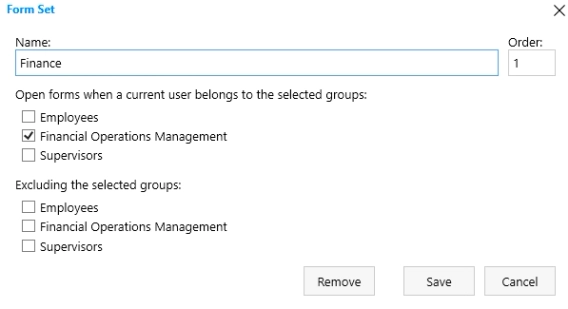
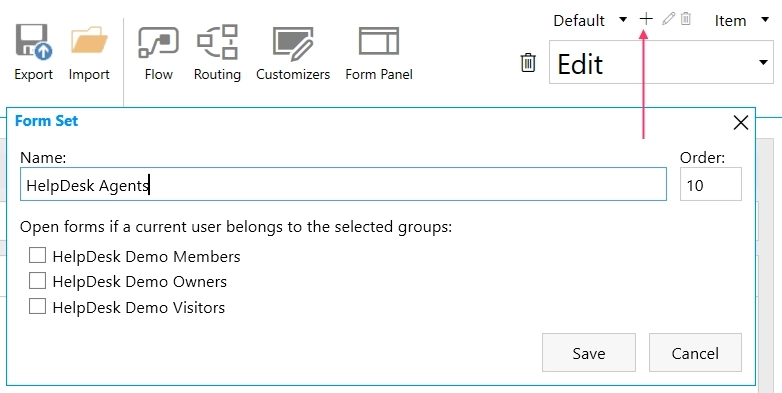
For agents, create a separate Form Set. Do not check any groups in the new Form Set dialog since those are groups from the current SharePoint site. We’ll configure routing based on Azure AD groups with the help of Custom Routing feature:
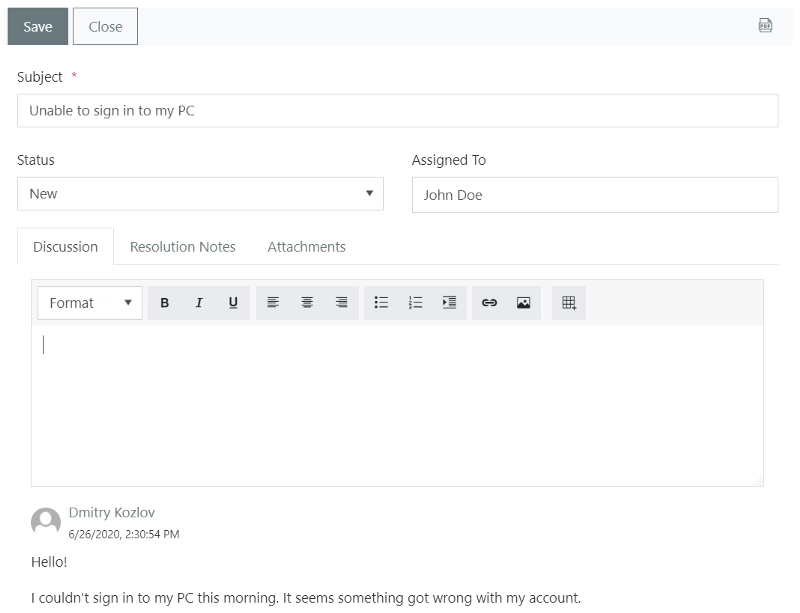
The agent’s Form Set contains more fields which are necessary for processing requests:
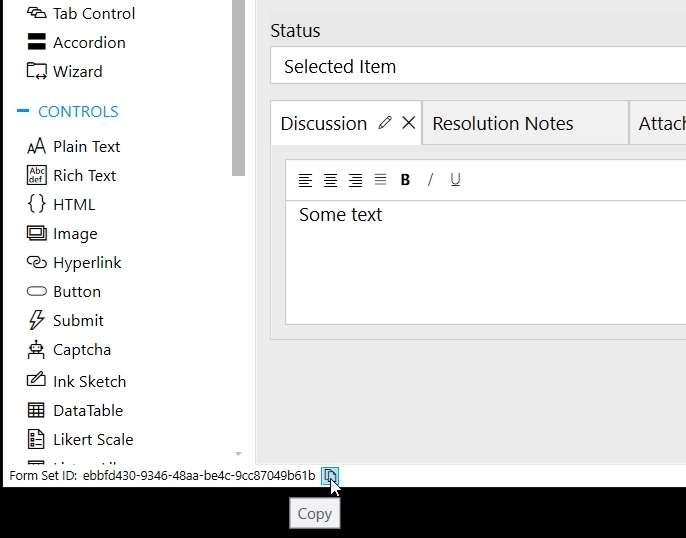
Copy agent’s Form Set ID:
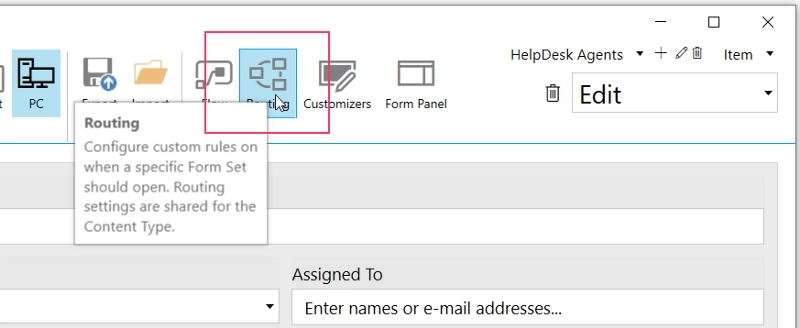
Next, open the Custom Routing editor:
And paste the code below:
return graph.me.memberOf().then(function(groups) {
    if (groups && groups.length) {
        for (var i = 0; i < groups.length; i++) {
            if (groups[i].displayName === 'HelpDesk Agents')
                return '--- Forms Set ID ---'
        }
    }
});
Do not forget to paste ID of your agent’s Form Set into the code.
In this snippet, we use a graph client from PnPjs library which is embedded into Forms starting from the package version 1.0.8.0. The graph client uses a built-in ‘SharePoint Online Client Extensibility Web Application Principal’ app for requesting data from Microsoft Graph API. So, you must ensure that the app has corresponding permissions for listing user’s groups.
Now we need to ensure that ‘SharePoint Online Client Extensibility Web Application Principal’ app has permissions for performing requests to Graph API and retrieving the list of groups the current user belongs to. There are multiple options to accomplish this, but the most straightforward way is using Office CLI tool. First, install Microsoft 365 CLI to your computer.
Connect it to your Microsoft 365 tenant from the command line:
o365 loginNow, we need to obtain ID of the ‘SharePoint Online Client Extensibility Web Application Principal’ application since it’s unique for a tenant:
o365 aad sp get --displayName 'SharePoint Online Client Extensibility Web Application Principal'Copy objectId value:

Next command lists permissions granted to the application:
o365 aad oauth2grant list --clientId {objectId}If the above command returns nothing, we need to add Directory.Read.All from Microsoft Graph API. First, we should obtain its object ID with the command:
o365 aad sp get --displayName 'Microsoft Graph'And then grant permissions for listing user groups with the command:
o365 aad oauth2grant add --clientId {objectId of SP Client Extensibility app} --resourceId {objectId of Microsoft Graph} --scope Directory.Read.AllIf any permissions are already granted to ‘SharePoint Online Client Extensibility Web Application Principal’, we just need to ensure that Directory.Read.All are presented in the list. And if not, copy the objectId and save it somewhere, copy the current permissions from the scope parameter and concatenate them with the Directory.Read.All:

Then, use objectId and scope values from the above in the next command:
o365 aad oauth2grant set --grantId {objectId} --scope '{scope} Directory.Read.All'Once the required permissions are provided, you can start using your forms. Find more information on using Microsoft 365 CLI commands.
Microsoft Graph API provides a lot of capabilities which can be utilized in your forms with the handy graph client from PnPjs. You can retrieve current user’s information, list users, list email messages, manage events in personal calendars, or even communicate with Dynamics 365 Business Central. If you have any difficulties with configuring the above case, just let me know in the comments. If you want me to describe more cases of utilizing Microsoft Graph API in SharePoint forms, just leave a comment as well.
Providing unique forms for different user groups (SharePoint Online / Modern UI)
Custom Modern UI forms that support multiple languages.
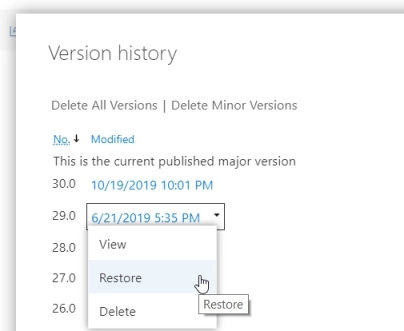
Plumsail Forms app allows you to create customized SharePoint forms, find out how to restore them.