With a new Zoho Sign integration in Plumsail Documents, you can automatically generate documents from a template and instantly deliver them to Zoho Sign for e-signing.
Below is a step-by-step example of how it works.
- Create new document generation process
- Insert Zoho Sign signature tag
- Add Zoho Sign delivery
- Start process
- Get started
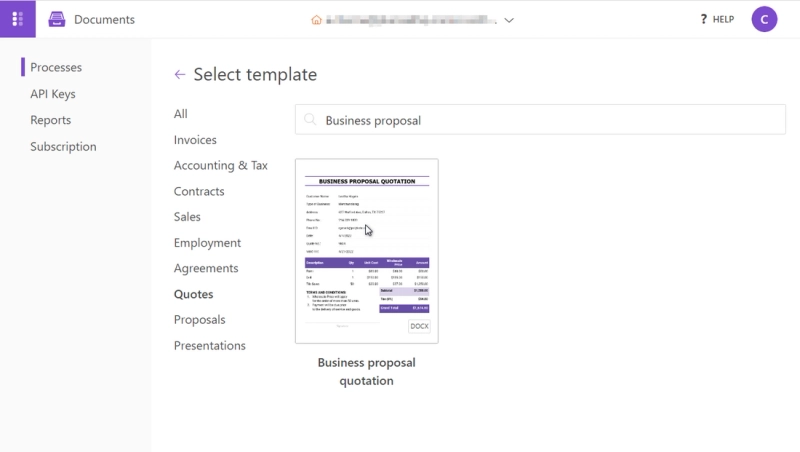
1. Create new document generation process
Inside your Plumsail account, create a new process. For demonstration purposes, I created a process from a Business proposal quotation template:
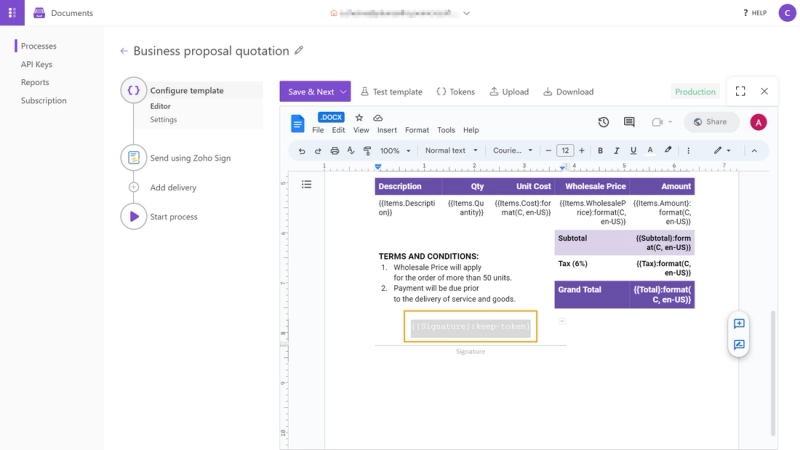
2. Insert Zoho Sign signature tag
The next step is to insert a Zoho Sign signature tag to indicate the signature location. Zoho Sign signature tag is simple like this: {{Signature}:keep-token} and {{Signature:Recipient2}:keep-token} if you have more than one recipient. The formatter keep-token inside the tag lets the Plumsail Documents templating engine know that this token should be kept for another system (Zoho Sign in our case) and not processed by the Documents templating engine.
This is how the Zoho Sign tag looks inserted into my business proposal quotation template:
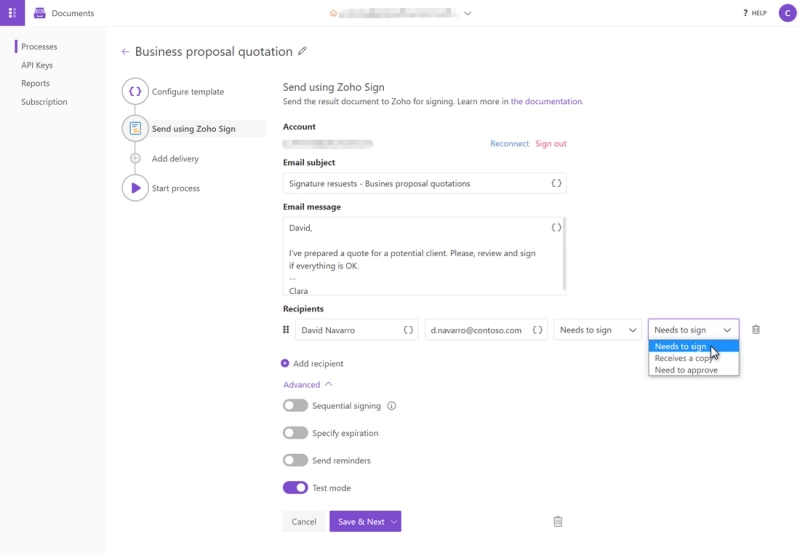
3. Add Zoho Sign delivery
Next, we need to add a Zoho Sign delivery. You will be asked to sign in to your Zoho Sign account from the Plumsail account. After it's done, you can configure the settings of the Zoho Sign delivery: specify the subject and body of the letter, add recipients and choose their roles, and some advanced settings such as sequential signing, reminders, and more.
Also, there is an option to enable a Test mode to check how everything works and not spend Zoho Sign credits.
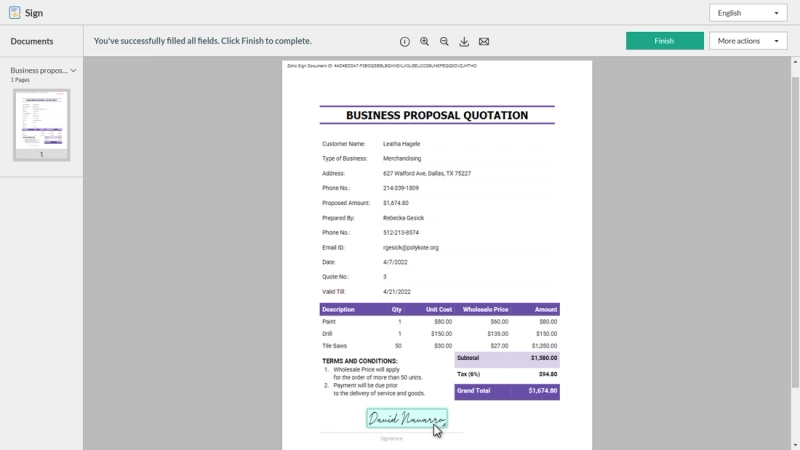
4. Start process
Start the process to generate the document and deliver it to Zoho Sign. I triggered my process by filling out a data capture form. This is how the generated document appeared in Zoho Sign to my recipient signer:
Get started
Sign up and get a 30-day trial for free if you don’t have Plumsail Documents yet.