Need to convert JSON to Excel in Power Automate or load JSON arrays to Excel? Business systems often return data as JSON, but your teams need Excel spreadsheets they can filter, sort, and analyze.
In this article, you'll learn how to convert JSON to Excel using the Plumsail Documents connector in Power Automate — making it simple to create ready-to-use reports from any CRM or API.
I'm creating a flow that gets data from an API with an http request. The JSON output contains several transactions. I want to load all transactions into an excel file, but all I tried is always mentioning that the output is an object, and I need an array to insert in Excel.
We'll use data from Microsoft Dataverse, but the same steps apply to Salesforce, HubSpot, or any other system that returns JSON — even custom APIs.
To solve this task, we'll go through the following steps:
Retrieve data from Microsoft Dataverse
Format and transform JSON arrays inside Power Automate
Use the Convert JSON to Excel action to generate .xlsx files
Automatically deliver the result by email
The result is a fully automated process to load a JSON array to Excel and turn it into a clean report — all using Power Automate to parse JSON and generate Excel from dynamic data.
Use case: Convert CRM JSON data into ready-to-use Excel reports
In a typical JSON to Excel Power Automate scenario, you may have a table that stores customer and deal information. For example, this data could come from Microsoft Dataverse or any other system.
Our table includes fields like Customer, Country, DealValue, CloseDate, and Status, as well as additional metadata often used in CRM systems — such as assigned sales reps, probability scores, or pipeline stages.
We want to export only the relevant fields, such as Customer, Country, DealValue, CloseDate, and Status, into Excel and share the file with your team for analysis.
Let's move to the setup process in Power Automate.
Create a Power Automate flow to convert JSON to Excel
To convert JSON to Excel in Power Automate, you'll need to build a flow that collects data from your source (such as Microsoft Dataverse), transforms it into a simplified JSON array, and then uses Plumsail Documents to generate an Excel file.
Let's walk through the setup step by step and create an automated flow that turns JSON into Excel.
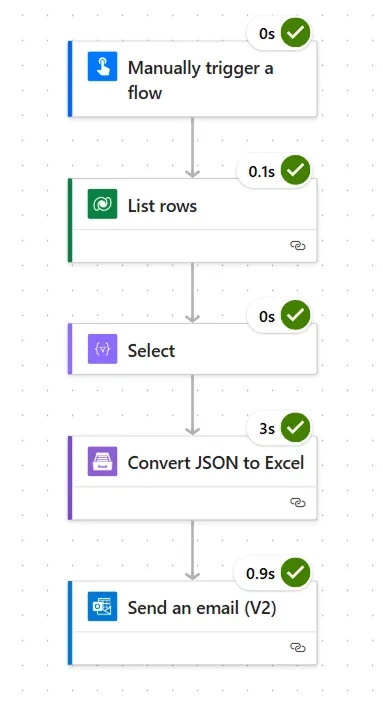
Step 1: Manually trigger the flow
We start with a manual trigger so you can test the flow before connecting it to a live business process. You can replace this trigger with a scheduled one (e.g., daily export) or use an event-based trigger (like when a new record is created).
Add the Manually trigger a flow action and set a name like: JSON to Excel
Step 2: Get data from Dataverse
Next, we need to retrieve the actual business data — in this example, from a Dataverse table that stores customer deals.
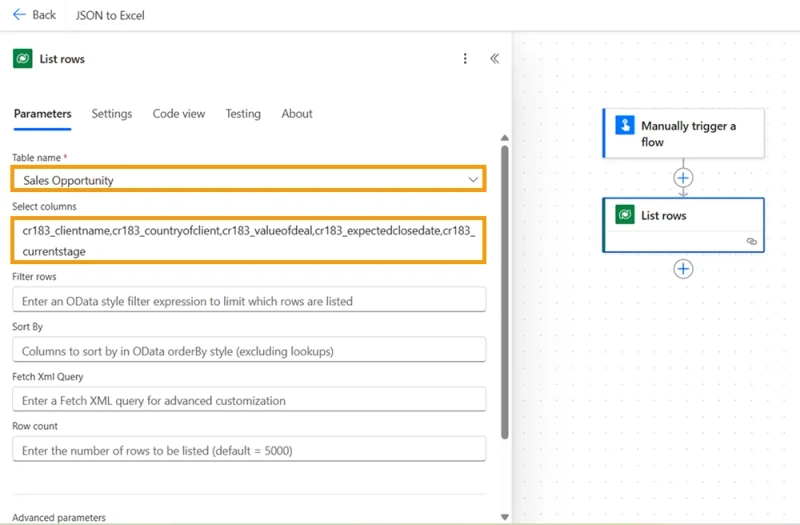
Add the List rows action from the Microsoft Dataverse connector.
Choose your table (e.g., “Sales Opportunities”)
In Select columns, include only the relevant fields:
cr183_clientname — customer name
cr183_countryofclient — customer country
cr183_valueofdeal — value of the deal
cr183_currentstage — sales stage
cr183_expectedclosedate — estimated closing date
This action returns the data in JSON format.
If you're working with a different system, you can use an HTTP request instead, as long as it returns a JSON array of records.
Step 3: Format the JSON
The data returned from Dataverse (or any other source) may include internal field names or nested objects. Before converting it to Excel, we need to flatten the structure and rename the fields.
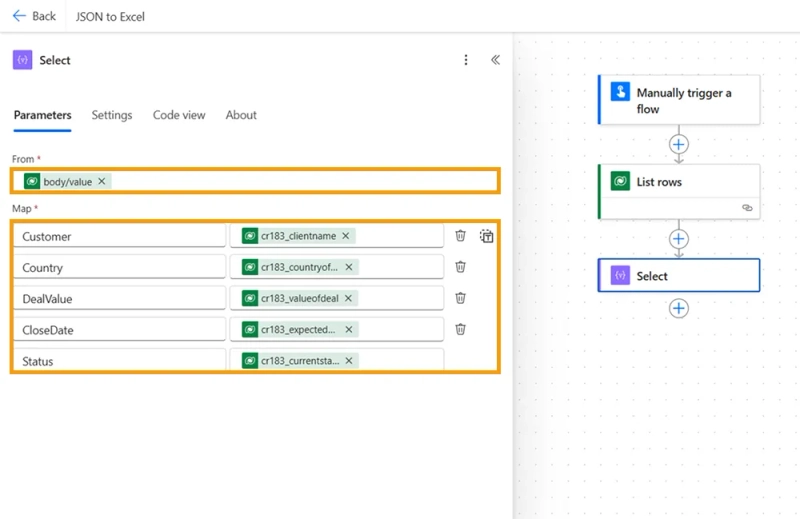
Add the Select data operation.
From: the value array from the previous step (body('List_rows')?['value'])
Map each internal field to a readable label:
Customer → cr183_clientname
Country → cr183_countryofclient
DealValue → cr183_valueofdeal
CloseDate → cr183_expectedclosedate
Status → cr183_currentstage
After the Select step, the output will be a clean JSON array that looks like this:
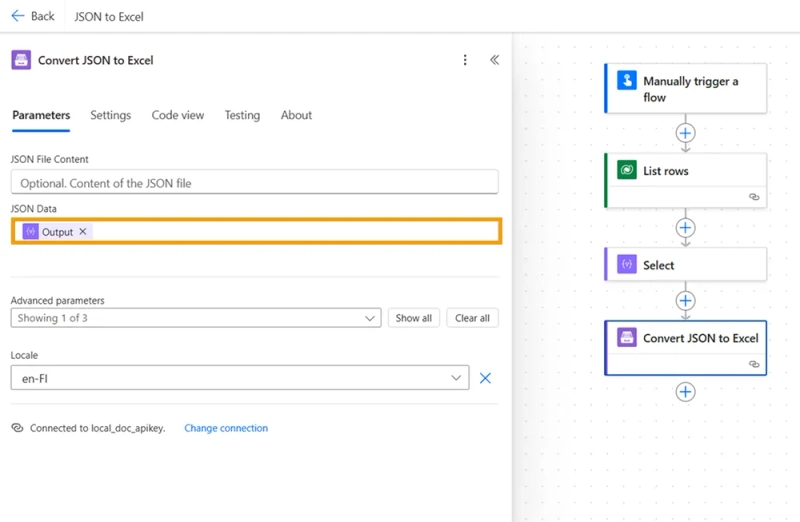
If this is your first time using the Plumsail Documents connector in Power Automate, you'll be prompted to create a connection using an API key. You can generate this key in your Plumsail account, just register for a free 30-day trial if you don't have one yet.
JSON data: use the output from the Select step
Locale: set the formatting for dates and numbers, such as en-US or en-GB
This action generates a Excel file with headers matching the mapped fields from the previous step.
It's the core of this convert JSON to Excel Power Automate flow.
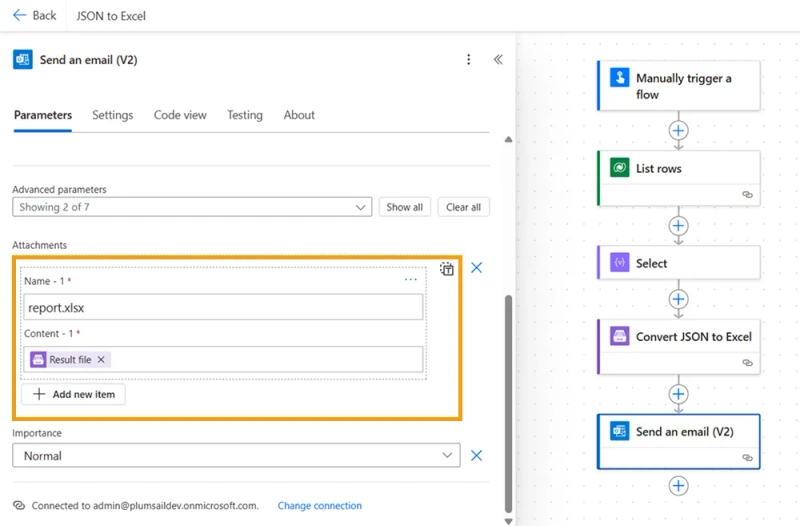
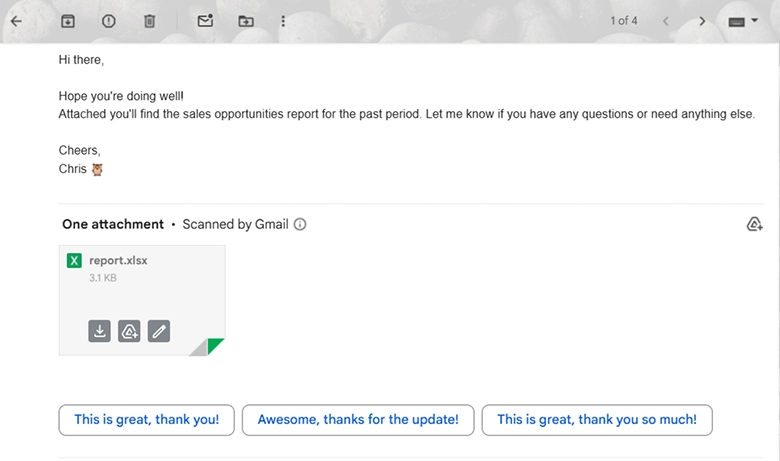
Step 5: Send the Excel file
Once the Excel file is generated, you can send it to your team or store it in the cloud.
Add the Send an email (V2) action.
To: enter the recipient's email address
Subject: specify the subject of the email
Attachments:
Name: report.xlsx (make sure to include the .xlsx extension in the file name)
Content: use the Result file output from the Plumsail action
You can also replace this with other delivery methods, depending on your business process:
Store it in SharePoint, OneDrive, or Google Drive
Send it as a message in Microsoft Teams
Pass it to another system for integration or analysis
This completes the flow. This approach is ideal when you need to convert JSON to Excel in Power Automate from any source — whether you're loading CRM records, external API responses, or system logs. With just a few actions, you can parse JSON and transform it into Excel reports for your team.
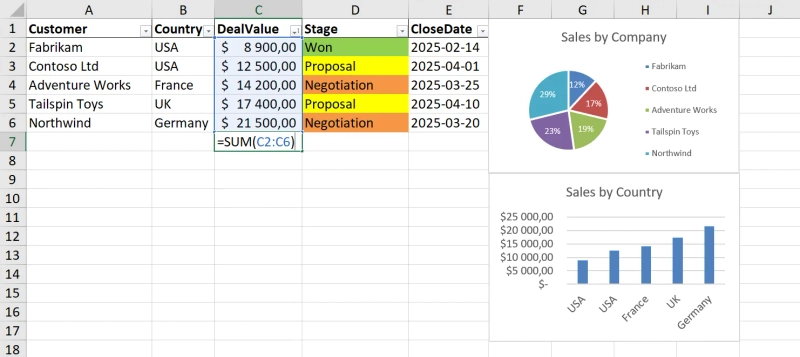
With the resulting Excel file, you can:
Filter deals by stage
Sort by deal value to see the biggest opportunities
Group by country
Use pivot tables to summarize data (like total deal value by stage or country)
Make charts to visualize sales performance
Filter by closing date
And much more, depending on your reporting needs
Get started with converting JSON to Excel using Plumsail Documents
In this article, we built a Power Automate flow that extracts data from Microsoft Dataverse, transforms it into a clean JSON array, and converts it to an Excel spreadsheet using Plumsail Documents.
This method works in Power Automate with any JSON-based system, including Dataverse, Salesforce, HubSpot, or custom APIs.
Register an account for a 30-day free trial to explore Plumsail Documents in Power Automate — including the Convert JSON to Excel action used in this article. Need help? Book a free Intro call with the Plumsail team, and we'll assist with your automation needs.
Printable document automation in Microsoft 365 at LT Corporation
See how LT Corporation replaced legacy reporting approaches with Microsoft 365 automation for printable reports, shipping documents, and operational checklists.
Jeff Phillips
Senior Director of IT at LT Corporation
Documents
Forms
Customer Story
Mar 10
Airtable forms and document generation for proposals and site reports at Northern GeoSeptic
Learn how Northern GeoSeptic reduced manual data entry by using Airtable, Make, and Plumsail for proposals and site reports.
Todd Heiman
Owner at Northern GeoSeptic
Forms
Documents
Mar 10
How to manage quoting process with monday.com and Make
Learn how to create a personalized quote from a public form submission using Make.