In this article, we'll explore how to convert Power Apps form data into a PDF document. There are a few ways to achieve this, starting with a built-in and very basic print PDF feature, a more involved workaround using the HTML conversion method and Power Automate flow, and the approach that we'll describe in detail, which includes Plumsail Documents. This method enables the straightforward conversion of data submitted through Power Apps forms into visually appealing PDF documents.
The Print PDF function in Power Apps is a feature that enables users to print a specific form or app screen to a PDF. It's quite basic, offering no control over the PDF's appearance or the ability to combine data from multiple screens into one document.
Power Apps provides an experimental function to convert the displayed page to a .pdf file, but when we last tested it, the documents didn't generate according to expectations. The better way is to create a Power Automate flow that is either triggered from within the app or when the data is submitted to Sharepoint.
The HTML method for creating documents from Power Apps involves converting app data into an HTML format, which is then transformed into a PDF document. This approach allows for some degree of customization in how the PDF looks. However, its main drawback lies in the complexity of formatting the PDF to meet specific design requirements. Many users find this method challenging, particularly when it comes to customizing the document's appearance to their liking.
This works fine but I find it extremely difficult to format the PDF the way I want it to be...
Our partners BizIT Digital Solutions specializing in process automation with Power Platform and SharePoint used this method after the built-in feature but found it not suitable for them and not convenient.
Before discovering Plumsail, our approach was a clumsy workaround where the flow would create the desired file in HTML, then convert it to .pdf by using the running user's OneDrive account, which provides the capability to convert between the two. The approach was difficult to implement and slow to execute. What we do now is define a .docx template in Plumsail Documents, and then trigger the document generation process within the flow. The generation process also allows us to define a delivery method: for example, by sending it to the user attached in an email, saving it to Sharepoint or OneDrive, etc. The delivery method is decided by the client's wishes and the sensitivity of the file in question.
Convert Power Apps forms to PDF using Plumsail Documents
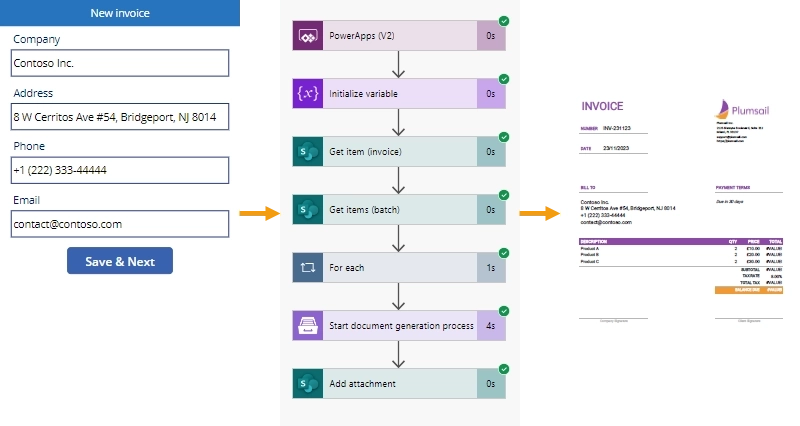
Now, let's return to the main part where I will demonstrate the method of generating a PDF using Plumsail Documents, showcasing an example of an invoice copy that includes a table part. Here's how it works.
The user fills in and submits the Power Apps form
The app saves data to SharePoint lists and triggers a flow in Power Automate
Plumsail Documents receive the data in the flow and generate a PDF invoice
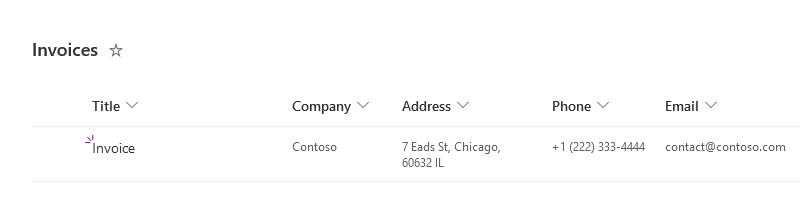
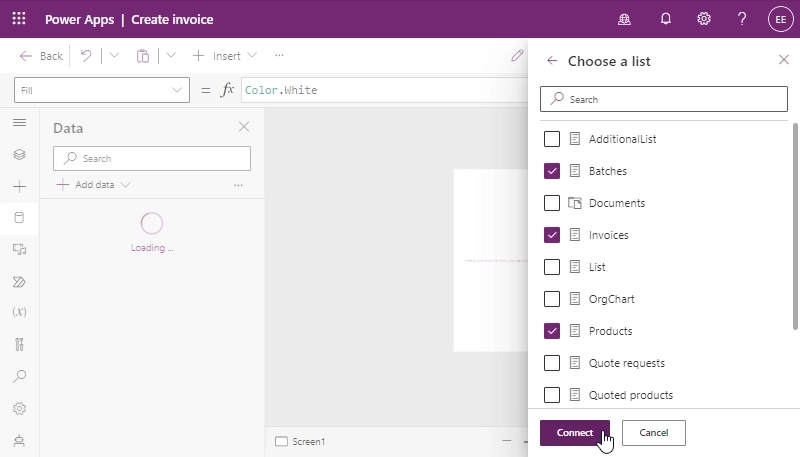
Set up SharePoint lists to store submissions of Power Apps forms
To store the data submitted through the Power Apps form, we need three SharePoint lists with the following columns:
Invoices (general information about invoices):
Title (text, the default value is "Invoice"),
Company (text),
Address (text),
Phone (text),
Email (text);
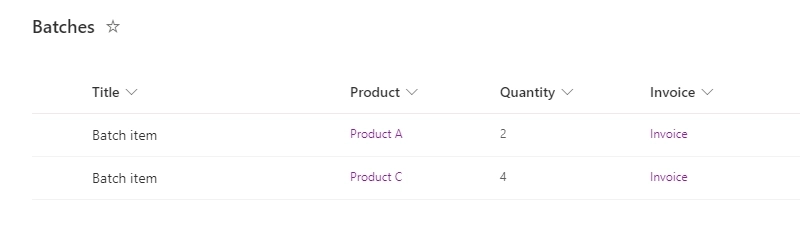
Batches (batches of products related to certain invoices):
Title (text, the default value is "Batch item"),
Product (lookup to Products),
Quantity (number),
Invoice (lookup to Invoices);
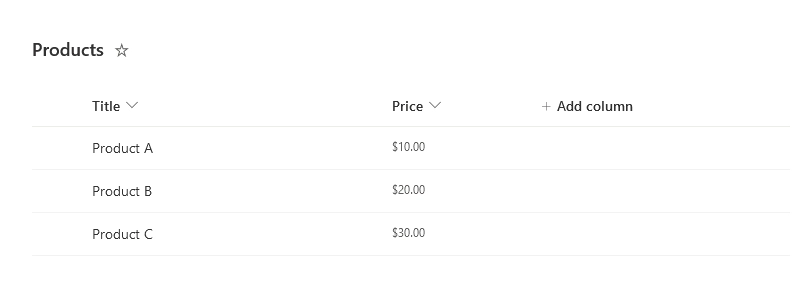
Products (available products with prices):
Title (text),
Price (number).
Configure the Plumsail process to convert the submitted Power Apps form to PDF
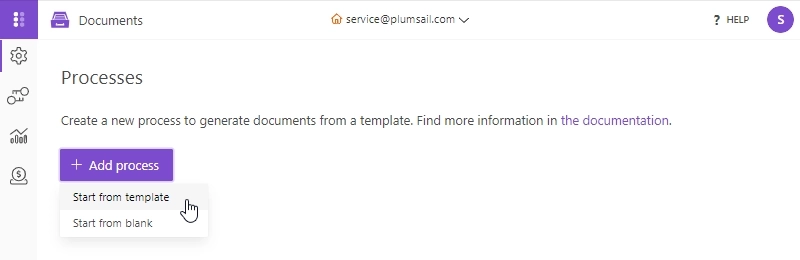
If you do not have a Plumsail account, start with registering one. After that, you will have a free 30-day trial for testing and evaluating the product. Now, create a new process from template either manually as shown below or by this link.
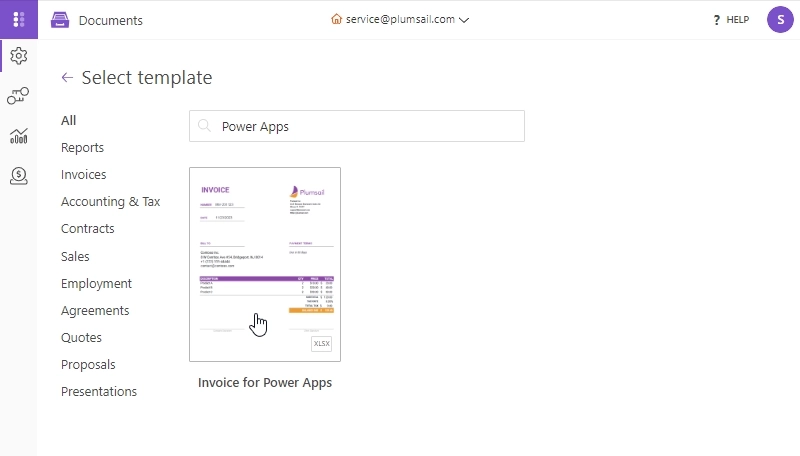
We have different templates in Word and Excel formats but for this use case, we prepared a special one: an Excel template that fits this example and allows to use of formulae for calculations. Choose it to proceed.
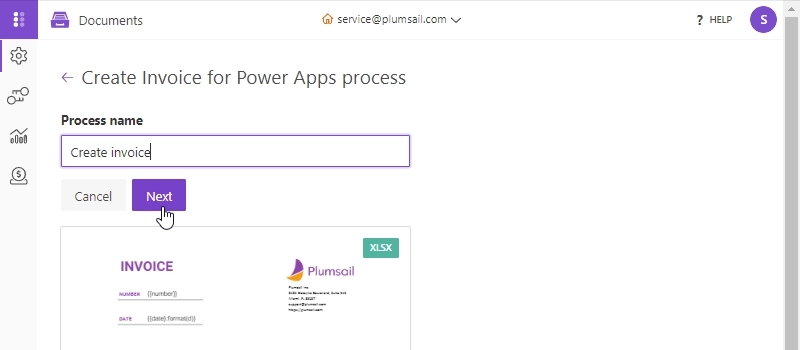
Name the process and click Next.
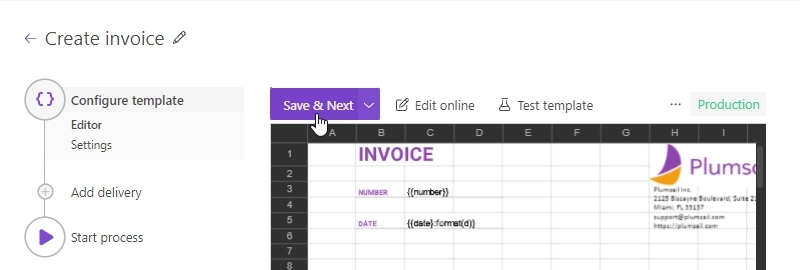
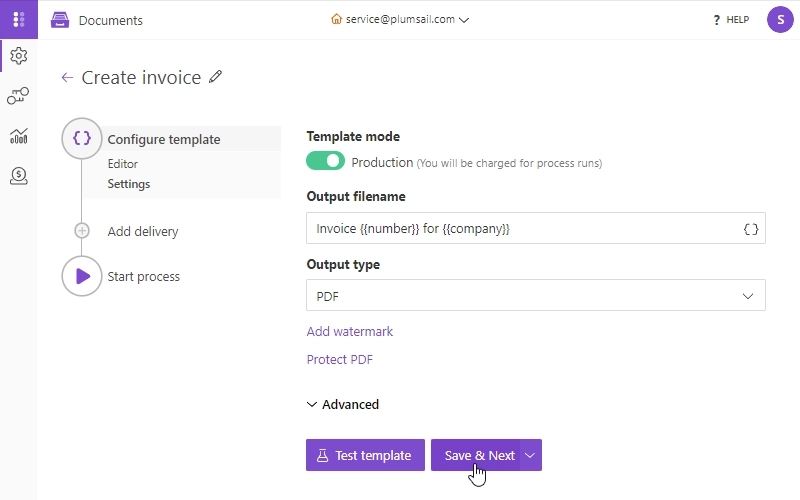
Save the template and navigate to template settings.
Specify an output name and format. In the file name, I used tokens from the template to generate files with unique names. As for the file format, I selected PDF.
If required, you can add deliveries, but I skipped that step because am going to use the result file in a Power Automate flow.
Configure Power Automate flow to integrate Power Apps, SharePoint, and Plumsail Documents
I will start my flow in a canvas app from Power Apps, create an invoice, and save the result document as an attachment to the accordant item in the Invoices list.
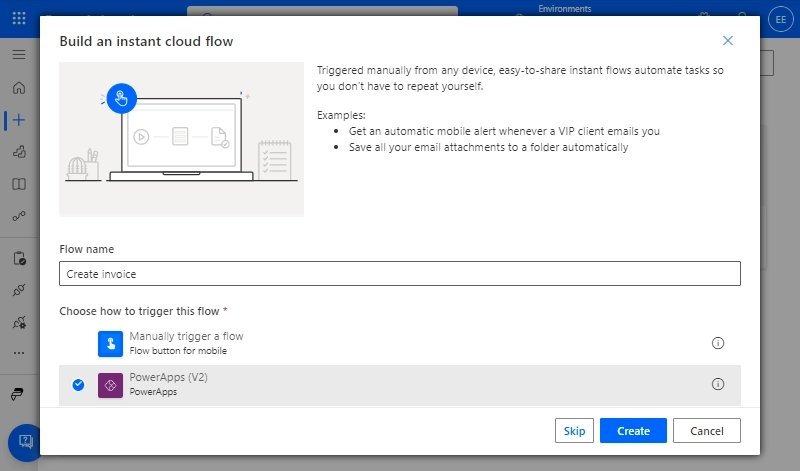
So first, create an instant flow and use the Power Apps trigger to run it.
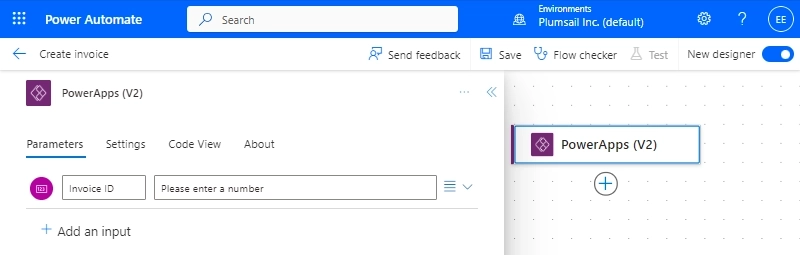
In the trigger, add a number input and name it, for example, "Invoice ID".
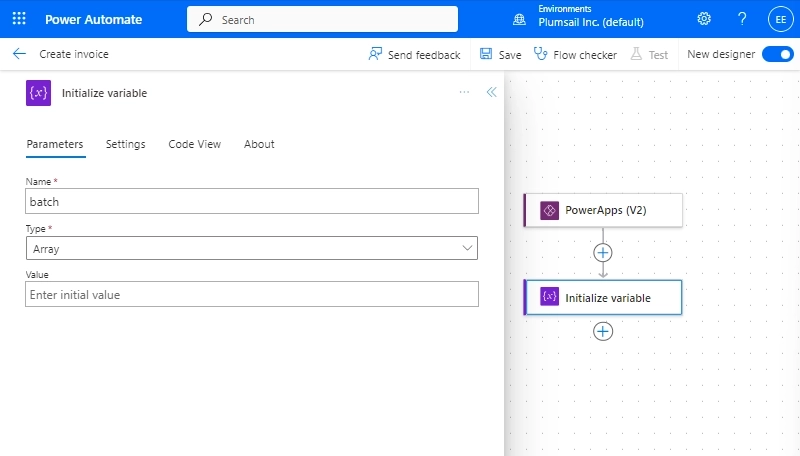
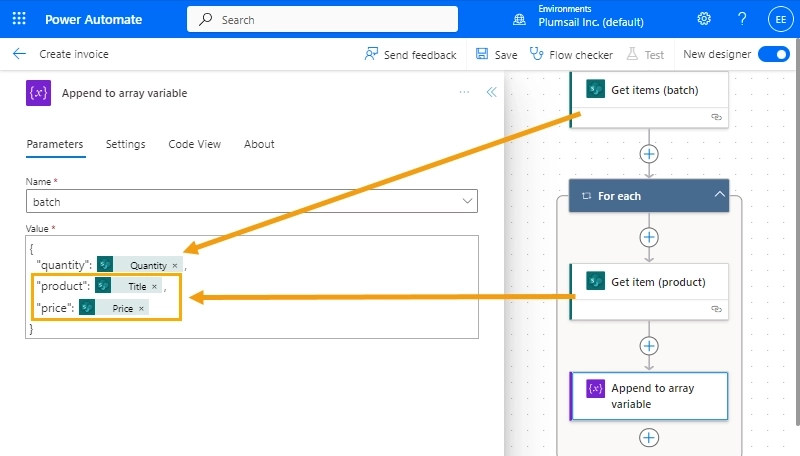
Create an array variable in which we will store the list of products for the current invoice.
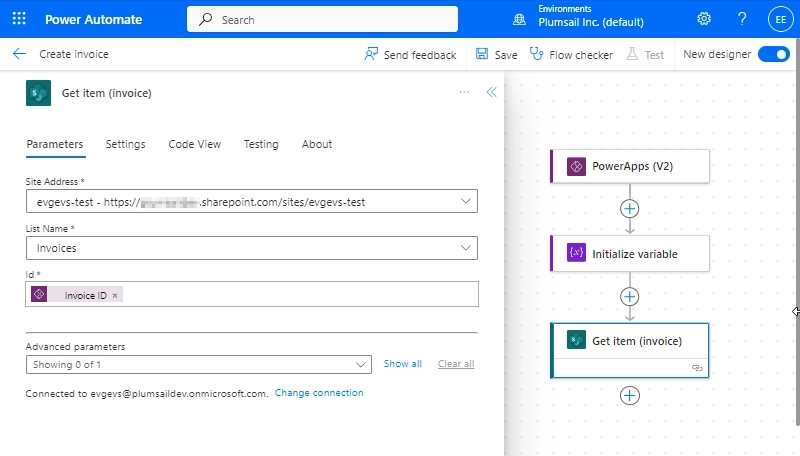
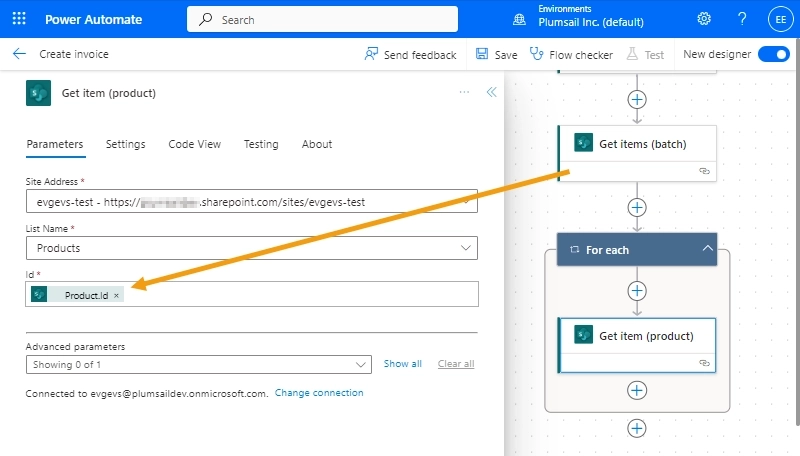
The app will pass invoice item ID to the flow, the rest information should be retrieved through a SharePoint connector from the accordant lists:
Invoices: get an item by the provided ID,
Batches: get all items for which the Invoice column refers to the accordant item in the Invoices list,
Products: get each product from the batch.
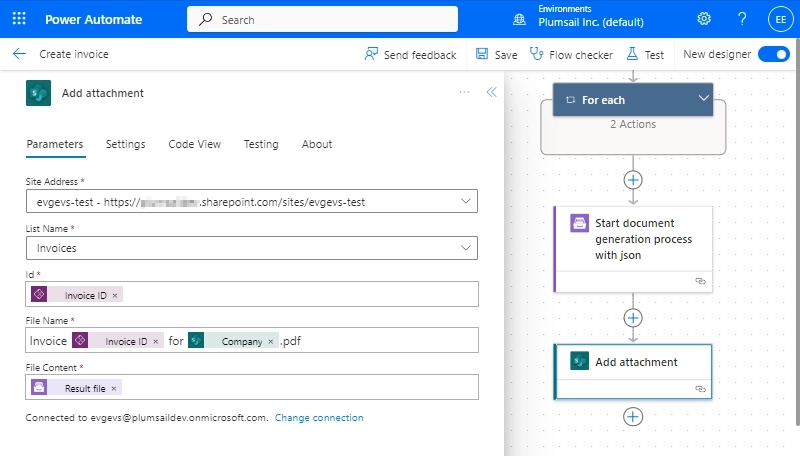
In the For each control append to the batch variable an object containing data for rendering batch table in the invoice: product name and price from the Products list, and quantity from the Batches one.
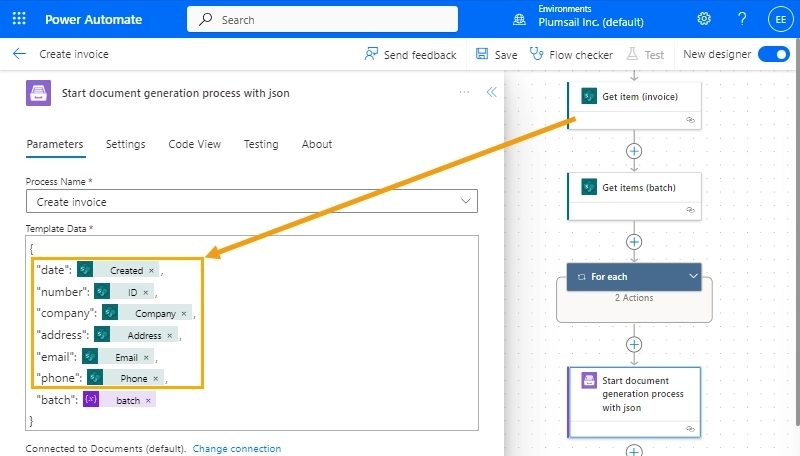
Start the document generation process with JSON. Use dynamic data from the previous steps to fill the invoice. For generating the table with batch items, pass the batch variable. For the rest data, use the outputs of the retrieved invoice item.
Finally, add a SharePoint action for saving the result file as an attachment to the accordant item in the Invoices list.
Configure canvas app in Power Apps
Create the app and connect it with SharePoint and Power Automate
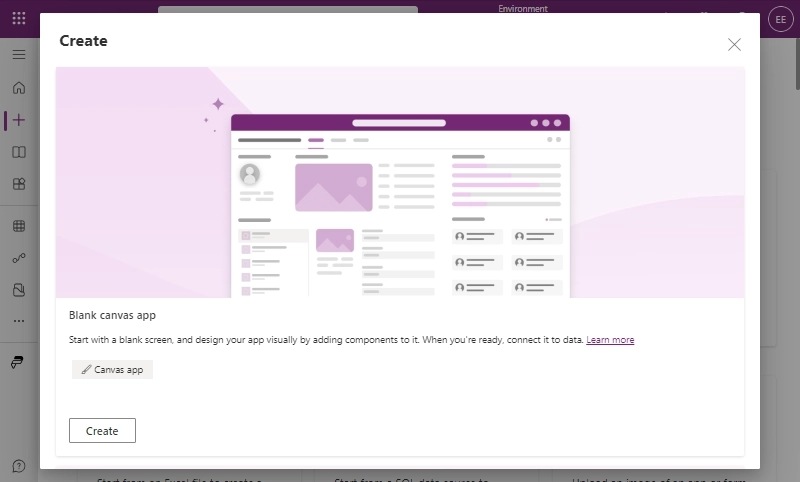
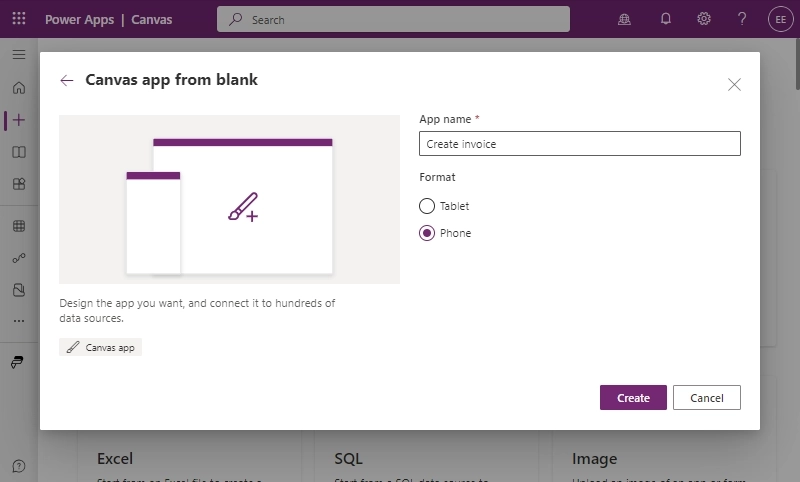
Create a blank canvas app and name it.
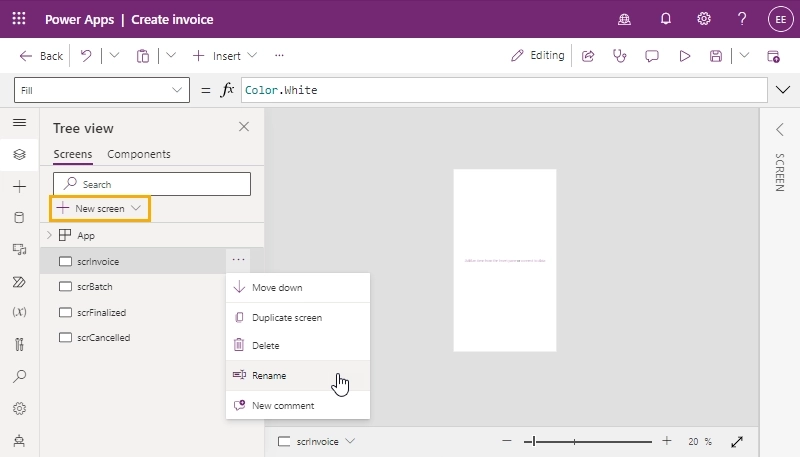
In Tree view, create four screens for:
creating an invoice,
adding batch items,
finalization message,
cancellation message.
I would advise you to name them accordingly to avoid confusion in the Power Apps formulae.
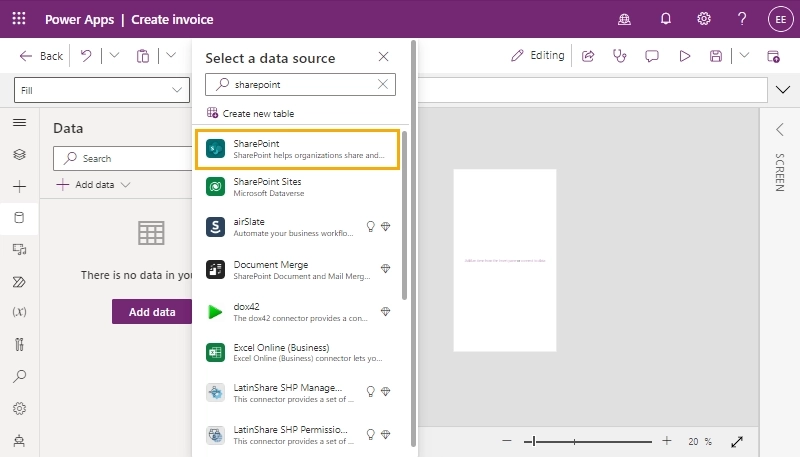
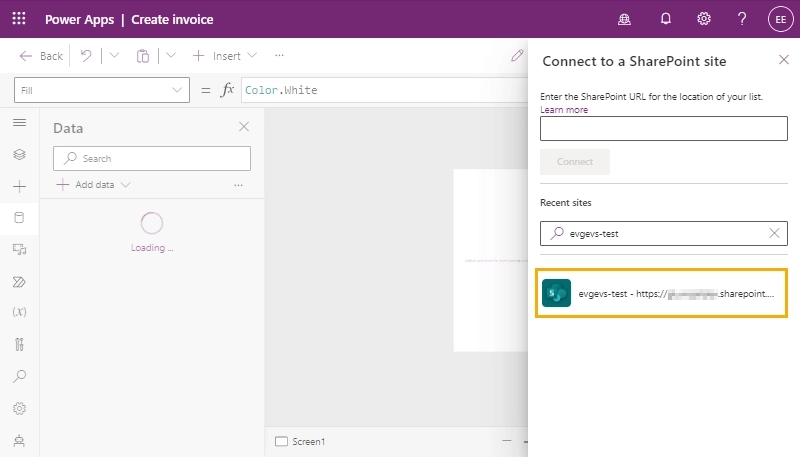
Switch to Data and search for a SharePoint connector.
Connect to the site with the data source lists and add them to the app.
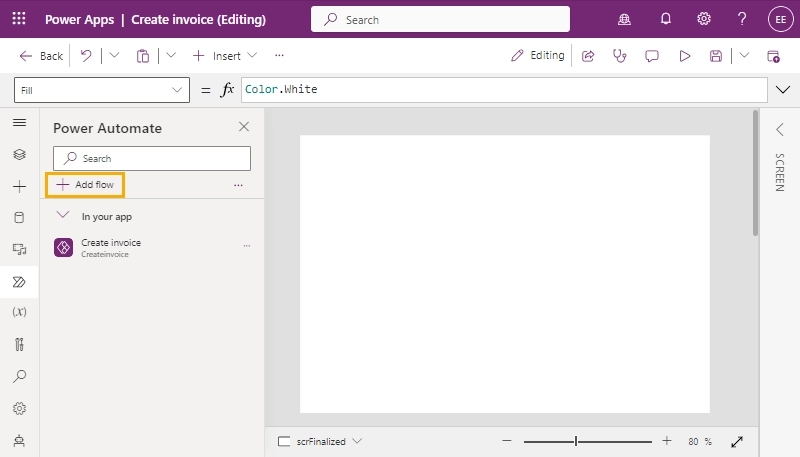
In the Power Automate section connect the flow that we created in the previous step.
Configure invoice screen to create items in SharePoint list
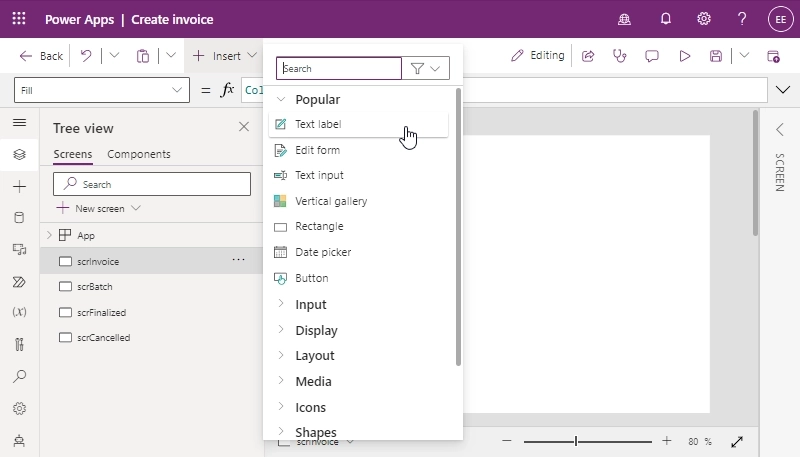
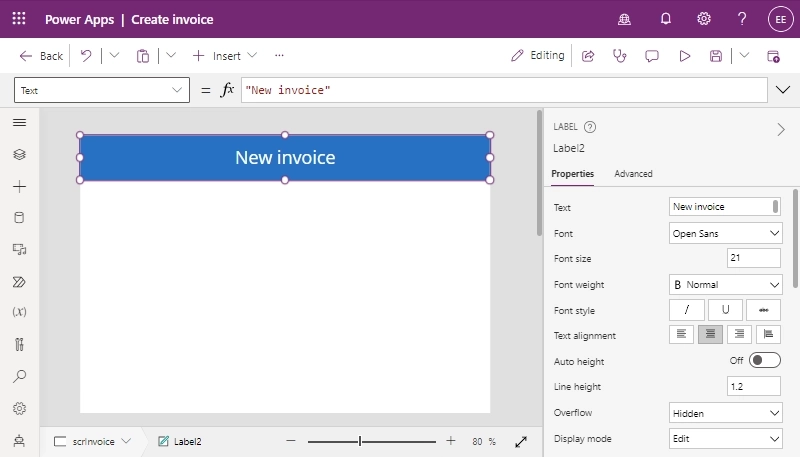
On the invoice screen insert a text label and format it as a heading.
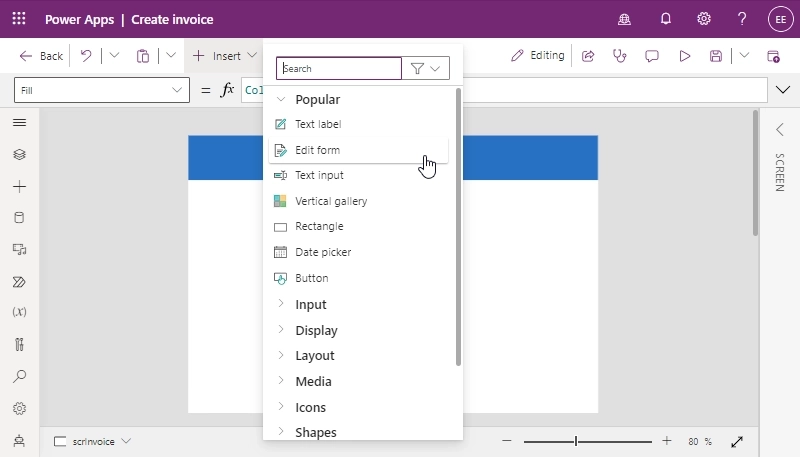
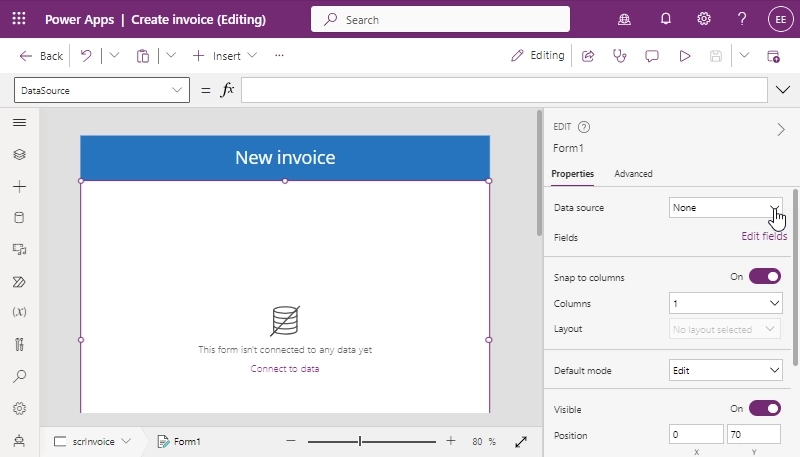
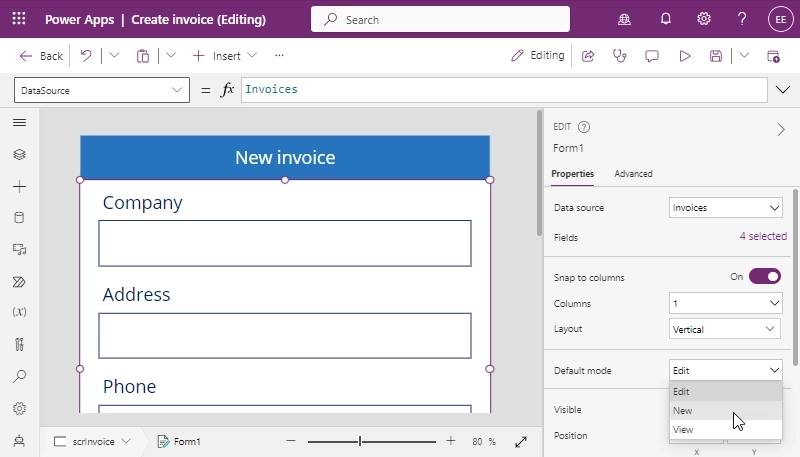
Then insert a form control and connect it to the Invoices list.
Switch the form mode to New and select the fields for displaying:
Company,
Address,
Phone,
Email.
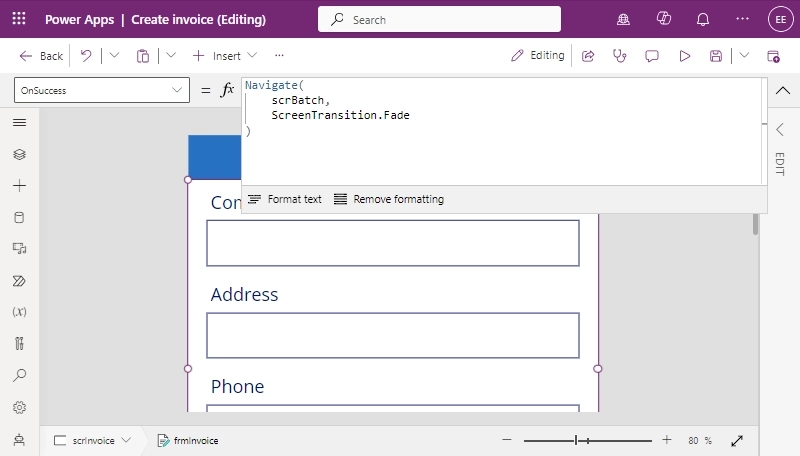
Set an OnSuccess property to perform certain actions when the form is successfully submitted. I used the code below to navigate to the next screen.
Navigate(
    scrBatch,
    ScreenTransition.Fade
)
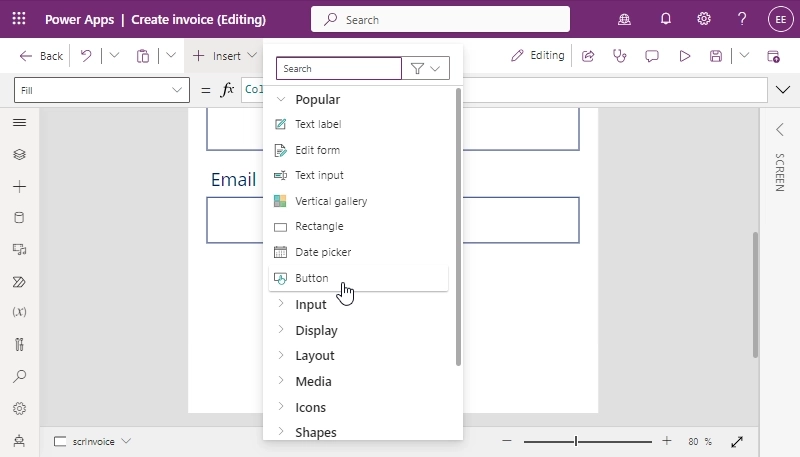
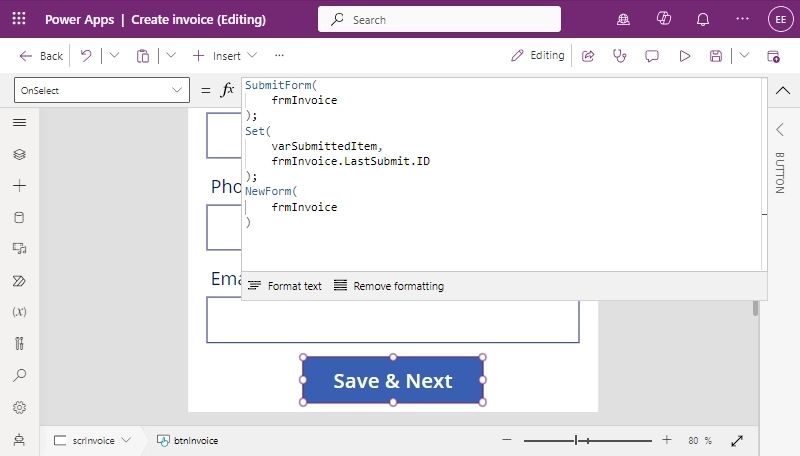
Add a button for submitting the form.
Add the code below to the OnSelect property of the button: it will submit the form, save an ID of the submitted item to variable varSubmittedItem, and create a new form.
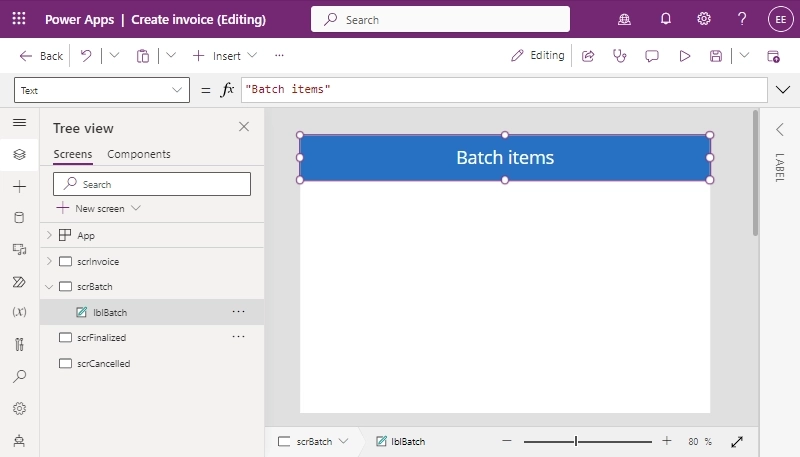
Configure batch screen to create items in related SharePoint list
Insert and format a heading label.
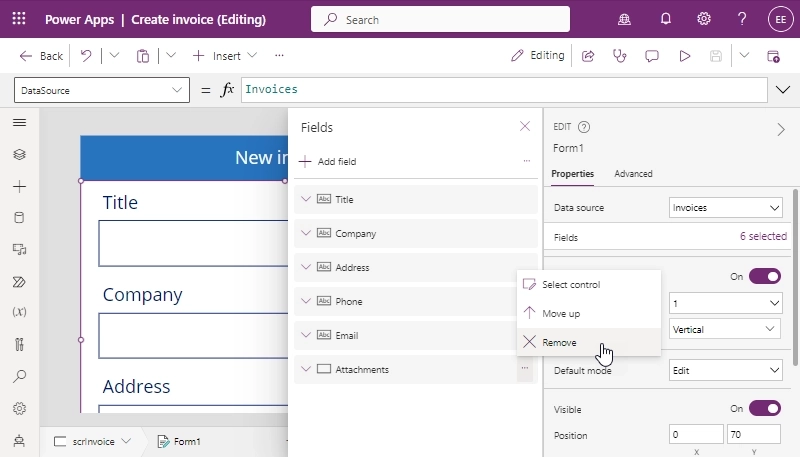
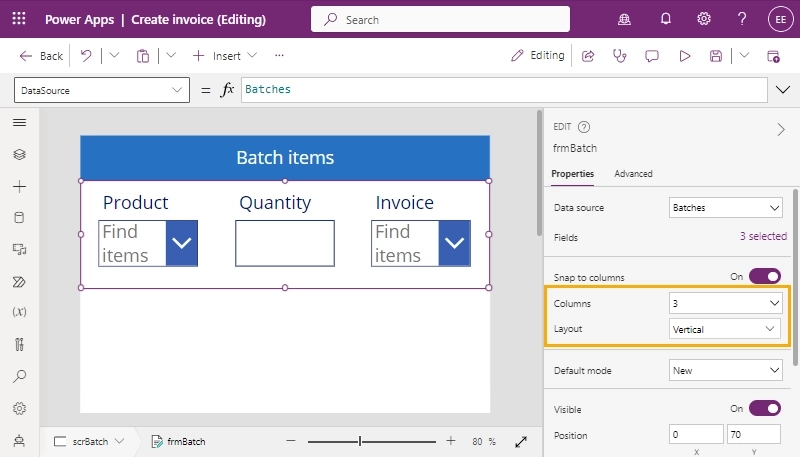
Then insert a form control, connect it to the Batches list, switch the default mode to New, and leave three fields:
Product,
Quantity,
Invoice.
Additionally, I set the number of columns to three and thus reduced the vertical size of the control.
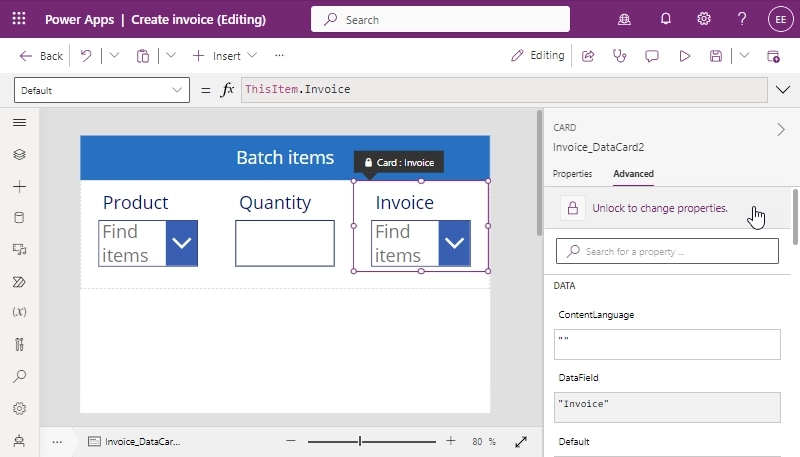
Select the Invoice field and on the right panel, switch to Advanced tab and unlock properties for editing.
Define the Default property as per the code below. Using the varSubmittedItem variable, we tie each added item in the Batches list to the invoice that we created in the previous step. After that, hide the Invoice field and show only two columns in the form control.
{
    Id: varSubmittedItem,
    Value: "Invoice"
}
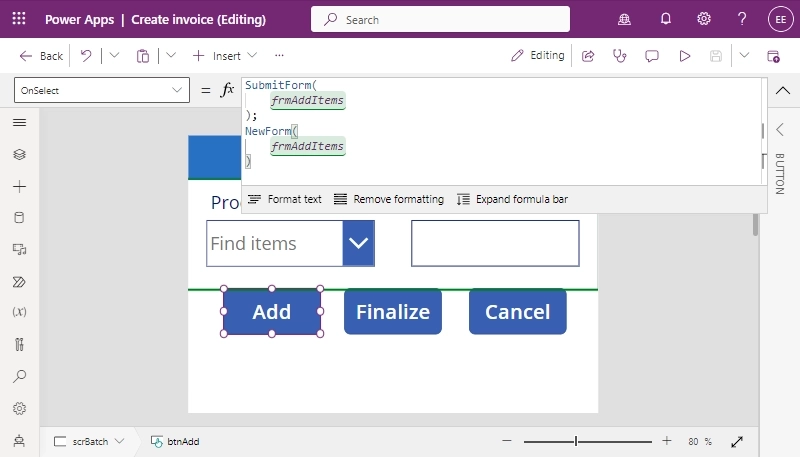
Under the form, add three buttons. The Add button submits a newly created item to the Batches list and re-render the same form for adding other products. Set its OnSelect property to the code below:
SubmitForm(
    frmAddItems
);
NewForm(
    frmAddItems
)
The next button, Finalize, starts the connected Power Automate flow and passes it an ID of the invoice created earlier. After that, it navigates to the finalization screen. Its OnSelect property is below:
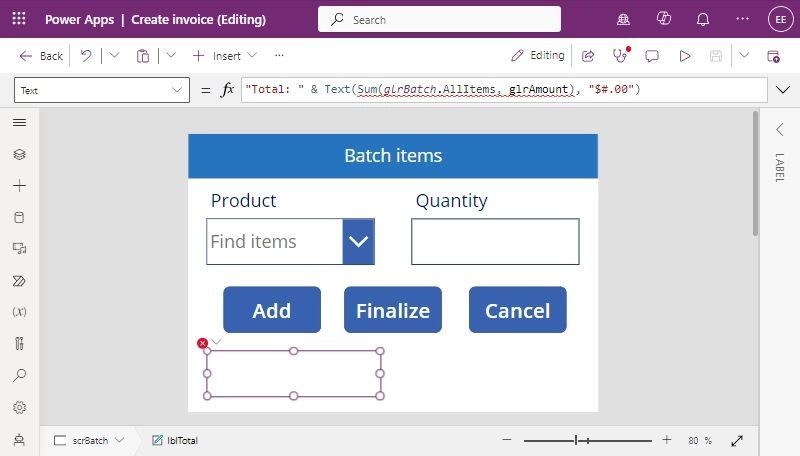
Under the buttons add a text label to display a total sum of the current batch. Set the Text property to the value below. Please note that glrBatch and glrAmount are names of the gallery and one of the fields in it so it is necessary to keep the suggested forth.
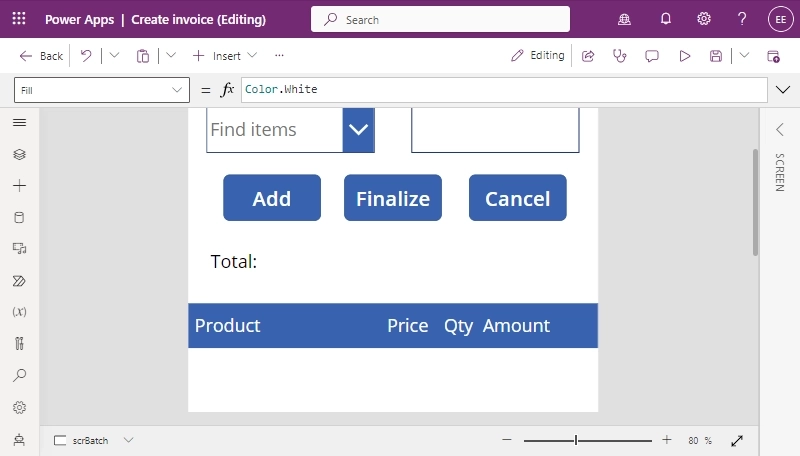
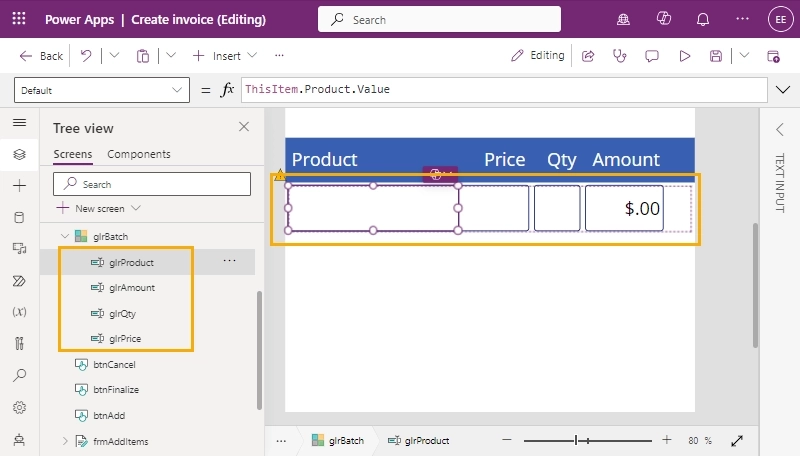
We will show the added items in a vertical gallery. But before adding it, insert four labels in a row and add a colored rectangle, it will serve as headings for the gallery table.
Now we get to another control, insert a blank vertical gallery.
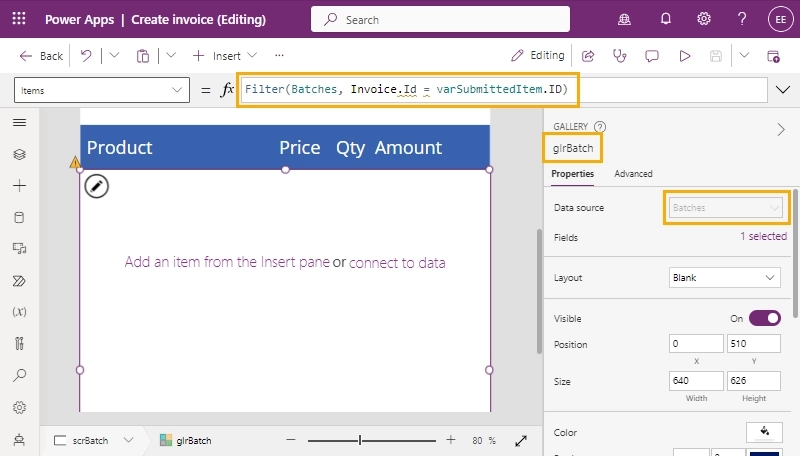
The gallery renders existing items in the data source list. Connect it to the Batches list and filter the displayed items using the formula below: it will show only the items that are tied with the invoice from the previous step. The name of the gallery should be glrBatch because it is used in the total calculation.
Filter(Batches, Invoice.Id = varSubmittedItem)
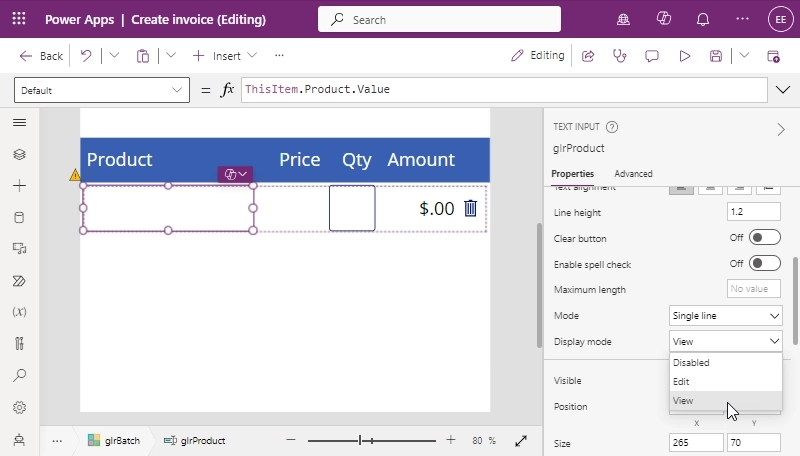
Select then a current item row and add four text inputs for product name, price, quantity, and amount. All fields will only display the required information except one for quantity: it will be editable, and its change will be saved in the SharePoint list. To achieve that, name and configure the fields as per below:
for glrProduct set Default to ThisItem.Product.Value,
for glrPrice set Default to Text(LookUp(Products, Title = ThisItem.Product.Value, Price), "$#.00"),
for glrQty set Default to ThisItem.Quantity and OnChange to Patch(Batches, LookUp(Batches, ID = ThisItem.ID), {Quantity: Value(glrQty.Text)}),
for glrAmount set Default to Text(ThisItem.Quantity * LookUp(Products, Title = ThisItem.Product.Value, Price), "$#.00").
For each field except glrQty change the display mode to View.
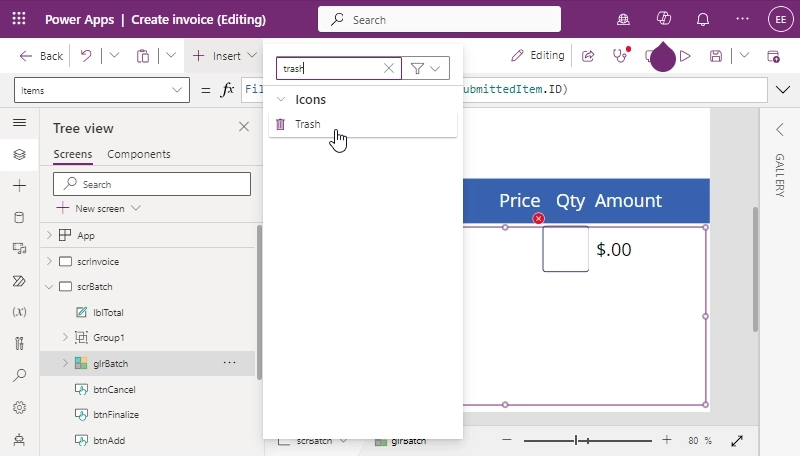
To delete an item from the batch, add a trash icon.
Fit its size and position to the row and set the OnSelect property to Remove(Batches, ThisItem).
Design final screens for the app in Power Apps
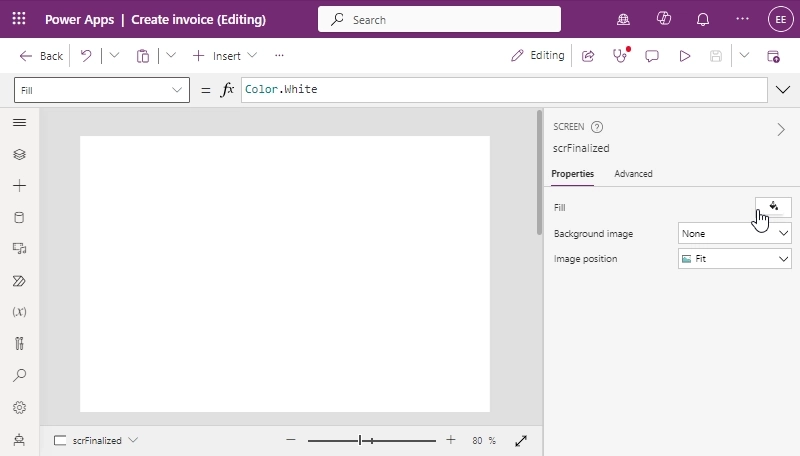
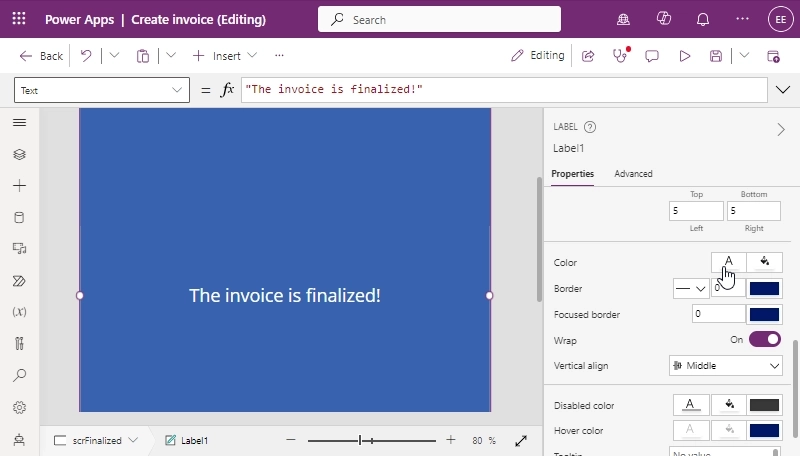
When clicking a Finalize or Cancel button, you get to an accordant screen with a text message about the result. We configured the navigation when added the buttons. The only thing left to do is to add the messages. I filled both screens with a blue color and added text labels as per the screenshots below.
Conclusion
Let's summarize. In our article, we highlighted three methods for generating PDF documents using Power Apps:
Utilizing the Print PDF function within Power Apps
Employing the HTML method to craft a document directly from Power Apps
Generating documents through the integration of Plumsail Documents with Power Apps and Power Automate
Also, I should mention another technique using the Microsoft Office connector for more flexibility, notably the "Populate a Microsoft Word Template" action, requiring a Premium plan. It's more flexible than the basic PDF feature and HTML method, yet less so than Plumsail Documents. For a comprehensive look, see Matthew Devaney"Easiest Way To Generate A PDF In Power Apps (No HTML)," which offers valuable insights into this alternative.
Each method has its advantages and disadvantages, which one you choose depends on your needs.
Get started with converting Power Apps forms to PDF