Manage quick launch and top navigation items for SharePoint site using Power Automate
This article will show how to manage quick launch and top navigation items for a SharePoint site using these Plumsail actions:
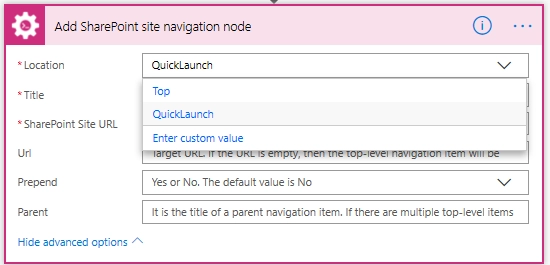
You can add/remove a navigation node to/from two places: Top navigation bar or Quick launch
Adding the Plumsail action for the first time, you’ll be asked for a Connection name, API Key, and Data center location.
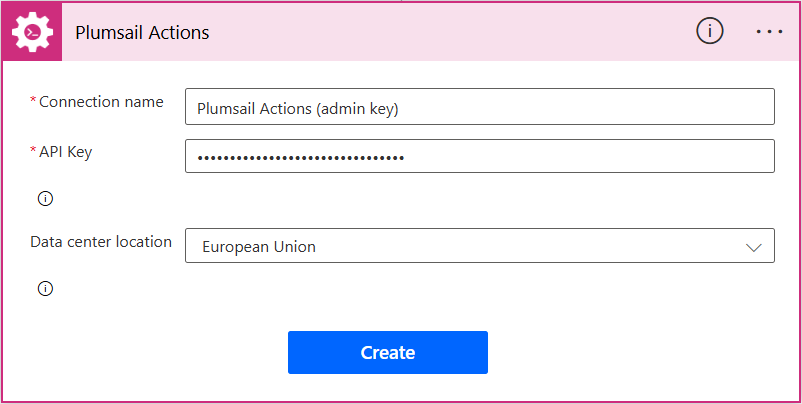
You can type any name for the connection, for example Plumsail Actions (admin key). Next create an API key on your Plumsail account page, copy, and paste it to the API Key field. Ensure that the selected data center location matches one of your account.
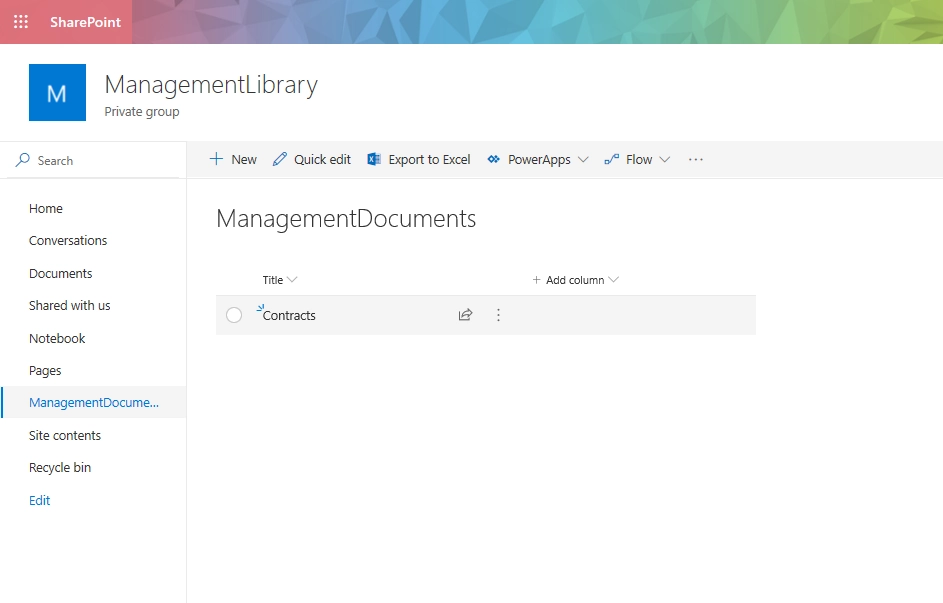
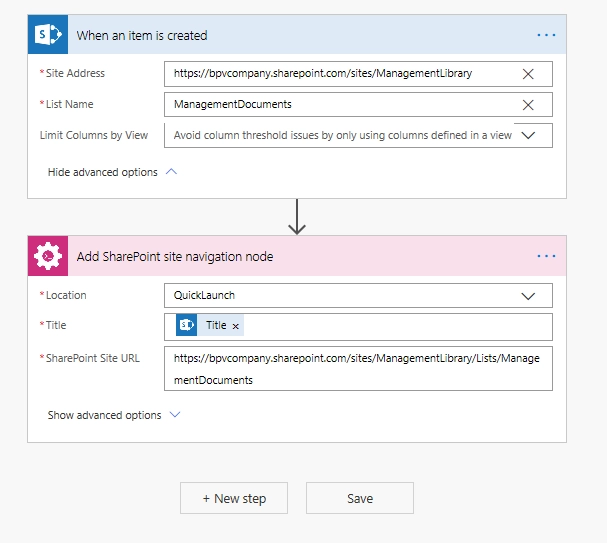
Let’s say you need to add a Quick launch navigation node each time an item is created in a specific list.
We can use this simple flow which is triggered when an item is created.
Also we can add navigation nodes to the top menu. For example, there could be this flow
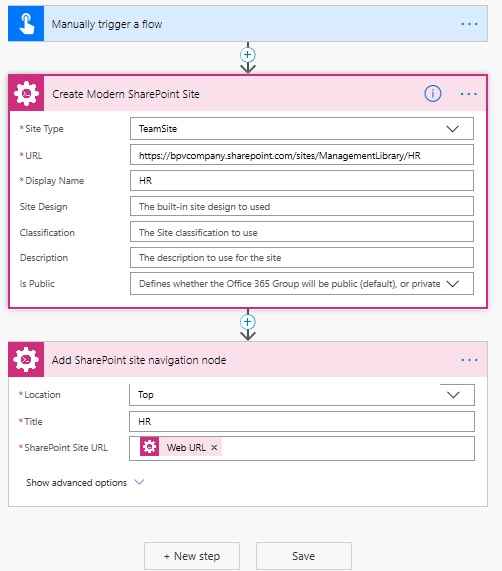
When you create a subsite the flow adds navigation node to the top menu of the parent site.
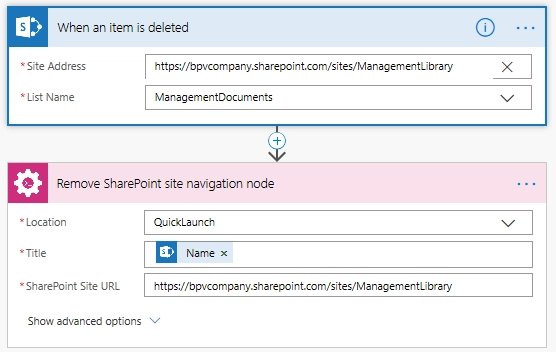
The same way you can program Power Automate (Microsoft Flow)s to remove navigation nodes when an item or subsite is removed.
Conclusion
That’s all! It’s possible to manage your SharePoint site navigation very effectively using Plumsail Add/Remove navigation node action.