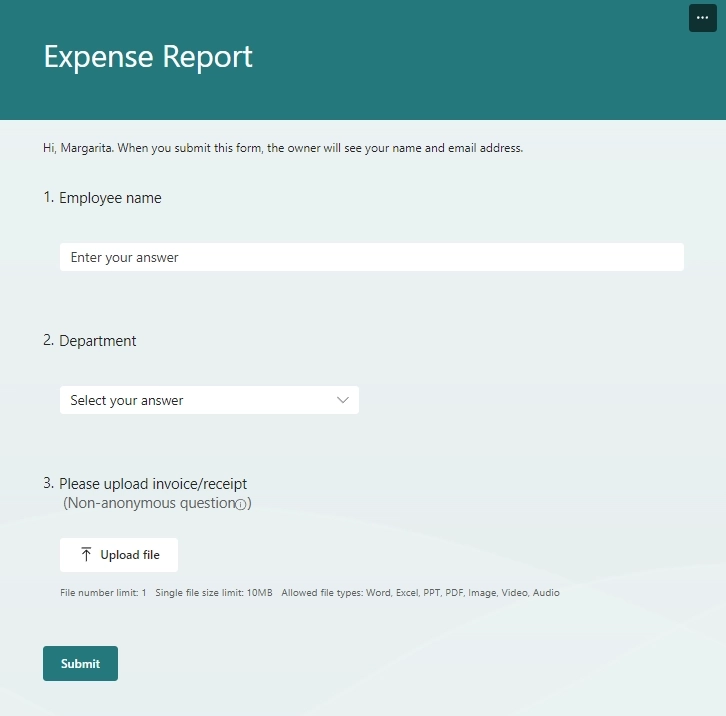
If you've ever used Microsoft Forms for file collection, you know managing all those uploaded files can be cumbersome. For those who, like me, value well-organized data with responses and files stored together, there's a solution!
This article will guide you on how to save Microsoft Forms attachments to a SharePoint list using a Power Automate flow.
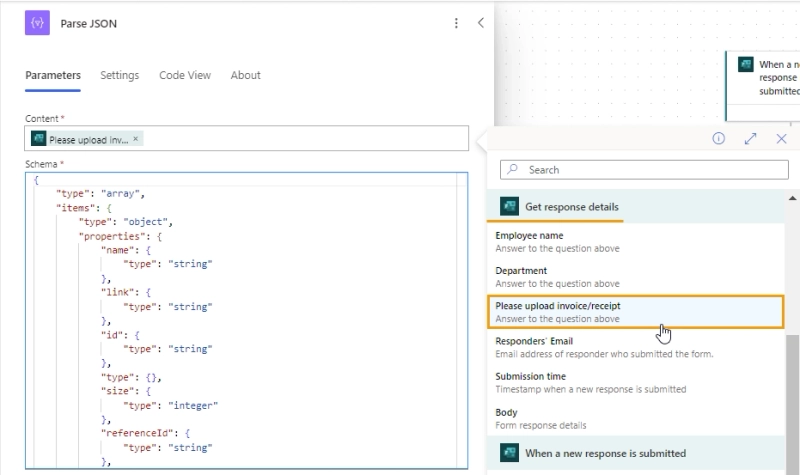
Alternatively, use the Generate from sample to create a JSON schema:
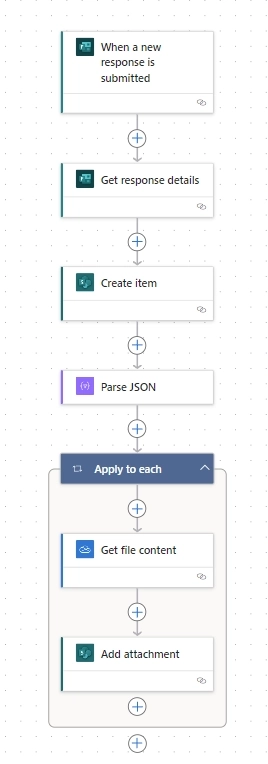
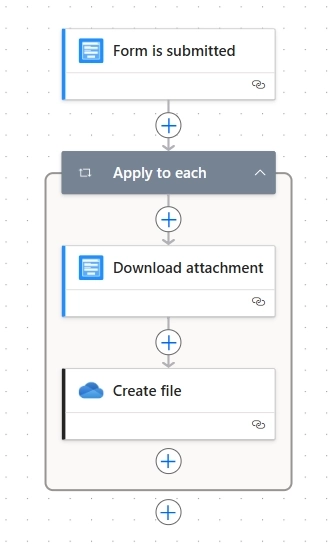
5. Get file content
Add the OneDrive for Business - Get file content action. In the File, select the Body id—the output of the Parse JSON step.
Once you do that, the step will be placed inside the Apply to each action to run through each attachment
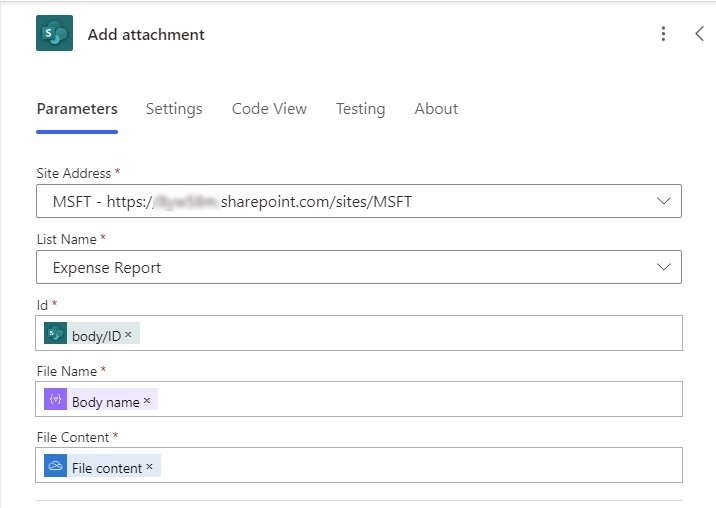
6. Add attachemnt
The final step is to add attachments to the newly created SharePoint list item. Add the SharePoint - Add attachments action inside the Apply to each step.
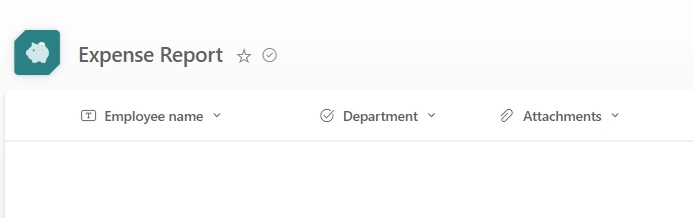
Specify site and list name as you did for the Create item step. Set up the action with the data from the Dynamic content list as follows:
Id: Create item - body/ID
File Name: Parse JSON - Body name
File Content: Get file content - File content.
Finally, you're all done! Save the flow and test the process of saving responses together with attached files to the SharePoint list.
Frequently asked questions
How can I handle multiple attachments within a single response from Microsoft Forms?
You can allow users to upload up to 10 files to the Upload file question. To save multiple attachments to SharePoint or send them by email, you need to create an automated flow in Power Automate. To collect more than 10 files, consider using Plumsail Forms as an alternative to Microsoft Forms.
Can I save Microsoft Forms attachments to a specific SharePoint list?
Can I collect files from external users with Microsoft Forms?
No, the File upload question is only available for users within your organization. If you need to collect files from anonymous users, consider using Plumsail Forms.
Better alternative to Microsoft Forms for file uploads
If you're looking for a workaround for Microsoft Forms file upload limitations—such as needing to allow more than 10 files at once, accepting uploads from external users, and saving them to SharePoint—look no further!
MS Forms would not let me handle attachments from users outside my organization, and did not have the variety of control tools that Plumsail has.
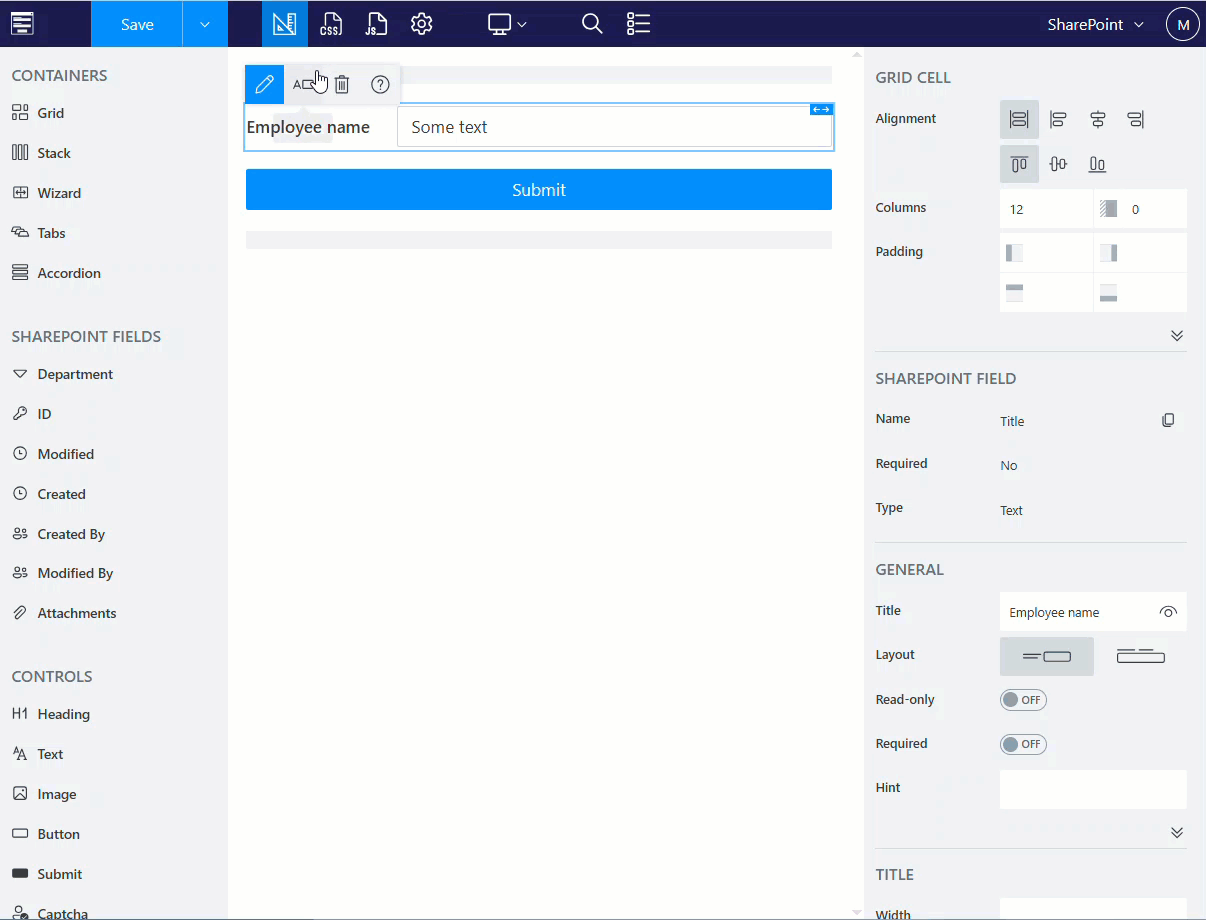
Plumsail Forms has a direct integration with SharePoint—no flows, complicated setups, or JSON parsing required.
Simply create a connection with your SharePoint tenant and select the list where you want to save responses and uploads.
Once connected, you'll see all your SharePoint fields in the left pane. Drag and drop them onto your form:
Then, just save and share the form link. When users submit the form, all responses and uploaded files will be saved to the SharePoint list automatically.
Neat and simple!
And if you want to save files to OneDrive, Google Drive, or send them by email, use Power Automate and Plumsail Forms connector. Plumsail has a dedicated action to download files, so you don't have to deal with JSON parsing.
This is my flow that saves files to OneDrive:
Much simpler than the Microsoft Forms flow, right?
Connect Microsoft Forms to SharePoint using Power Automate
Learn how to seamlessly connect Microsoft Forms with or without attachments to a SharePoint List or Library using Power Automate. This comprehensive guide will help you automate data collection and streamline workflows efficiently.
Nikita Kurguzov
Customer Support Engineer
Forms
Jun 18, 2024
How to create a Microsoft Forms approval workflow
Learn how to create an efficient Microsoft Forms approval workflow using Power Automate and SharePoint. Step-by-step guide with use cases and best practices.
Ilia Lazarevskii
Customer Support Engineer
Forms
Jun 25, 2024
How to add a signature in Microsoft Forms
Learn how to add a signature in Microsoft Forms with our comprehensive guide. Discover workarounds and best practices to collect signatures easily and effectively.