Plumsail Documents lets you insert HTML and rich text into Word templates while preserving formatting. To do this, add a special token to your DOCX template and pass the HTML content to it.
The token preserves all formatting from the source HTML.
{{#html value}}
Let’s look at a simple example in the sections below.
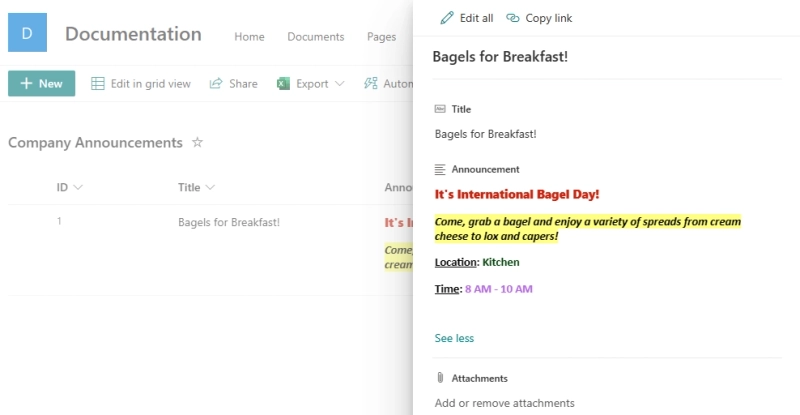
Let us say we have a SharePoint list item that contains rich text. The goal is to move rich text into a Word template while preserving formatting.
We add a special placeholder that will process the rich text HTML data and apply it to the Word template along with all formatting. This is how it looks in the DOCX template:
Power Automate flow
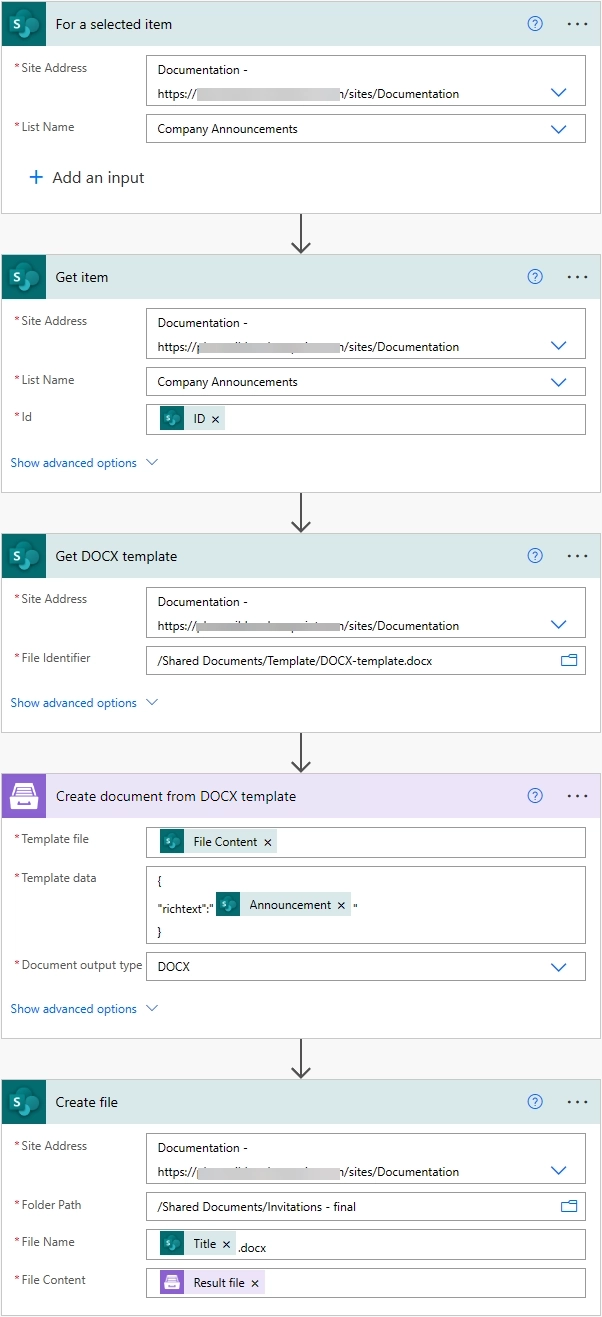
The flow itself is pretty simple. This is how it looks:
Let us review each step of the flow.
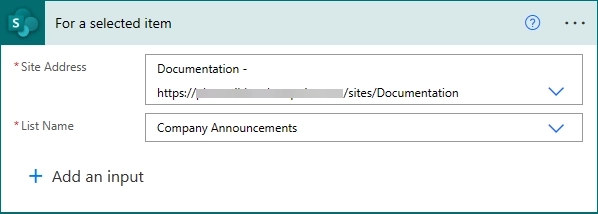
For a selected item trigger
First, we need to find a SharePoint trigger called "For a selected item". You can click on "Instant Cloud Flow" and then "Skip". Select "SharePoint", and you will see a list of different triggers. We pick "For a selected item" as this trigger will link the flow to the selected list in SharePoint. After that, we connect to our "Documentation" site and choose the list "Company Announcements":
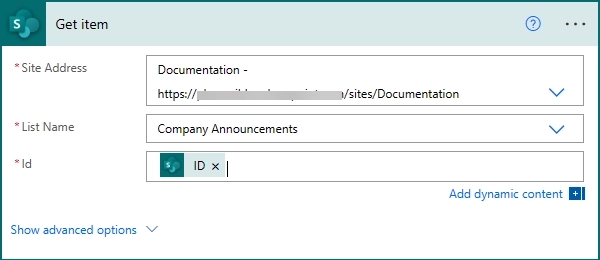
Get item
Next, we get an item with the rich text data using the SharePoint action "Get Item":
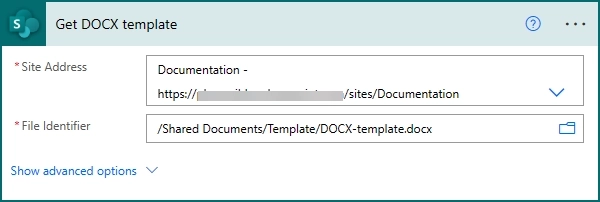
Get DOCX template
Then we download a DOCX template using default SharePoint action "Get file content". Let us rename this step to "Get DOCX template" so we can easily find it later:
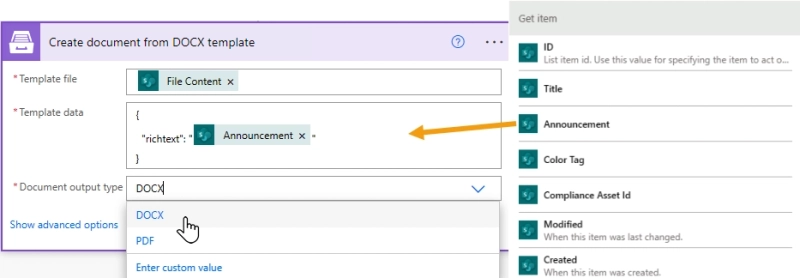
Create document from DOCX template
After that, we add a Plumsail action, "Create document from DOCX template". In this action, we utilize dynamic content from the previous SharePoint actions. In the "Template file" field, we insert our DOCX template we just got in the previous action. The following field, "Template Data", is an object applied to the DOCX template. In this case, we apply the column "Announcement" containing rich text from the SharePoint list. The "Document output type" field allows you to choose between PDF and DOCX formats, we'll keep the file in the DOCX format:
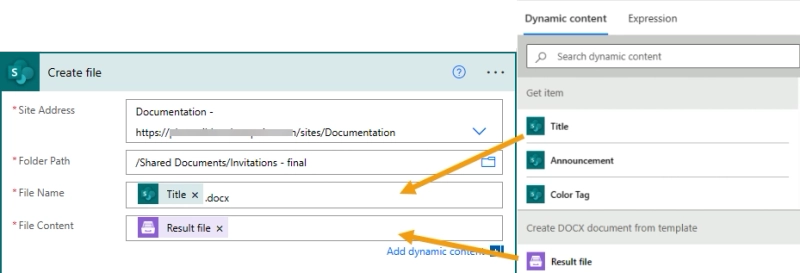
Create file
Finally, we create a new DOCX file containing the rich text data in a SharePoint folder using the SharePoint action "Create file". In the "File Name" field, we can choose "Title" column. This is possible because we used "Get item" action in combination with the SharePoint trigger "For a selected item". Specify the file extension; in our case, we type ".docx" since we kept the Word format, but if you decide to convert to PDF, type ".pdf". In the "File Content" field, select the result file from the Plumsail "Create document from DOCX template" action.
Before clicking "Save", let us give the flow a meaningful name. For example, "Create Announcement Document". Now, click "Save".
Run the flow in SharePoint
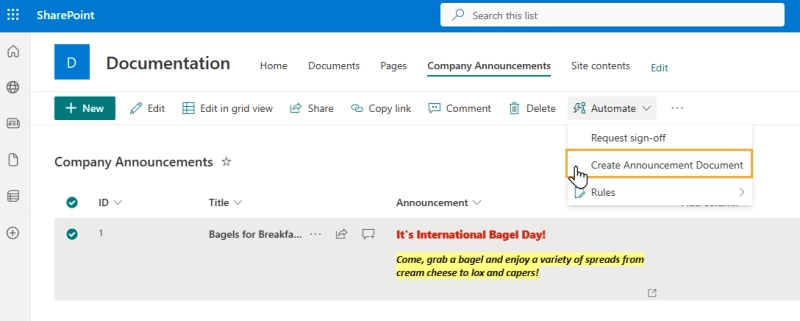
To run this flow, we need to go back to our SharePoint list, select an entry, click on "Automate", choose "Create Announcement Document" and run the flow:
Now we can check our result Word file. As you can see the rich text migrated to the Word template:
Get started
Hopefully, this simple example helps to start using the HTML formatter with DOCX templates.
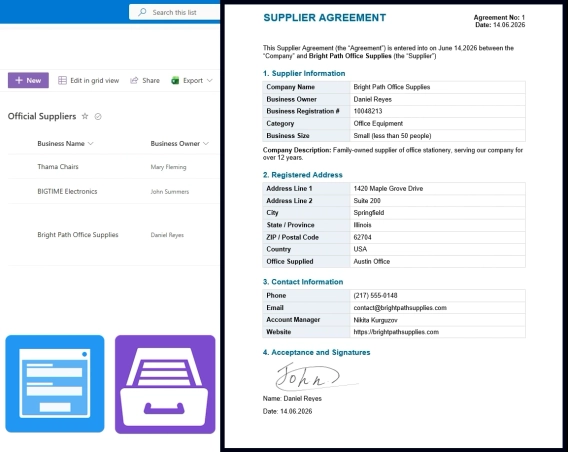
Supplier onboarding form for SharePoint: no login required
Build a supplier onboarding form that saves straight to SharePoint — no vendor login, attachments support, conditional field visibility, e-signatures, and automatic contract generation.
Nikita Kurguzov
Customer Support Engineer
Documents
Customer Story
May 21
How Oil-Royalties automated agreement generation and e-sign workflows
Learn how Oil-Royalties used Plumsail Documents with Jotform, Make, and Dropbox Sign to automate agreement generation and deliver pre-filled e-sign agreements.
Ronald Achs
Founder and Chief Executive of PRODUITS DE L’EQUIPE LLC
Forms
Documents
Customer Story
May 18
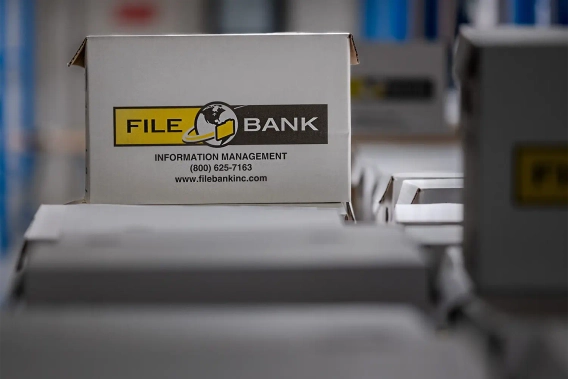
How to automate multi-step approval process in SharePoint with PDF timesheet result
See how FileBank Inc. built a four-stage timesheet approval workflow in SharePoint Online — with auto-calculated hours, signature capture, and final PDF generation — with Plumsail and Power Automate.