Forms
Sep 05, 2024
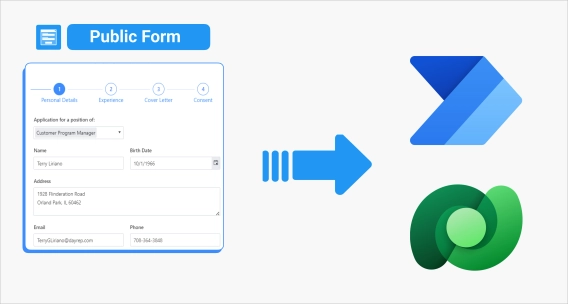
How to save public forms with file uploads to Dataverse using Power Automate
Learn how to save public forms with file uploads to Dataverse using Power Automate. This step-by-step guide walks you through each step.

In this article, I will show you how to retrieve data from Dataverse and use it in a public web form designed with Plumsail Forms for populating dropdown options and other fields after selecting a record in the dropdown. For this example, I will use Dynamics 365 CRM tables—Contact and Account but the same approach can be used for getting data from any other tables of Dataverse as Dynamics 365 apps rely on Dataverse for storing and managing their data.
Microsoft Dataverse is a platform for storing data of apps designed in Power Apps. It's a collection of relational tables shared across all apps within a Power Platform environment— an isolated space for all your flows, apps, connections, and data. In addition to managing data via the Power Apps portal, Dataverse provides versatile API for creating tables, defining relationships between them, and getting and updating their data. Therefore, even if you don't use Power Apps for your app development, you can still leverage Dataverse as a robust database for your custom applications. Dynamics 365 apps—Sales, Customer Service, and Talent—also use Dataverse for organizing and securing their data.
Microsoft Dynamics 365 is a suite of apps for managing customer relationships, sales, and business tasks, while Dataverse stores and organizes data for apps in Microsoft Power Platform. All Dynamics 365 apps except Business Central keep their data in Dataverse. You can find tables created by those apps amid other tables in the Power Apps portal. Integrating Dynamics 365 with the Power Platform unifies access to your business data, letting you design custom apps and use a single API to interact with both custom and Dynamics 365 data. Look, here I opened exactly the same table from the Dynamics 365 app and Power Apps portal:
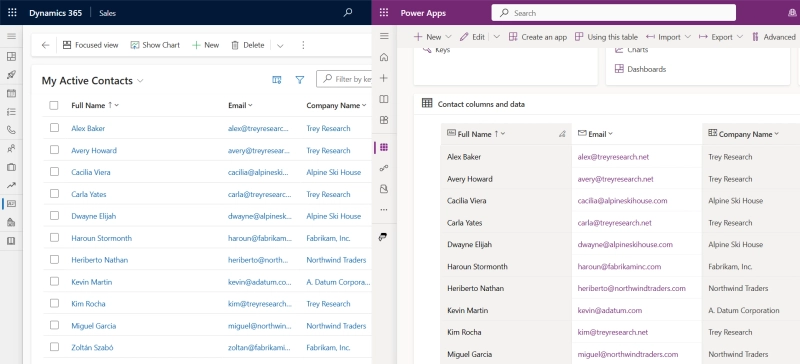
In this article, I will demonstrate how to retrieve data from tables created by Dynamics 365 apps, but the same approach can be applied to any other tables in your Dataverse.
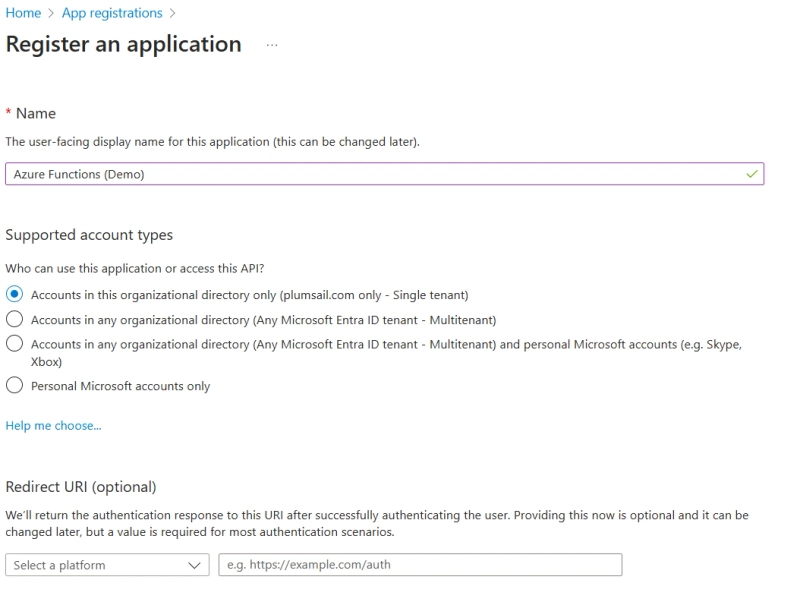
First of all, we need to register an Entra ID app with delegated permissions to Dataverse API. To complete this step, you must be a tenant administrator.
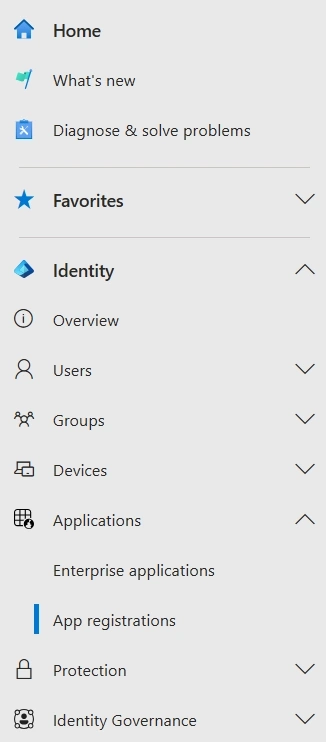
Now, we need to provide the app with delegated permissions to Dataverse:
Finally, we need to create a client secret for our app to use in Azure Function:
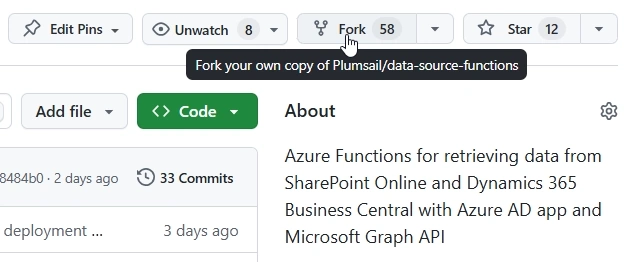
You can deploy functions for retrieving data from Dynamics 365 CRM directly from our GitHub repository. No need to modify the source code to specify the app or the data source settings, all of them can be configured via the Function App's environment variables after the deployment:
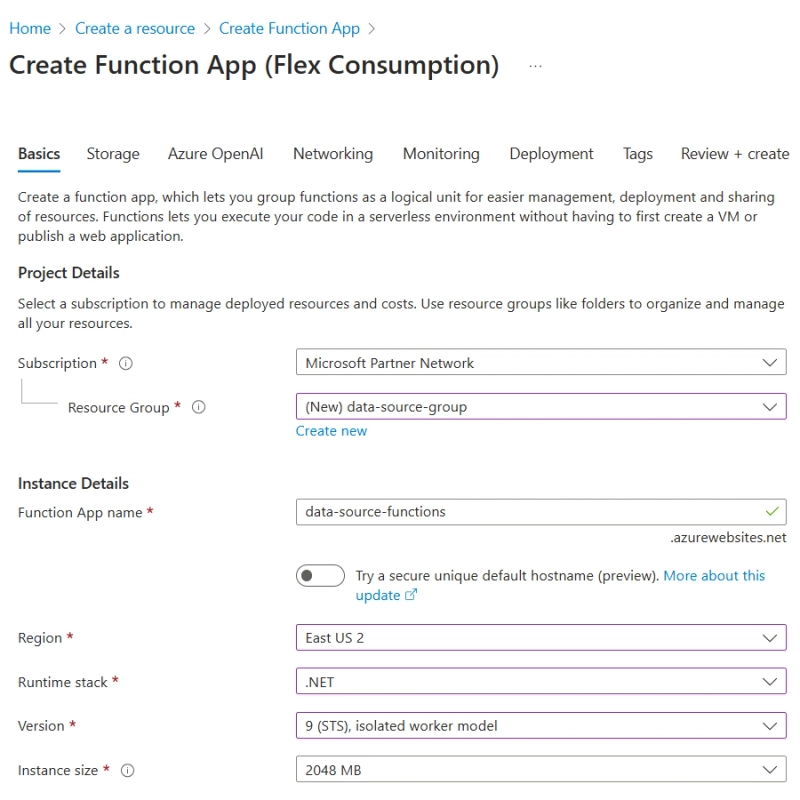
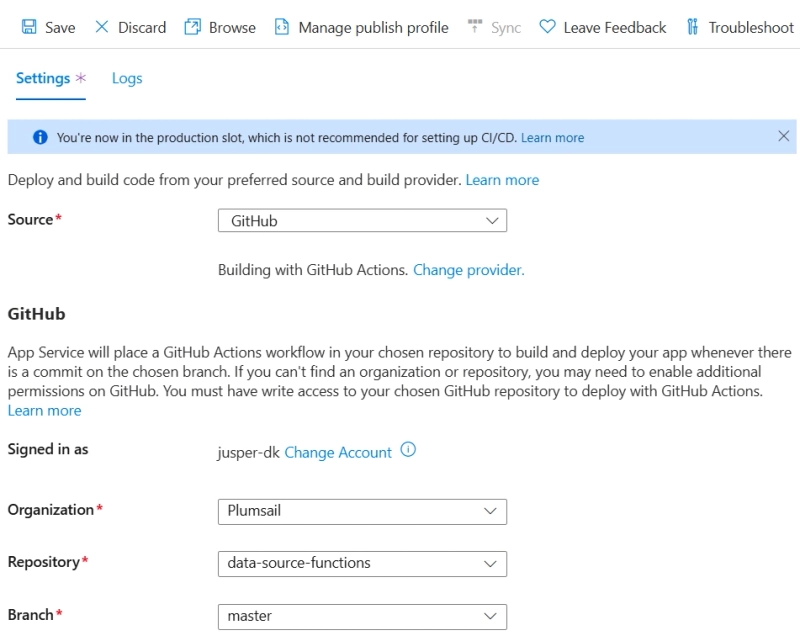
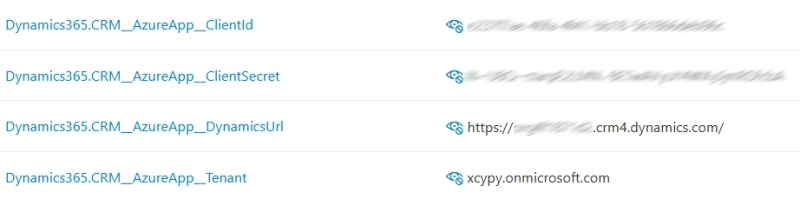
Once the project is built and deployed, you will see the functions in your Function App. Now, we need to define its environment variables to get access to our Dataverse.
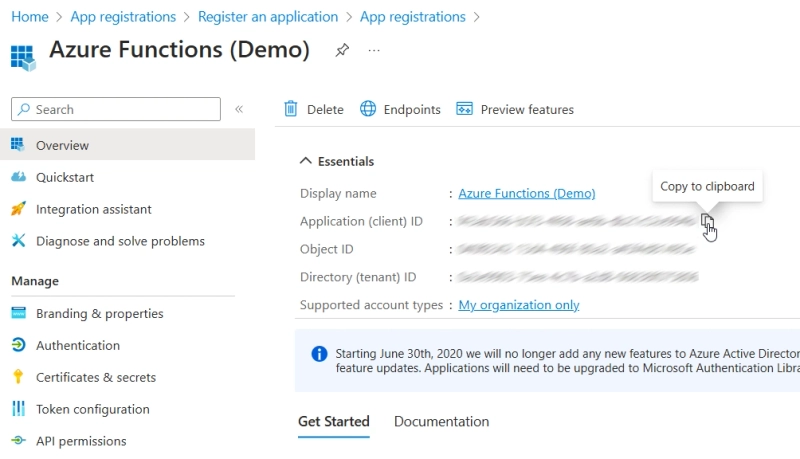
Dynamics365.CRM__AzureApp__ClientId
The Application (client) ID of the Entra ID app

Dynamics365.CRM__AzureApp__ClientSecret
The Client secret of the Entra ID app

Dynamics365.CRM__AzureApp__Tenant
Your Microsoft 365 tenant, ex.: contoso.onmicrosoft.com

Dynamics365.CRM__AzureApp__DynamicsUrl
Web API URL of your Dataverse instance, ex.: https://contoso.crm.dynamics.com
See below where it can be found
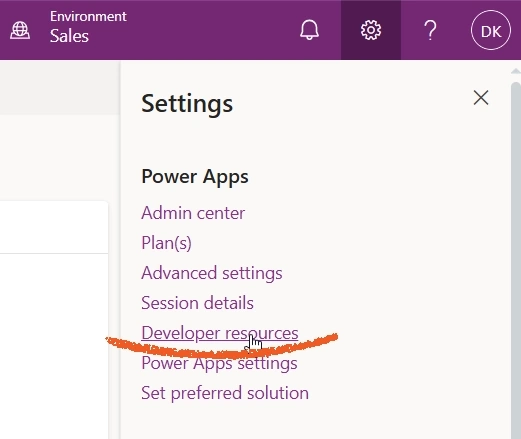
To find the Web API URL of your Dataverse instance:
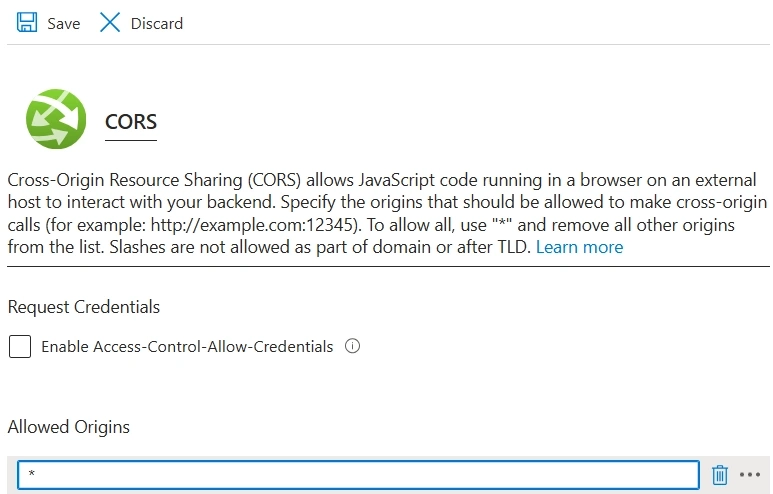
Finally, we need to enable Cross-Origin Resource Sharing (CORS) for our app to allow JavaScript requests from our web form:
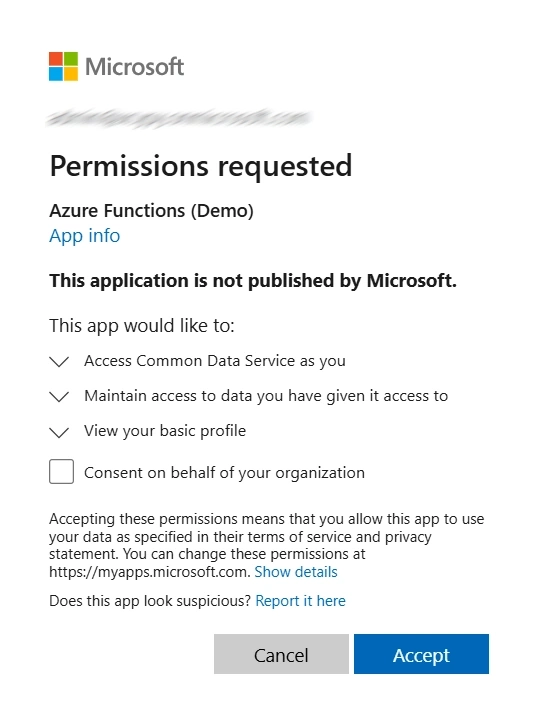
As we configured the Entra ID app with delegated permissions, we must consent access to Dataverse on behalf of a specific user. In the Function App, you can find the D365-CRM-Authorize function which needs to be called once to provide delegated permissions to our app. All further communication with Dataverse will be performed on behalf of a user who approved the app's permission request.
Alternatively, you can create a special Application User associated with your Entra ID app which does not require a separate license. In this case, you will not need to give user consent to the app to perform operations on behalf of that user. Instead, you will use the Application User with certain security roles and will need only Client ID and Client Secret to authenticate the app.
Before calling the D365-CRM-Authorize function, we need to add its URL to the list of redirect URLs of the app:

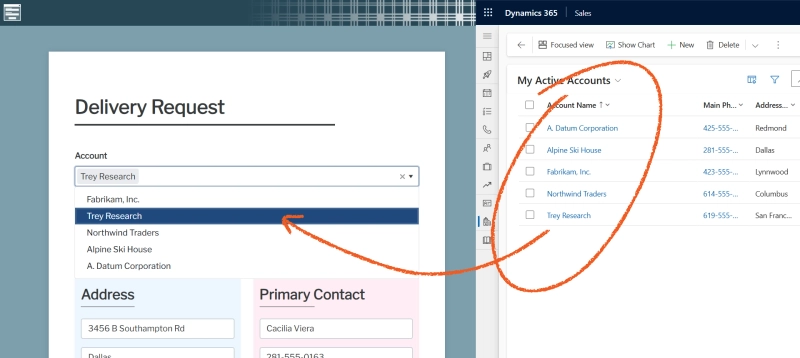
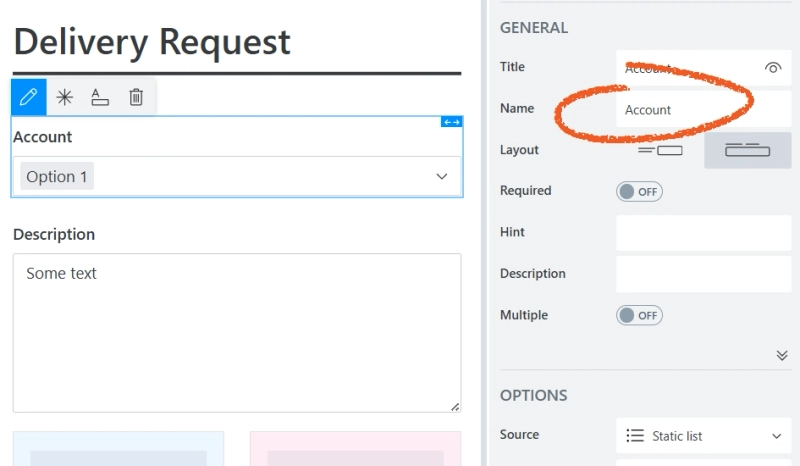
Now, I'm up to designing a web form with a dropdown field populated from the Azure Function with JavaScript. I created a simple Delivery Request form and want to populate its Account dropdown field with rows from the Account table in Dynamics 365 CRM.
Copy the name of the field for using it in JavaScript:
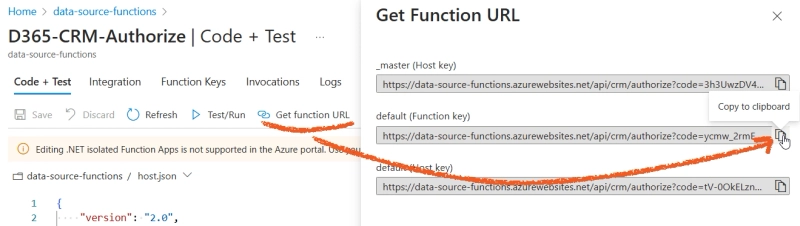
Next, copy the URL of the D365-CRM-Accounts function but before using it in the code, remove the {id} parameter. Without the id, it returns all records from the Account table:
https://{your-function-app}.azurewebsites.net/api/crm/accounts/?code=...Switch to the JavaScript editor and add the code below. Do not forget to insert the correct field name and URL of the D365-CRM-Accounts Azure function.
fd.rendered(() => {
const accountField = fd.field('Account');
const accountWidget = accountField.widget;
accountWidget.setDataSource({
transport: {
read: '-- URL of D365-CRM-Accounts (without {id}) --'
}
});
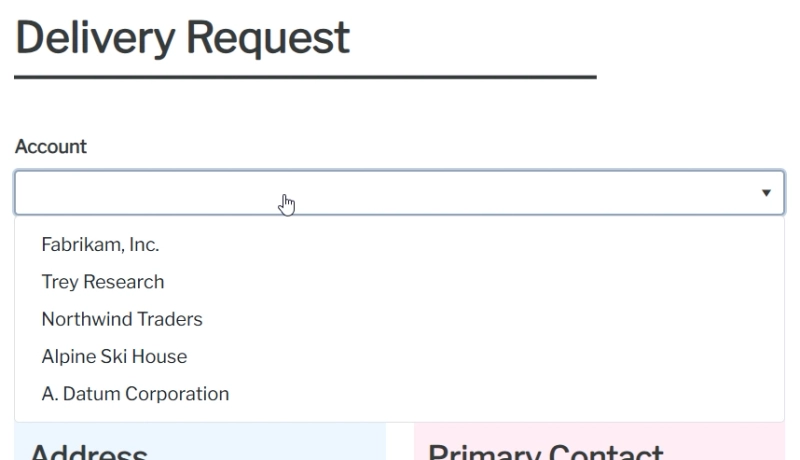
accountWidget.setOptions({dataTextField: 'name', dataValueField: 'accountid'});
});As you see, I specified different fields for dataTextField and dataValueField. Thus, the dropdown will display account names but its value will be set to id.
Once a user selects an account, I want other fields to be filled out with the selected account's properties—address and primary contact information. As contacts are stored in another table, we'll make a separate request to the D365-CRM-Contacts function. First, let's define functions for populating address and primary contact fields:
async function populateAccountData(accountId) {
    const response = await fetch(`https://{your-function-app}.azurewebsites.net/api/crm/accounts/${accountId}?code=...`);
    if (response.ok) {
        const account = await response.json();
        fd.field('Description').value = account.description;
        fd.field('Address').value = account.address1_line1;
        fd.field('City').value = account.address1_city;
        fd.field('Country').value = account.address1_country;
        fd.field('State').value = account.address1_stateorprovince;
        fd.field('ZIP').value = account.address1_postalcode;

        populatePrimaryContactData(account._primarycontactid_value)
    } else {
        fd.field('Description').value =
            fd.field('Address').value =
            fd.field('City').value =
            fd.field('Country').value =
            fd.field('State').value =
            fd.field('ZIP').value =
            fd.field('Name').value =
            fd.field('Phone').value =
            fd.field('Email').value = null;
    }
}

async function populatePrimaryContactData(contactId) {
    const response = await fetch(`https://{your-function-app}.azurewebsites.net/api/crm/contacts/${contactId}?code=...`);
    if (response.ok) {
        const contact = await response.json();
        fd.field('Name').value = contact.fullname;
        fd.field('Phone').value = contact.mobilephone;
        fd.field('Email').value = contact.emailaddress1;
    } else {
        fd.field('Name').value =
            fd.field('Phone').value =
            fd.field('Email').value = null;
    }
}
And now, we just need to call populateAccountData whenever a user switches the options in the Account dropdown. populateAccountData calls populatePrimaryContactData after receiving properties of the selected account and passes the _primarycontactid_value property which contains the id of the primary contact:
fd.rendered(() => {
    const accountField = fd.field('Account');
    accountField.$on('change', v => populateAccountData(v));
});
Ta-da!
Here, we learned how to request data from Dataverse tables (including those created by Dynamics 365 apps) using Entra ID apps, retrieve this data in Plumsail Forms, and dynamically populate form fields and dropdowns—all in a simple, practical example to understand the logic.
Here's a real-world example to put this into context: Thrive Tribe, a UK-based company promoting healthier lifestyles, uses Microsoft Power Platform and Plumsail web forms to simplify referral collection. With Howdang Rashid, Microsoft MVP and 7x Certified Power Platform & RPA Developer, they implemented a solution using Azure Functions connected to Dataverse CRM to check postal codes in real time. This ensures that users are in areas where Thrive Tribe operates.
If you're struggling with populating forms from any other data source, please share your case in the Plumsail community and we'll make it a topic of our future blog post.
Learn how to save public forms with file uploads to Dataverse using Power Automate. This step-by-step guide walks you through each step.
Learn how to retrieve data from Dynamics 365 Business Central via Azure Function and Entra ID app and use it in a form.
Learn how to get SharePoint list data via Azure Function using Entra ID app and Microsoft Graph API and use it in public web forms.