Email settings with forwarding
You can configure HelpDesk to create new tickets or ticket comments with email messages as well as specify some custom settings for the email address used for notifications.
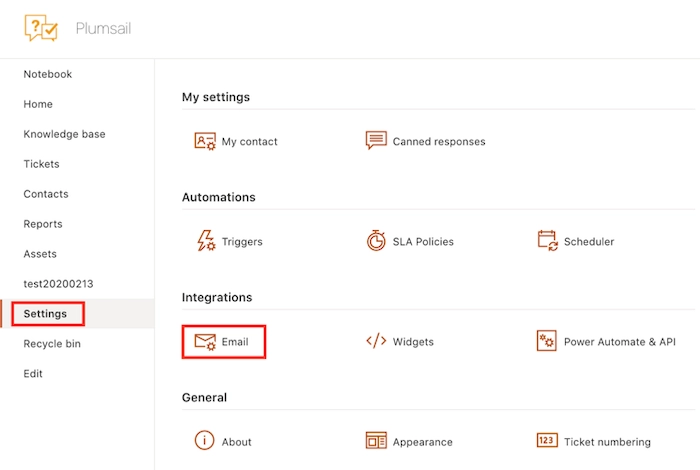
Navigate to Email settings section on the Settings page.
Forwarding of e-mail messages from your support mailbox
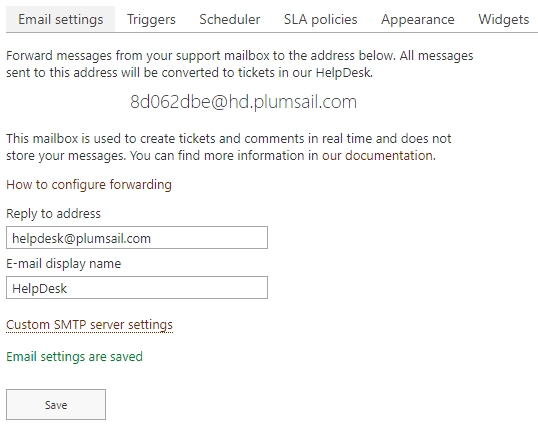
If you want to receive new tickets sent to your support email in HelpDesk, you’ll need to configure e-mail forwarding. Take a look at the email address in the screenshot above. It was created automatically during HelpDesk installation.
If you send a message to this address, it will appear in HelpDesk as a new ticket. If you reply to this message directly or via HelpDesk, the reply will appear as a comment in a ticket discussion. This mailbox is used to create tickets and comments in real time and does not store your messages. You can find more information in this article.
You can use this address as the support email address of HelpDesk, but most likely you already have your own support e-mail address. That is why you may want to configure e-mail forwarding from your address to HelpDesk.
Create a rule in your mailbox to forward incoming email messages to HelpDesk address. Here is a list of instructions on how to set up e-mail forwarding for some of the most popular platforms:
Change the reply address and email display name
By default, HelpDesk will use the auto generated email address for sending notifications. You can specify your own Reply to address, so your customers will reply to your own support mailbox.
You also can specify a friendly display name for your email address. By default, it is “HelpDesk”.
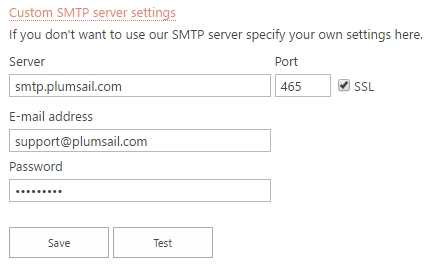
Custom SMTP server settings
By default, HelpDesk will use the auto generated email address for sending notifications. You can specify a custom Reply to address as described above, but alternatively, you can specify SMTP server settings for your support mailbox to make HelpDesk use your support mailbox for sending messages. To do it click Custom SMTP server settings. You will see a few parameters. Fill them in by following your SMTP server’s instructions and click “Save”. Also, you can test the correctness of entered settings by clicking on Test button